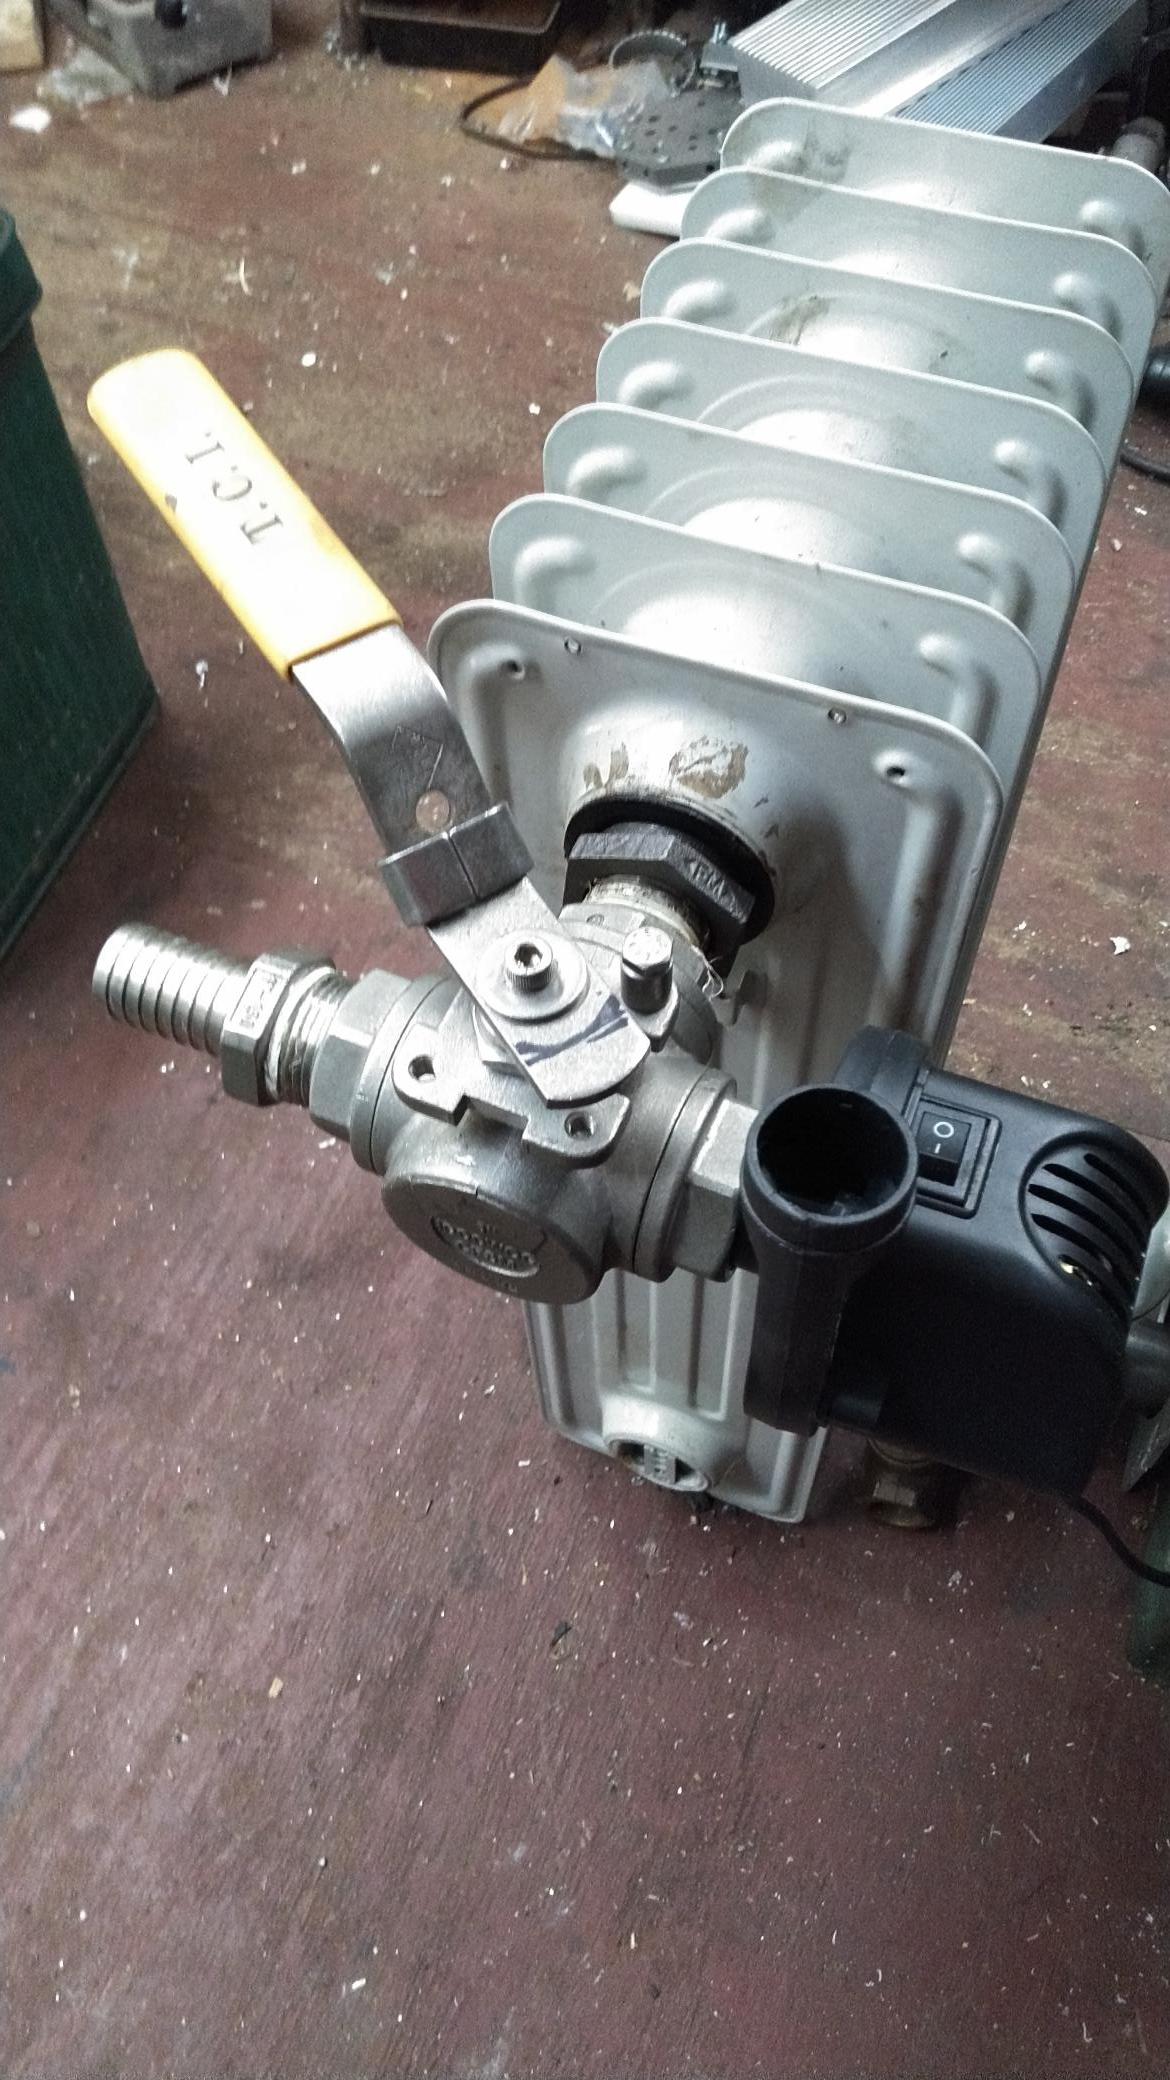
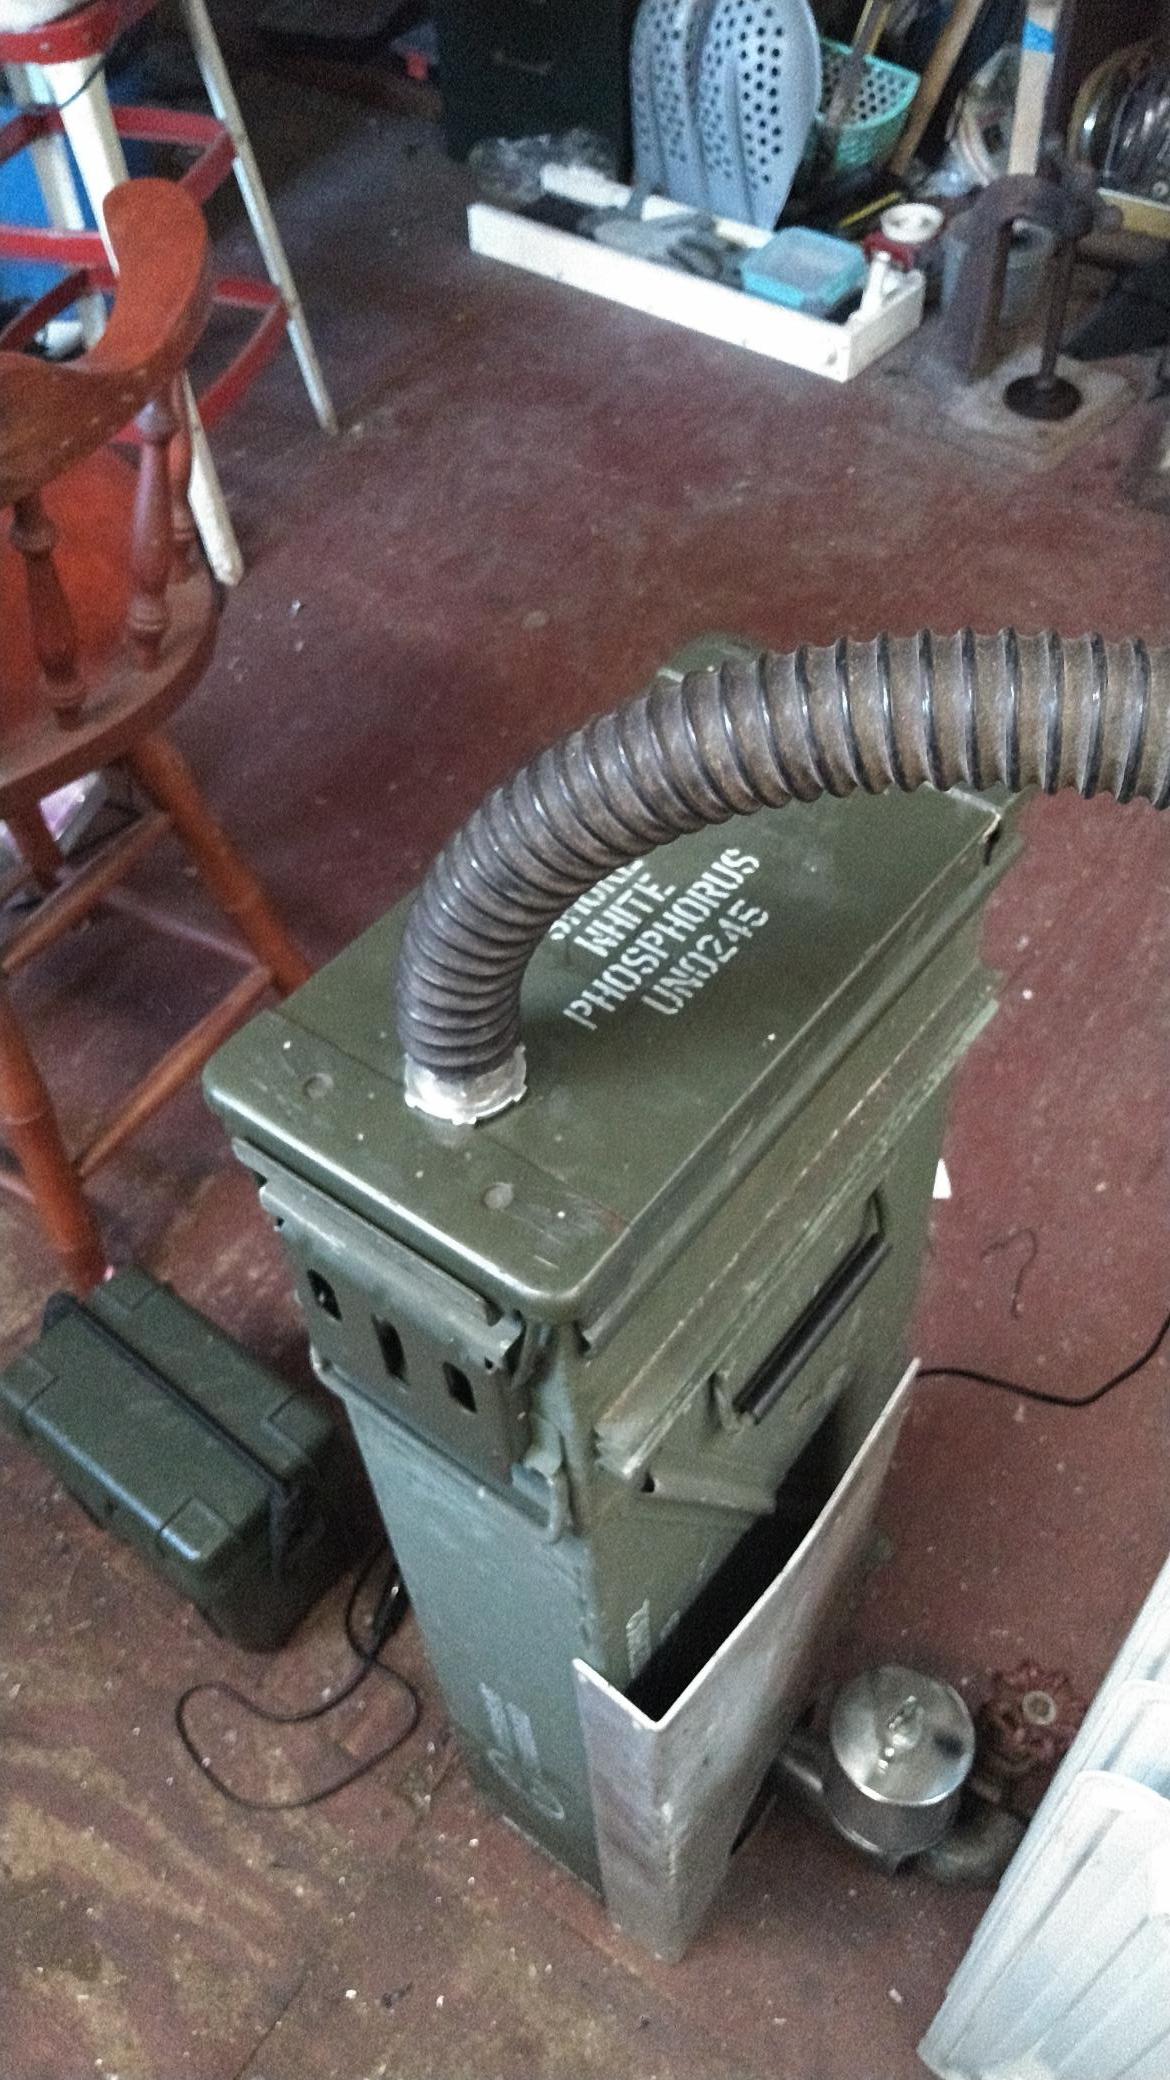
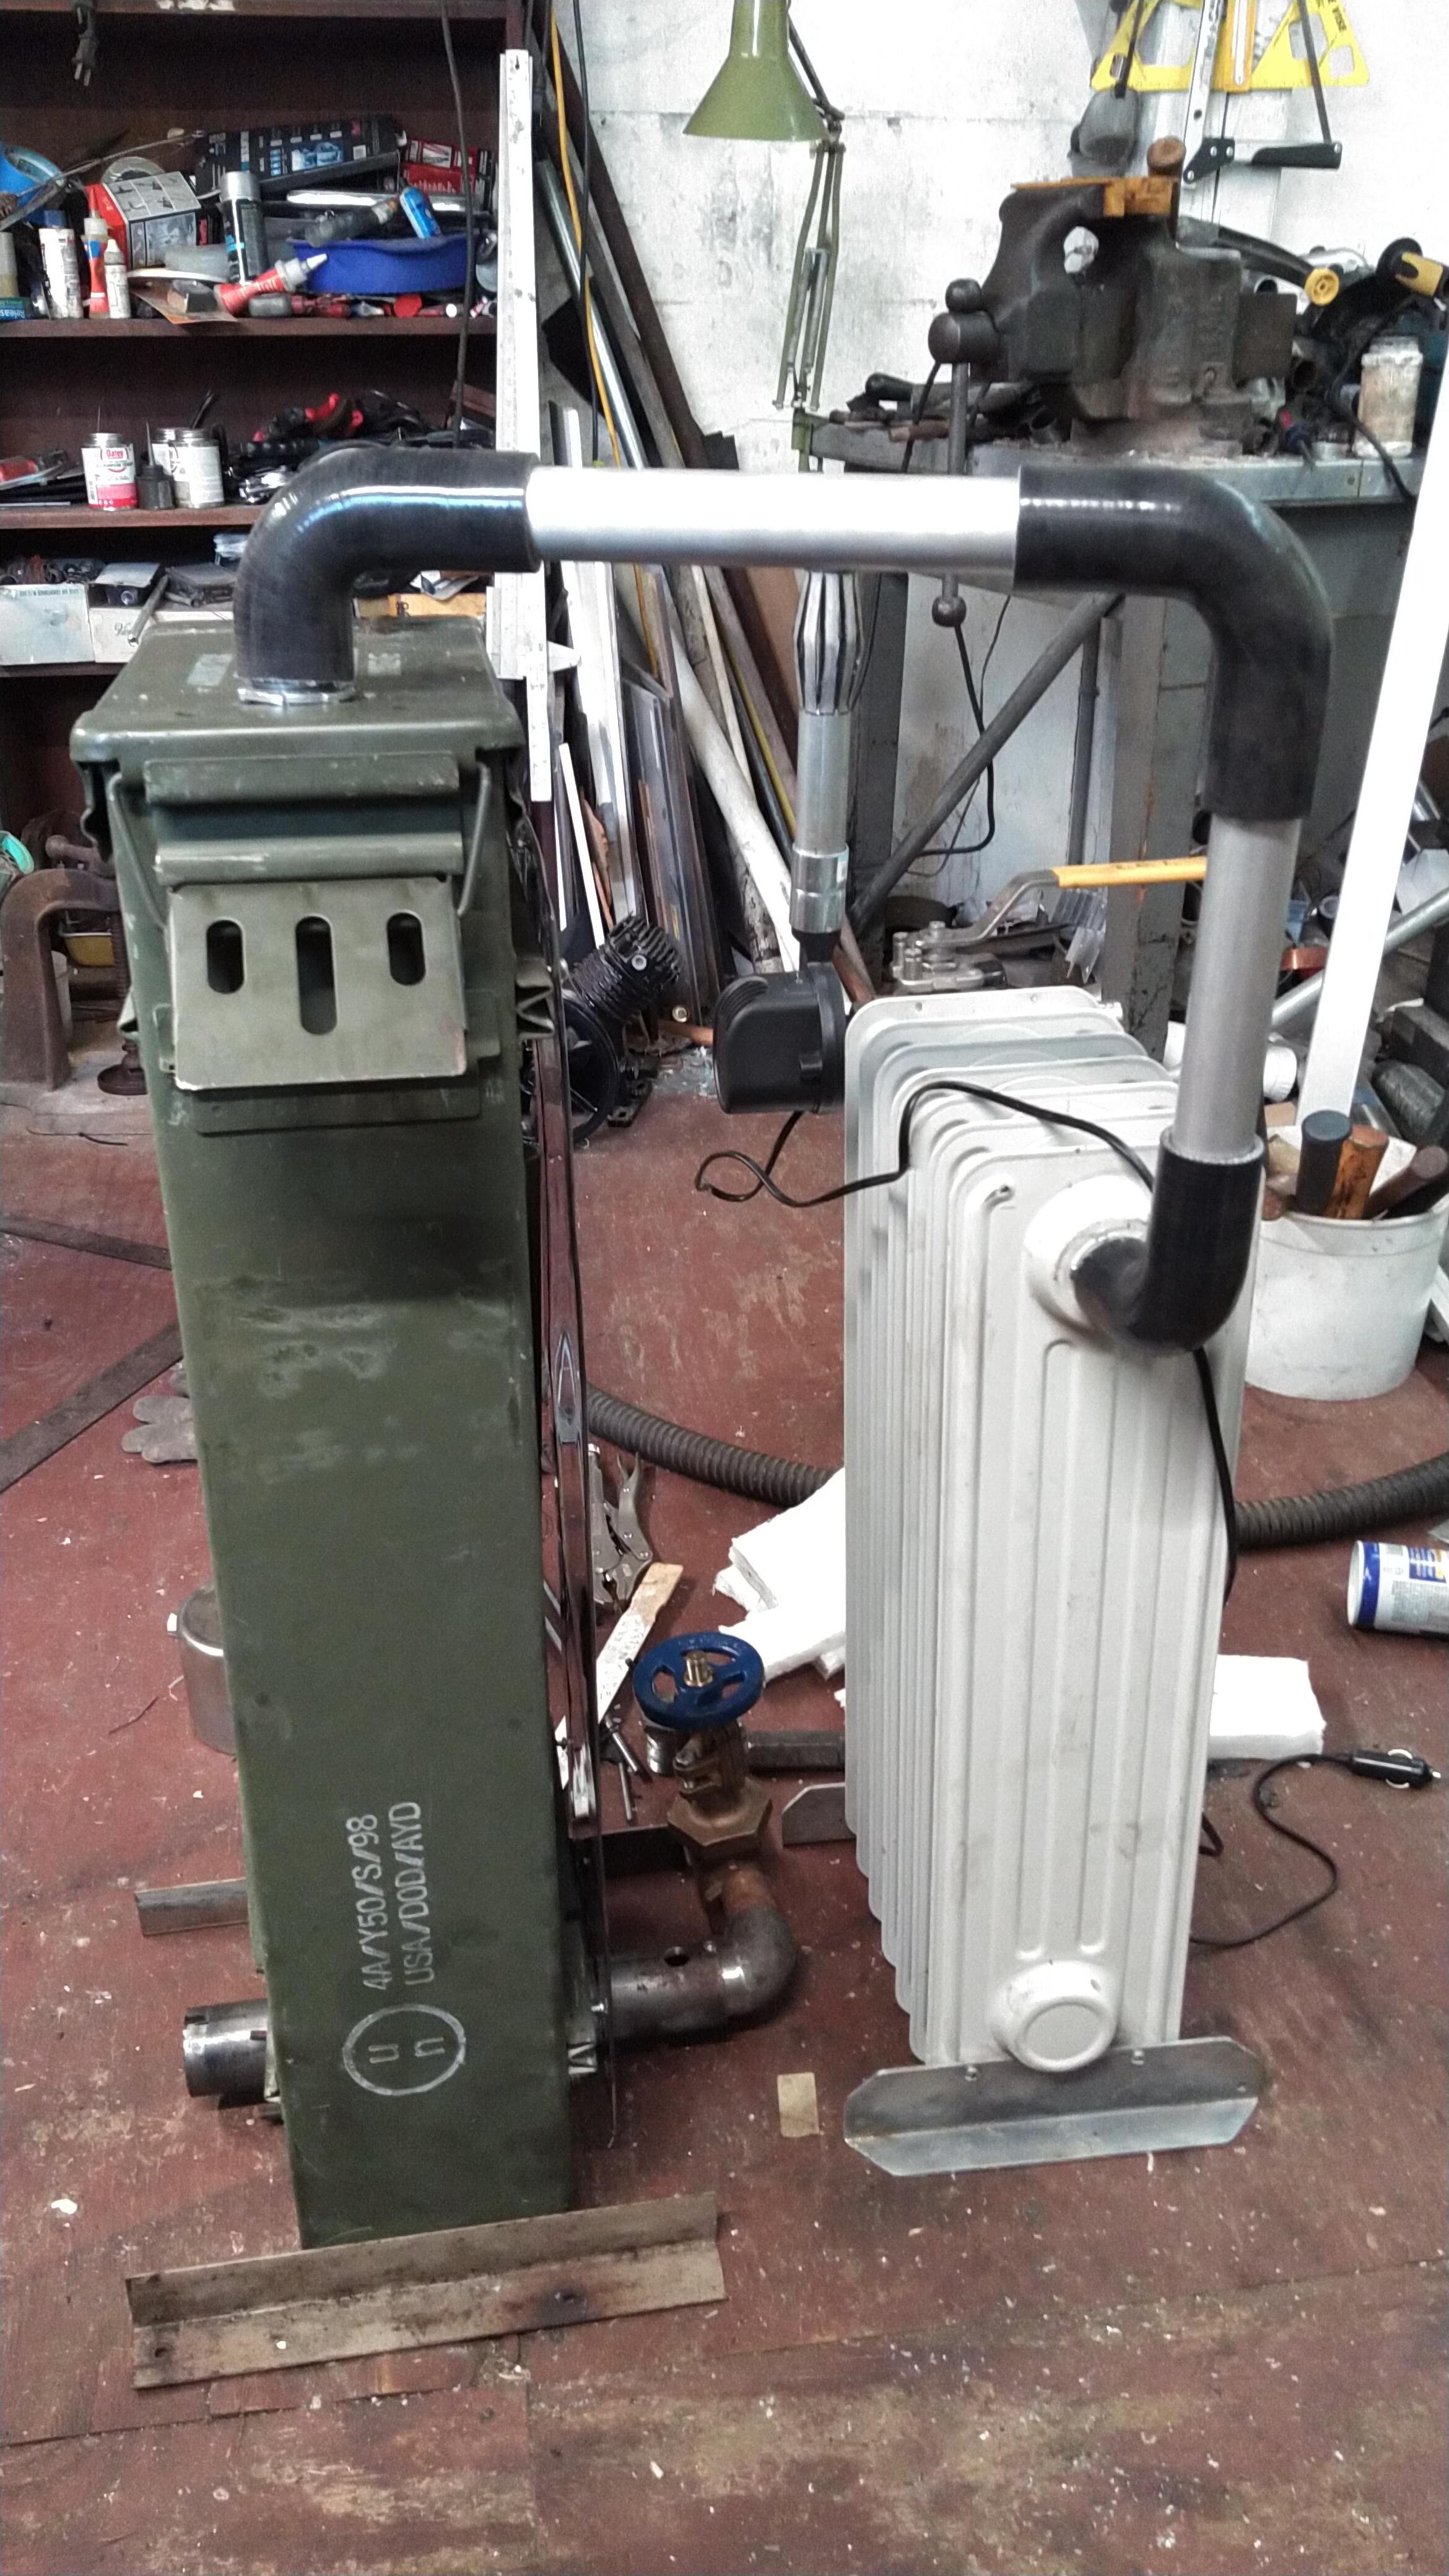
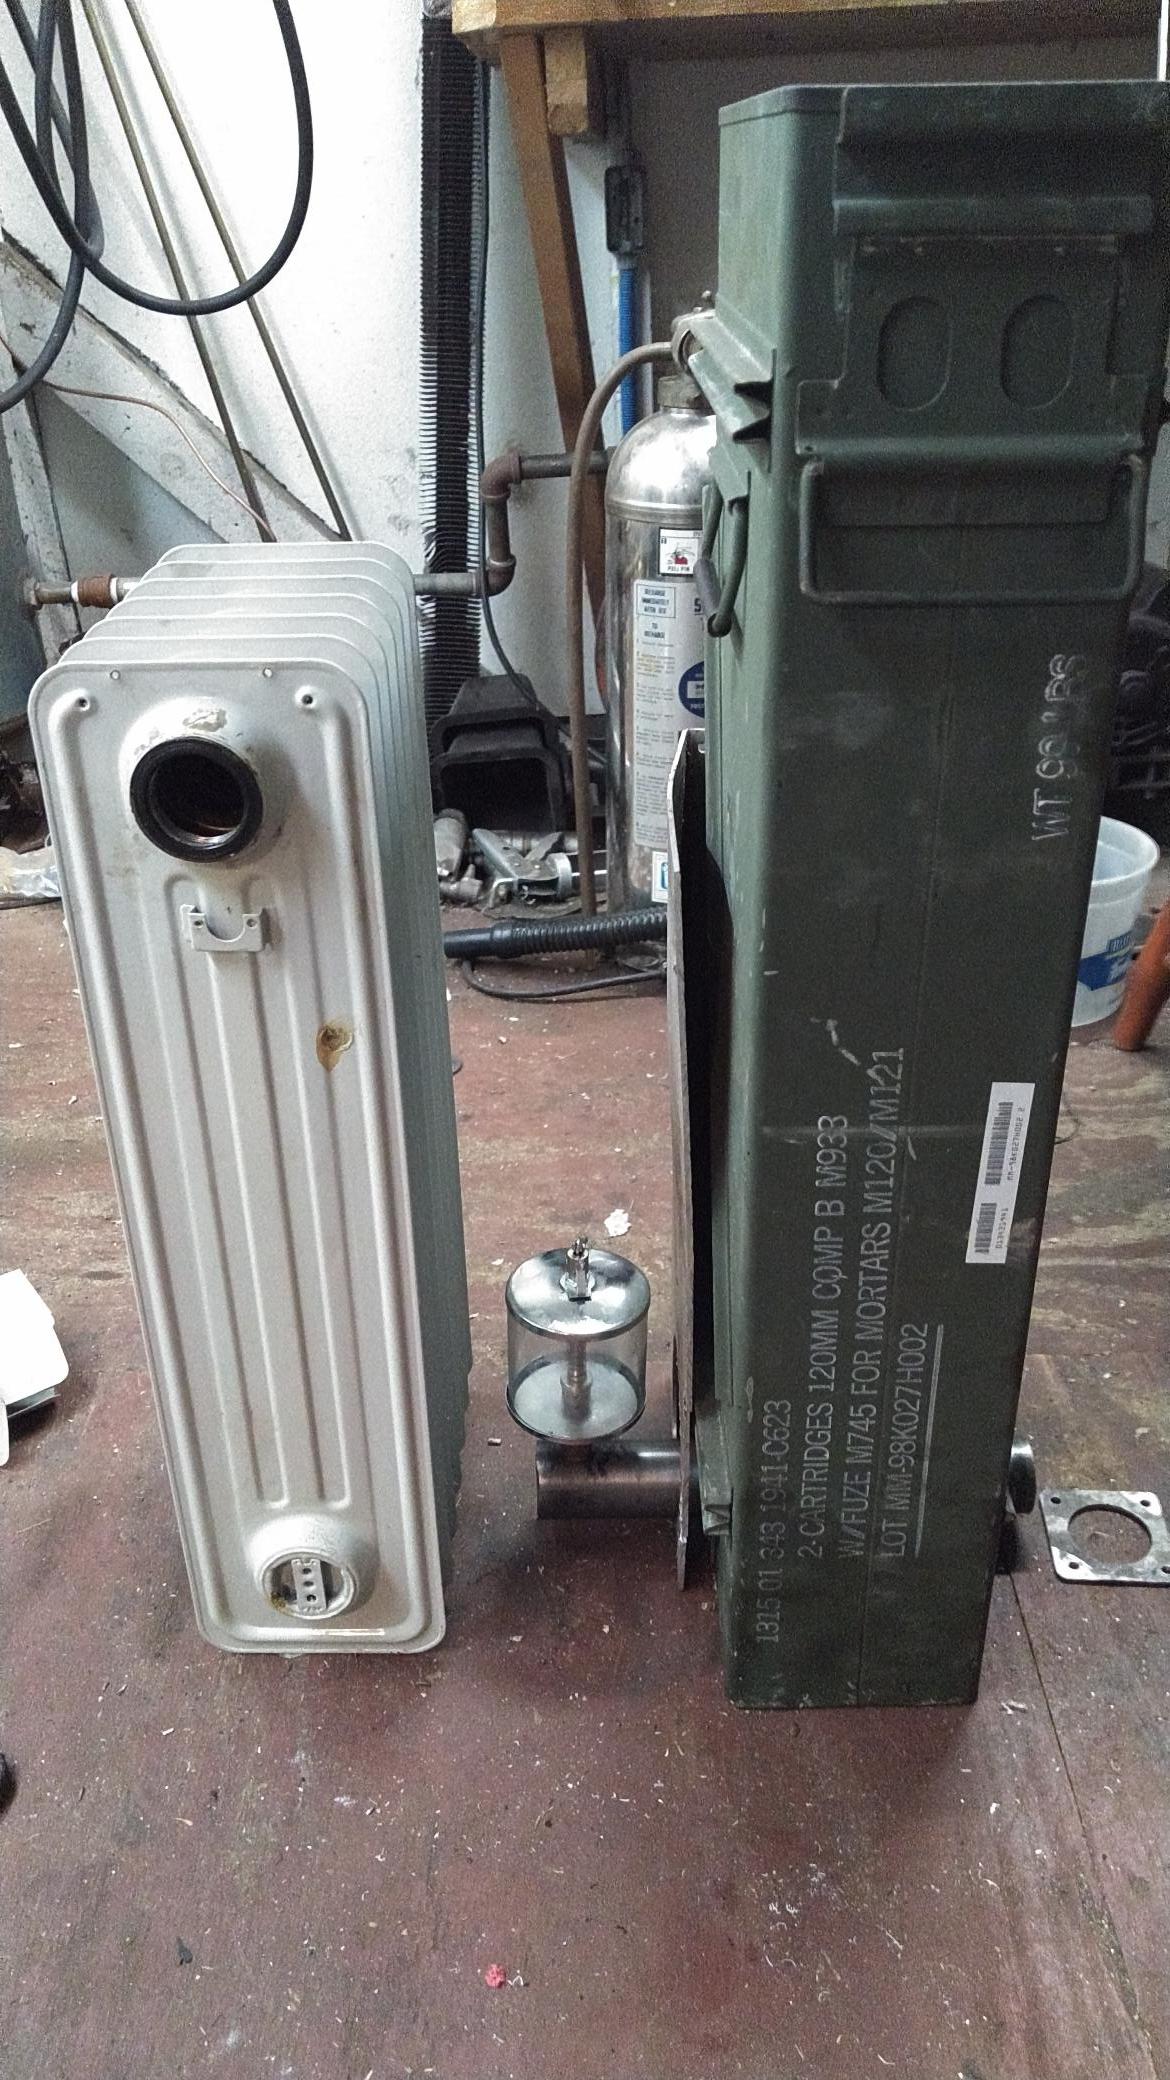
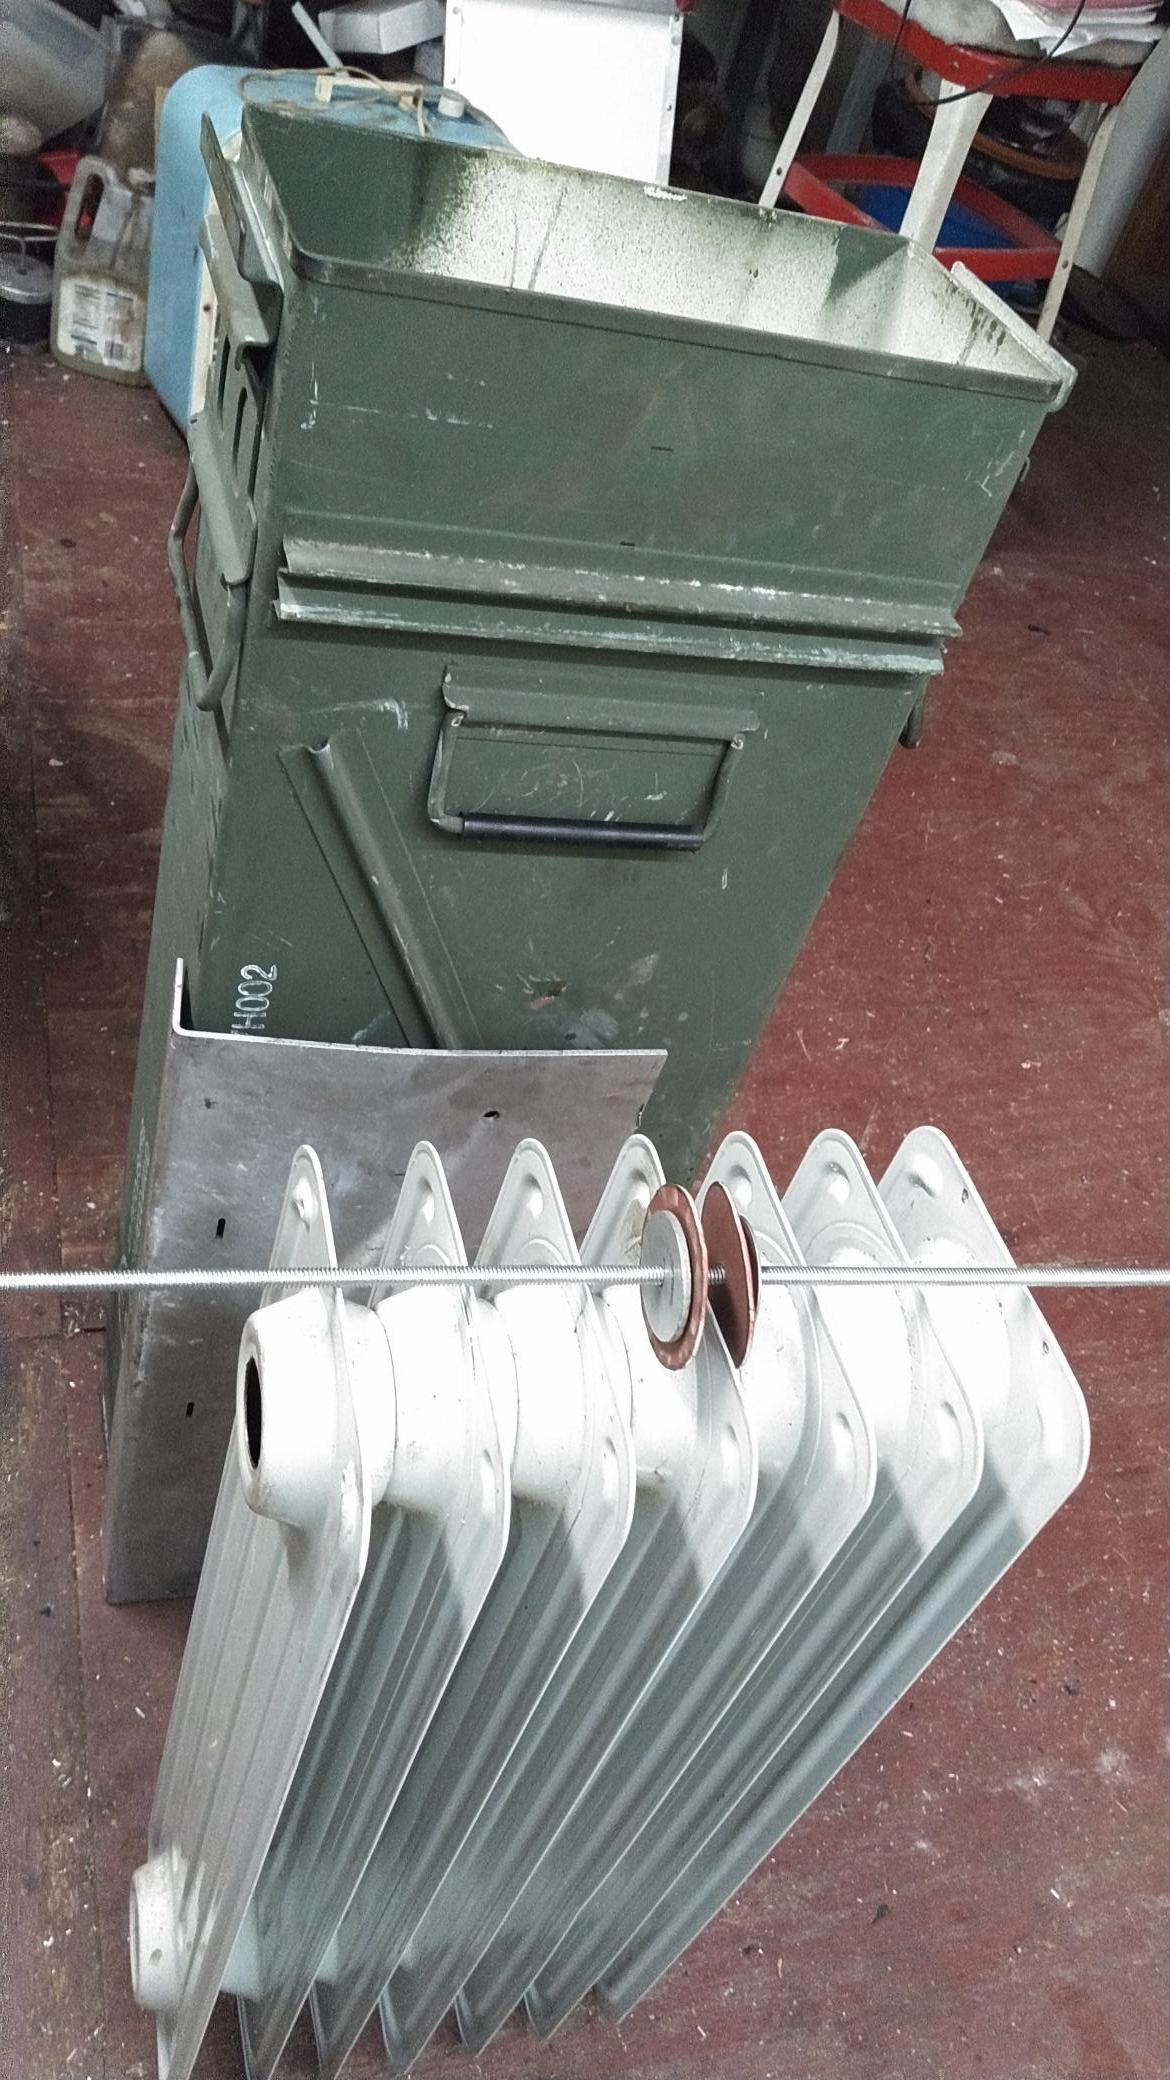
This old oil filled heater is becoming a cooler by blocking the gas flow between two of the chambers in the top to give it 4 cooling webs going down, then through the bottom and three paths up
Hi Bruce , your going great guns on the new build cant wait to see the finished build .
Love the way you have plugged the chambers to get the gas going in the direction you want .
Dave
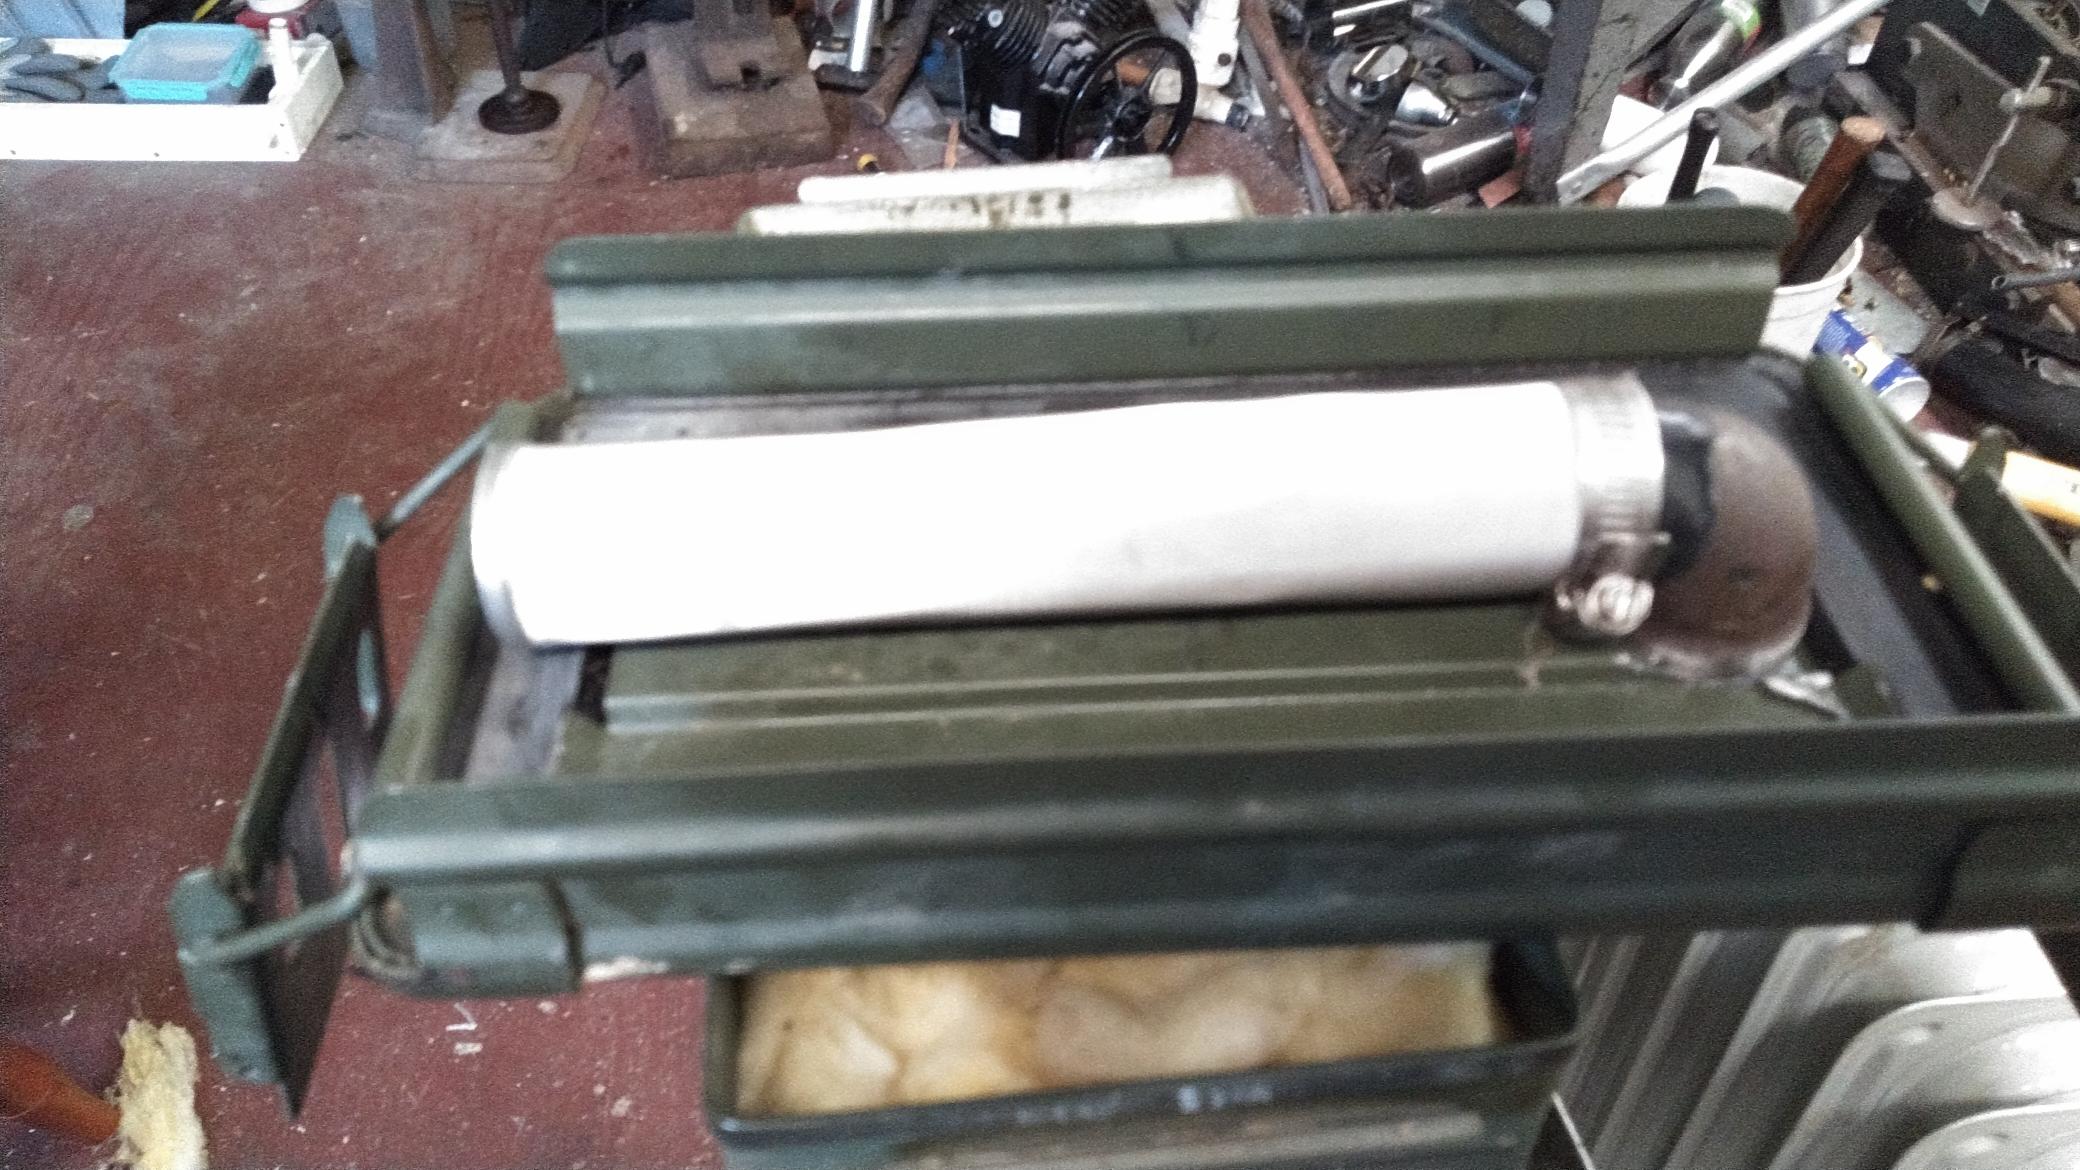
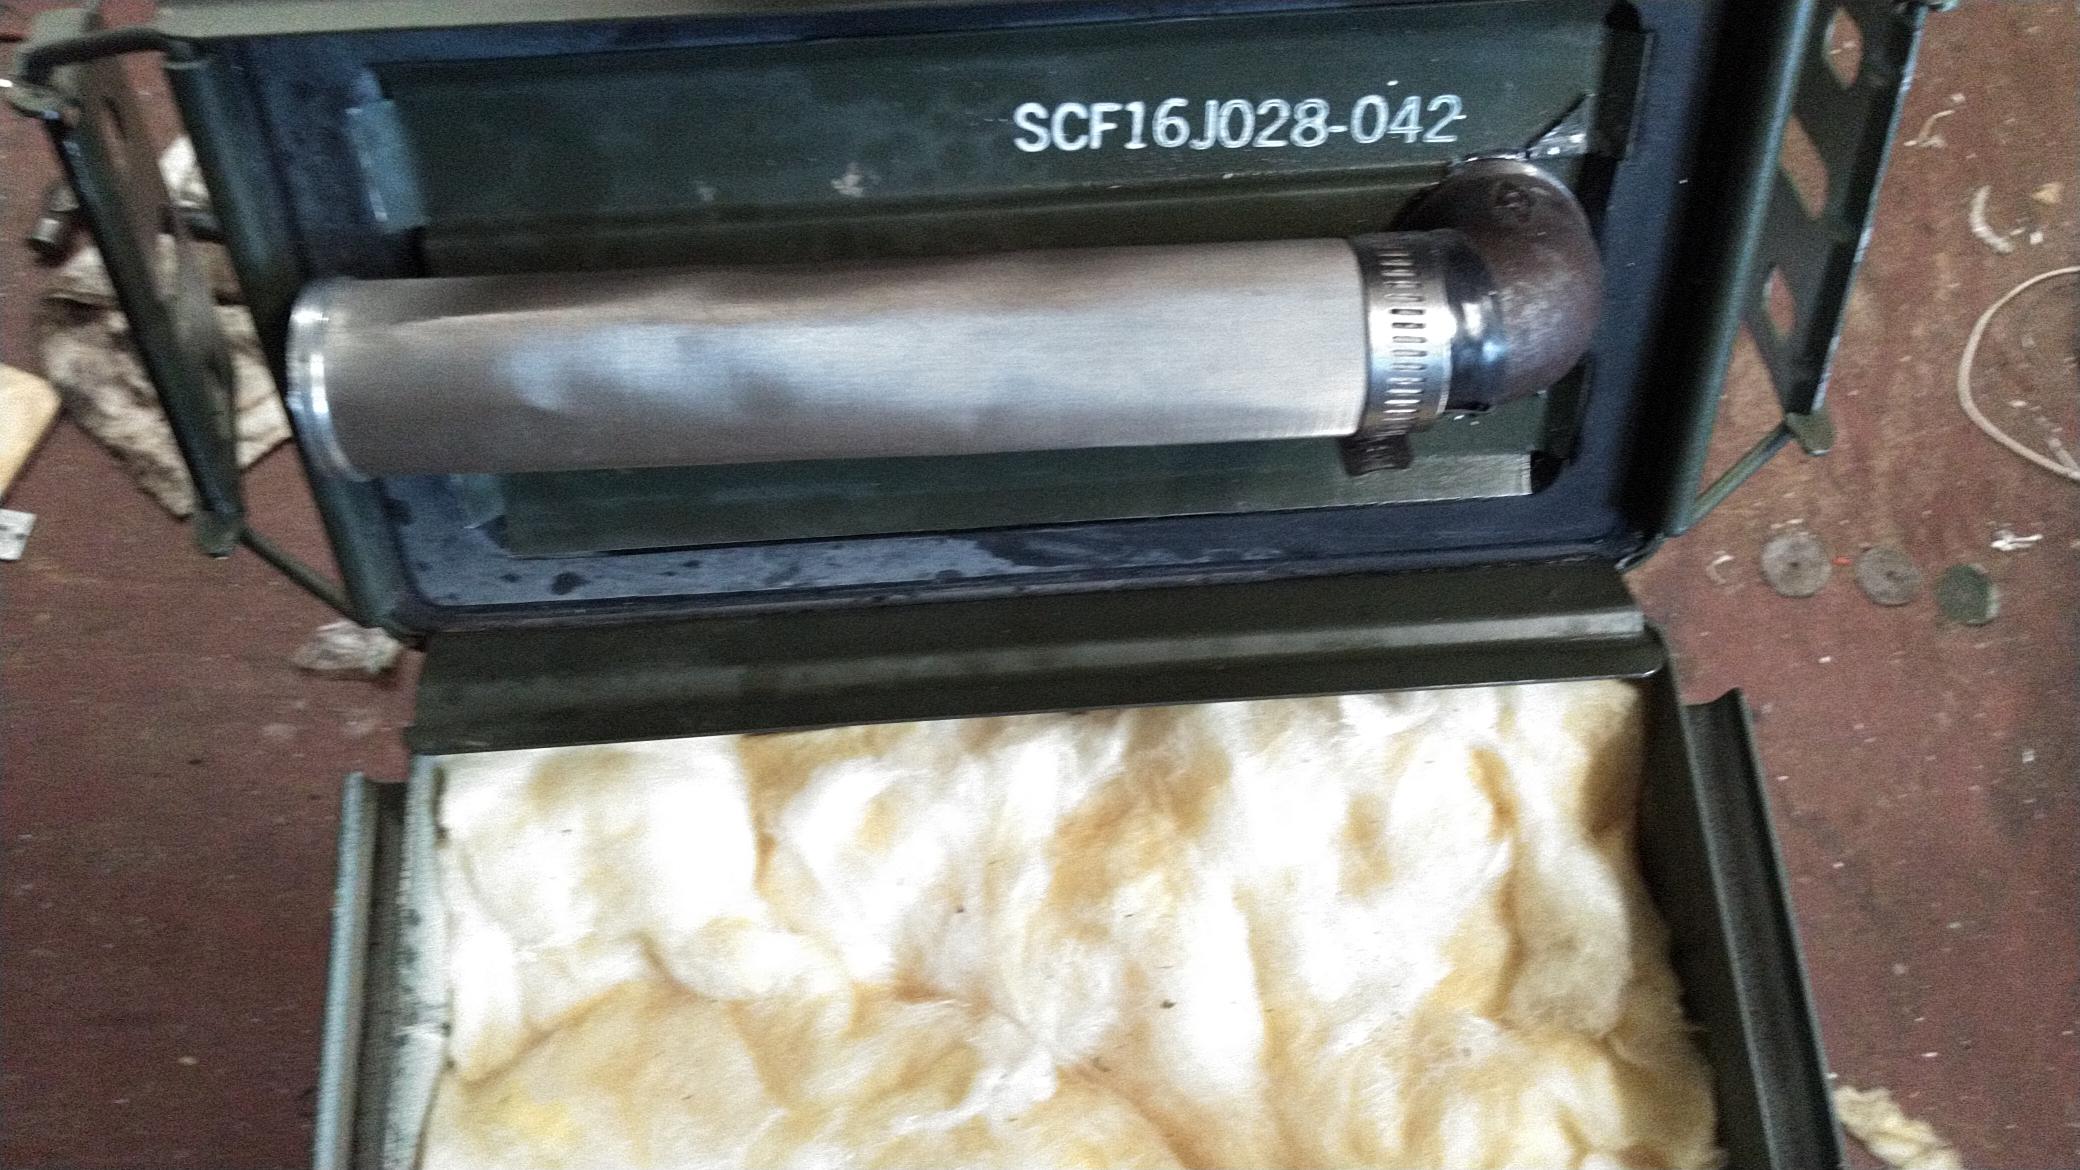
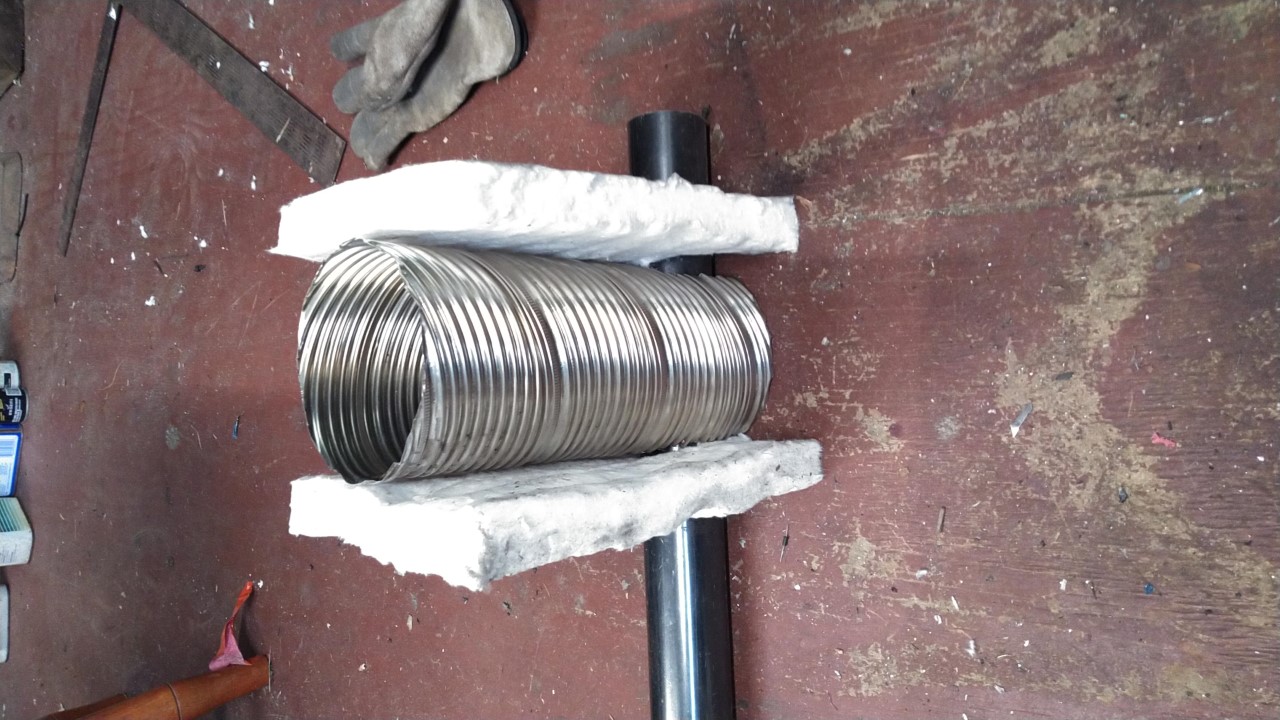
It is amazing what you collect when looking for gasifier related stuff. This is a 25 micron stainless steel screen tube. Got a deal on ebay. One end is a bit larger than the other so i assume they were manufacturing rejects.
Converting the heater into a cooler is a little like building a ship in a bottle.
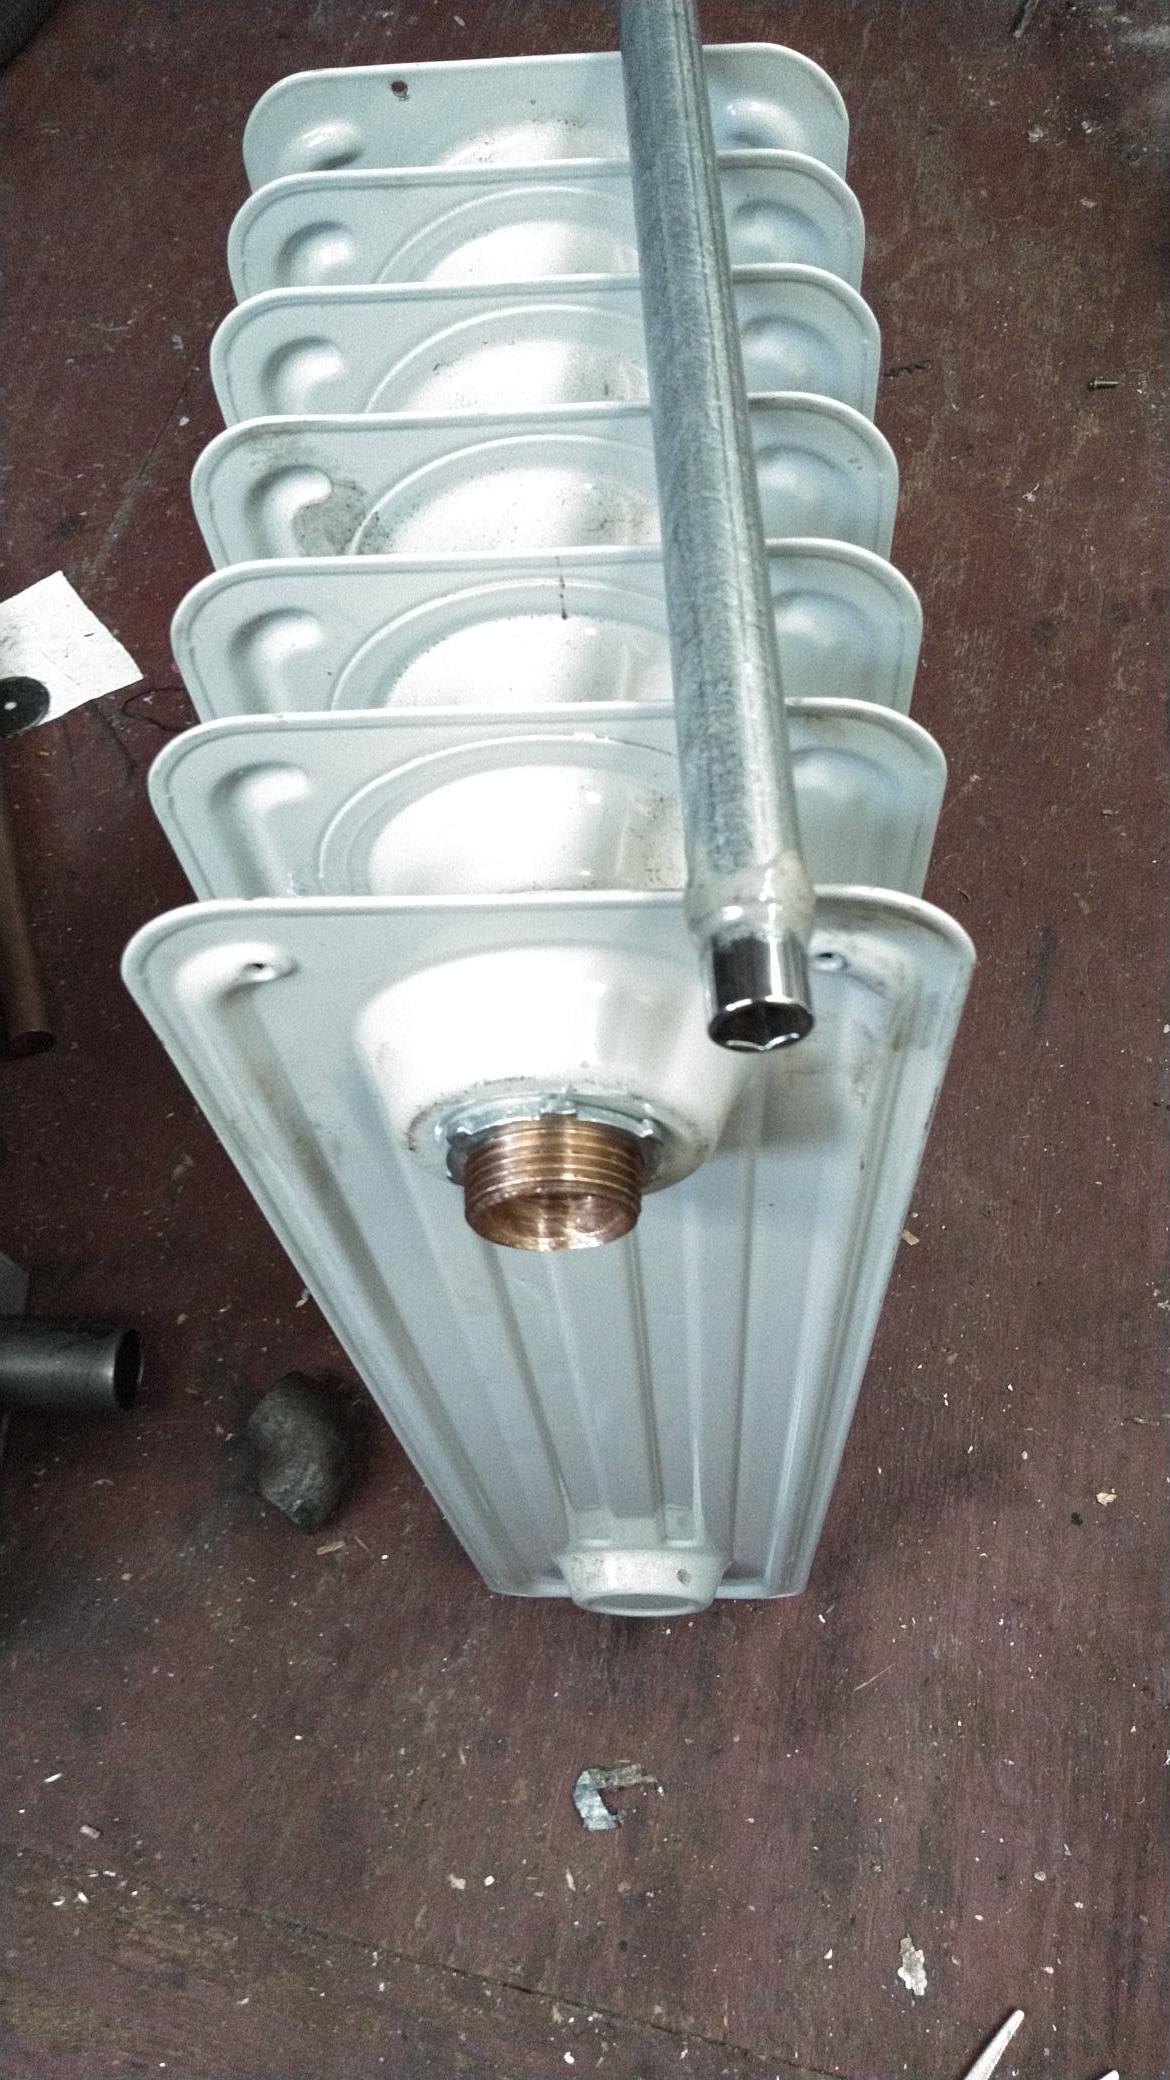
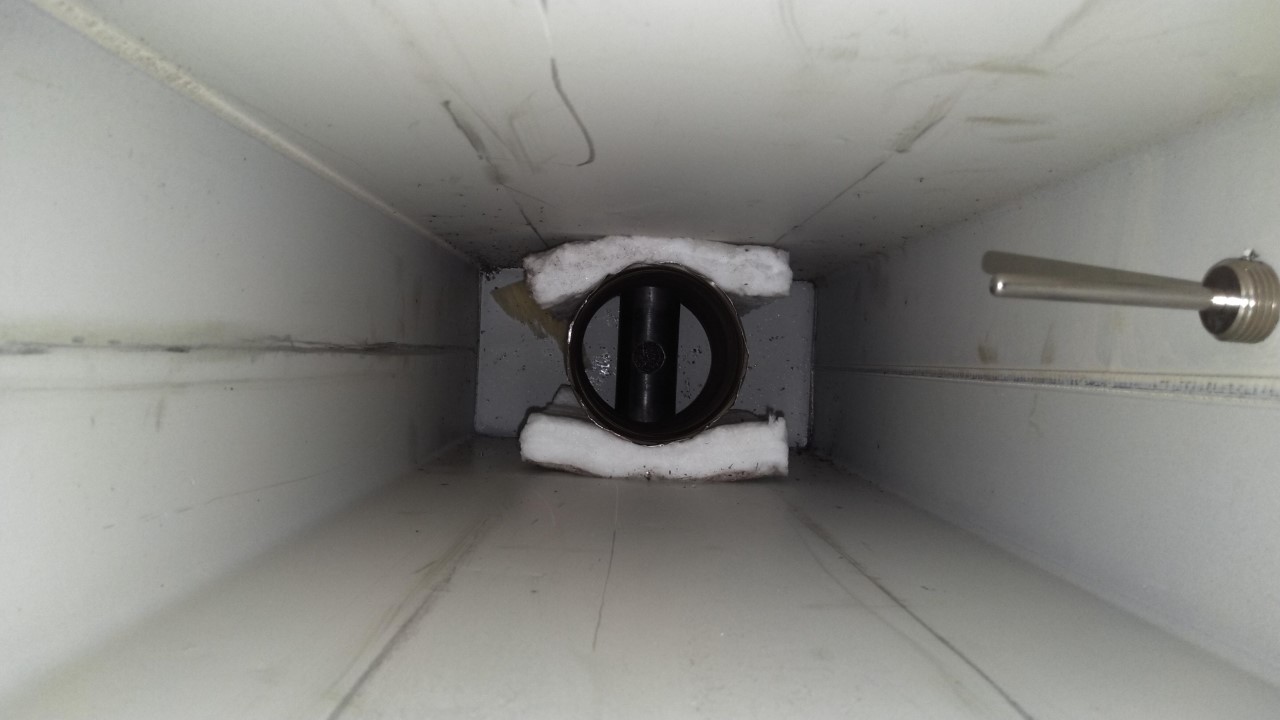
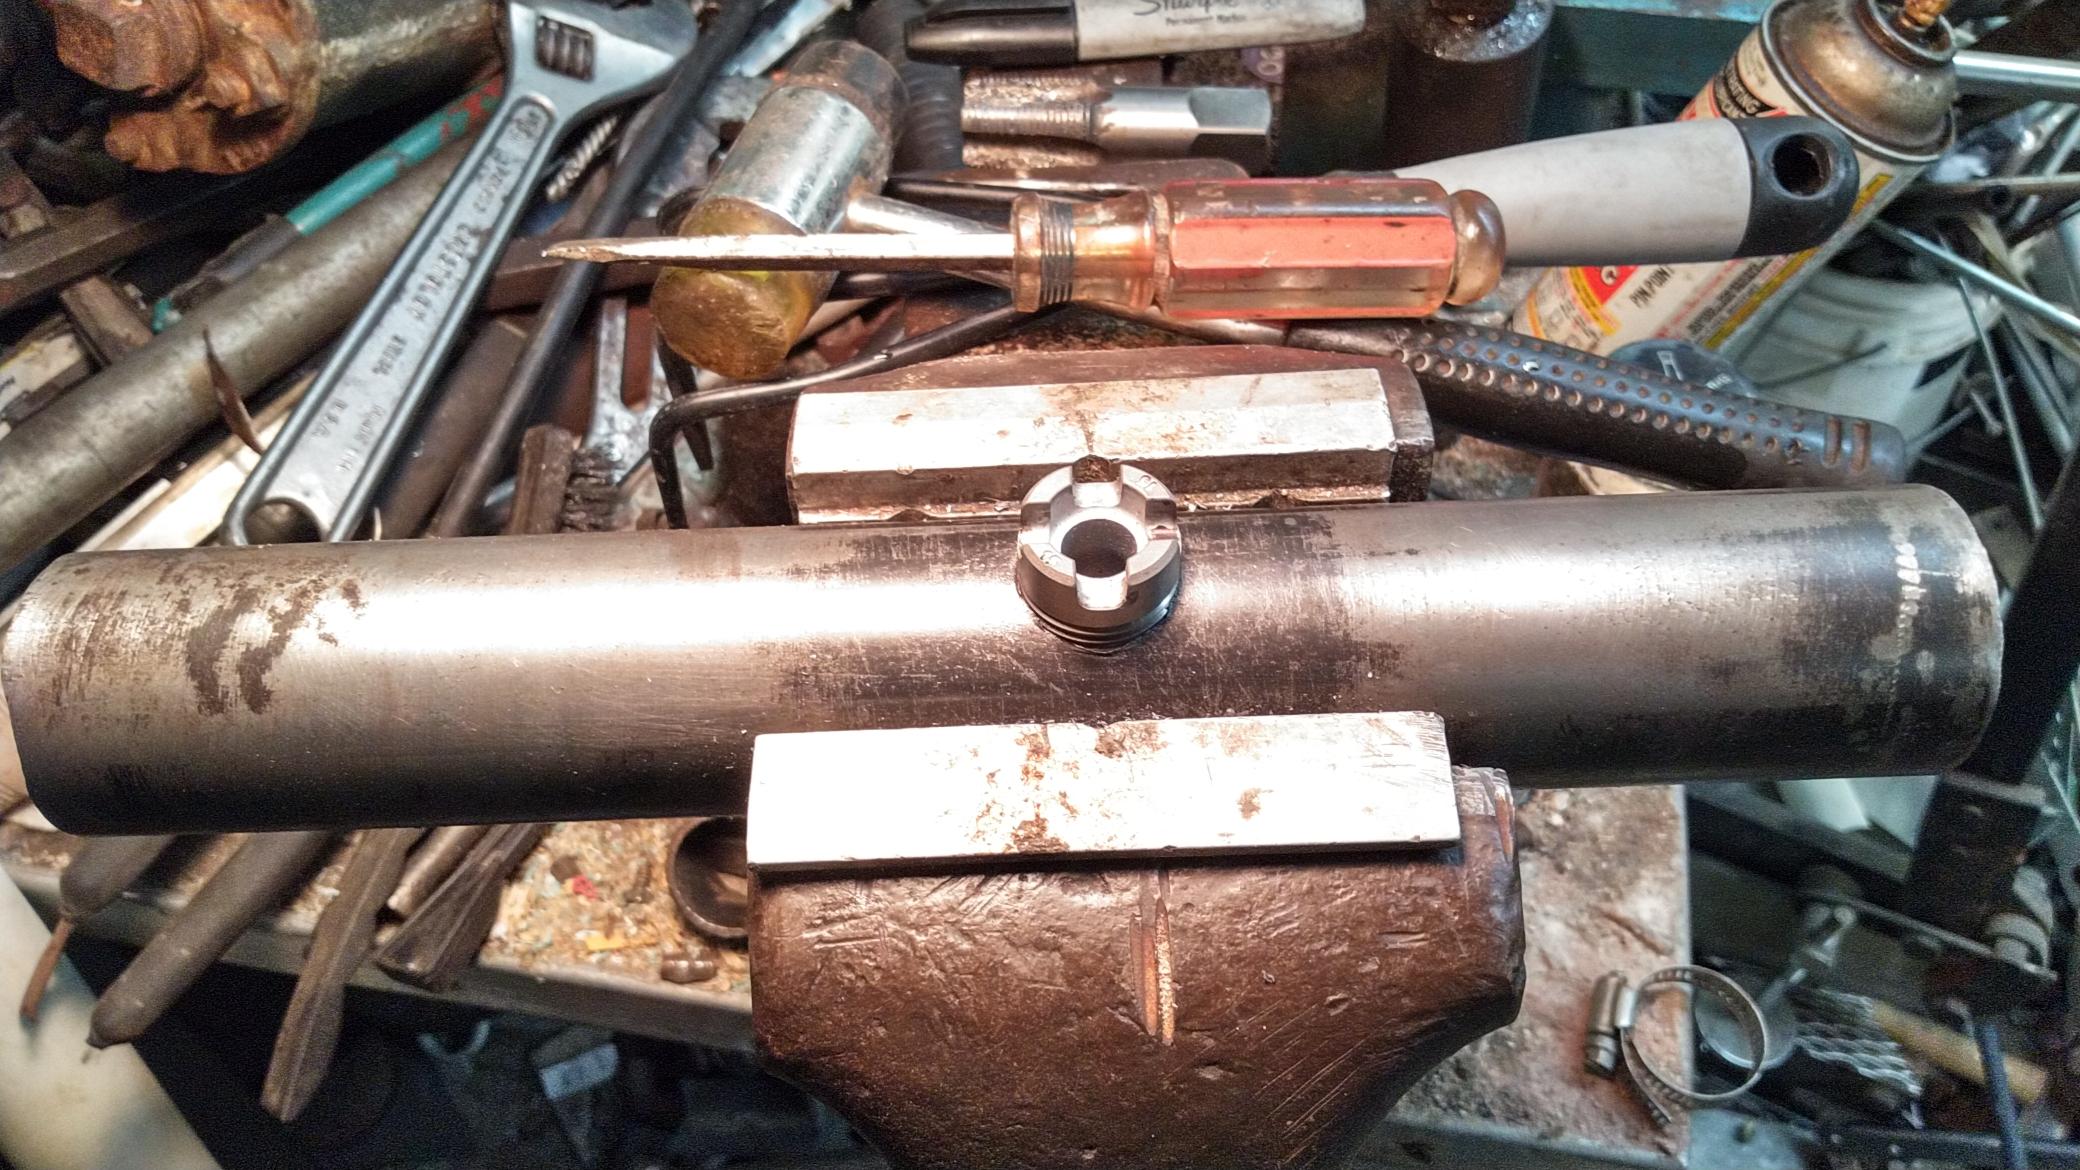
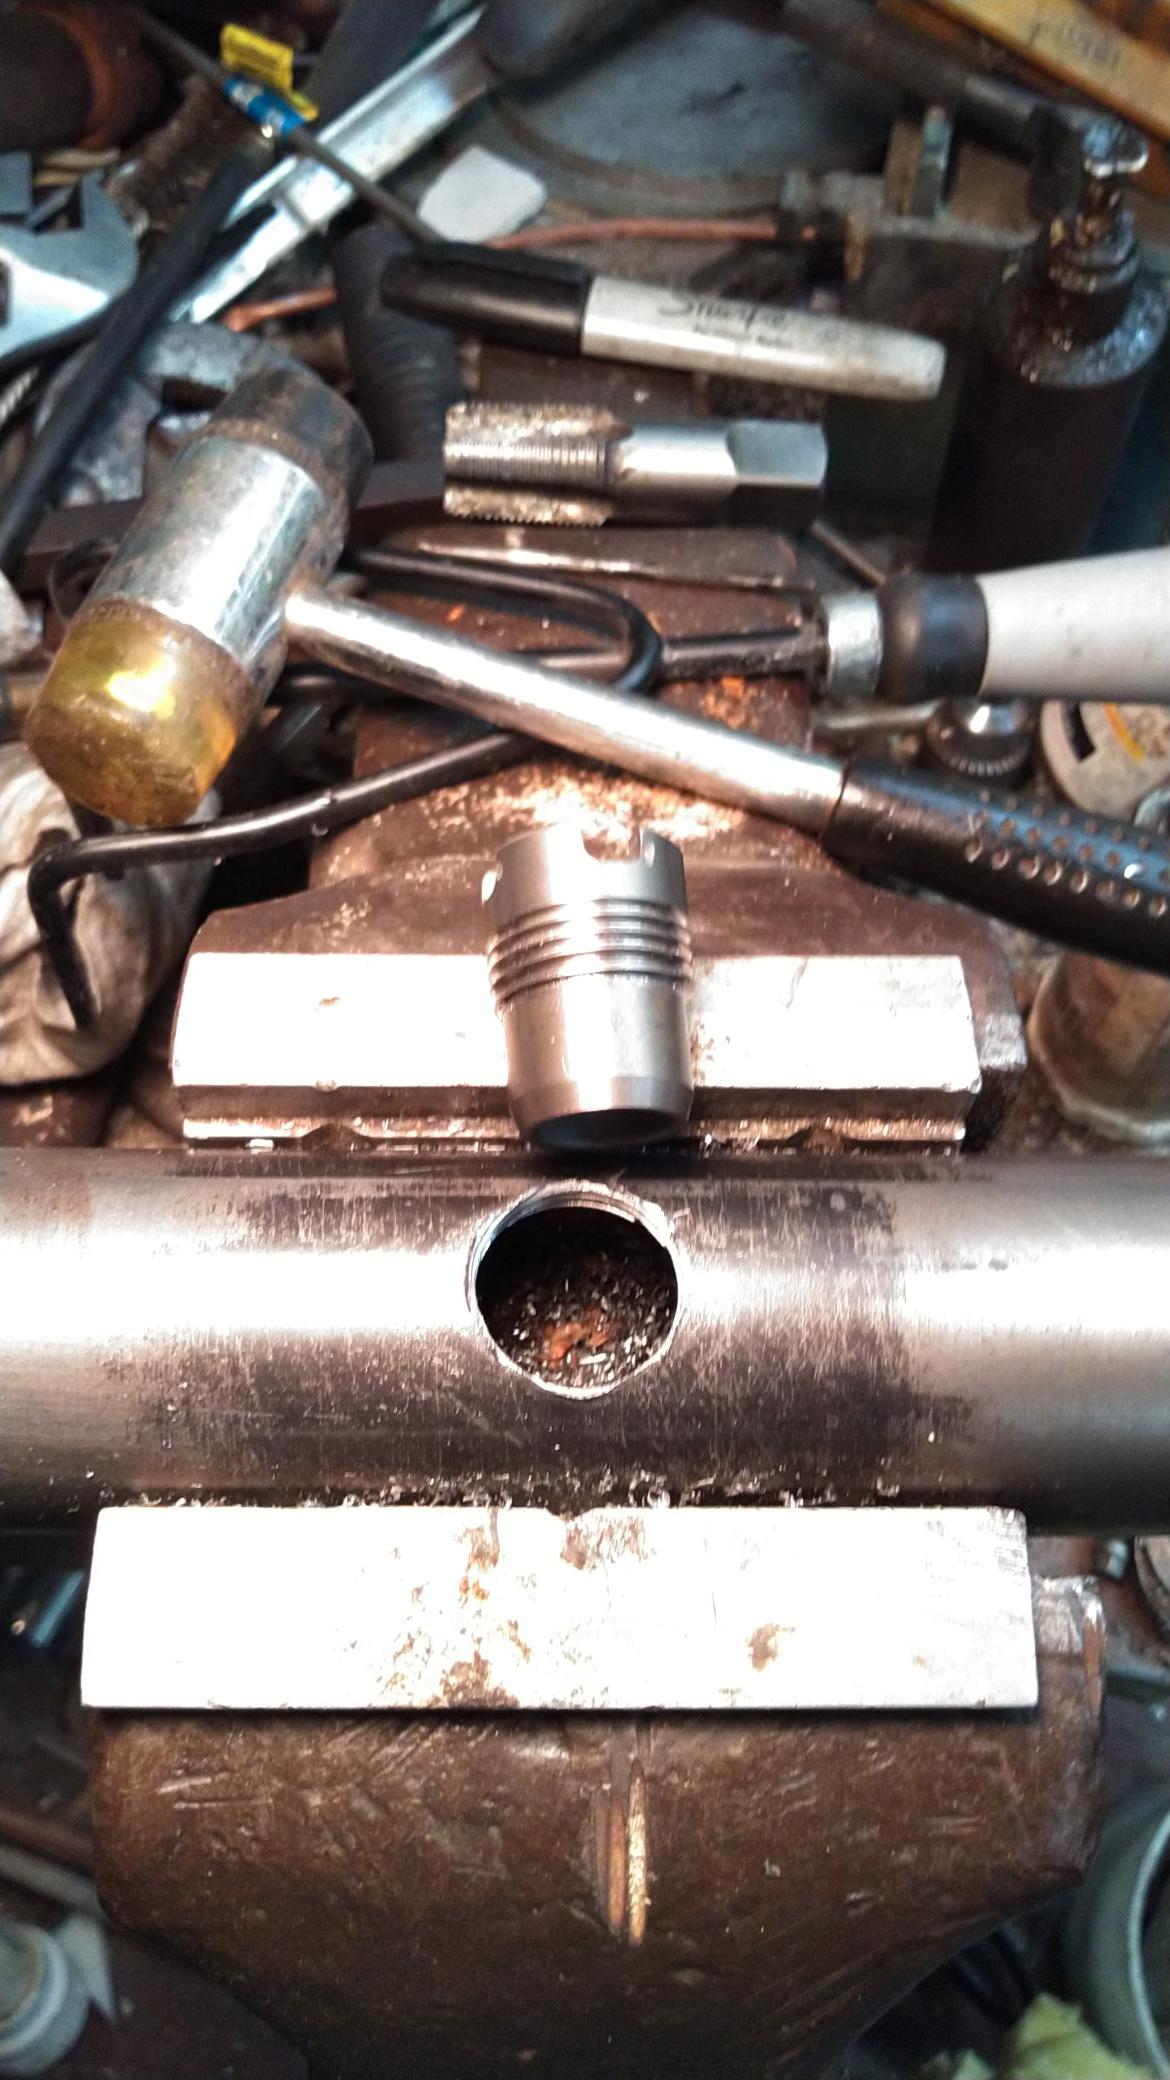
The outlet fitting is a 1" x 3/4" reducing bushing drilled out to 1" ID. The hex nut portion of the bushing is ground down to allow it to pass through the 1-1/2" internal openings, but still catch on the 1-1/4" exit hole. It is held in place with a 1" electrical lock nut.
In order to force the 2" rubber washers through the 1-1/2" holes and into position and to tighten the internal nuts, I made a little tool by epoxying a 1/4" drive 7/16" socket into the end of a piece of EMT conduit.
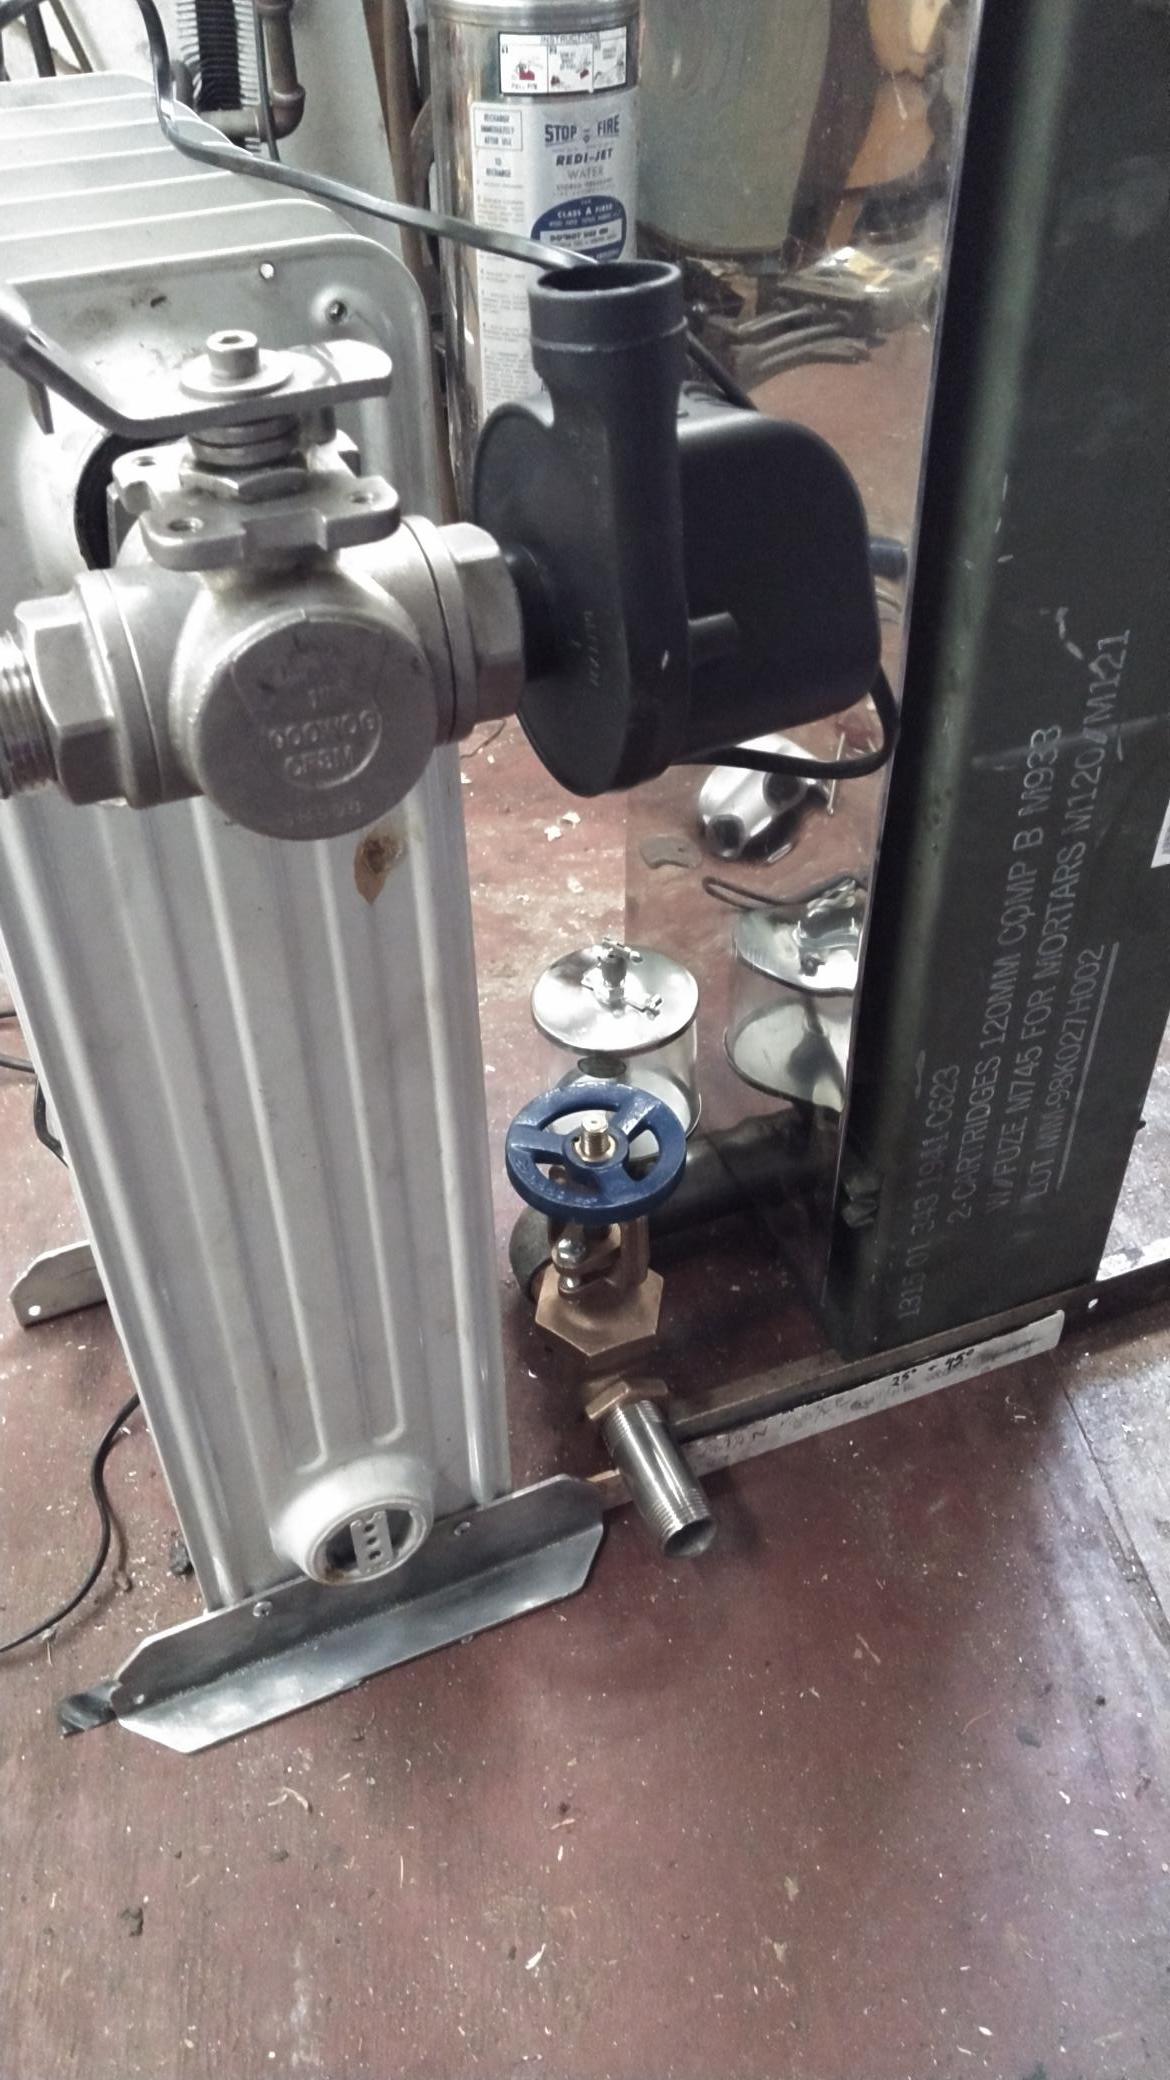
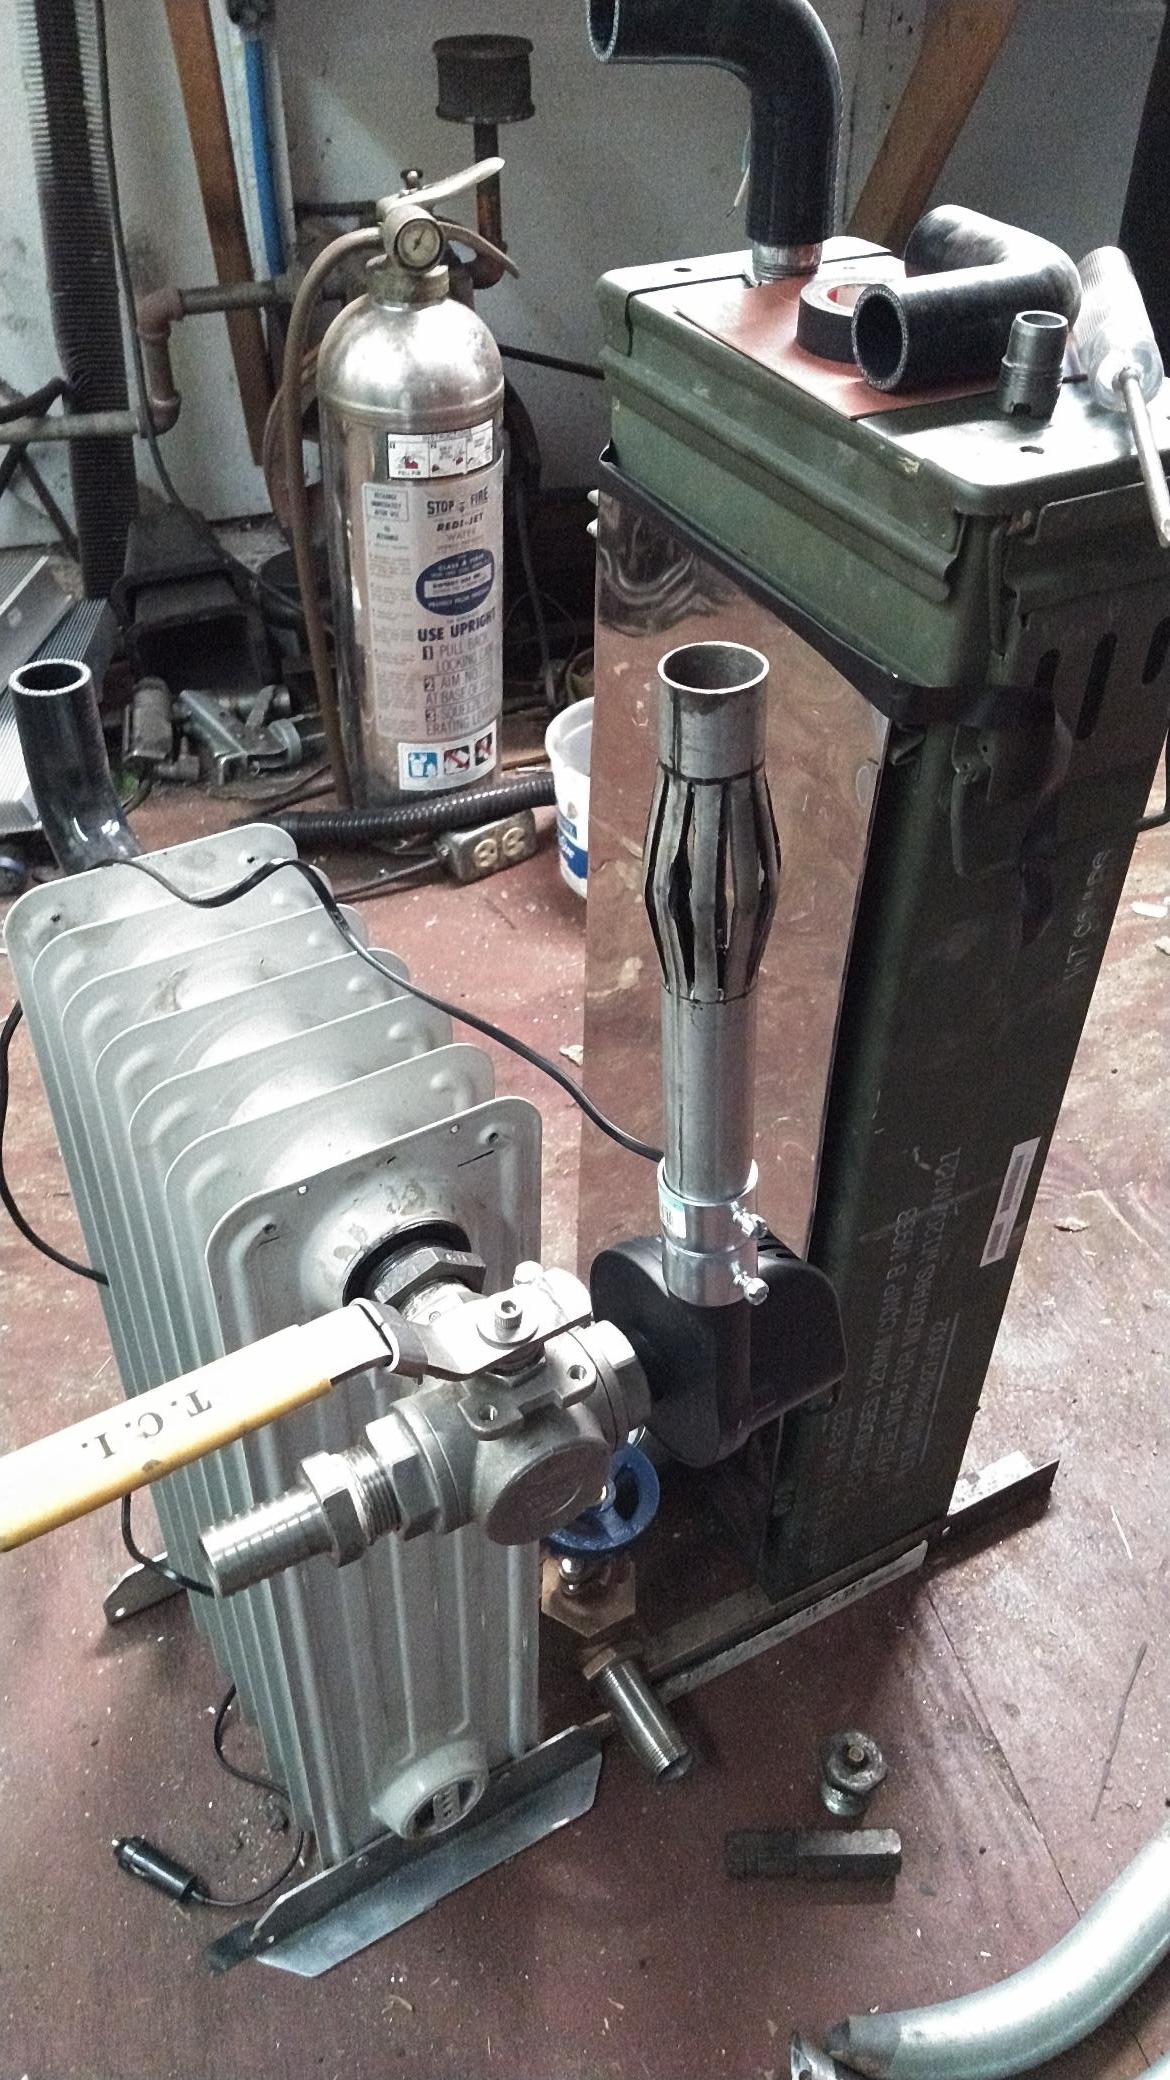
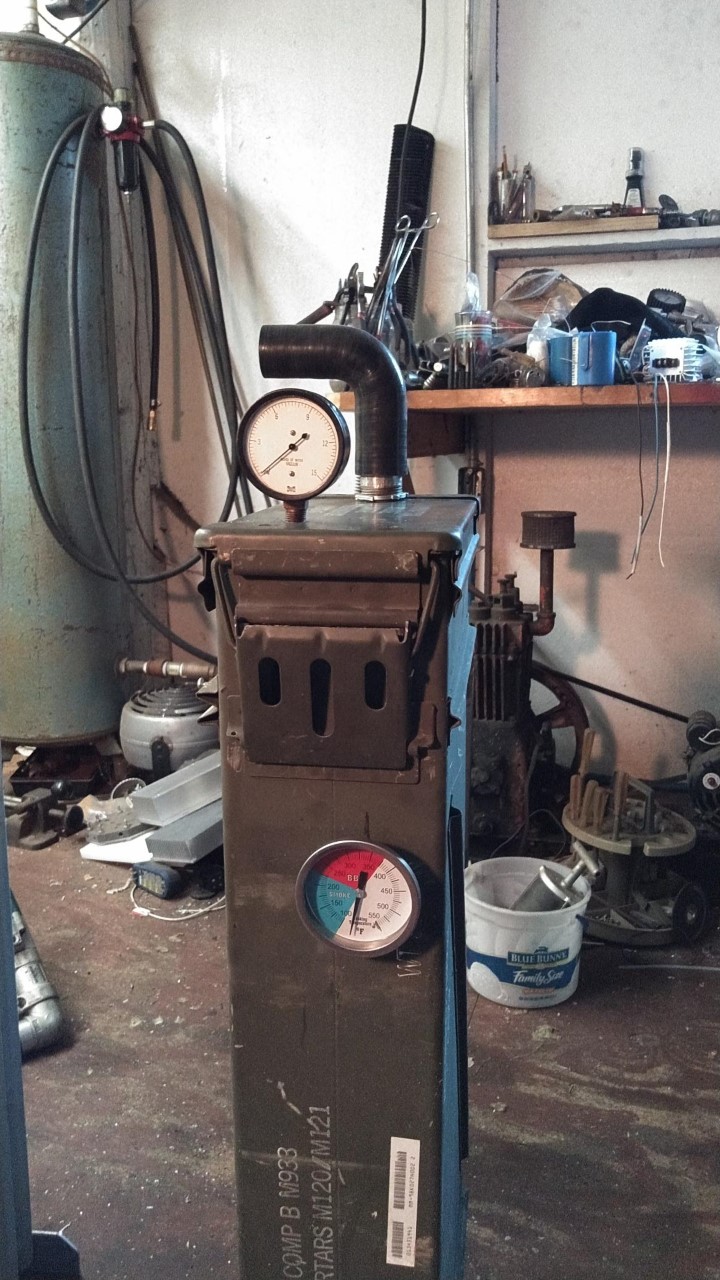
I added a monster sized EGR valve and a piece of scrap stainless steel for a heat shield. This is definitely a Frankenstein, I hope it walks and talks.
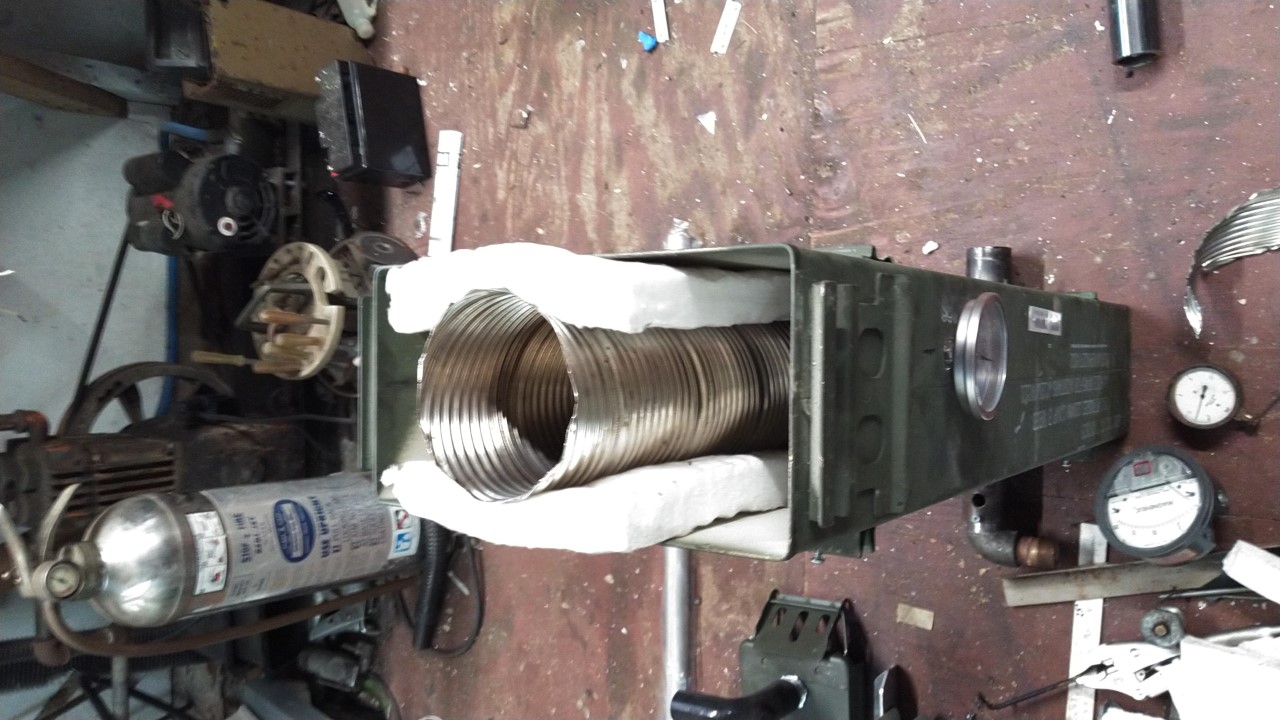
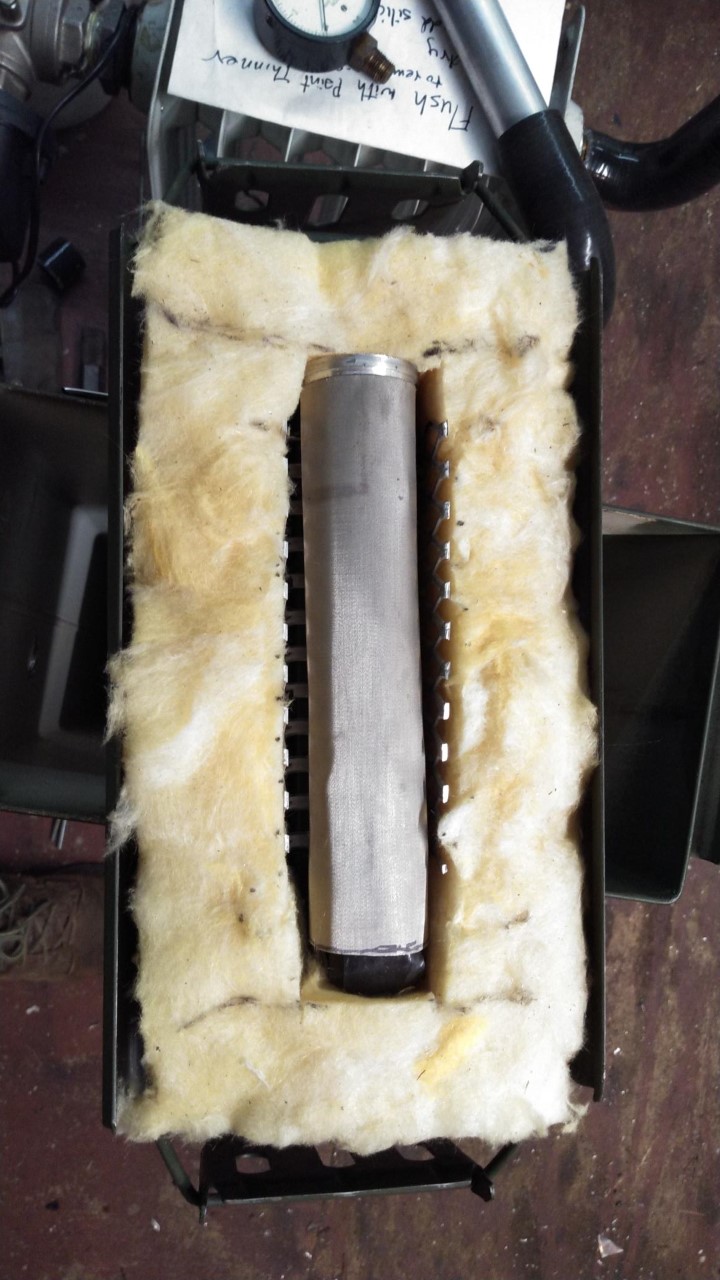
I will have a couple of inches of insulation between the charcoal and the gas outlet. I decided to put the temp gauge below the insulation so I will get a quick response when the charcoal starts getting low over the glowing reduction zone.
I had quite a good fight with myself about how tall to make this shield. Even a taller tube would still be below the shutdown level of charcoal. I’m curious about possible benefits of containing the reaction in a narrower vertical space based on Koen’s designs.
I’m headed to Washington state to visit my grandchildren so this project will be on hold for a few weeks.
Yes, Kristijan, my crown shaped nozzle might make slag build up worse and the chimney liner is probably not rated for 1300C. Thanks for your interest and comment.
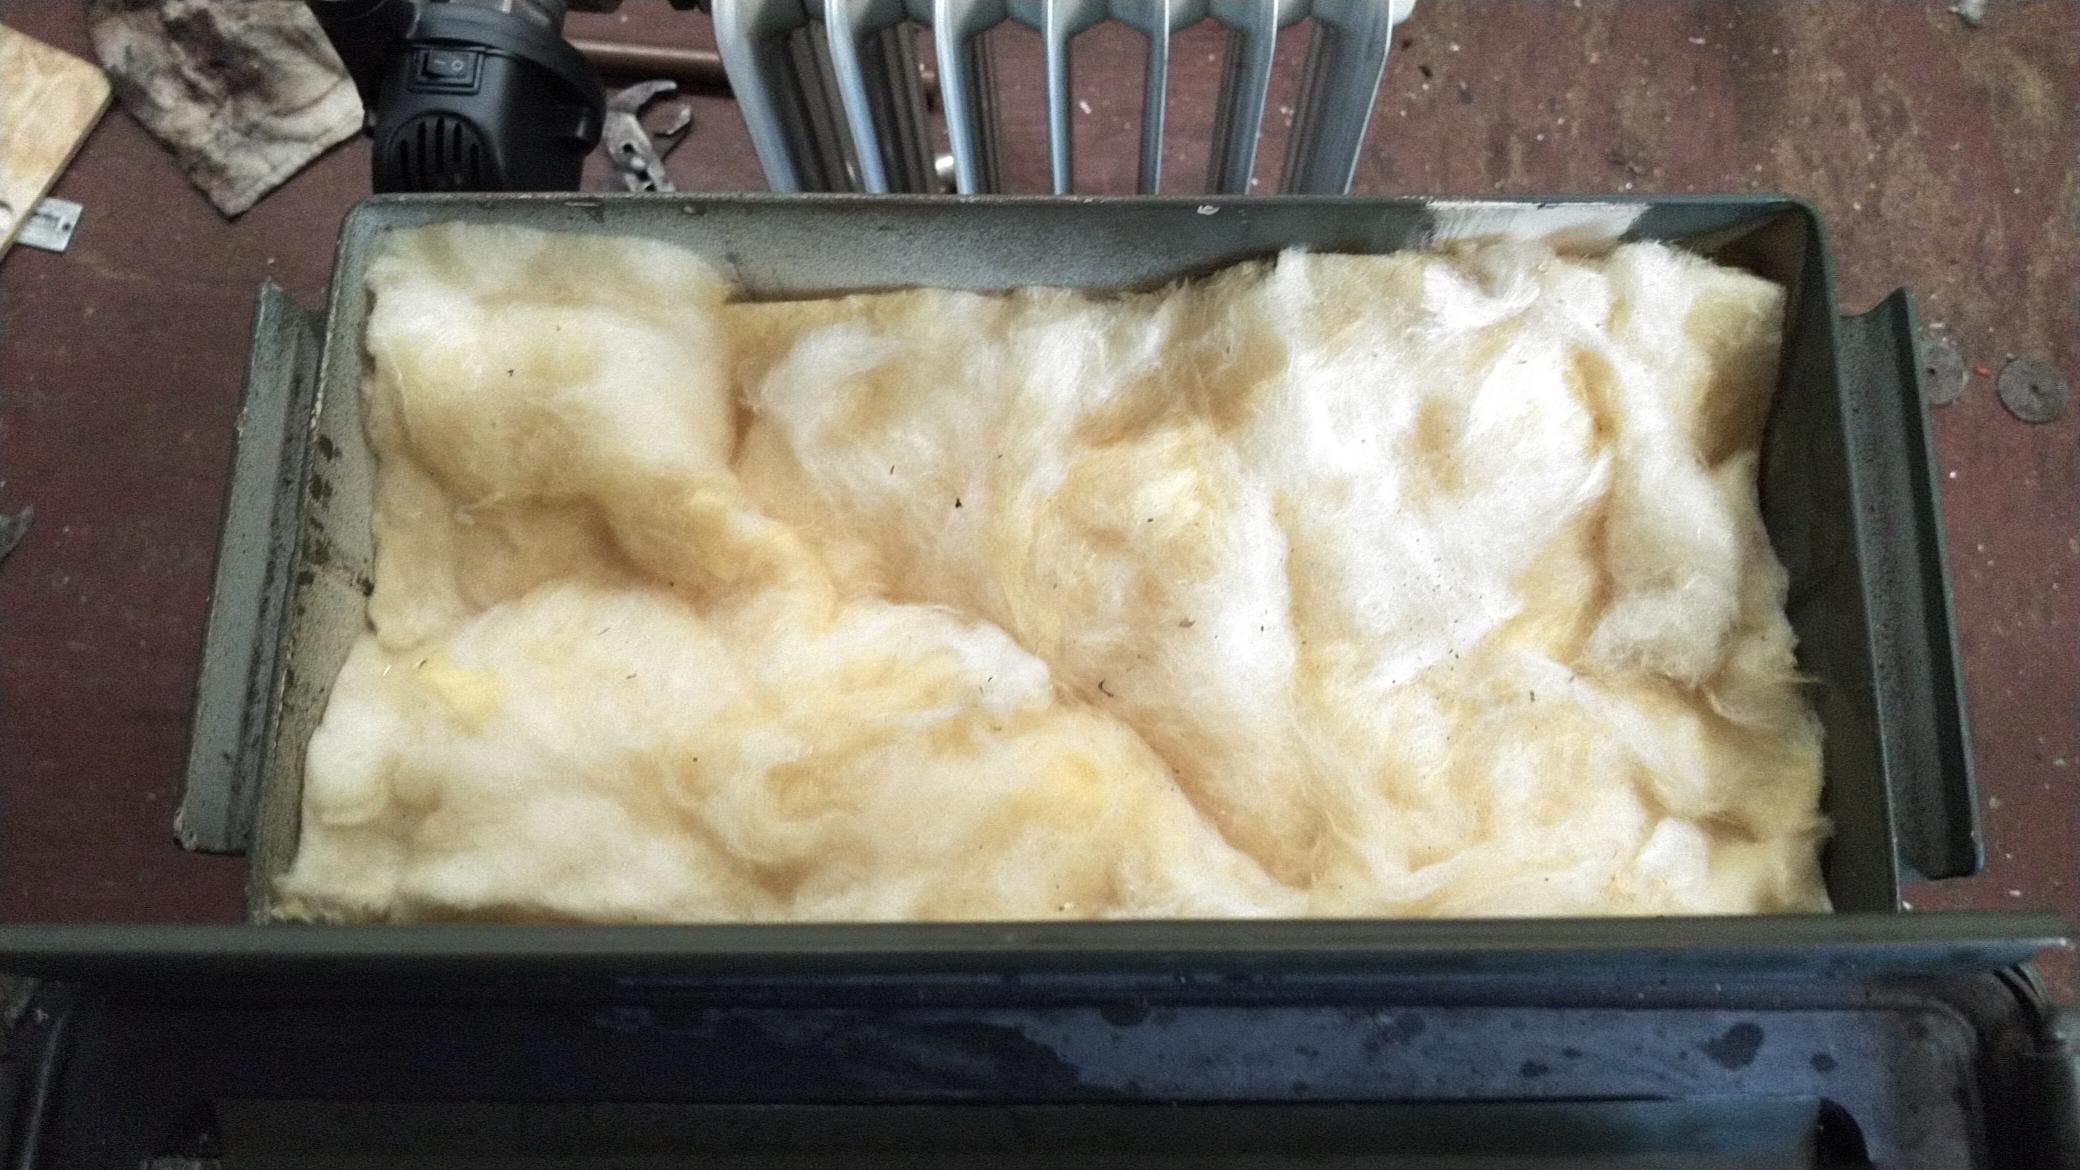
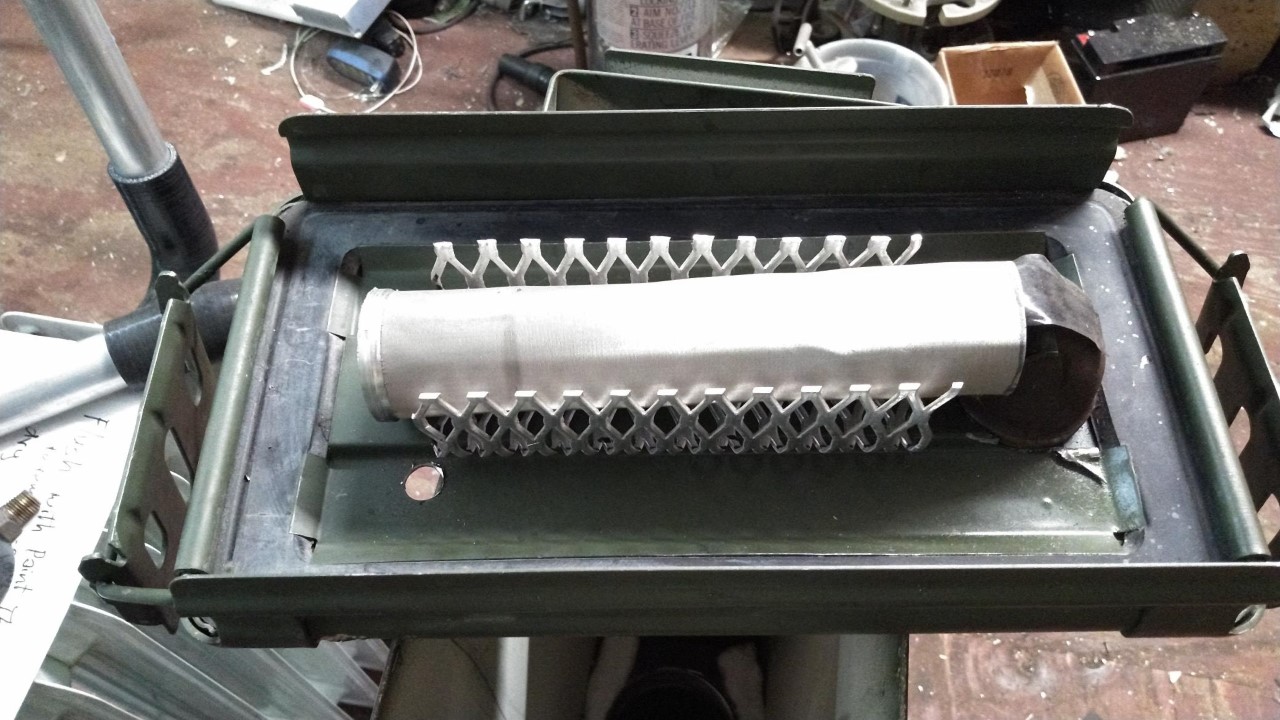
OK, back from visiting kids in Washington. While away I got this idea for my internal filter that will allow a couple of extra inches of fuel height. I put the fiberglass media around the 25 micron safety screen instead of below it.
First, a cage to keep the fiberglass from touching the screen:
Hi Bruce, I’ve been looking at your gasifier and have a few suggestions and predictions. The SS chimney liner is too high. My prediction is it will melt through in areas if you are using a 6hp engine or larger. It also prevents any charcoal from filling in the burning void once the charcoal level reaches the top of the SS pipe. I’d recommend only half that height. If the SS pipe melts, you could put clay around the outside of that SS pipe to prevent burn out. You will also have ash build up so will need to dump the contents from time to time. There is nowhere for the ash to go except to accumlate around the nozzle. If you could poke it from the side and the SS pipe was not in the way, you could go longer between dumps. Not sure the cooler is worth it. You may get a few more minutes of run time as your char bed gets close to the critical level, but once you get to that level, you also run into more carbon dioxide production. Just my guess at this point and anxious to see what you find. There is a lot of “dead” space on either side of your nozzle assembly that will get filled with unusable charcoal. Are you planning to block that space off and thereby reduce the amount of char needed to fill the gasifier? I am also curious where the paint will burn off the ammo can. My bet is above the nozzle on both sides of the can. I like the filter system, Simple and easy to maintain. Hope you get this fired up soon and share the results. I’ll be anxiously waiting
Gary in PA
 cant wait to see the finished build .