Don:
In your double barrel setup, do you light the fire from the top, or from the bottom?
Don:
In your double barrel setup, do you light the fire from the top, or from the bottom?
Light it at the top.
Don - OK. Based on your experience, it sounds like I do need to go with a double barrel setup, with insulation.
Couple of questions.
Does your inner barrel sit on a ring like Gary’s, with the 2" pipe coming into the ring?
Do you think I could put standard fiberglass insulation between the barrels?
Kyle with the fiberglass I found the binder cooked out and the glass crumbled so I use roxul. Just my experience…
David:
Thanks for the info.
I have some fiberglass insulation from an old house that we are tearing down. The house is a burned out shell, but a good bit of the insulation is still intact.
I think I will try some of it, since it is free, and easy to replace if it doesn’t work out.
When I got into this, it didn’t occur to me that making the charcoal would be almost as complex as building the gasifier.
Oh well.
On we go.
OK folks, have a nice day. I´m posting some photos of yesterdays production of charcoal and some specific details that may clarify some doubts of the system. Here I go:
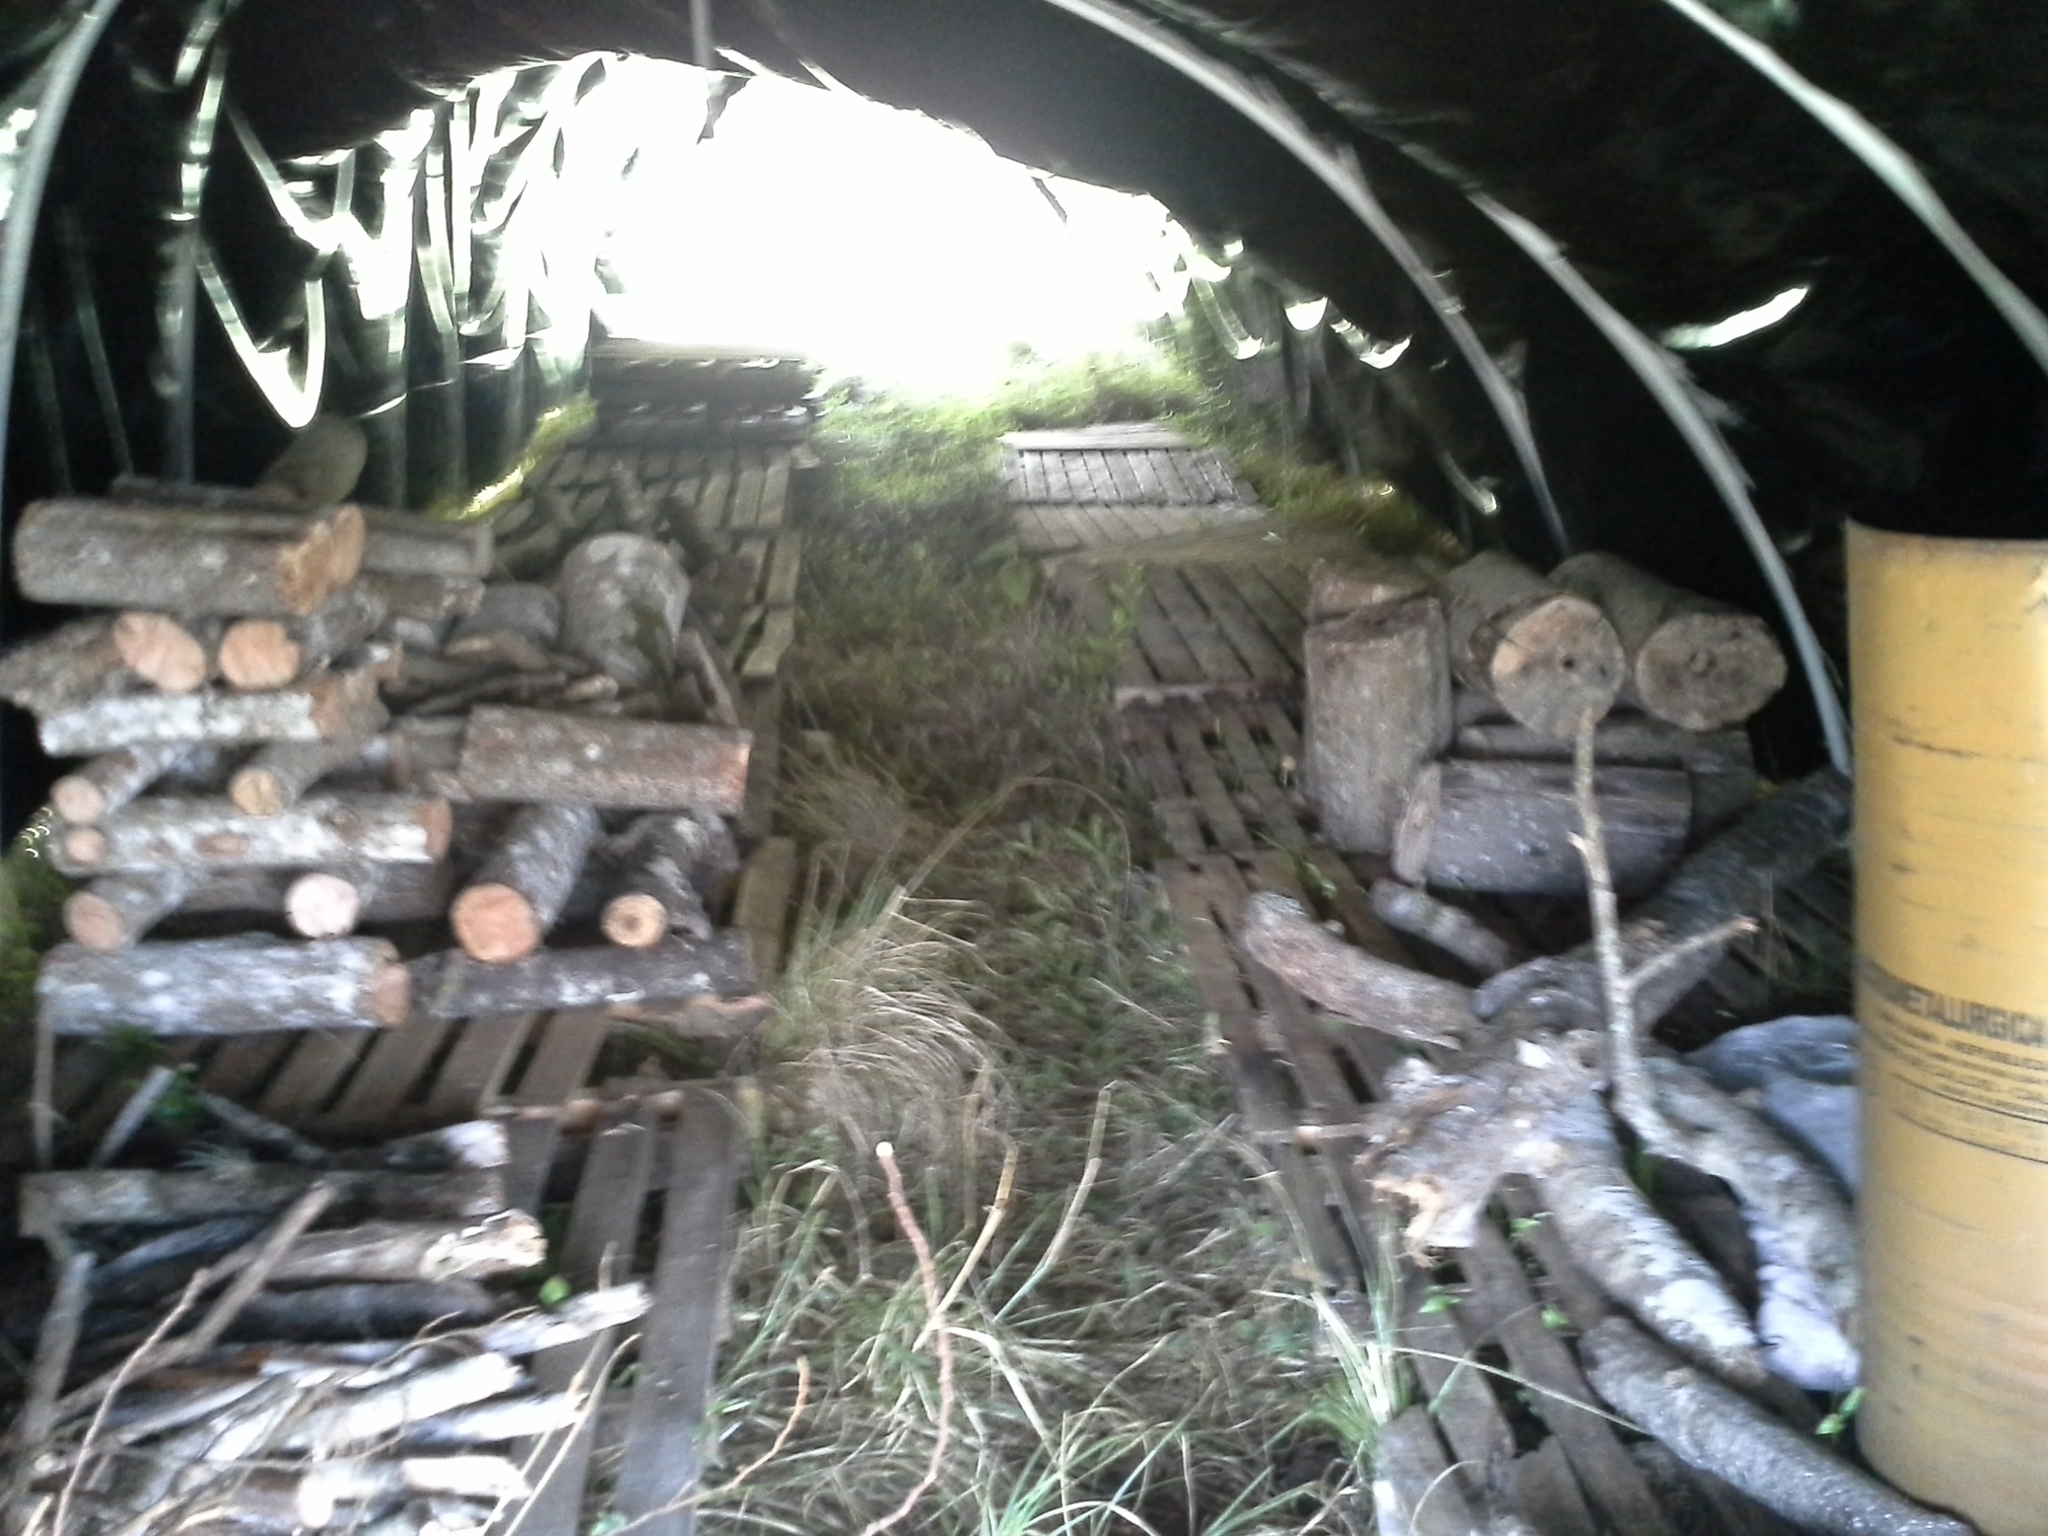
This is the inside so you can see the kiln. Wood gas escapes and ignites by the bottom
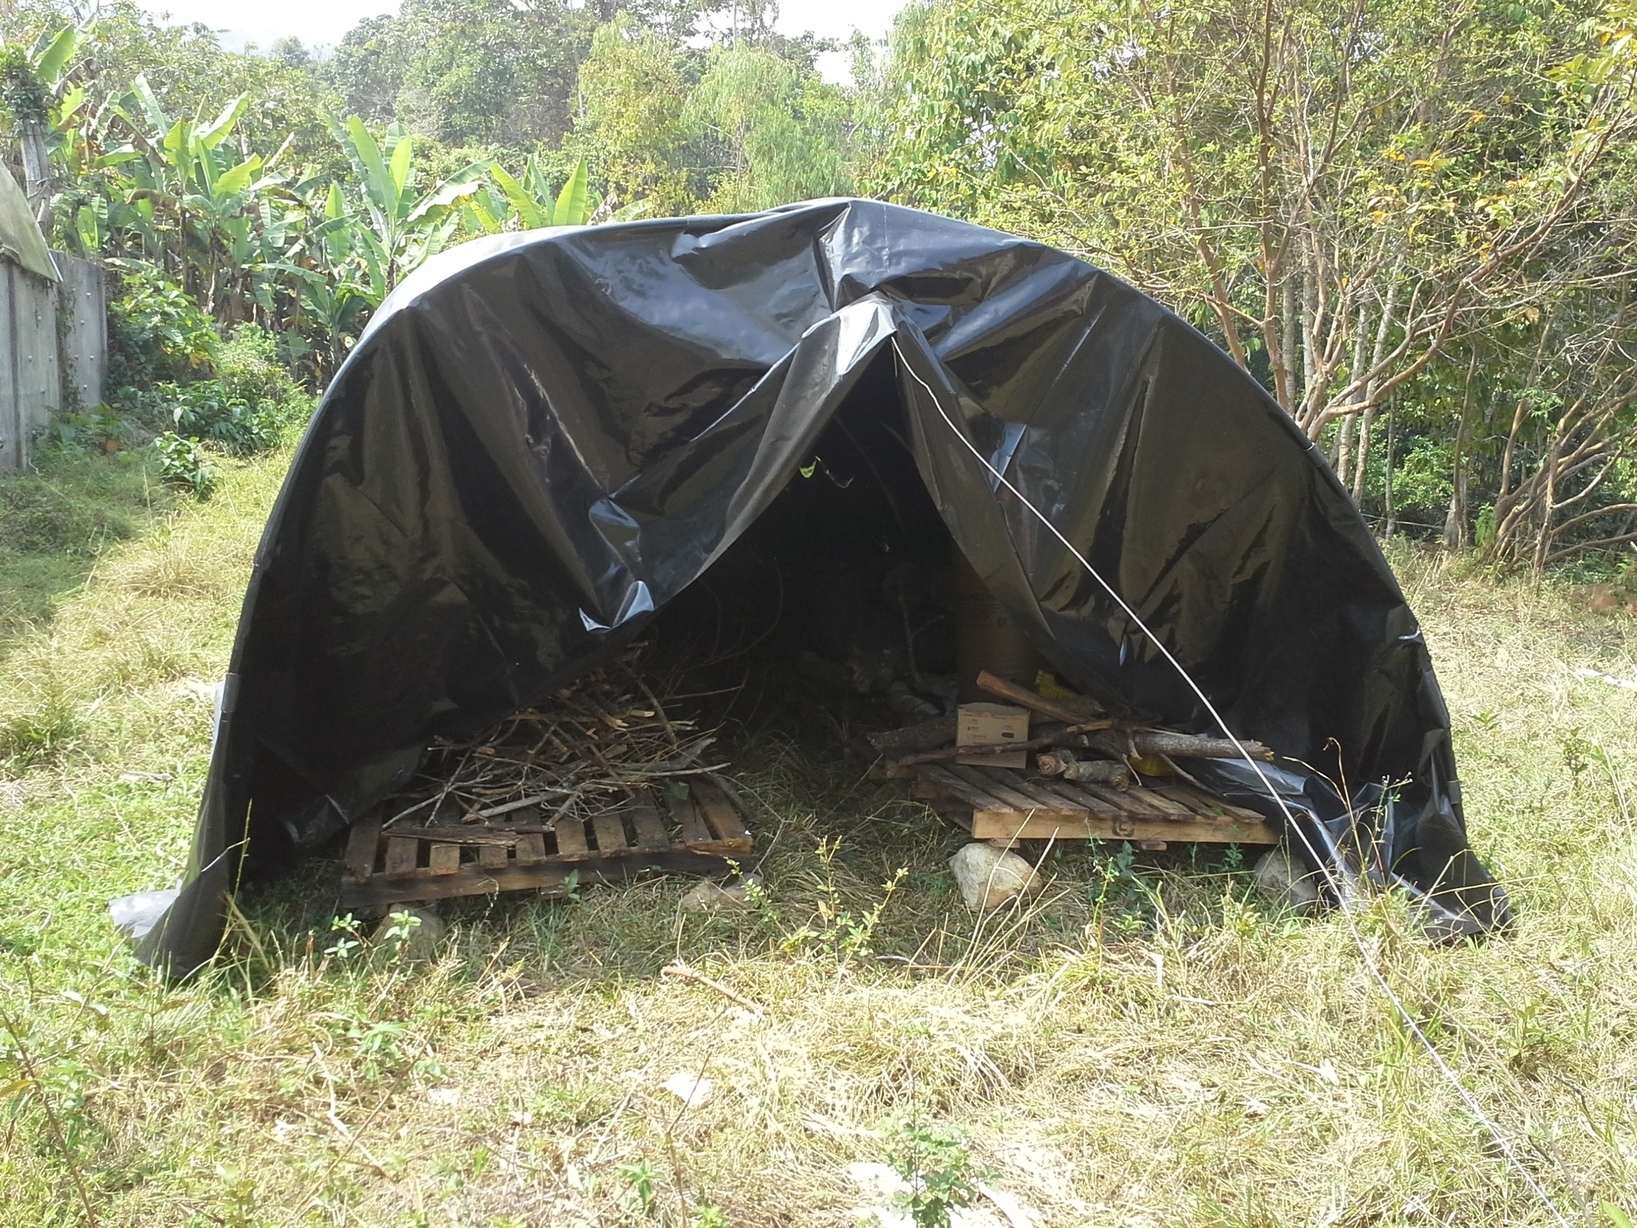
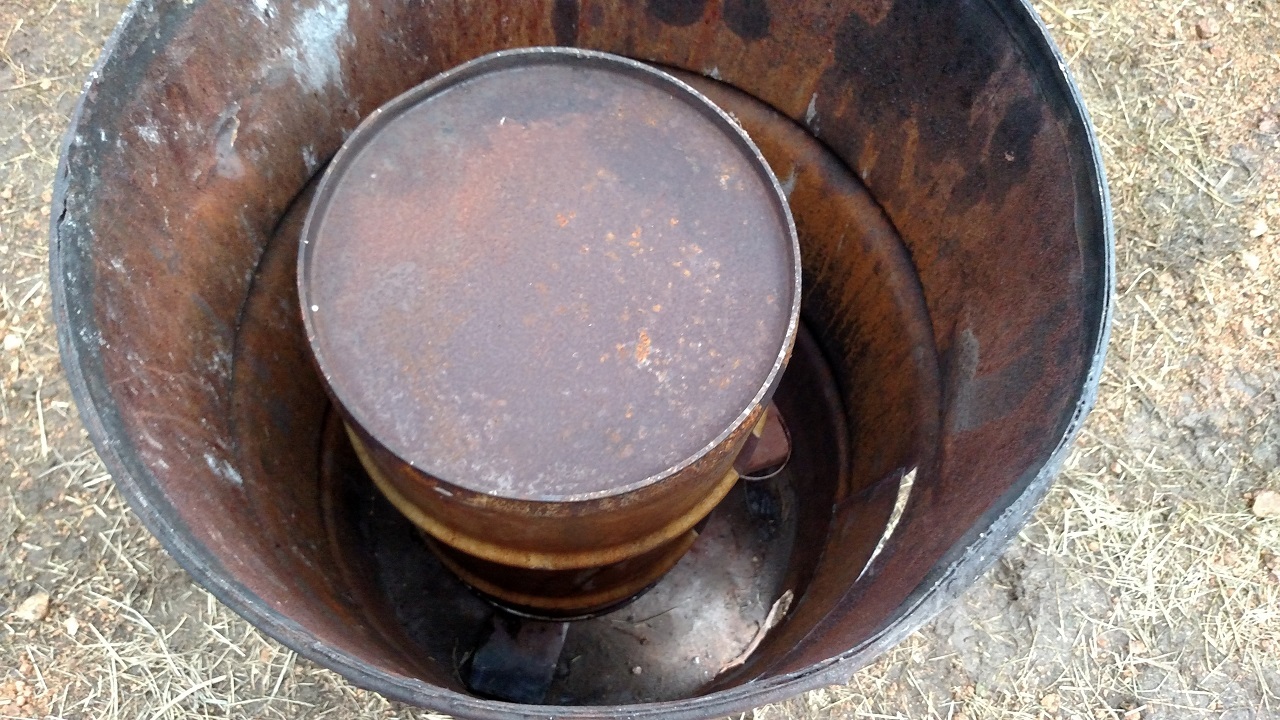
Lid on before puting the wood beween the outer en inner drums and wood on top with hay and small branches to start the system.. The outside one is a 55 galon and the insideone is a 30 galon drum. I don´t use anything to islelate the drum but Im thinking on covering the outer drum with harwaco clay (if you notice in the video it gets red hot. At these temperatures it will burn fiberglass wool.
Exterior lid on (we put it when the kiln is hot and expeling gas) it amost instantly ignites, if not we burn a small fire or torch and of it goes. And we put the chimene for a better draft.
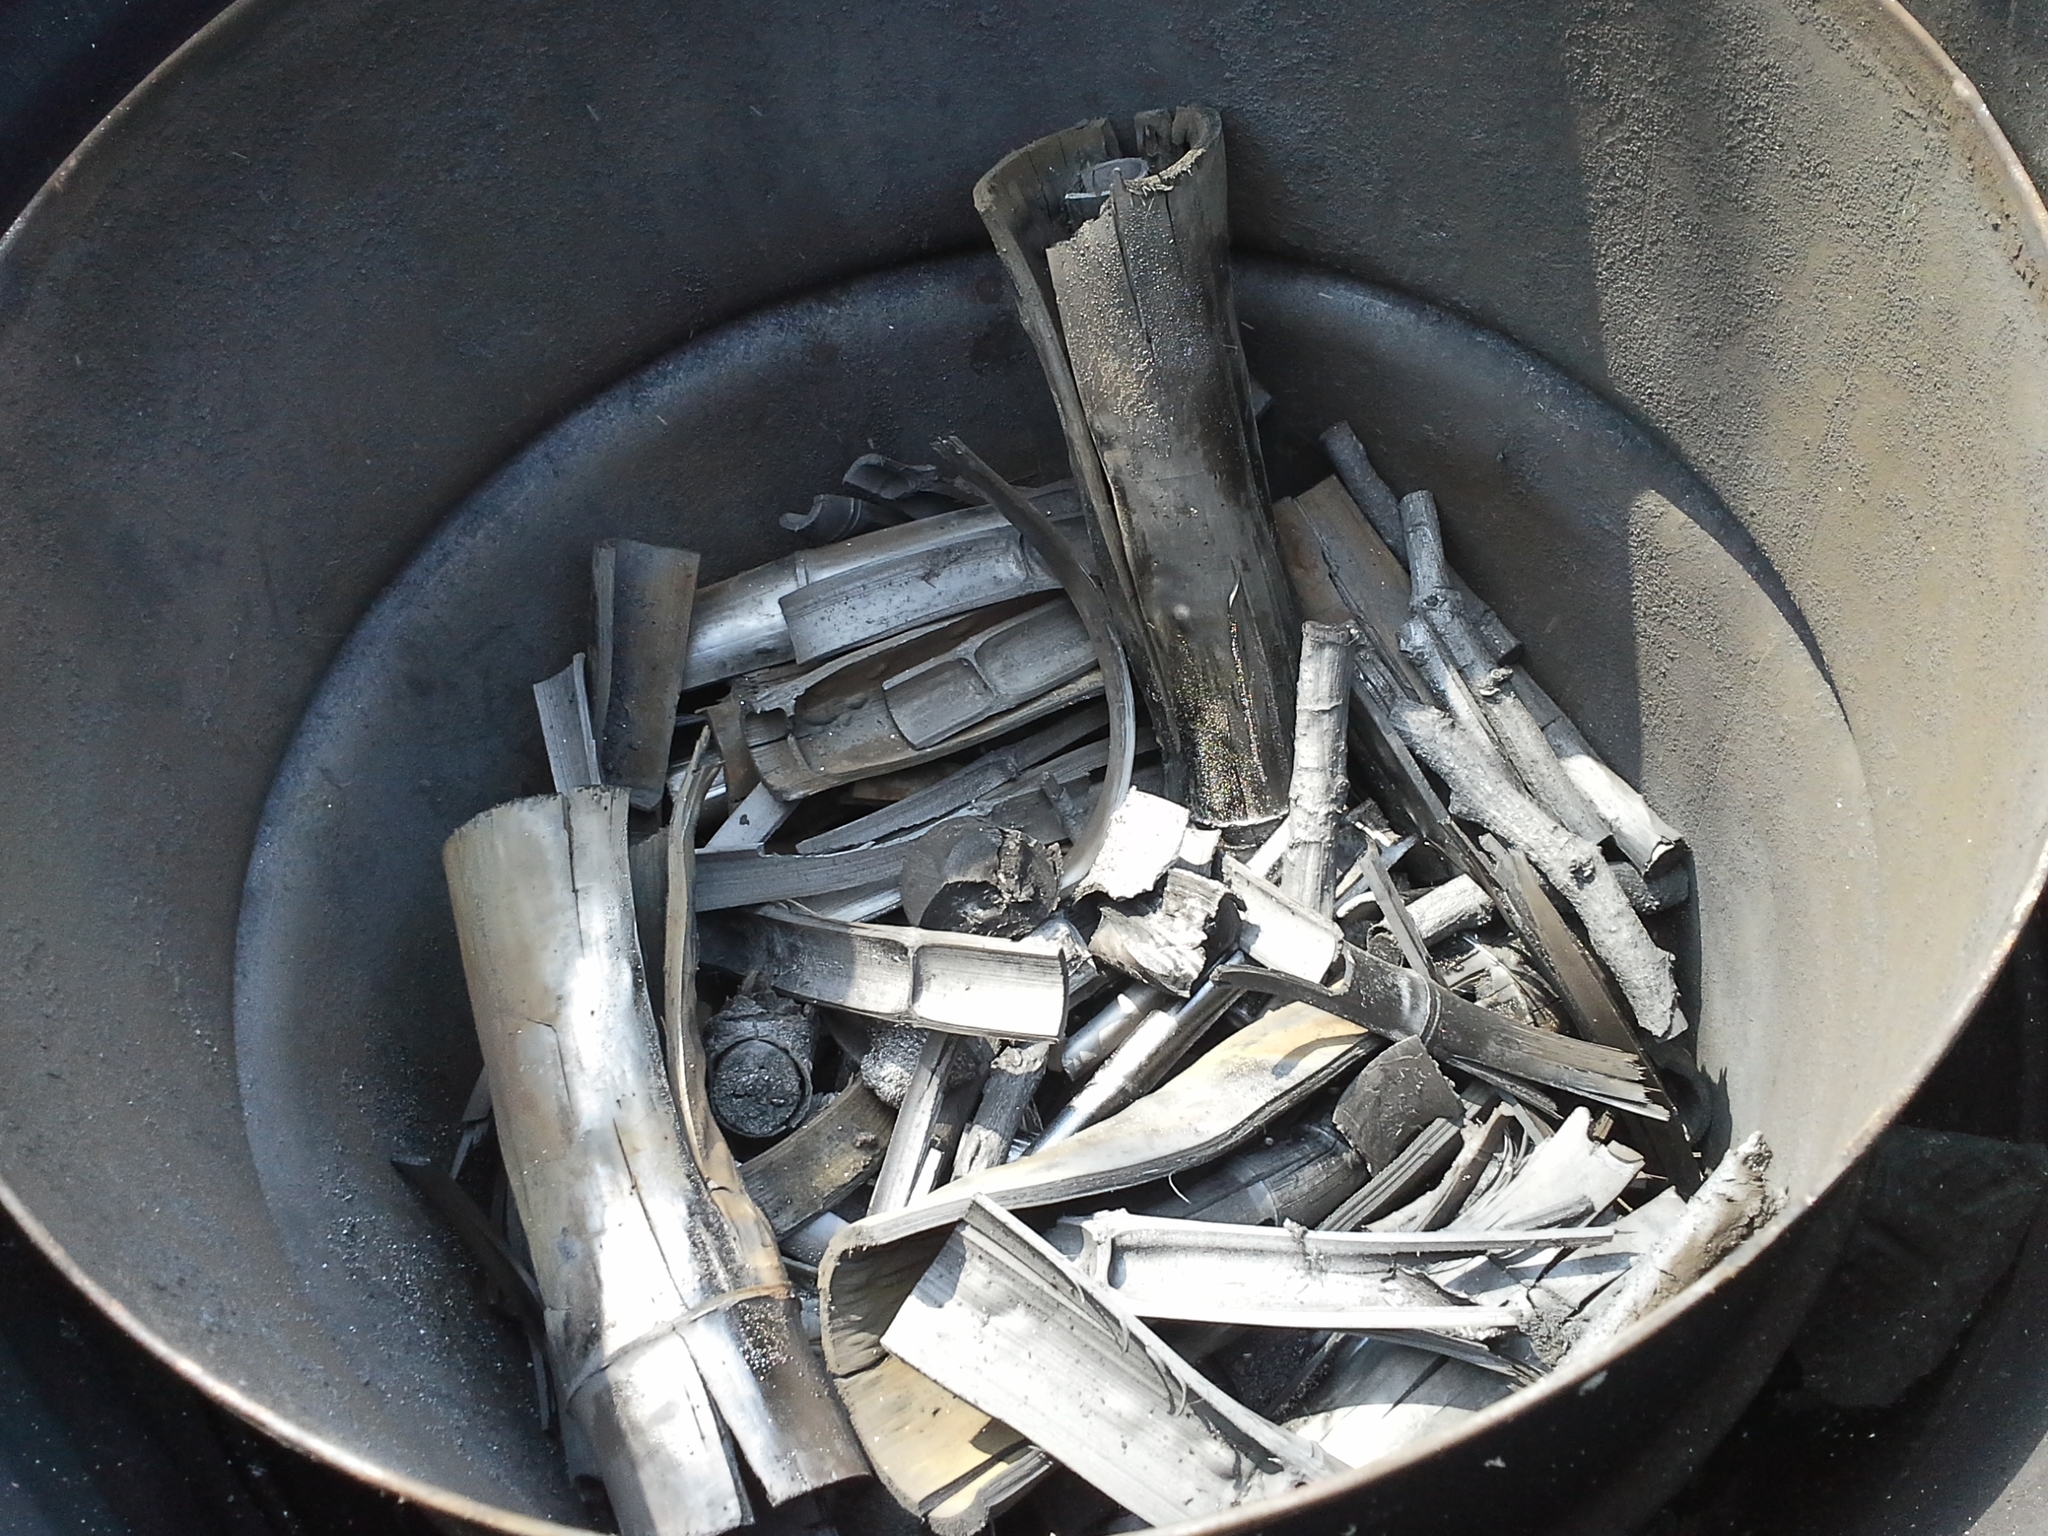
Last night´s production, notice I have bamboo biochar (its the best)
Drying wood in a black plastic tunnel before the charcoal fabrication.
Inside the drying tunnel.
A gift: last orchid of this year, they died early because we had a very dry season this year (you can see it in the pictures)
Hope these pictures can clarify the system. Next week I´ll post pictures anad drawings of the giant kiln. I hope you like it.
Found this video in witch you can visualize what happens inside the kiln. AWSOME!!!
Abner:
Thanks for posting the pics. You have confirmed my guess that you are using a more “traditional” charcoal making method in which the fire is OUTSIDE of the charcoal drum, and it is vented at the bottom to allow volatile gasses to escape (and add to the burning fire outside the drum).
I don’t know which method is better.
At this point, I am mainly interested in simplicity to make some experimental charcoal. Long term, I hope to produce the charcoal as a byproduct of my wood gasifier.
Kyle if you want it quick and dirty, just burn a pile of brush and sticks and rake the coals to a center pile while they are burning and as soon as the yellow flames are gone and you see only red coals and a little ash, then shovel them into an airtight barrel and screen them the next morning and you got charcoal.
Can’t wait to hear/see how Abner’s 2000 liter retort works.
Besides rockwool you may also use ashes or vermiculite for insulation.
Several years back when trying to make charcoal from wood pellets, the barrel in a barrel system didn’t produce enough heat to pyrolyze densely packed pellets. I added insulation (ashes) between the barrels and sent a 6 inch stove pipe up through the middle with gas inlet holes near the bottom and built a fire under and in the flue pipe (Anila stove plus insulation). It worked–pure pellet charcoal to fire my Kalle-style gasifier on my Toyota.
I later added a bottom burning chamber with air fins to create turbulence. This gave me a quicker startup time. When I moved away from pellets, I laid this system on its side with the internal flue running along the inside bottom of the retort barrel and turning 90 degrees upward just inside of an insulated lid. This gave me a simpler way to fill and empty the retort (i got tired of standing on my head to dig out charcoal).
We got 10 inches of snow last night so I am hiding on the computer today. I’d like to add to what Don said. Use a garden rake so you don’t sweep stones along in your charcoal. Then like he said keep pulling the pile into the center and let it burn until the “flame” is gone. Then reach into the center of the pile and pull everything towards the edge, making a created in the center. This will get air to material that has been buried at the center. Let this burn down to a glow of char and as suggested scoop the red hot char up and place in and air tight metal container… Depending on how large your pile of wood was, I suggest before scooping up the char, cover yourself to protect you from the heat. I use a hoody, with a hat to cover my face and head and I use welding gloves, but anything for gloves will help. At a shovel handles length away it will be HOT. TomC
Kyle,
The best thing of the system we use is that it´s the “lazy guy system” you just ligth it up, and go whatch TV an to bed, it works over night by itself and shuts of when it runs out of gas. Next day everything is nice and cold. All you have to do is “harvest” the char. Less work.
The other thing is that the char is DRY, no need to use water to stop the burn. Remember it can take DAYS to dry wet char!!!
OK.
Well, sometimes, you have to make a decision to just get on with it. So, that is what I did.
This may not be the best way, but given what was on hand, it is the easiest way for me to try charcoal making short of simply raking it out of the fire.
This design is going to be similar to Abner’s (I think).
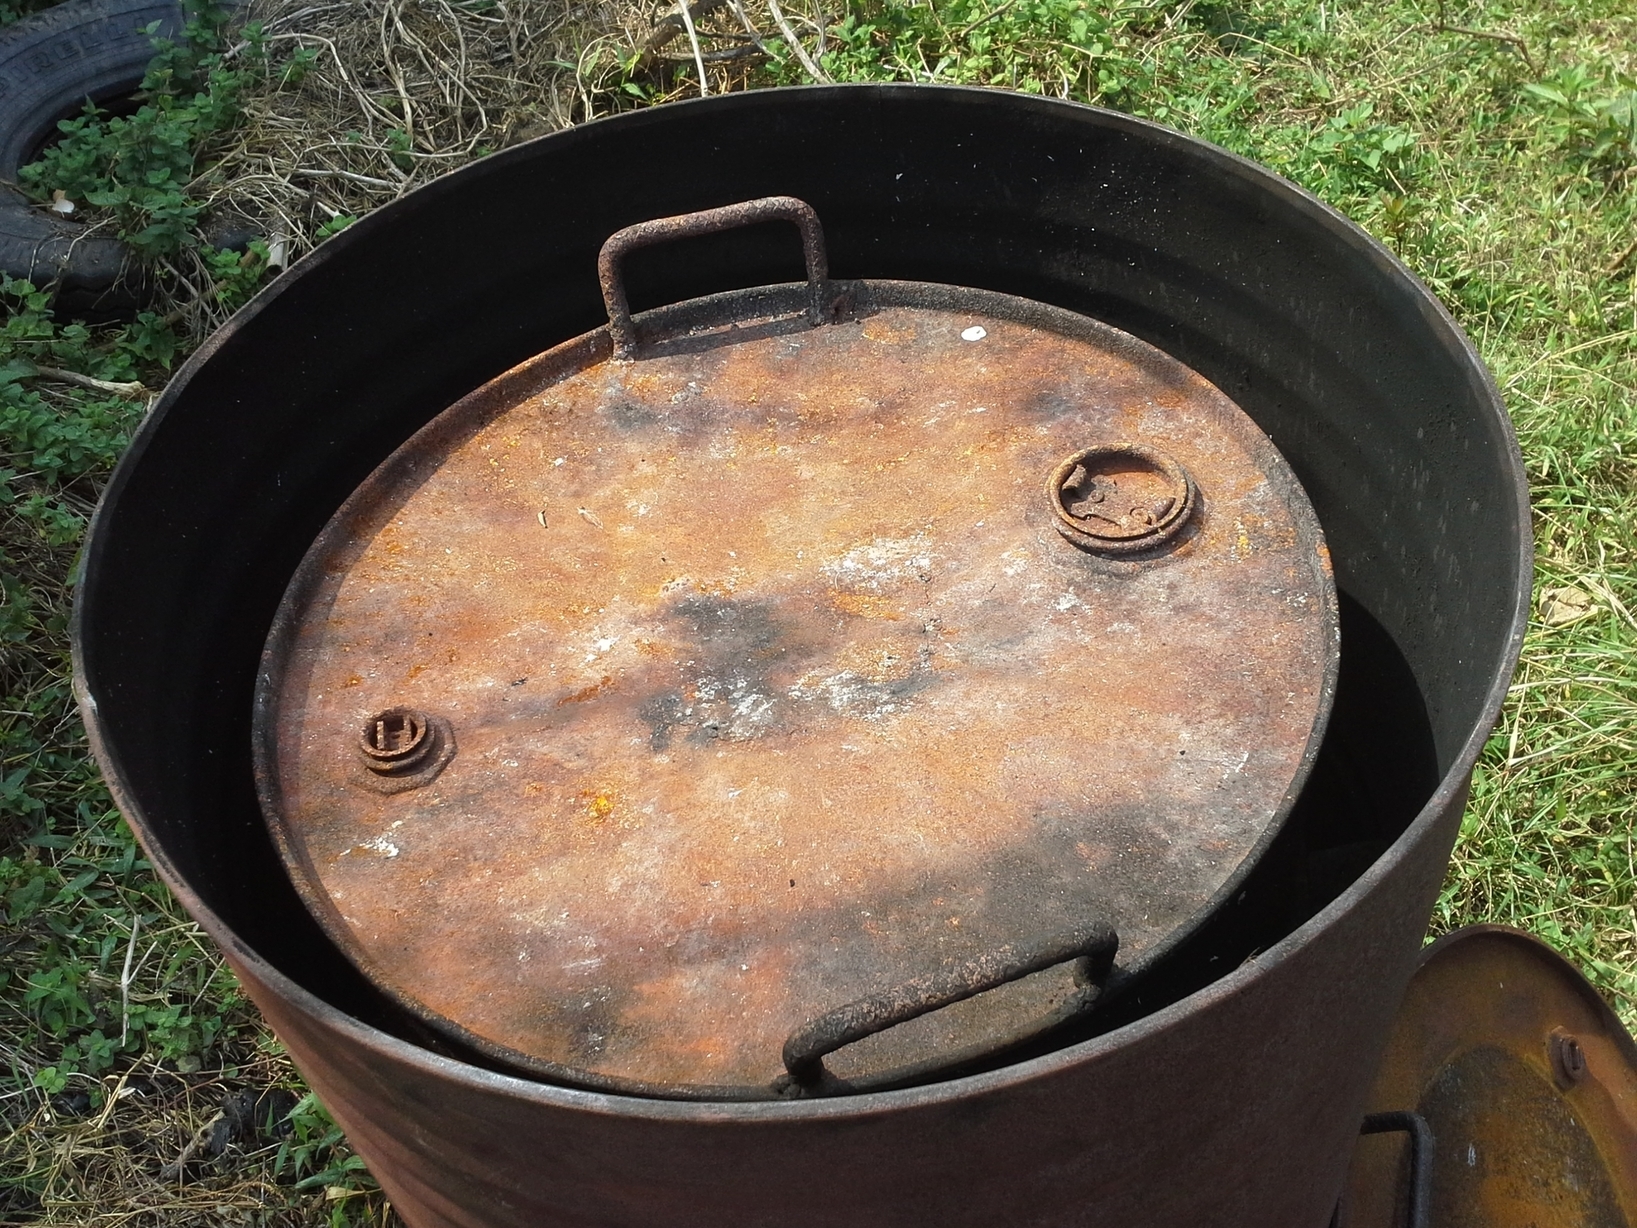
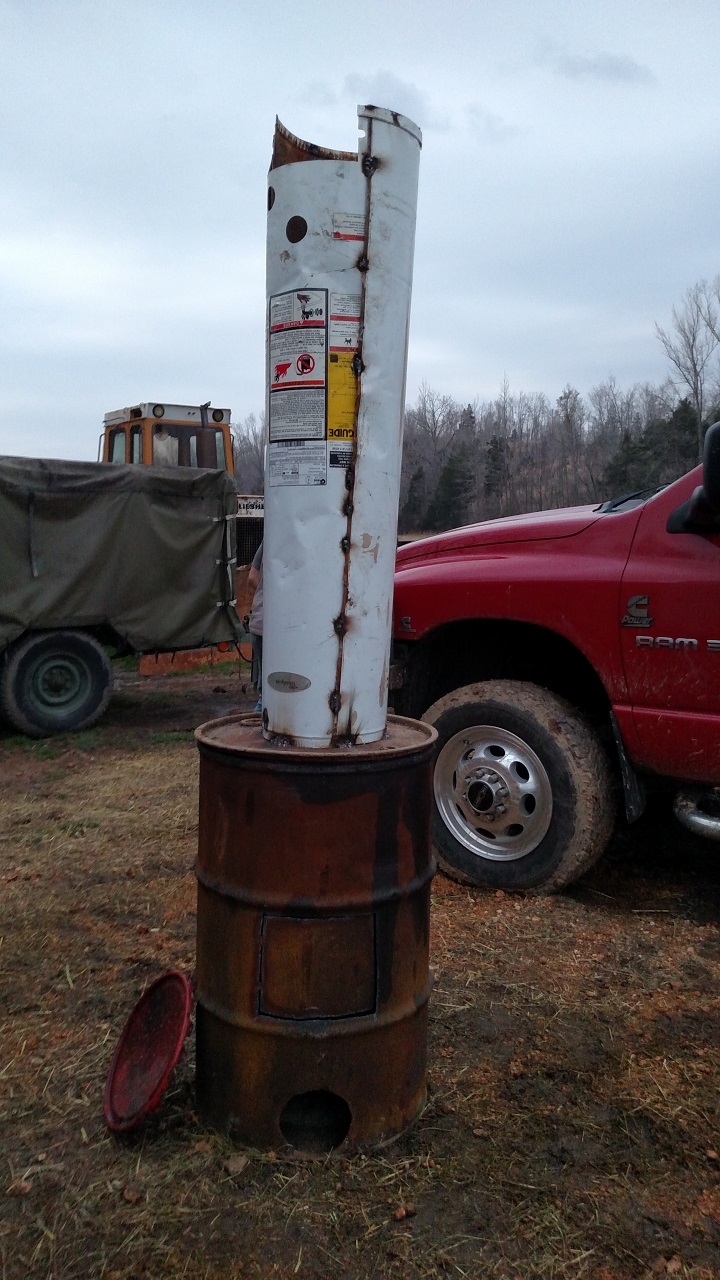
I have a grease drum, turned upside down, sitting on 3 bricks, inside a 55 gallon oil drum.
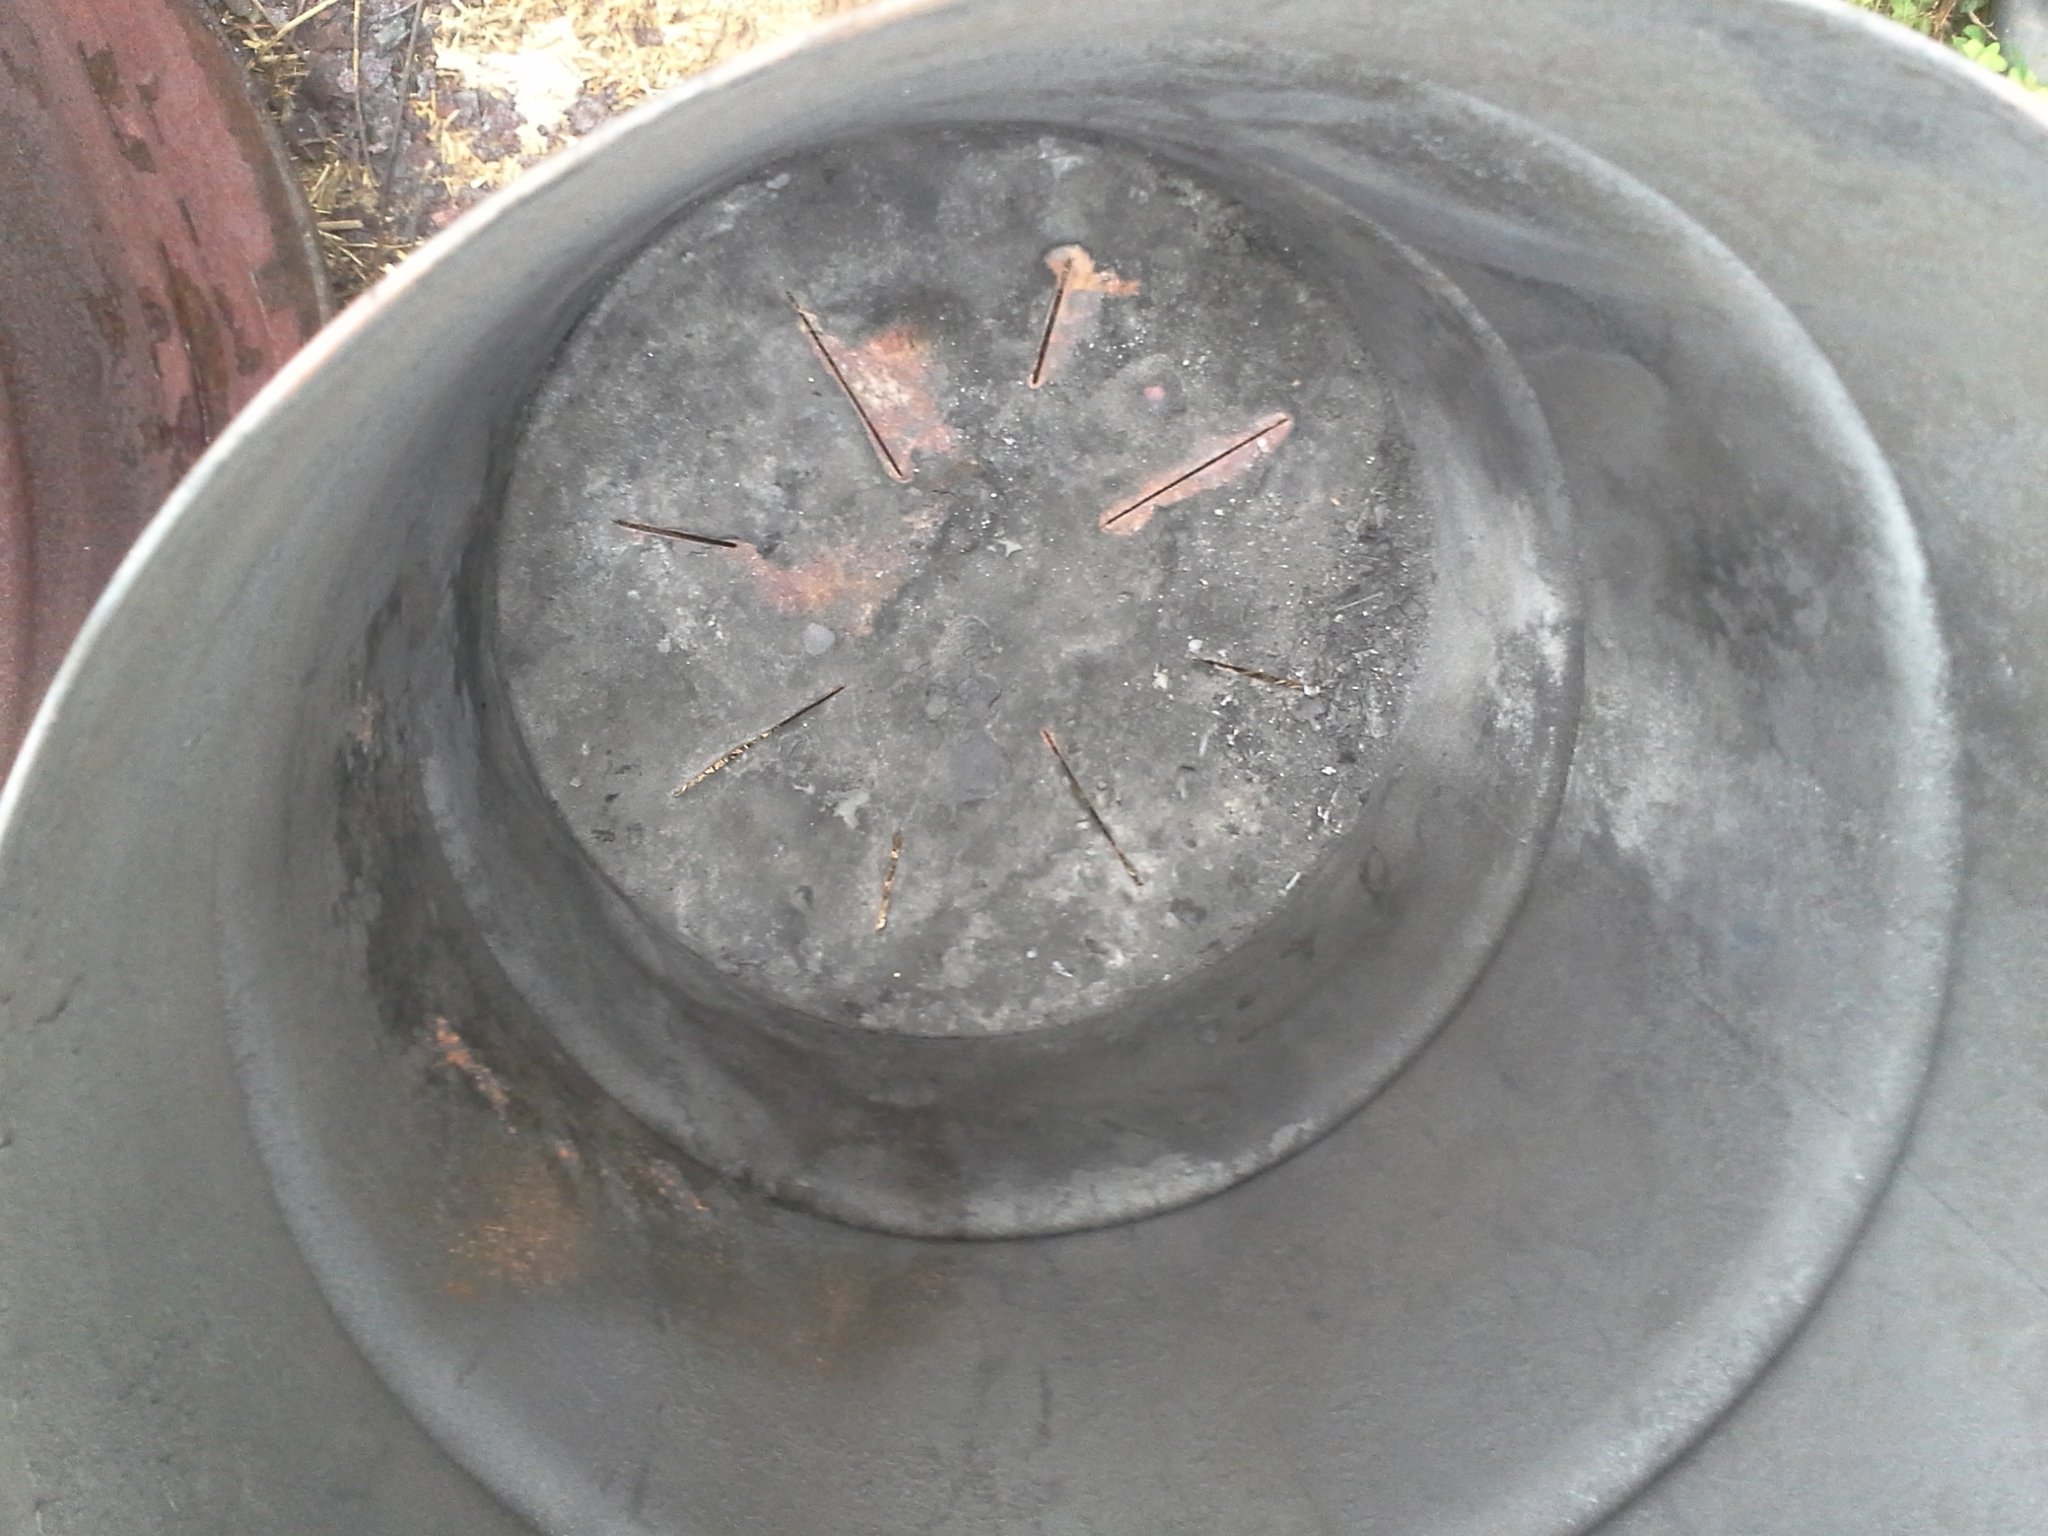
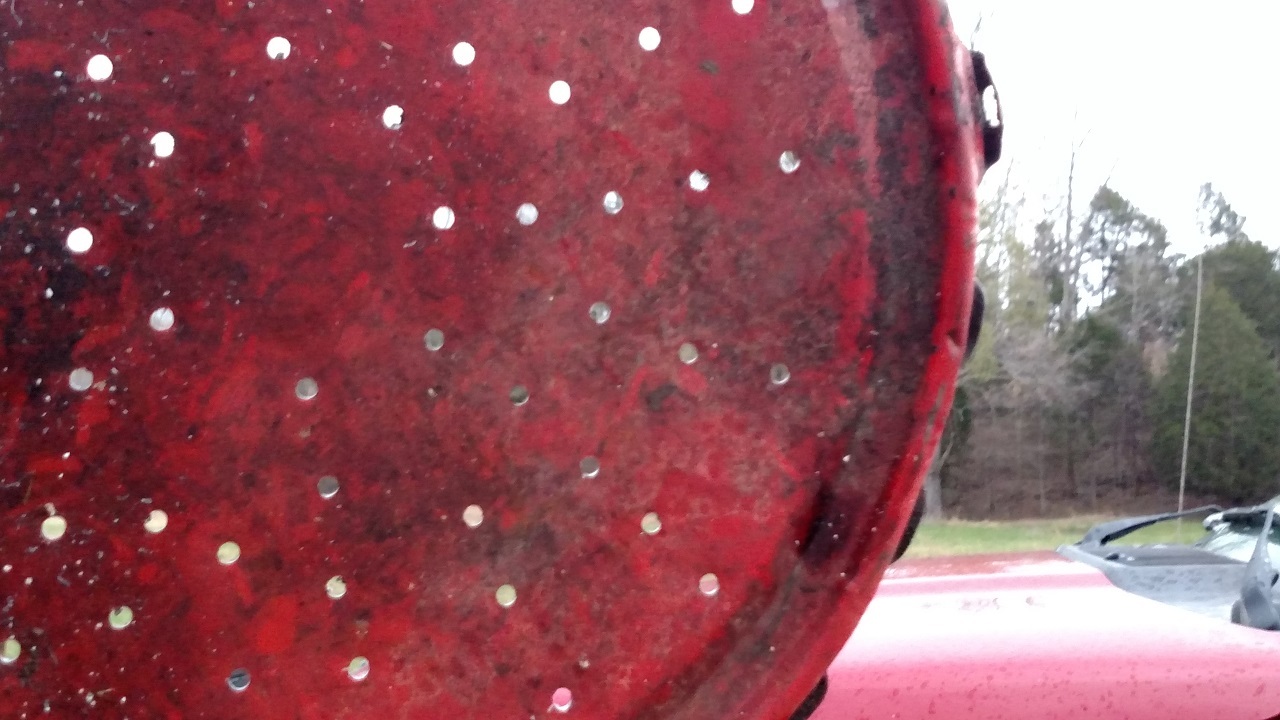
The grease drum will hold the feed-stock that I want to turn into char. The “top” (now the bottom) of the grease drum has holes in it, like this.
My plan is to build a big fire inside the 55 gallon drum. I am “recycling” the drum from another project, so it already has an 8" hole in the lower sidewall for an airdraft, and a hatch in the side to tend the fire.
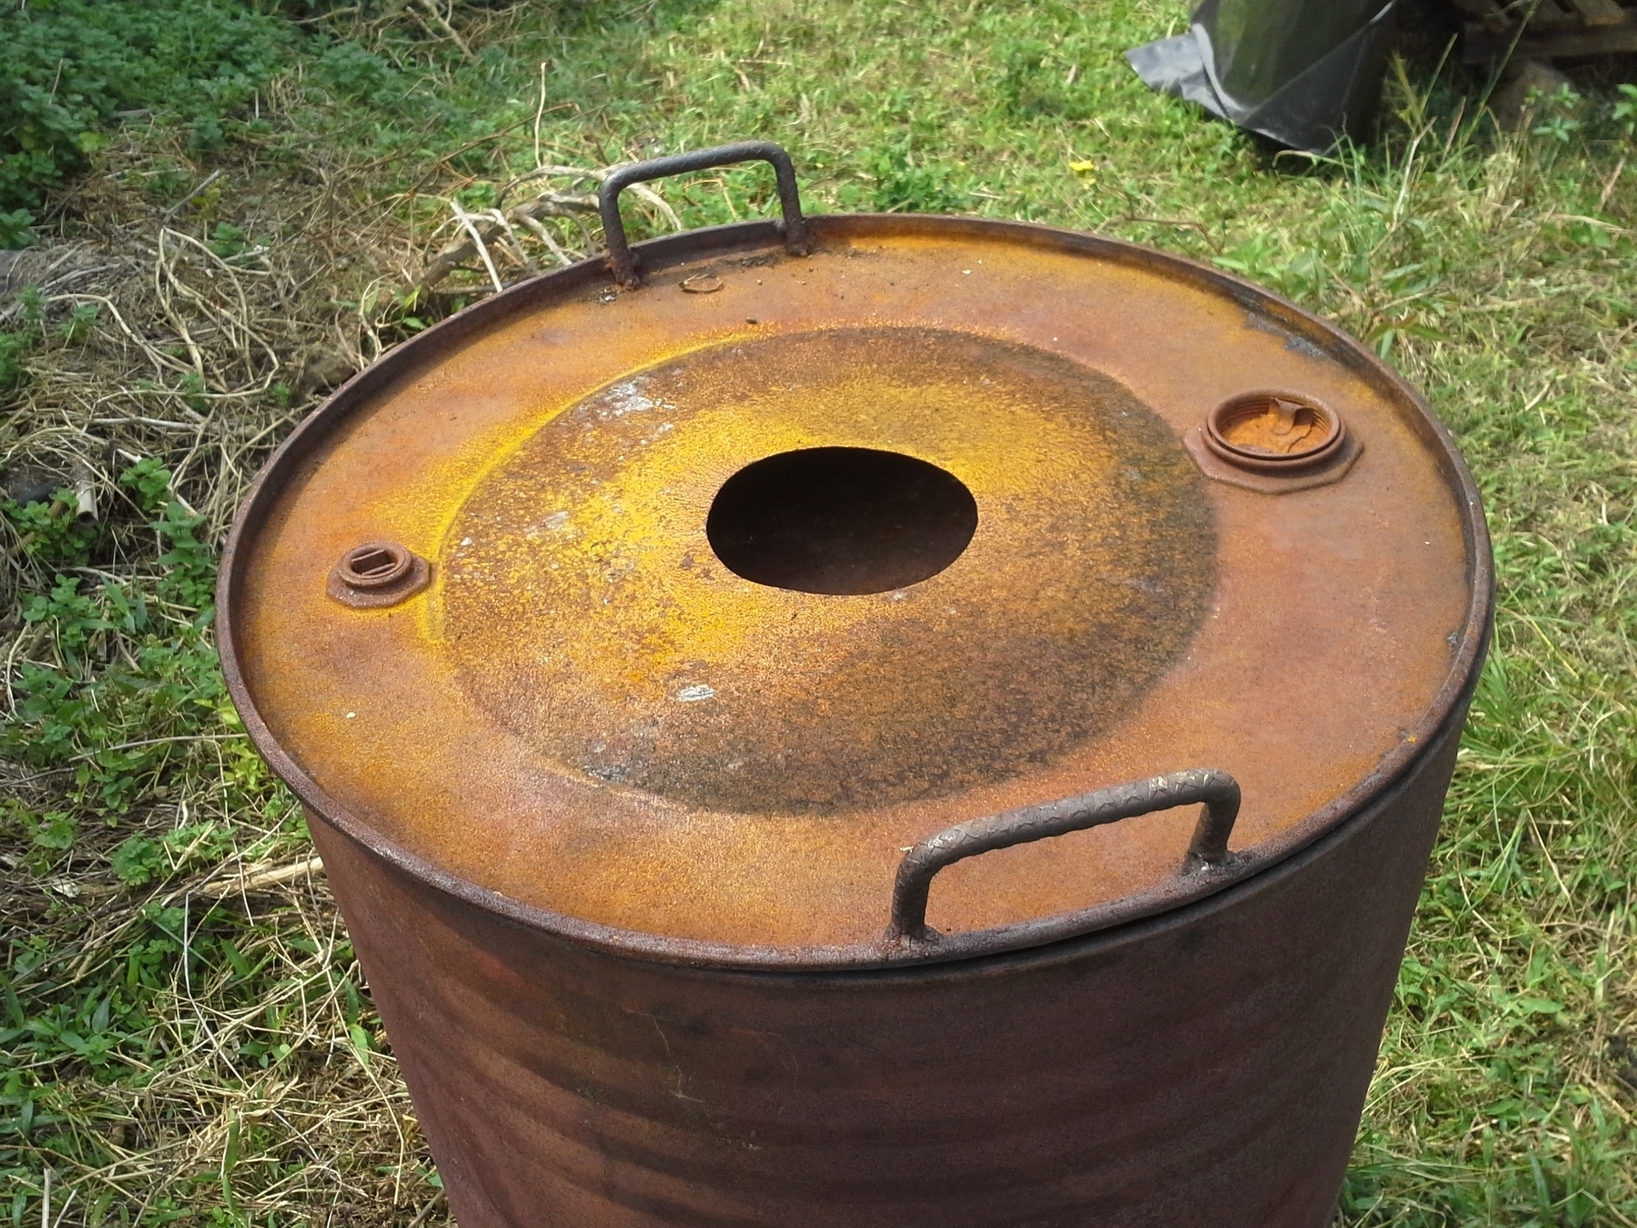
The only real “work” needed, besides drilling holes in the lid, was to roll up the skin of an old water heater to make a chimney, tack it together, then tack it to the top of the 55 gallon drum lid.
Here is what the finished product looks like.
Now, I will admit, it’s not exactly a work of art (or maybe it is, judging by what passes for art these days). But I hope it will work. I might whack the chimney off a little bit. I just tacked together the whole skin to avoid cutting anything at this point.
Hope to fire it off tomorrow and see what happens.
Tom:
Don’t blame you for hiding on the computer.
I started running a fever last night and have kind of felt like crap all day.
So, I called in sick to work.
However, that didn’t stop me from building the charcoal thing.
Hope my boss (aka my dad) doesn’t see this post. Ha.
Abner, when you light at the top, I take it that you also put fuel on top of the inner barrel as well as down the sides. If heat naturally goes up, how long does it take to start pyrolizing the wood inside the barrel to start adding heat from that gas? Also did you ever compare the weight of the wood fuel that gets burned up heating the inner barrel compared to what you would lose in the 2 barrel system? If that turns out to be about equal - then the only advantage (which could be significant) is the set it and forget feature. Do you agree?
Kyle.
Take the bricks away from the bottom before you light it. It needs to rest tight enough to the bottom of the 55 gallon drum to not allow air up into your finished charcoal and burn it all up by morning. The heat around the inner barrel builds up pressure and sends the gas out by force from under the inside barrel and then seals itself when done.
Thanks for the tip Don.
I will do that.
In your question to Abner, I imagine you are correct. I imagine that this design trades convenience for fuel.
I have about 100 tons of sawmill slabs that will either rot or get burned in any event, so I decided to try it this way.
OK Don, thats correct, I lite the top with a good fire and it starts to go down the sides and starts to burn the wood on the sides; this starts to heat the gases in the retort that have only on way to escape: the slots at the bottom. If you notice I have three legs in each barrel, this makes them more stable and they are separated from the bottom.I dont choke it and I never have ashes, just a little bit at the bottom and I think this makes the seal. Look at the videos and you get the idea. When pyrolisis reaches de bottom, both barrels are red hot. I dont do anything more. I just open it next day. I haven´t weigthed the wood I put in, but Ill try to do it to see the yield of the system, its a good question. Kyle, the only thing you have to take in account is that you have to stack the sides with good dry wood ( I use branches and bamboo pieces). If you see its week to soon an doesnt ignite the gases by the bottom, start a small fire and it will do the job; after it starts and I see the flames, it just keeps on going.
For my first batch of charcoal, I am probably going to use some hardwood construction scrap boards for the char. My idea is to cut it into strips about 3/4" thick and about 2 feet long and load the scrap vertically into the grease barrel.
Then, for the fire, I will be using mostly some seasoned hardwood slabs arranged vertically around the grease barrel mixed with some dry hay, sticks, and smaller scrap pieces.
I wonder if I should fire it from the top and bottom since the hardwood is likely to be slower burning than the stuff Abner uses?