Hi Kyle, this is what happens in my experience: the wood you put on the sides goes out at about half of its length and when the fire from the bottom of the retort kiln starts to sprout out again, they ketch fire and comsume. This kind of kiln mantaines some fire “to ensure” the combustion of the wood gas coming out or you can give it a help by makeing a small fire at the bottom, Sometimes when you come next morning, you can see some wood on the sides that isn´t burnt and you open de inner barrel and its all charcoal. My guess is that when this happens is because you have used to hard wood and the lower part of it won´t catch fire because flames coming out the bottom wont lite them because they arn´t long enough. If you see my videos, you´ll see red hoy steel and big flames coming out, this is because the inner barrel is hot as hell and gases keep sprouting out till the end; if you pay attention to the process, it´s almost ending when you see the flames getting small. My systems has slice cuts at the bottom, no holes (maybe this is the cause). We´ll have to see what yours does.
Super Excited - Made first WoodGas today!
So, I fired up the charcoal retort for the first time today. This is the first time I have ever made woodgas in a way other than just building a camp fire.
I have been reading about this for several years now, and have been working along on my V-10 project. But thinking about it and working on it is not the same thing as seeing it happen. Because of the way my retort is built, I could easily watch the gas jets shooting out of the bottom of the inner drum, almost like cooking with natural gas or something. And I was really surprised how, after the first 45 minutes or so, the whole reaction is really self sustaining and is basically relying on the heat from the gas long after the surrounding fire has burned to embers.
Anyway, I will give a more detailed blow-by-blow of how I ended up doing everything below. Just wanted to share my excitement first.
Wood Preparation
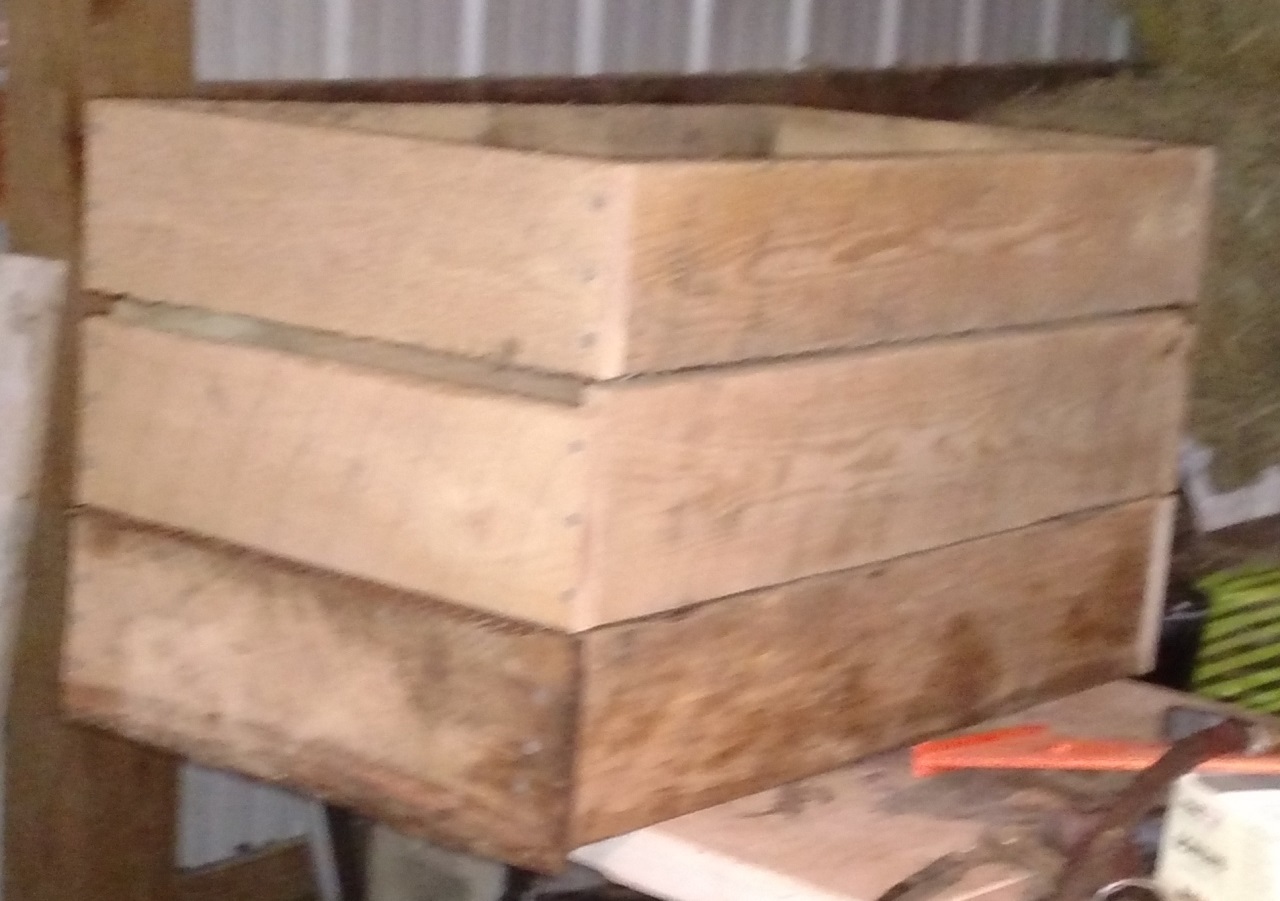
First, I took some leftover scraps of rough sawn oak planking, and ran it through my table saw, cutting it into 3/4 inch strips.
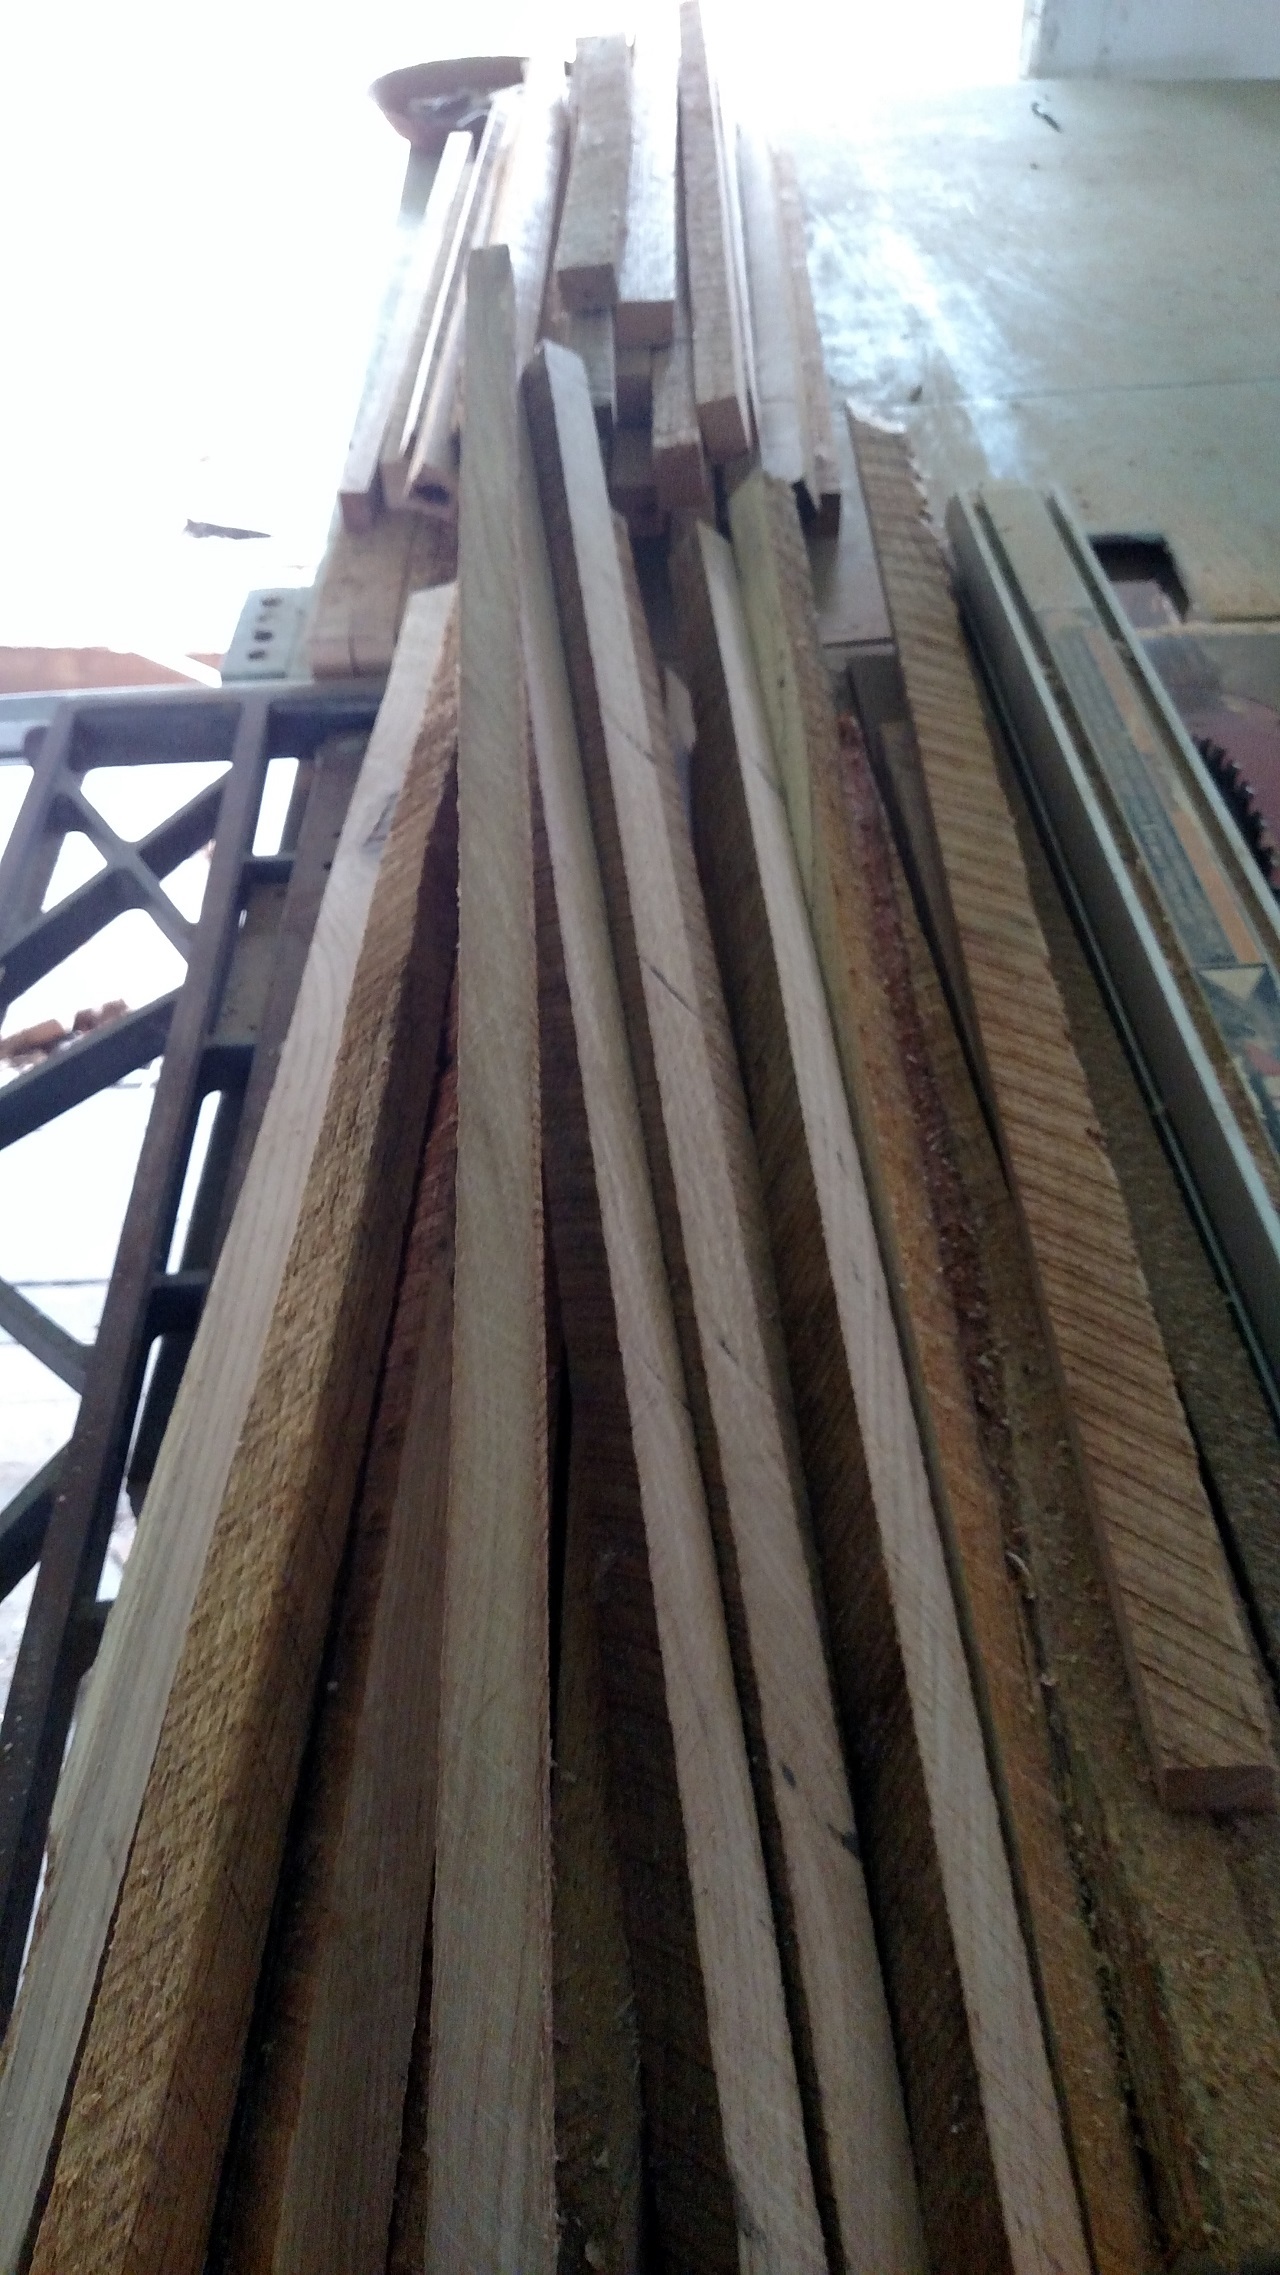
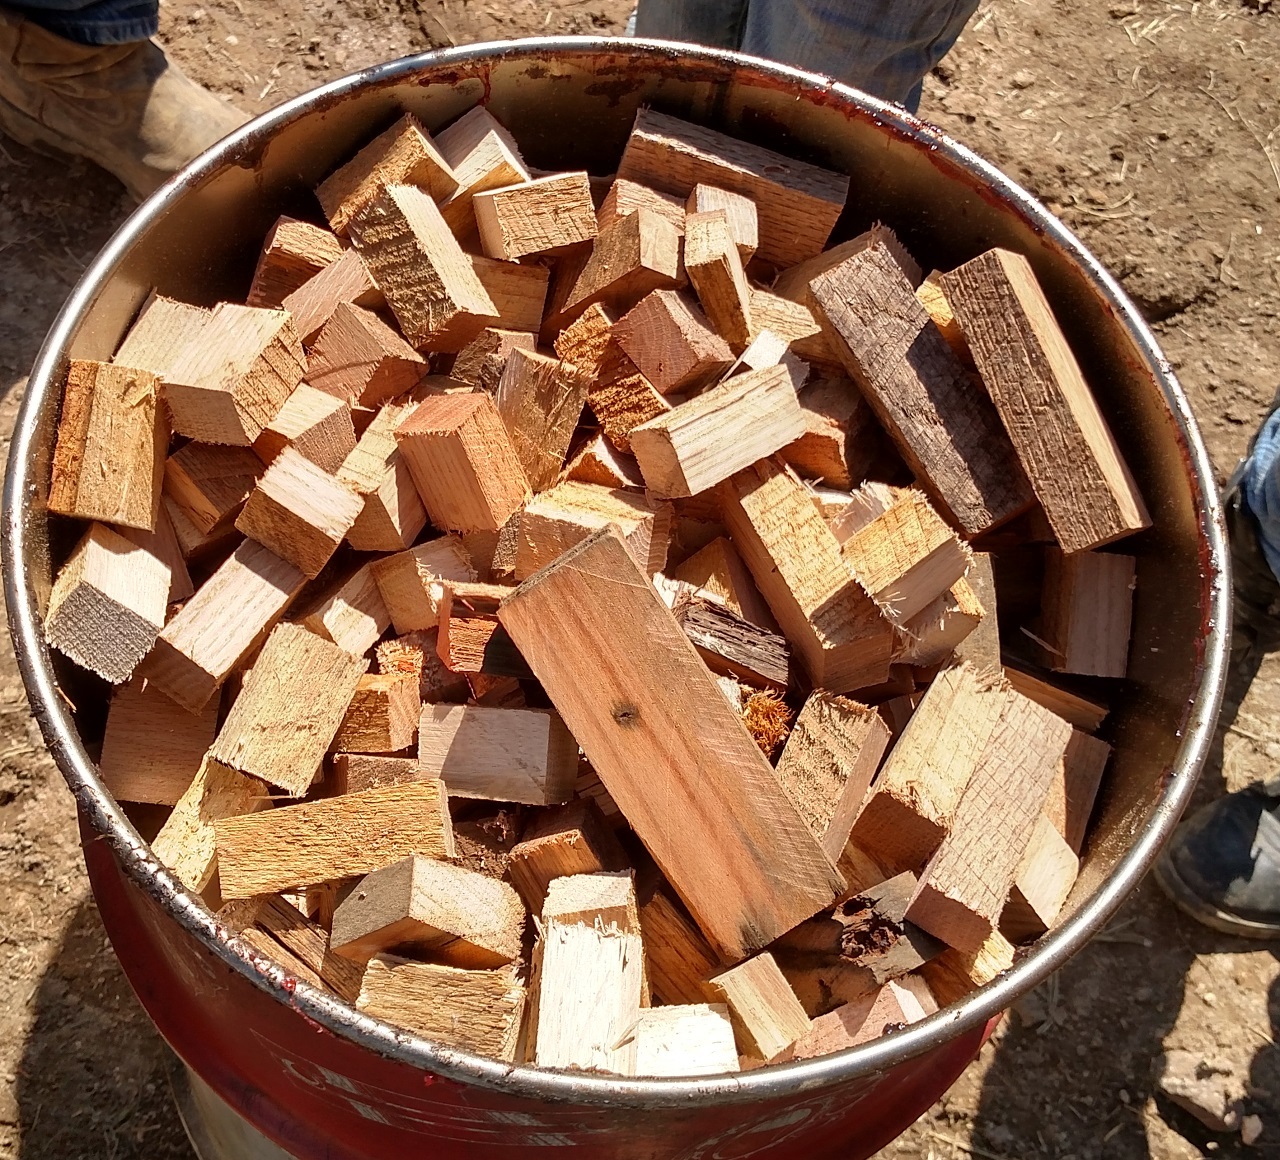
For this first burn, I decided to go ahead and chunk the strips up into smaller pieces. They range from probably a half inch to 1.5 inches. There are also a few bigger ones (didn’t want to get my fingers too close to the saw). I loaded these into the grease barrel, full to the top. I think it is about 20 gallons. It felt like the wood weighed about 80 lbs.
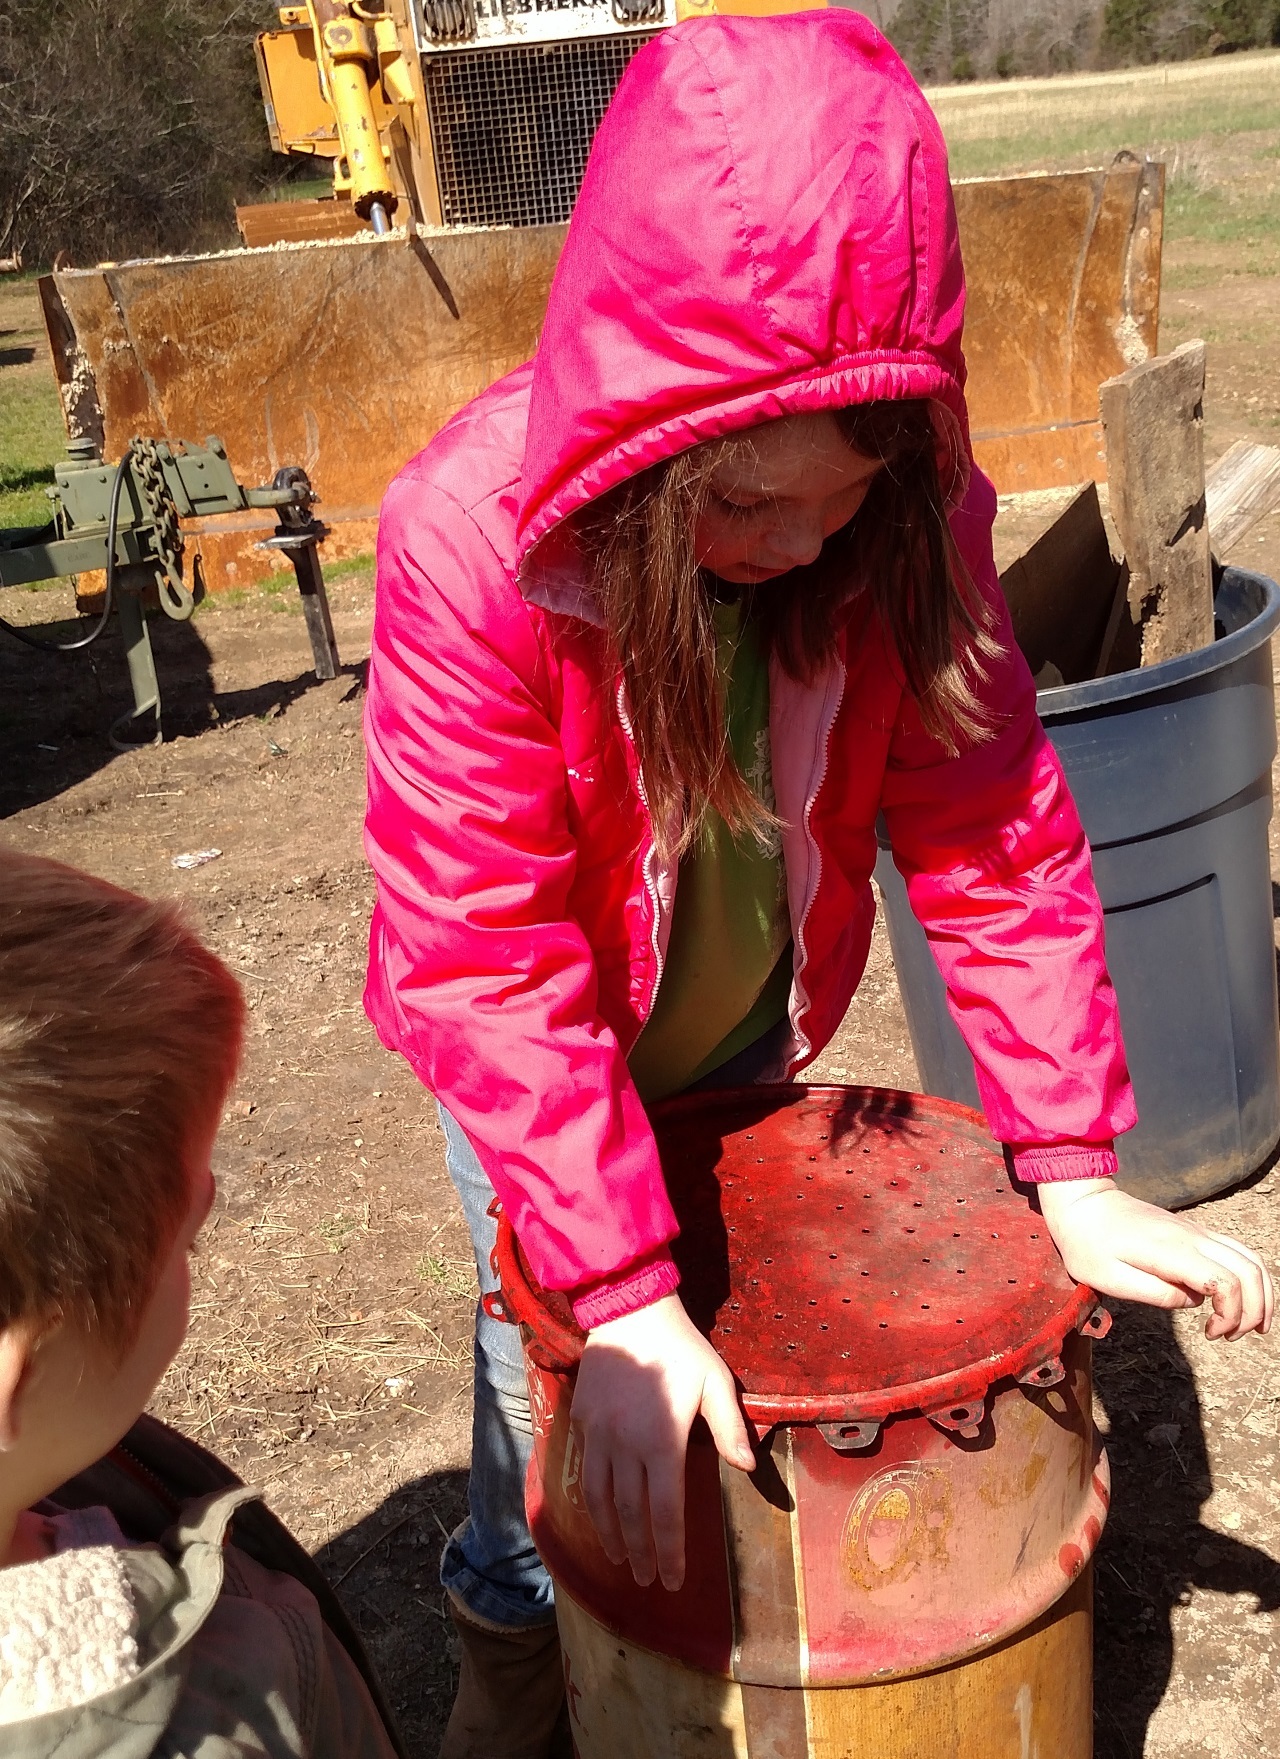
Here is my daughter, Aniston, securing the “Holey Lid” onto the grease barrel. After it was secured, we turned the whole thing upside down and sat it into the retort.
Looking forward to the final results!
The Burn
After hearing that Abner had legs on his inner barrel, I decided to leave the grease barrel on the bricks for this first burn.
I dropped some dry wheat straw and smaller sticks into the bottom of the outer barrel (not under the grease drum, but around it).
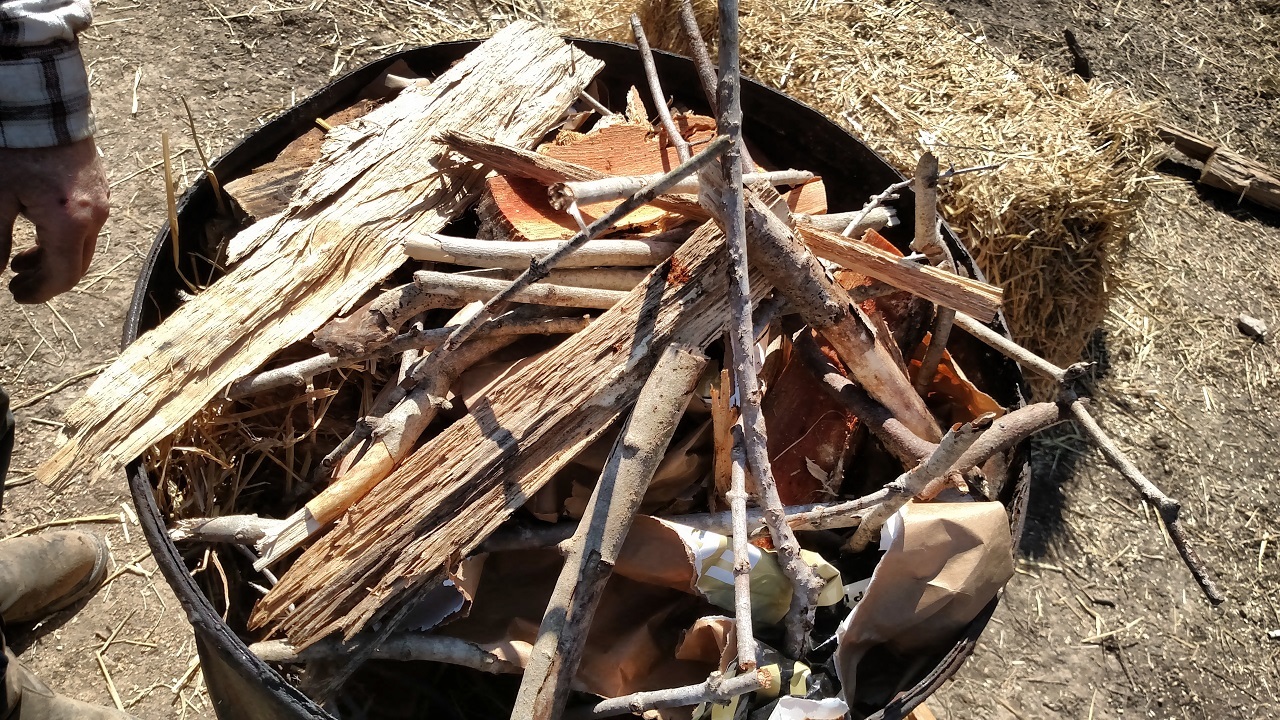
I then put some more hay, wood scraps, bigger sticks, and even some quartered firewood on top of that.
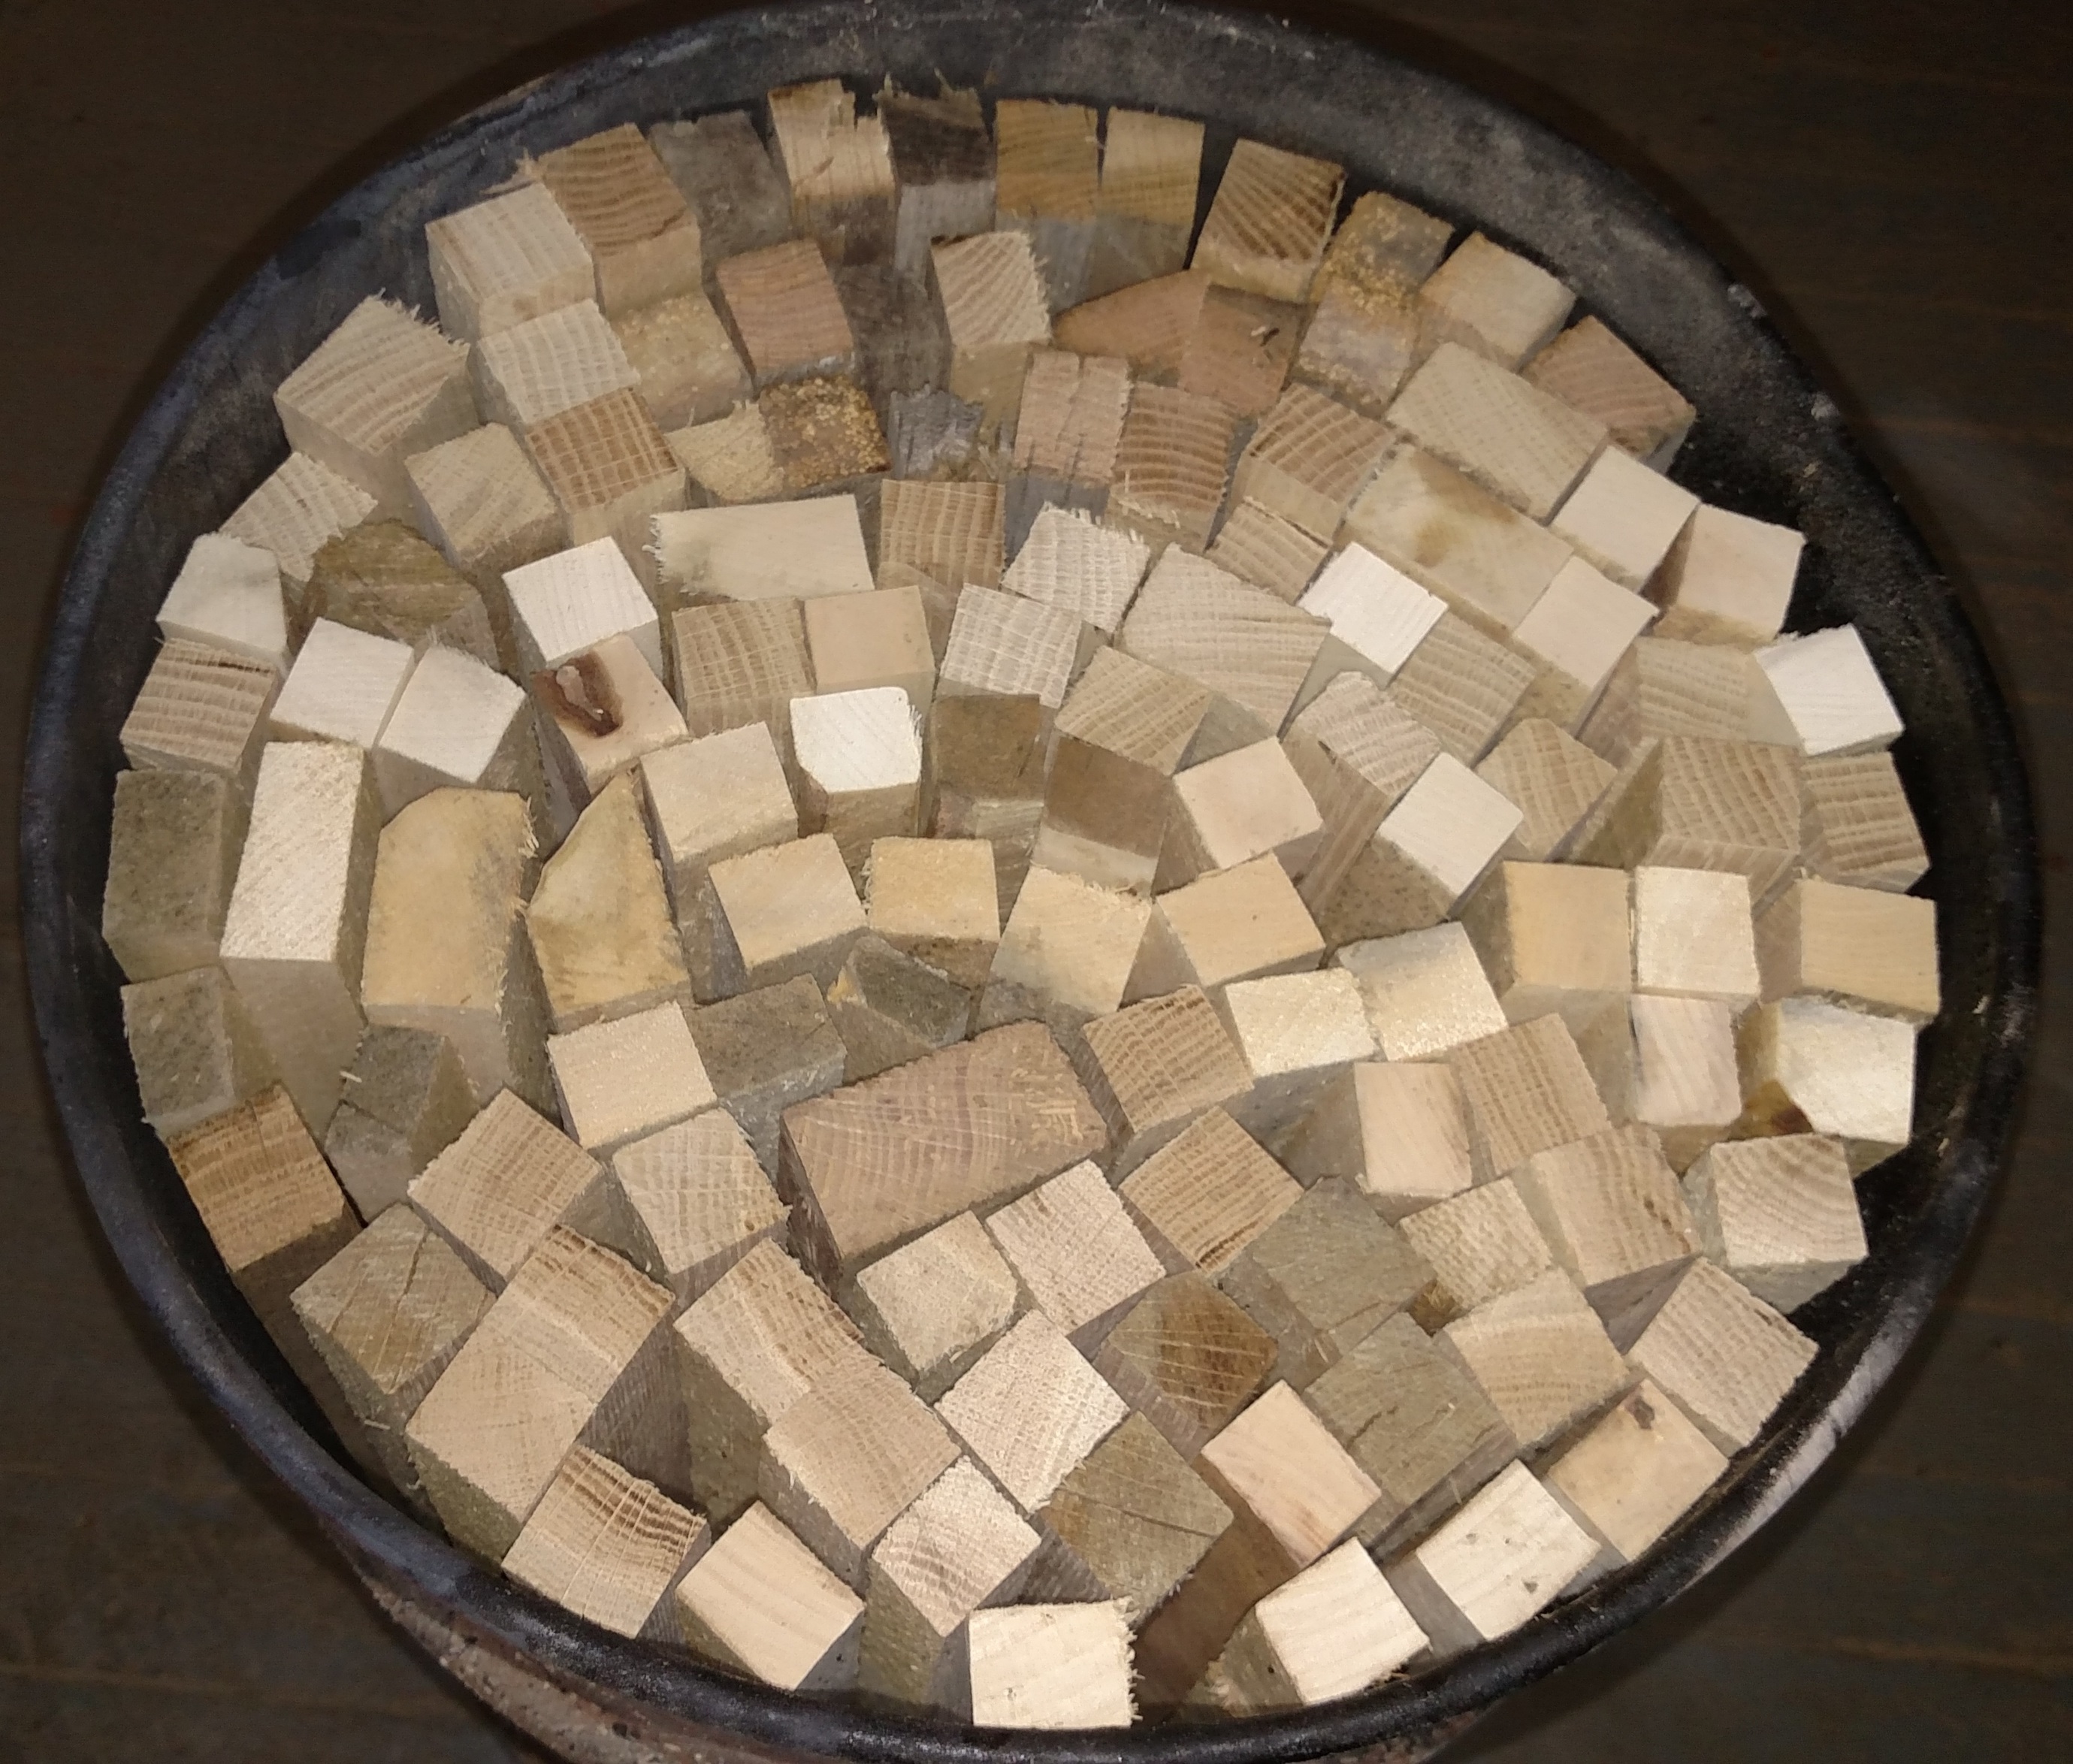
I kept building it up to the top of the grease barrel. Then, I laid a fire on top of the grease barrel using a few bigger pieces of wood, along with a bunch of small sticks, paper, and hay, Here is what the finished fire laying looked like.
We lit the fire off.
My plan was to let all of the small stuff on top burn quickly to make some coals, then shake it down and put the lid & chimney on it. We probably let it burn this way about 10 minutes before putting the chimney on.
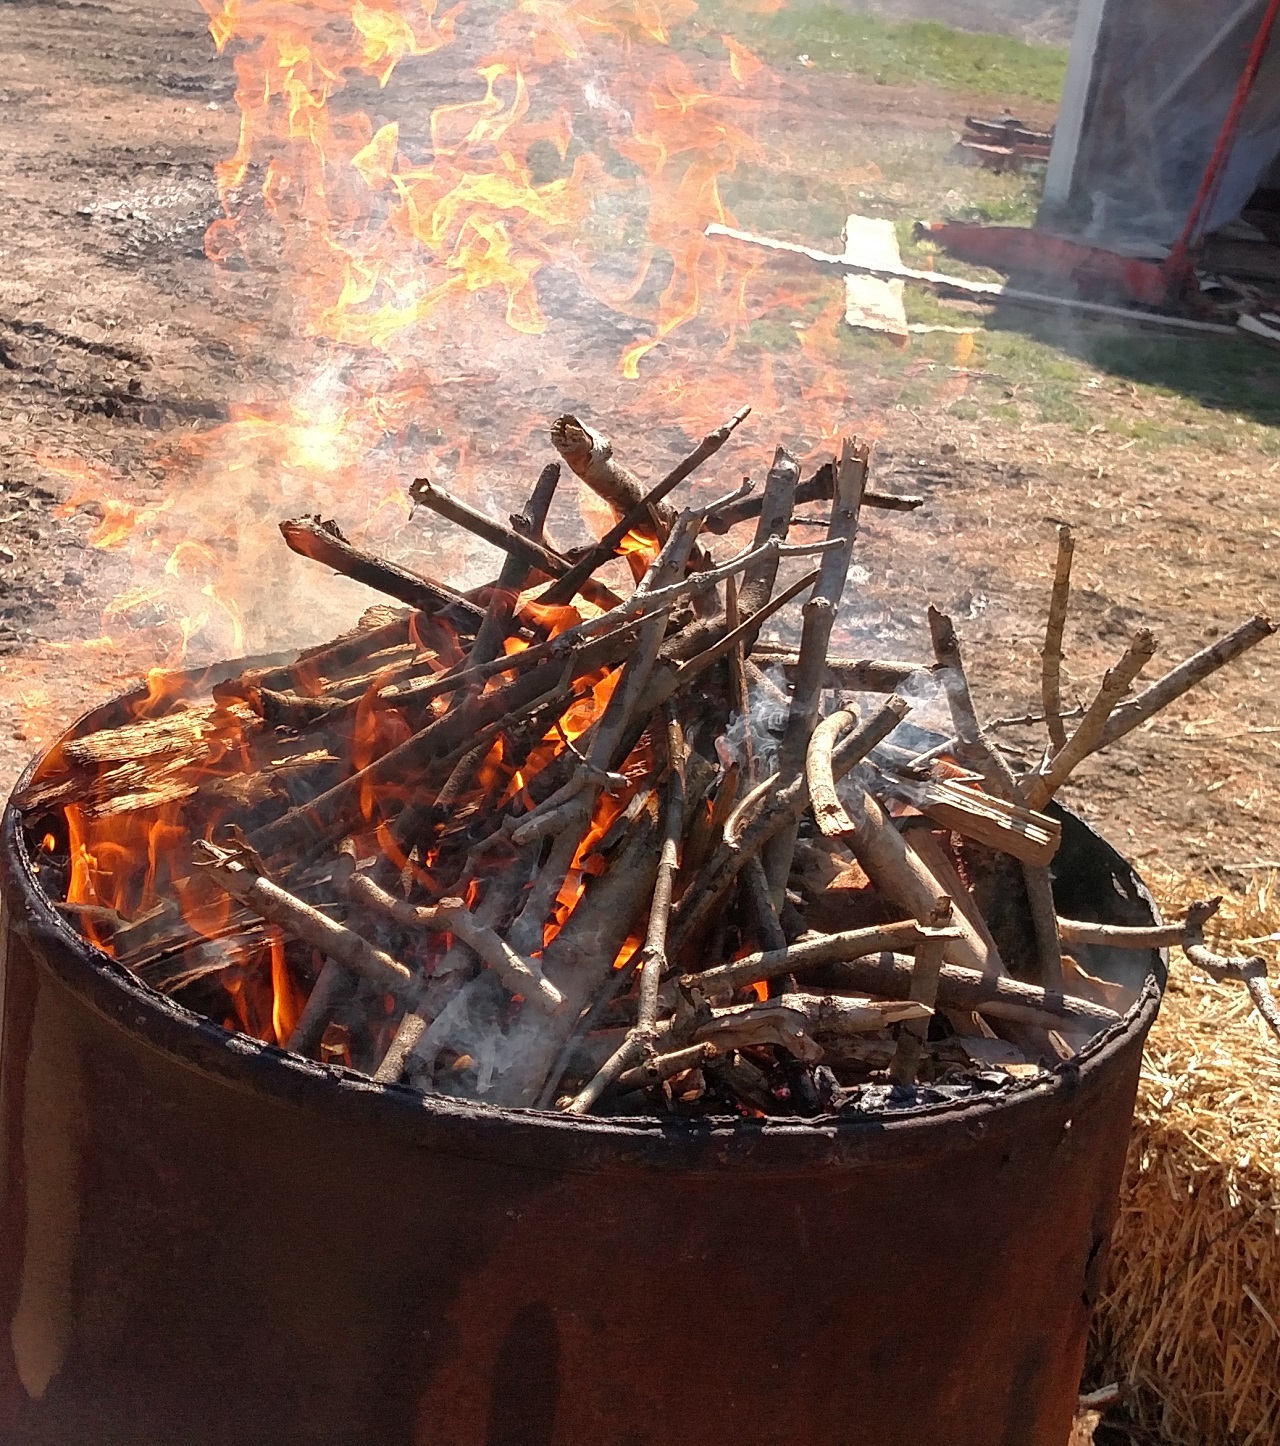
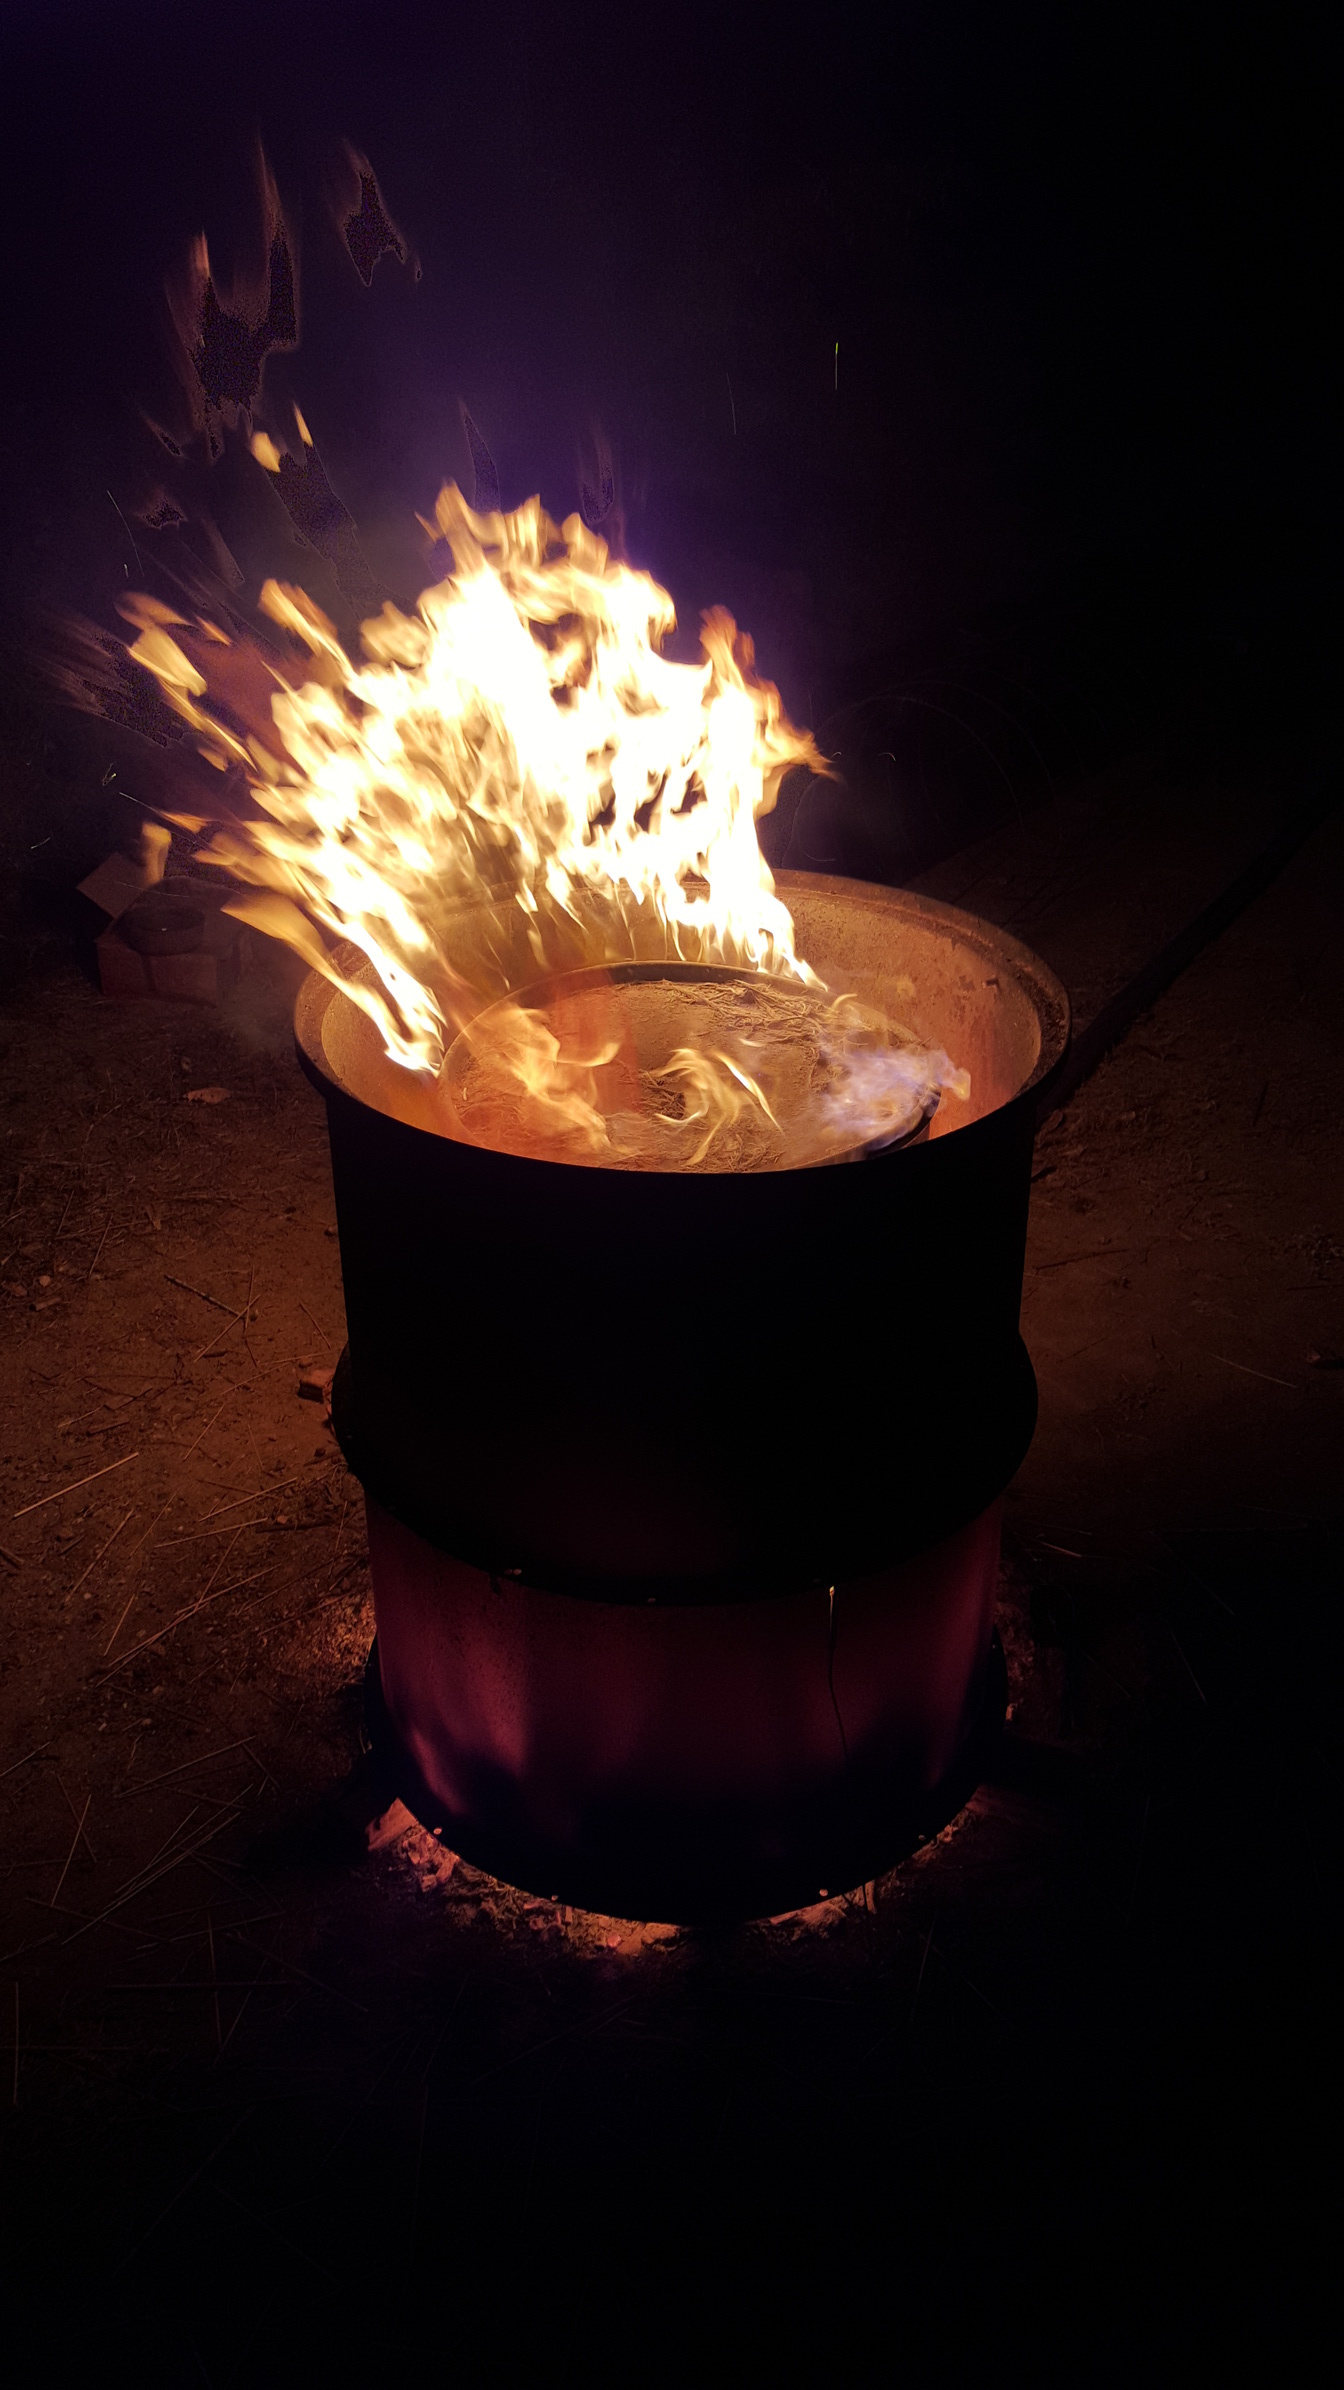
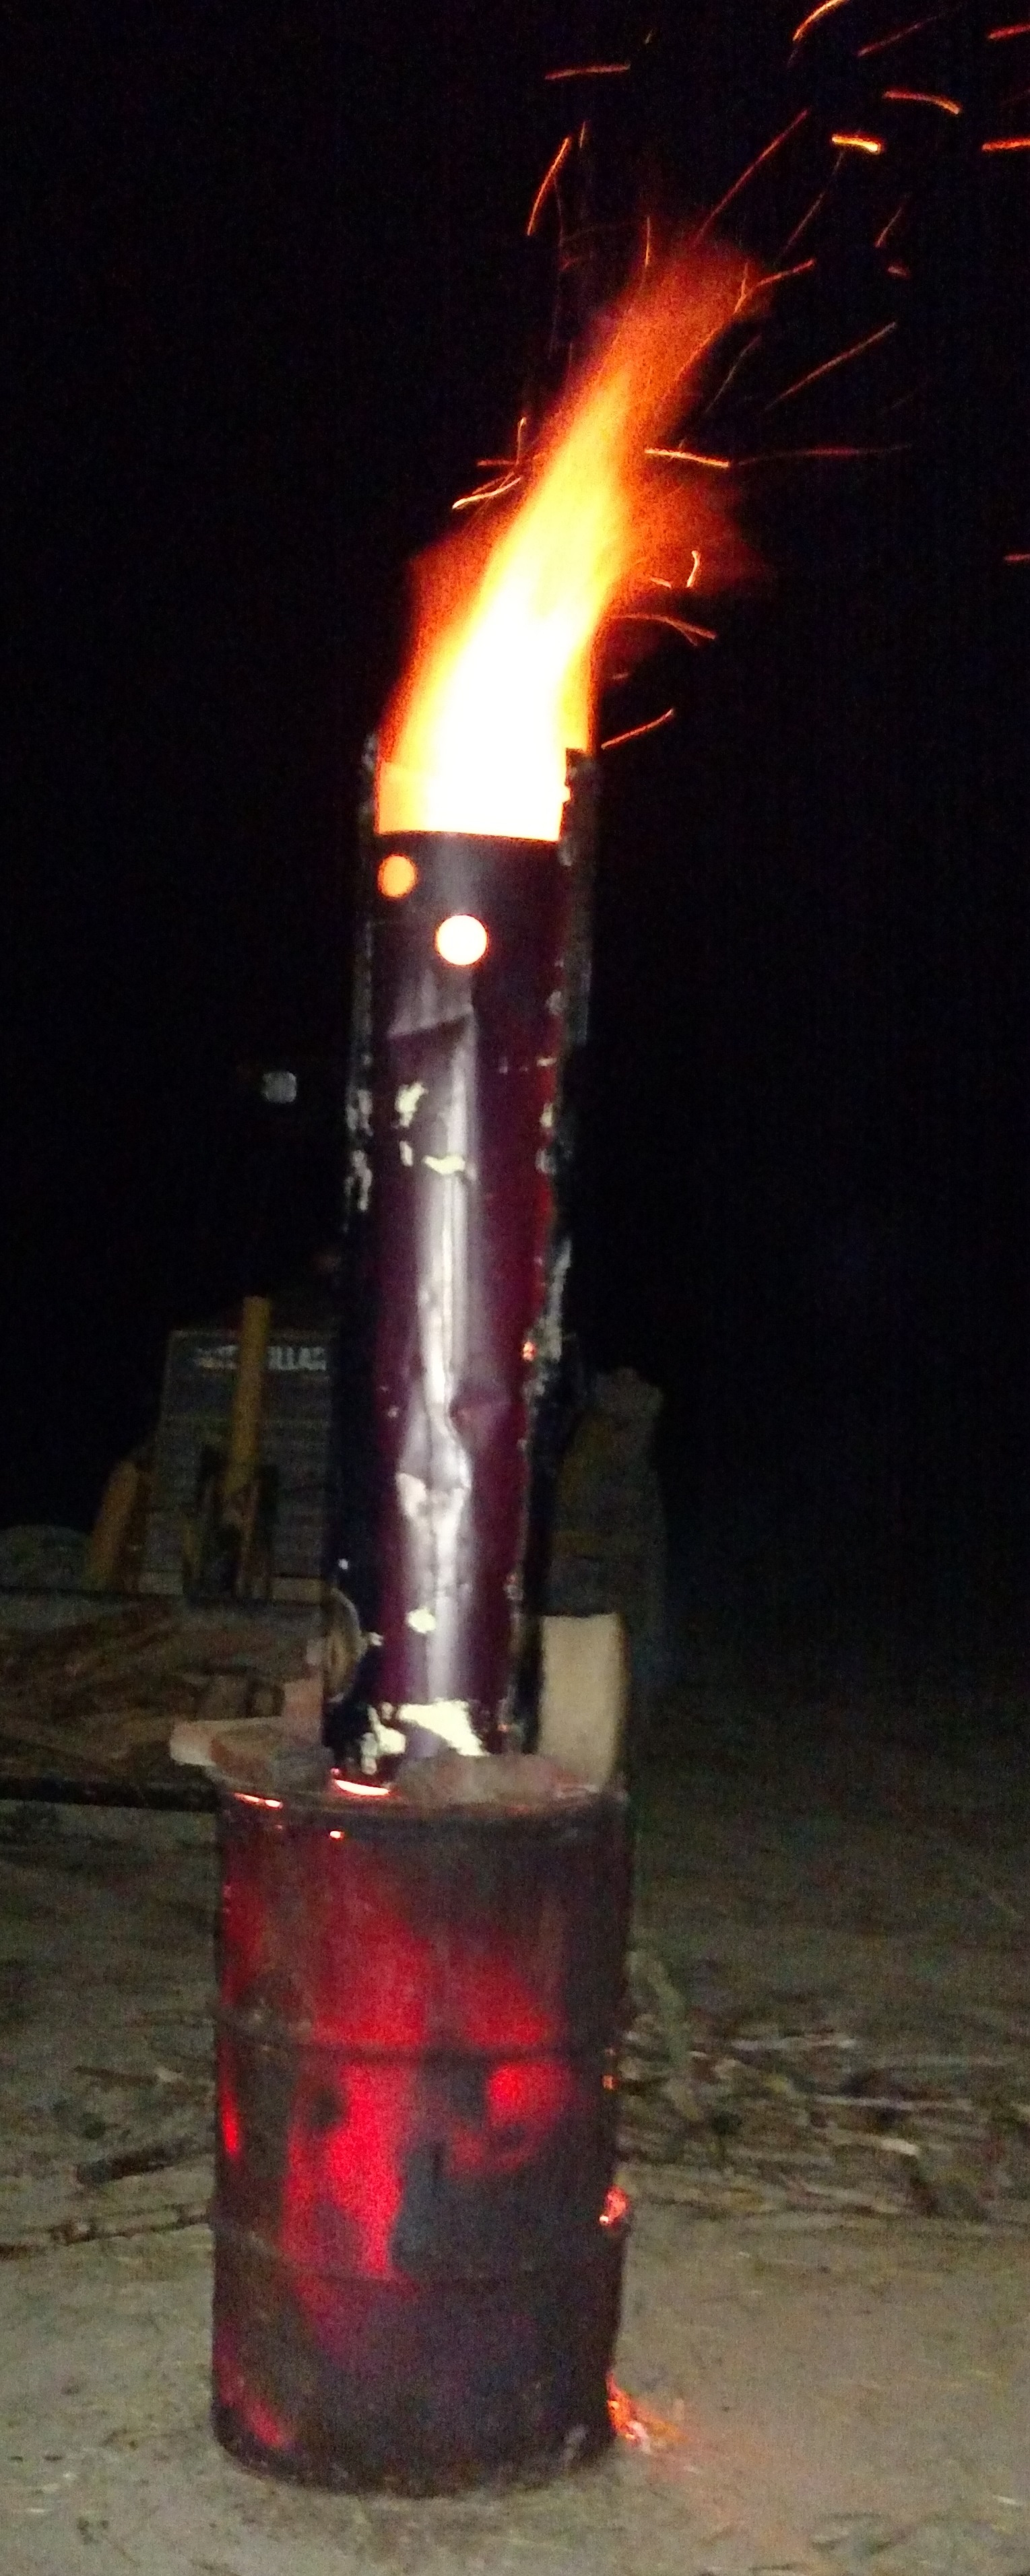
Then, we put the chimney on. I was really surprised that, almost immediately after putting the chimney on (2 or 3 minutes) we started hearing the roar of the fire, and it really picked up in intensity. Most of the smoke you see in this picture is the coating of the chimney burning off. The exhaust from the fire was very clear and clean, and stayed that way throughout the process.
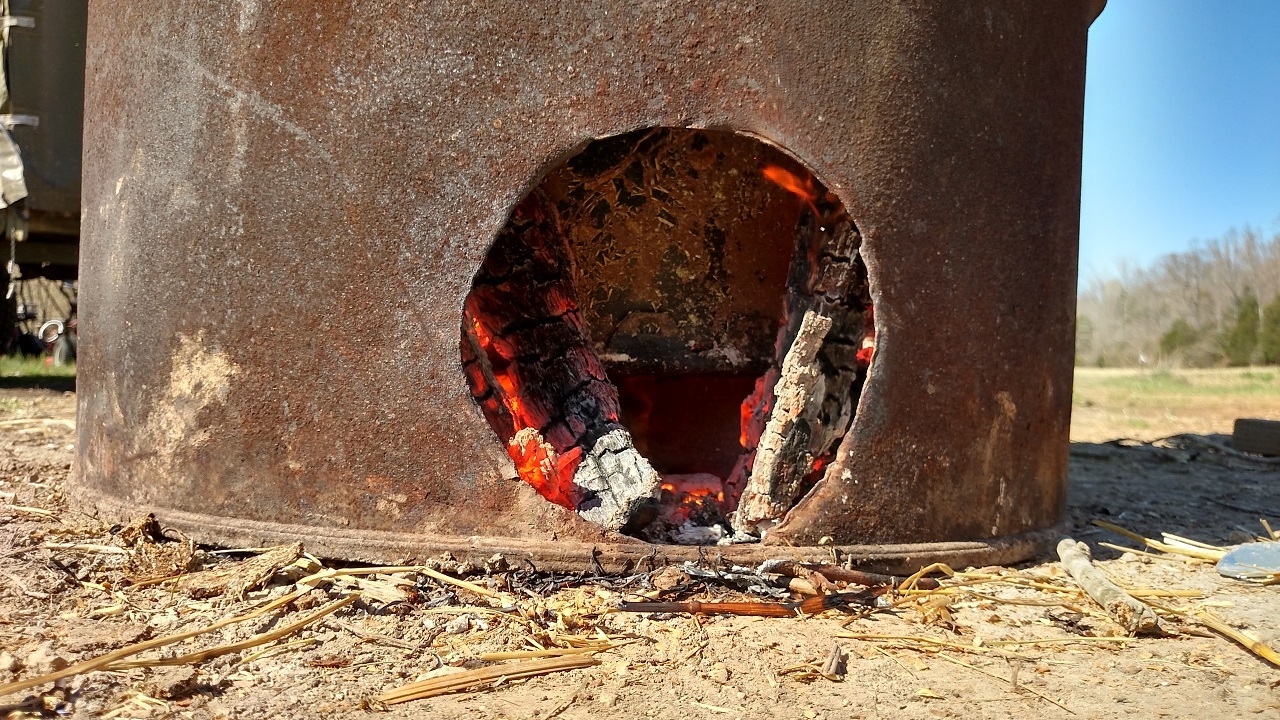
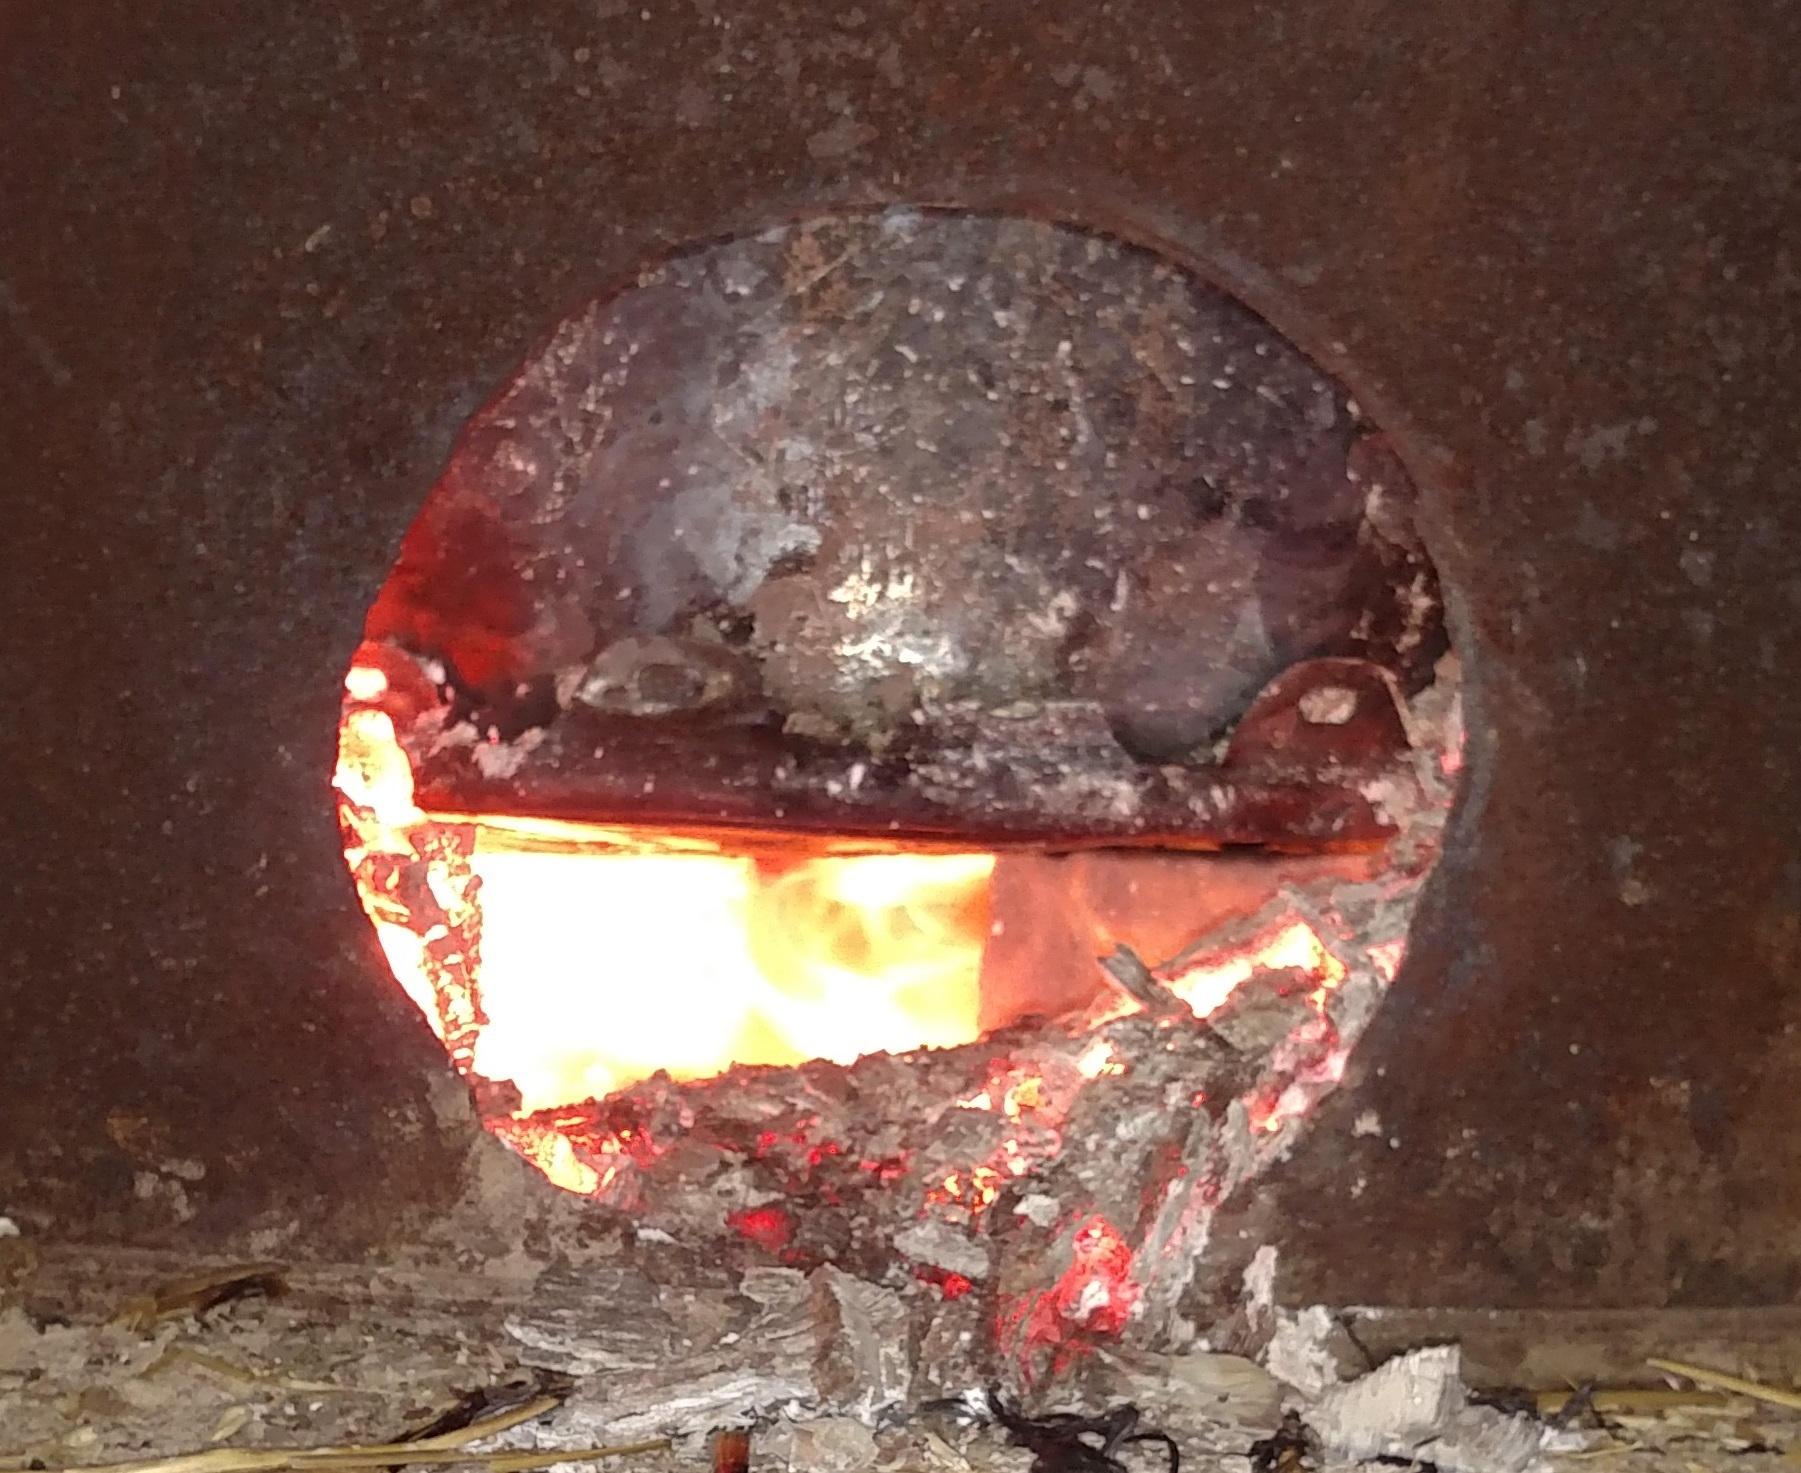
After about 30 minutes, the roar in the barrel seemed to be changing in timber, and shifting from the top of the barrel to the bottom. This is when the feed-stock started making gas, and burning at the bottom. I shot the barrel with an infrared thermometer. At first, the top was hottest. As the process progressed, the heat shifted to the bottom. The peak outer barrel temperature I saw was nearly 1000 F. I shot through the 8" hole in the bottom sidewall of the barrel where the gasses were escaping, and recorded a temperature of 1700 F! That is some hot stuff. I tried to take a picture of the burning gasses under the grease barrel. But they are a little hard to see in this pic.
By an hour into the burn, the “outer fire” had been reduced to embers, and the main heat was coming from the escaping gasses.
By the 2 hour mark, gas production was slowing down, and the outer fire was little but ashes.
At around 2 hours and 30 minutes, the gas production finally halted, and the gas flames under the inner barrel went out.
Preliminary Results & Thoughts
I know I was supposed to let this stuff sit over-night, but I couldn’t stand the suspense. Also, even though it appeared that there was little chance that the charcoal could continue to burn inside the retort, I didn’t want to take a chance on that since I had it sitting on bricks and air could get to the “Holey Lid.” However, to all appearances, the fire was completely out at the bottom of the barrel.
So, as soon as it was (almost) cool enough to touch, we removed the chimney. Here is what we found inside.
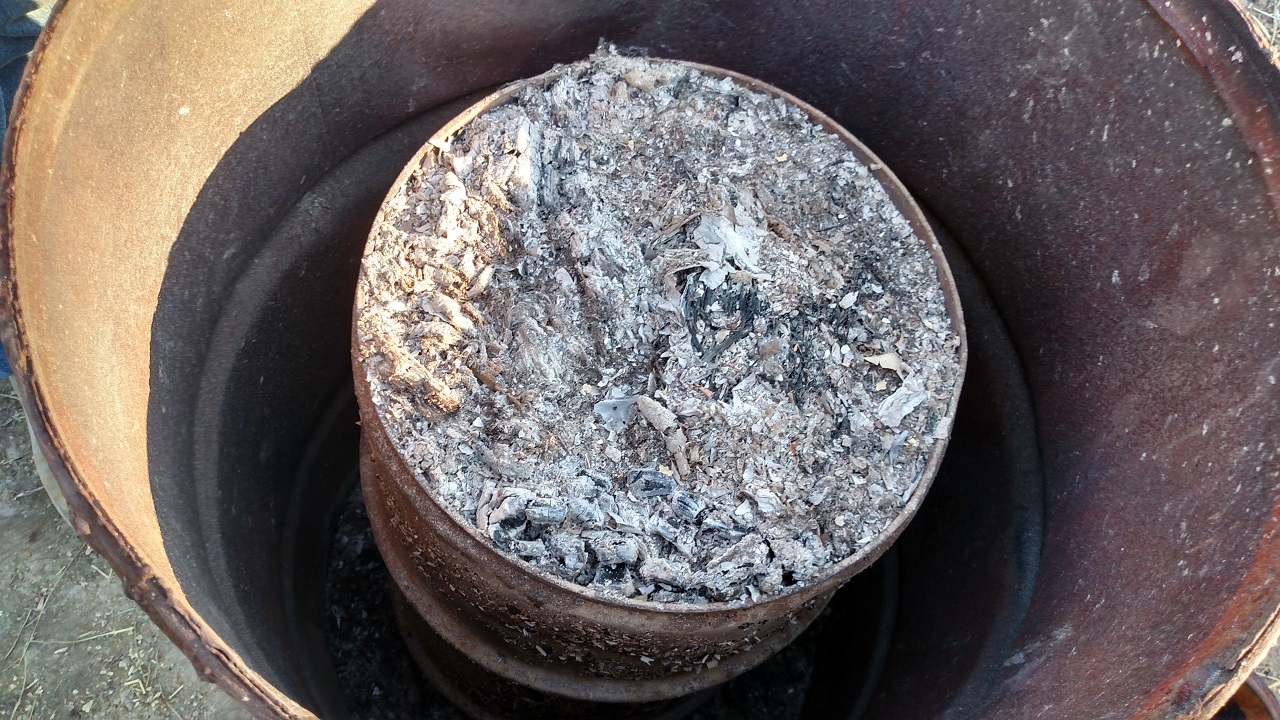
As you can see, the outer fire was completely reduced to ashes, and not much of that (maybe a quart?).
Next, we fished the grease barrel out. It was still pretty toasty! But WAY lighter than it had been. I would guess that the wood weight was reduced to 15 or 20 lbs, from about 80 lbs.
As soon as we flipped it upright, we could see some smoke escaping the holes in the lid. We popped the lid off. As you can see from this picture, which was taken immediately after removing the lid, something was still making some smoke in there.
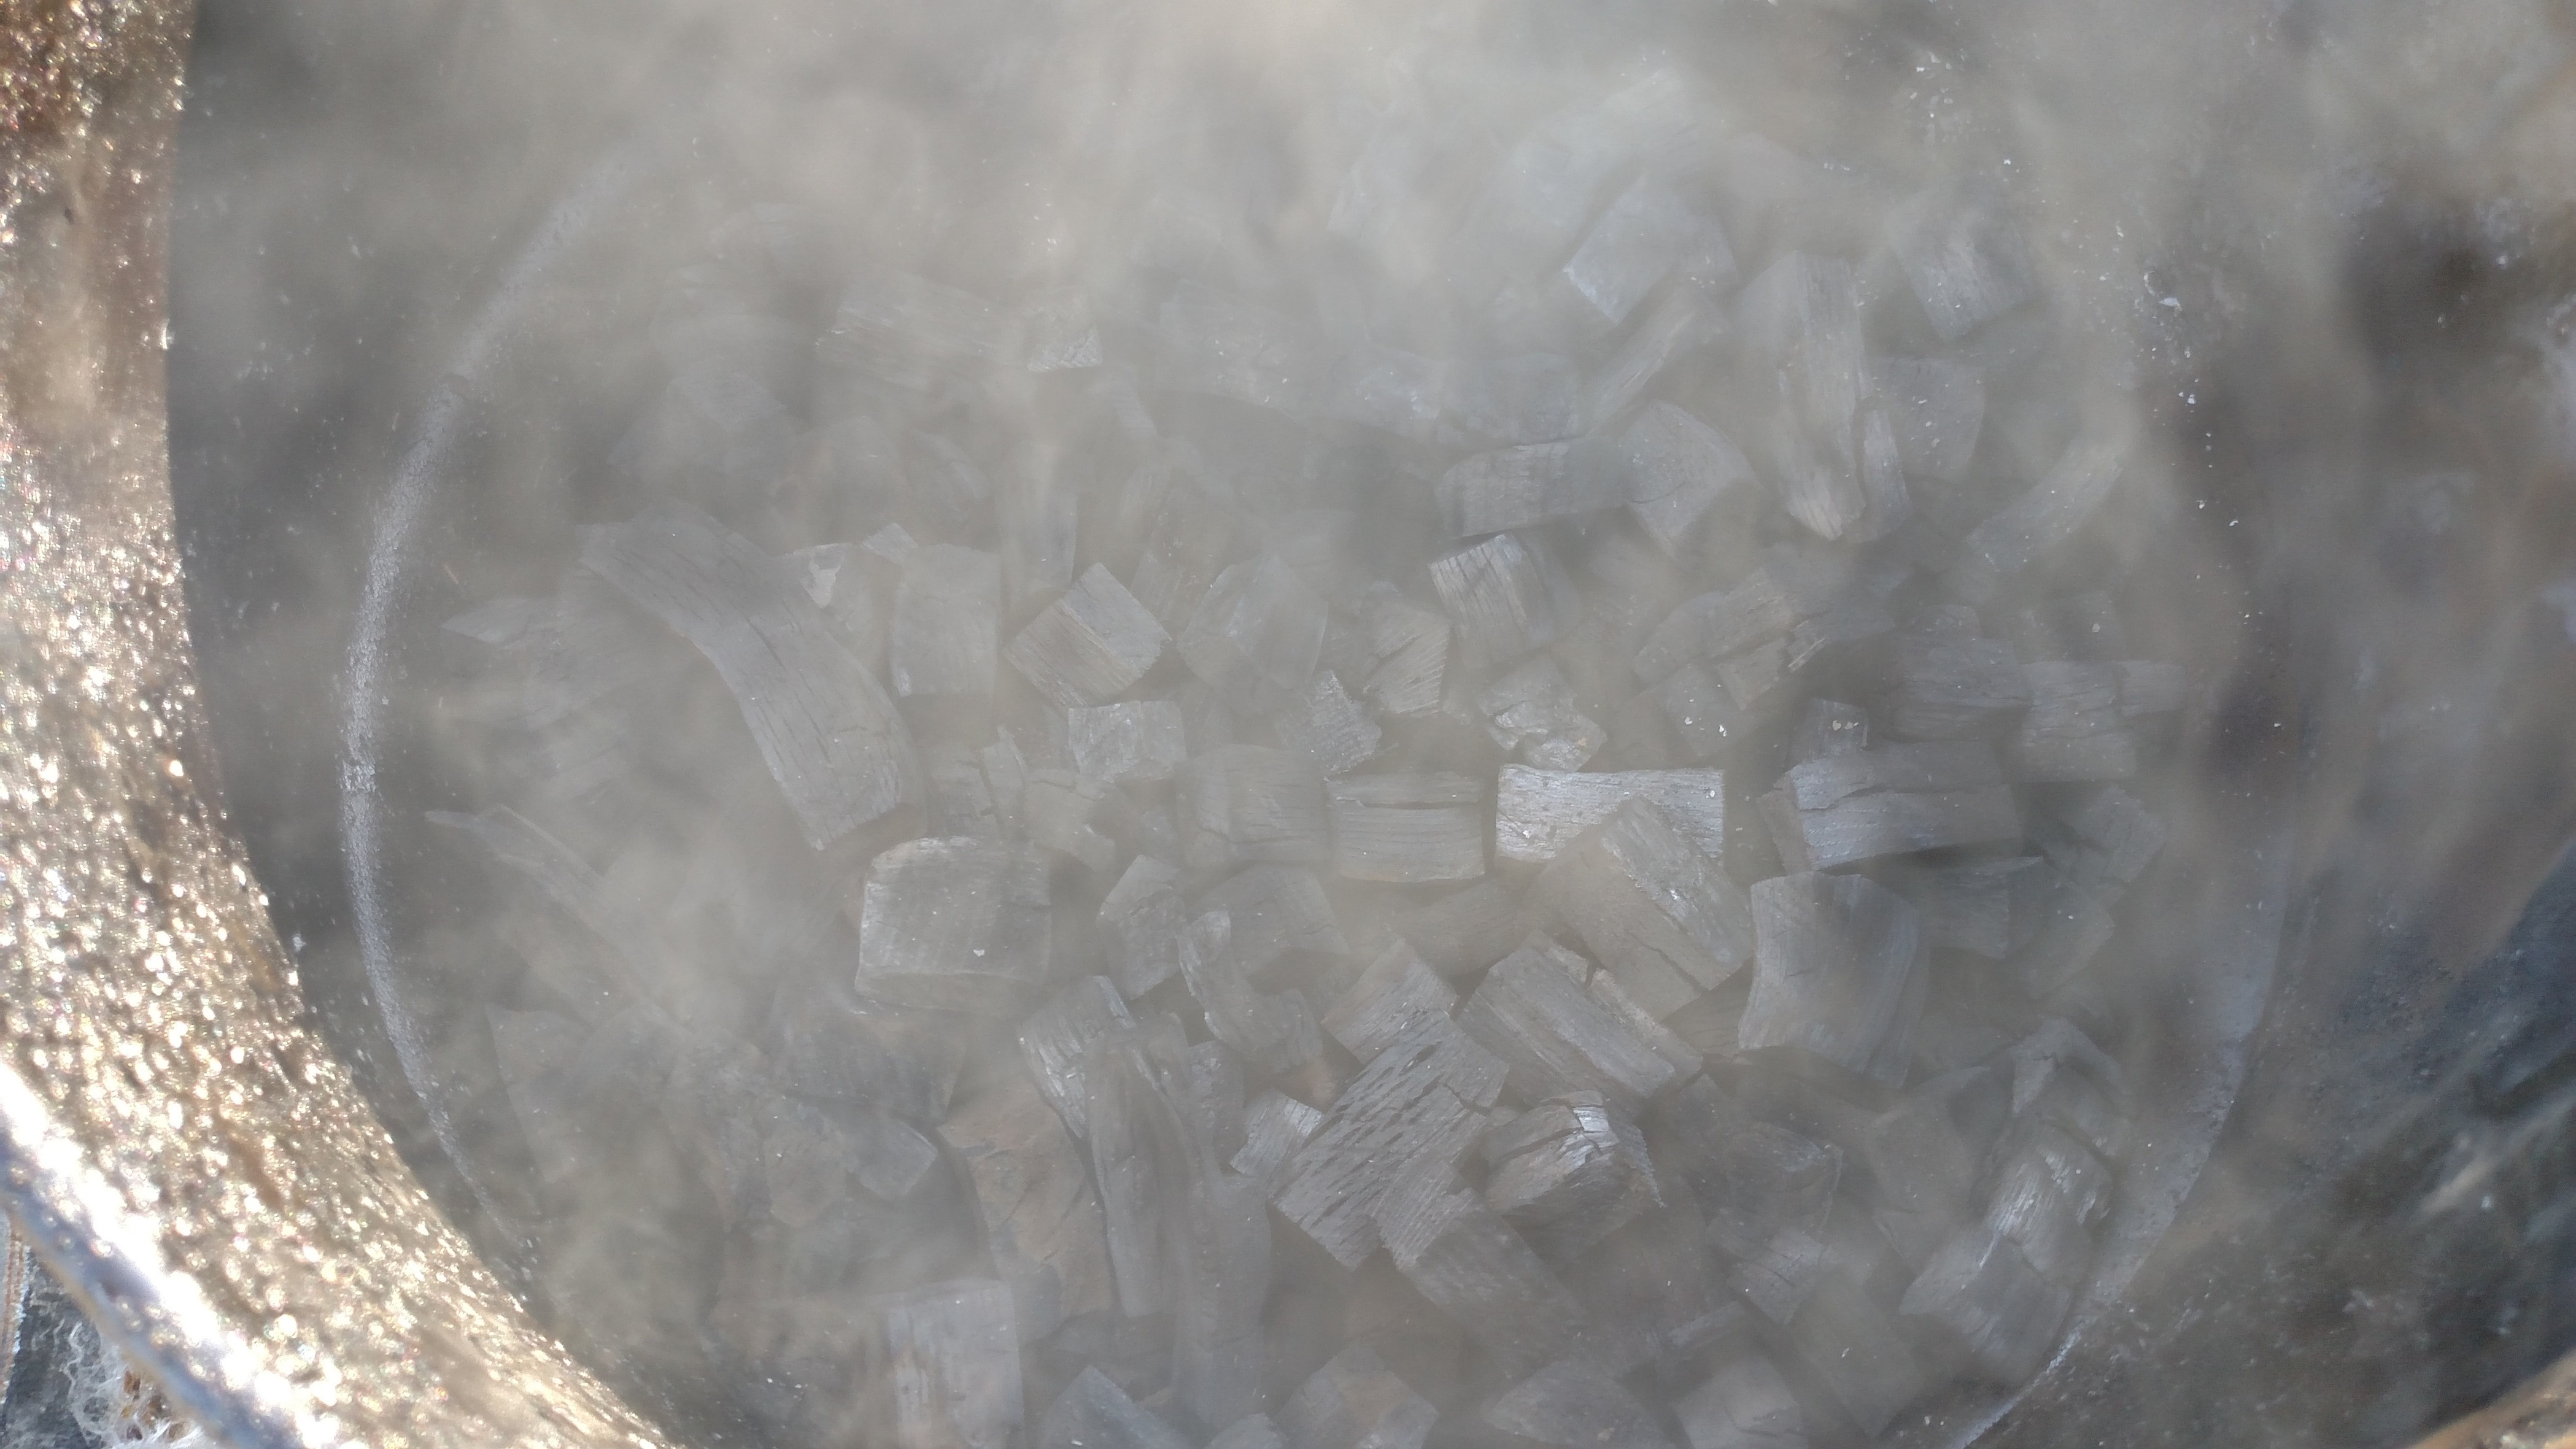
We were pretty excited by the way it looked. Nice little black shrunken cubes. I saw two or three that still looked a little “woody.” I fished out the most “woody” one. But it easily crumbled in my fingers, and was pretty well charred through and through. The volume of wood in the barrel was reduced by about 1/3.
But since the whole thing was still smoking (and the smoke seemed to be getting thicker), we decided to put the lid back on, turn it upside down on bare earth, and make sure there was a good seal. It would be a bummer to lose the charcoal after all of this.
That’s as far as I have gotten. I am eager to dig through it and see how well it is charred at different layers in the retort. I am optimistic, since it probably got shook around and mixed by us turning the barrel right-side up, but we will see.
Anyway, for a first shot, I am super pleased with what I have seen so far.
My thoughts at this point are:
-
The way I did it, wood prep was a big deal. It took a while, but it produced some nice results. I am wondering if it is better to chunk up the wood, or chunk up the charcoal after it is produced. It is probably more work to chunk up the wood. But I guess that chunking up the charcoal would produce a lot more fines and dust that might not be usable as fuel. The fuel I ended up with looks pretty good, with not much dust.
-
On the subject of wood prep, I am wondering what would have happened if I had stuck with my original plan, and just cut the wood into 2 foot strips and loaded it vertically into the retort. This would be a lot less work, and might lead to more even pyrolisis through better convection within the inner retort. I imagine it would be easy enough to break up the “long” charcoal without making a lot of dust.
-
I wonder what would have happened if I had just let the thing sit over-night. Would the charcoal have had enough oxygen to burn because it was sitting on the bricks, or not?
-
Like #2, I wonder what would happen if I just loaded the retort vertically with 2 foot long branches of brush. This would make a nice natural looking charcoal, and I have a lot of brush.
Anyway, I guess I am hooked at this point. I will let you know how the charcoal turned out tomorrow, after it completely cools, and I can inspect it closer.
Kyle I completely remember the excitement I felt when I made wood gas for the first time. Reading this post brought that back for me, thanks. You’re definitely hooked now. All the campfires I’ve had and never thought of it.
Yup you’ll never look at a fire the same way again!!!
Congratulations Kyle on a good job! I too am interested to know what would happen if you left it overnight on the bricks because I was almost sure that Abner had legs on the big barrel but nothing under the small on with the slits in it. Maybe I was wrong on that and Abner will weigh in with an answer. It is fun isn’t it?
Hi Kyle , its great fun isn’t it 
I would leave the wood in 2 foot strips and pack as many as you can into your grease drum ,and when its well cooked you will find that its mostly all broke into smaller pieces , plus if you are going to use this for engine fuel you will need to grind it up smaller anyway .
Dave
Congratulations Kyle!!! You are now officially a “charadict”, good burn and I sugest that the way you cut the wood is the and most rendering way, if the pieces are to big you will have less wood and less wood is less gas, we´ve been through that before. As for Don´s question I can tell you that I have legs on both barrels and I think, as I told before, because I have slots instead of holes, the bottom of the retort makes ashes that clog the slots and chokes the fire or the incandecent char inside and it stops the reaction. Thats my opinion. Again, congrats Kyle!!! Hat of!
Thanks Abner for clearing that up. That makes sense about the slots instead of holes to seal up at completion of burn. There is nothing as discouraging as to find an almost empty char barrel in the morning because air got in there.
I will have to look again on You Tube because there was a sort of a long biochar documentary I saw once where they were using the same method but did not have legs on the inner barrel and the gas was forced out of the bottom holes and under the tight rim and at that time I wondered if there was enough pressure of the gas to force itself out under the rim.
Final Results
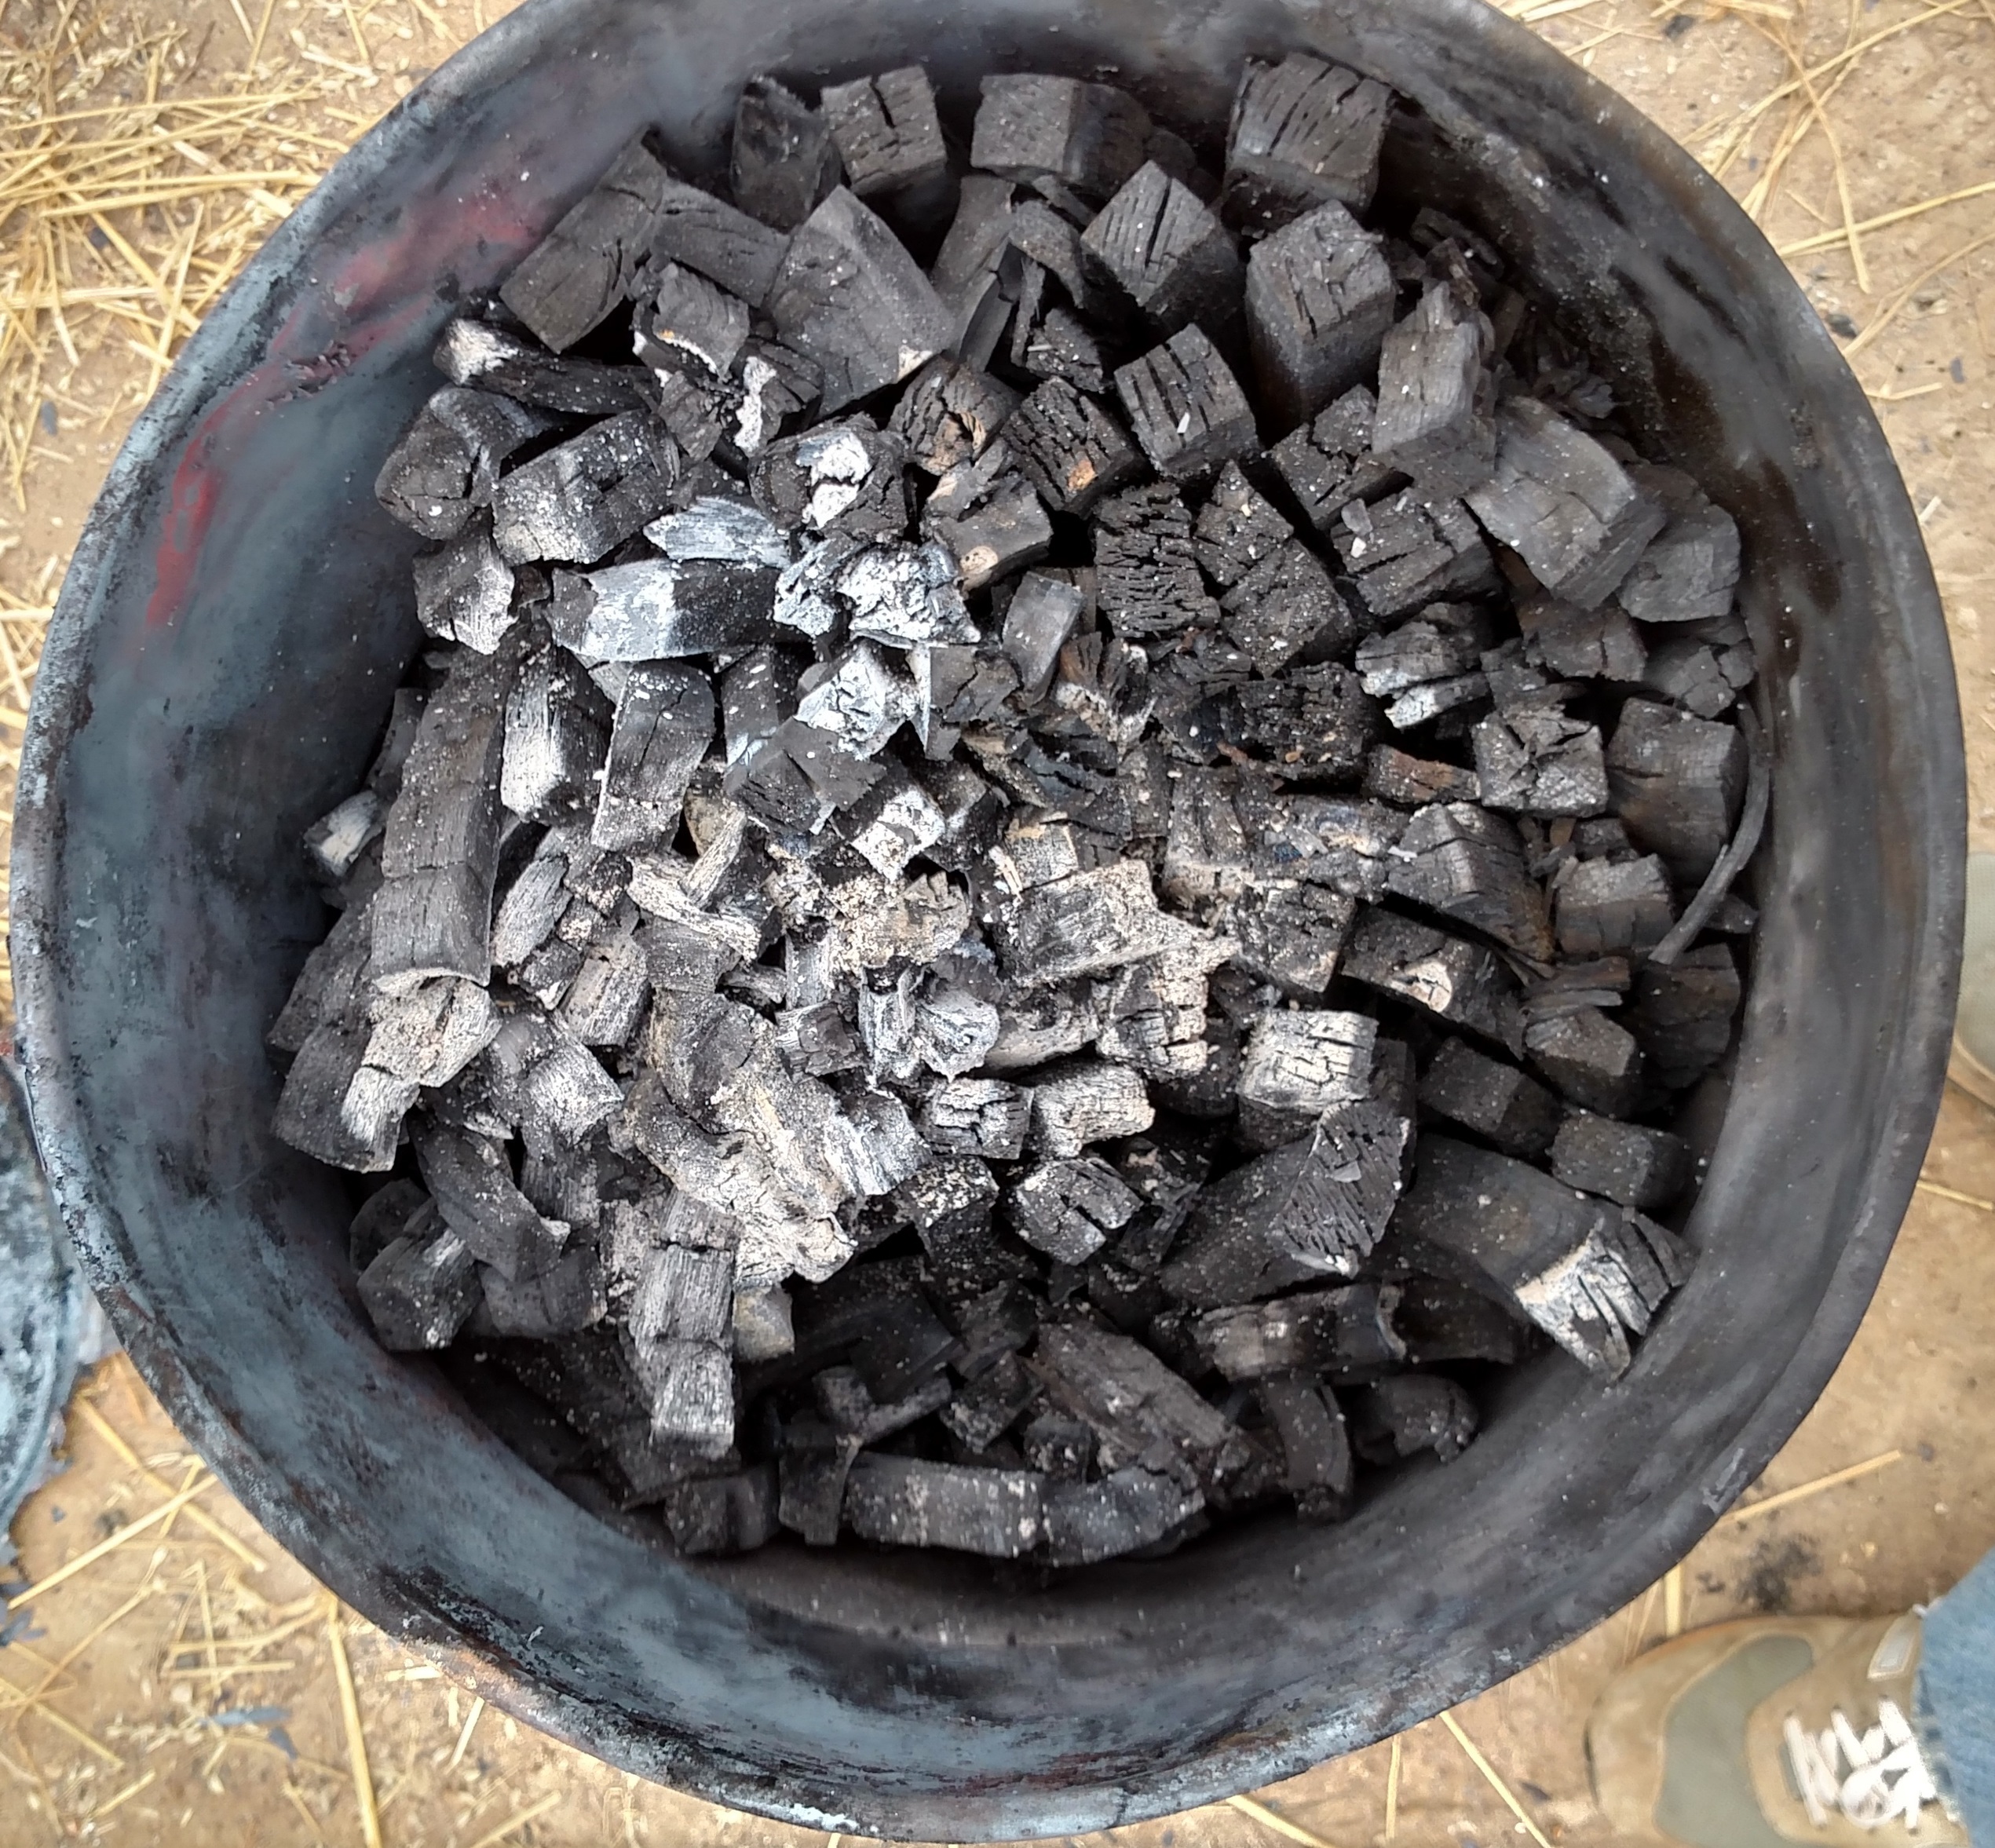
This morning, I removed the charcoal from the barrel. Here is what it looked like.
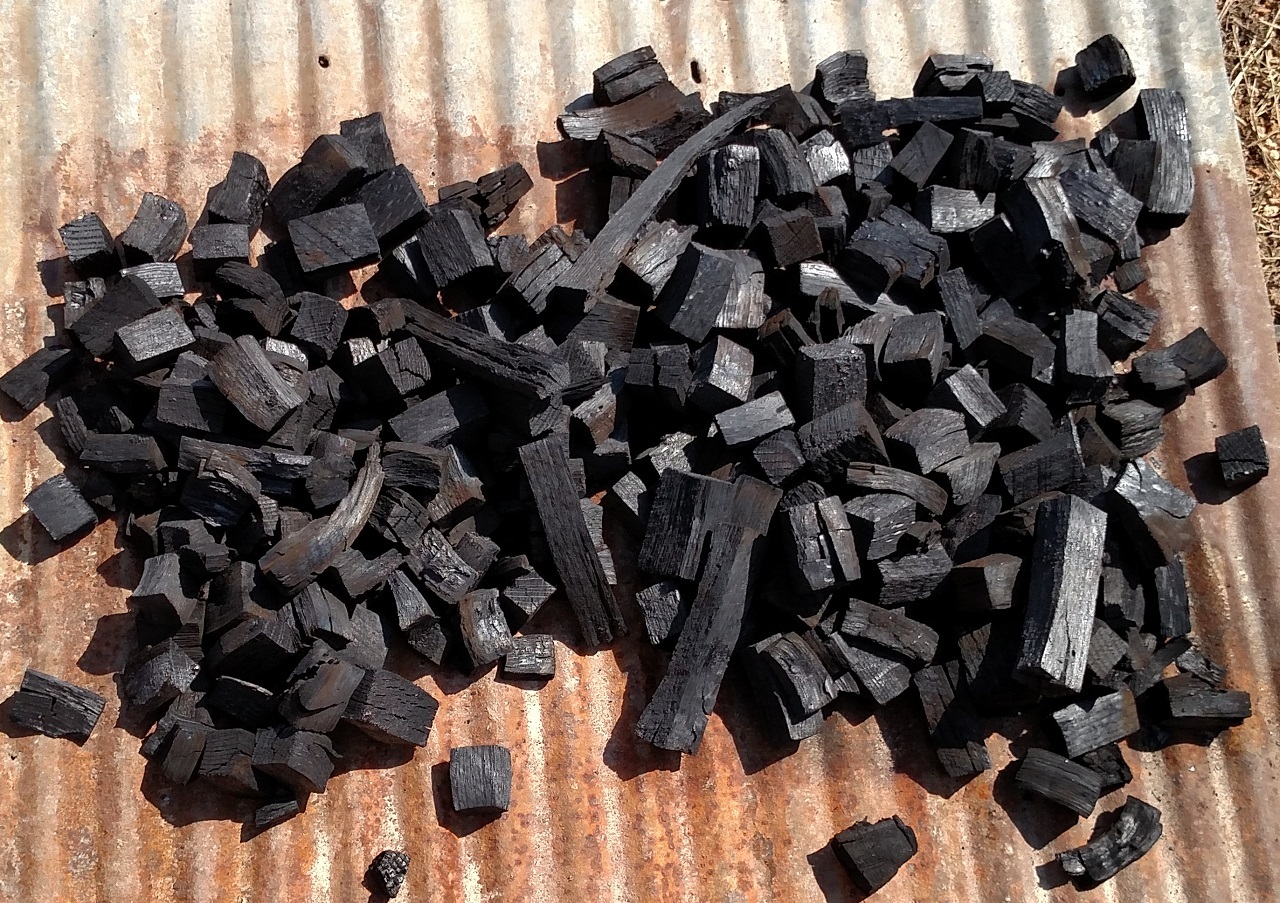
The wood appears to be well charred, and consistent from top to bottom of the barrel. However, I did find slightly more poorly charred pieces in the deeper levels (levels that would have been closer to the top of the barrel while it was being charred). All in all, I picked out about a dozen cubes that were not well charred. However, the appearance was deceptive. Some that looked “woody” easily crumbled and were black all the way through, with just a surface veneer in places. A few other pieces that looked completely black could not be easily broken. The only tip off for these type of pieces were that they looked more “solid” and were heavier in the hand.
I think I got pretty lucky to have so few poorly charred pieces. I am guessing that is because the feed-stock was uniformly pretty dry (some of it was old rough sawn lumber, and all of it had been under cover for at least a few months).
The actual yield turned out to be 10 gallons (2 5 gallon buckets full). This makes me think that my grease barrel is probably 15 gallons instead of 20 as I had guessed, since it was 2/3 full when I got done.
Don and others have been speculating about the amount of wood burned. I would guess that the quantity of wood used to fire the retort was about the same as the quantity that was placed in the inner barrel. Even though there was a larger volume in the outer barrel, the wood was packed much less densely.
I think for my next test I will try 2 foot long strips, and see what happens.
I am still going to have to figure out a way to grind the charcoal and screen it since it appears the pieces I have produced are still too big for the simple-fire.
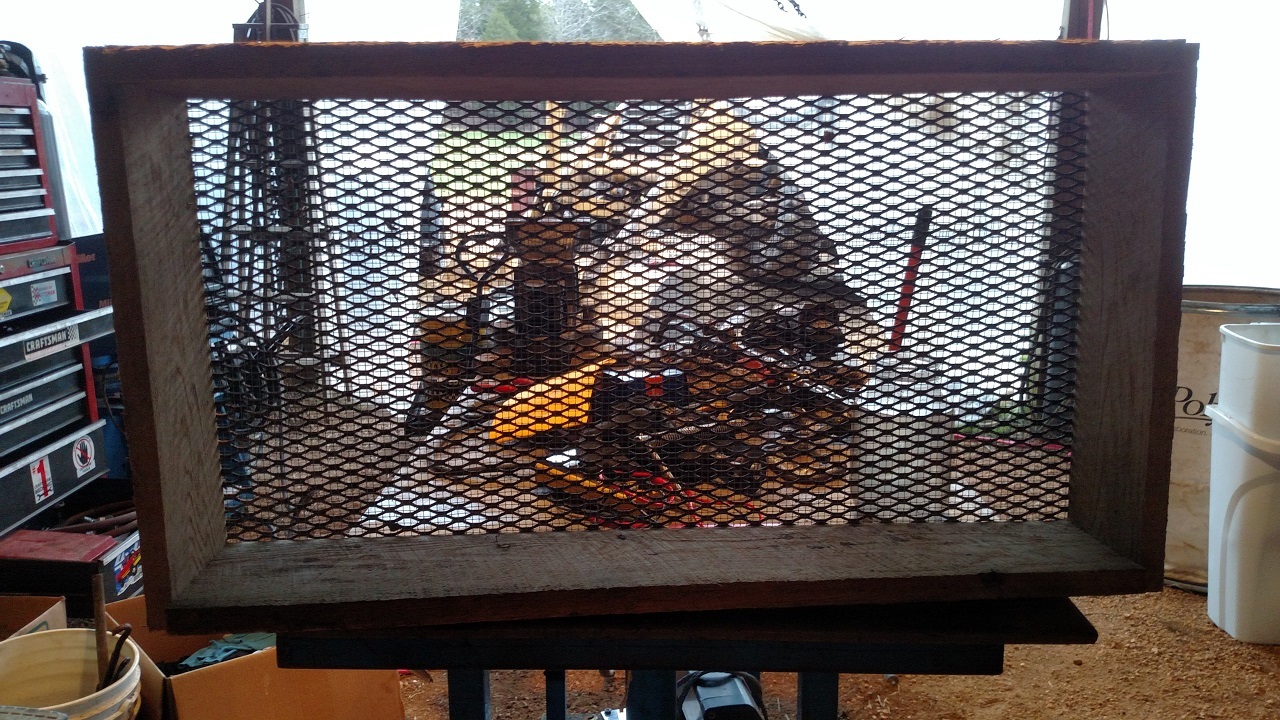
You can screen it with 1/8" hardware cloth. Jackson Wire sells Redi-Roll Hardware Cloth, 1/8" x 36" x 10’ for $25, through Amazon.com. I built a frame that sits over my wheelbarrow, so the fines smaller than 1/8" fall through, and end up in the compost pile. You can bust up the wood with your fingers, and if it won’t break put in back in the grease barrel for the next run, or use it in a TLUD cookstove mixed with regular small wood. Starting with torrefied wood or half done charcoal will give you a really full grease barrel (yield wise). Charcoal can ring like a bell, but still be hard as a rock, and not burn clean. I made three batches this morning; the first in a 55 gallon drum, second in a very large TLUD cookstove, and the third in an Anderson Quad TLUD stove (made in Africa). Now the wife is asking if I am going to finish a batch of Chili that I started this morning, so that will be the fourth load of char when I’m done.
Keep your eyes open for a small garden shredder/hammer mill , I have one that was petrol driven and i mounted a 12 volt wheel chair motor belt driven to the pulley rotor and that turns at about 40 rpm , just by luck if I have ever put anything in it that isn’t charred completely it stop the belt or motor , I then have to reach in and take out that piece that’s jammed , luckily that’s only ever happened about 4 times in all the time I have used this .
Dave
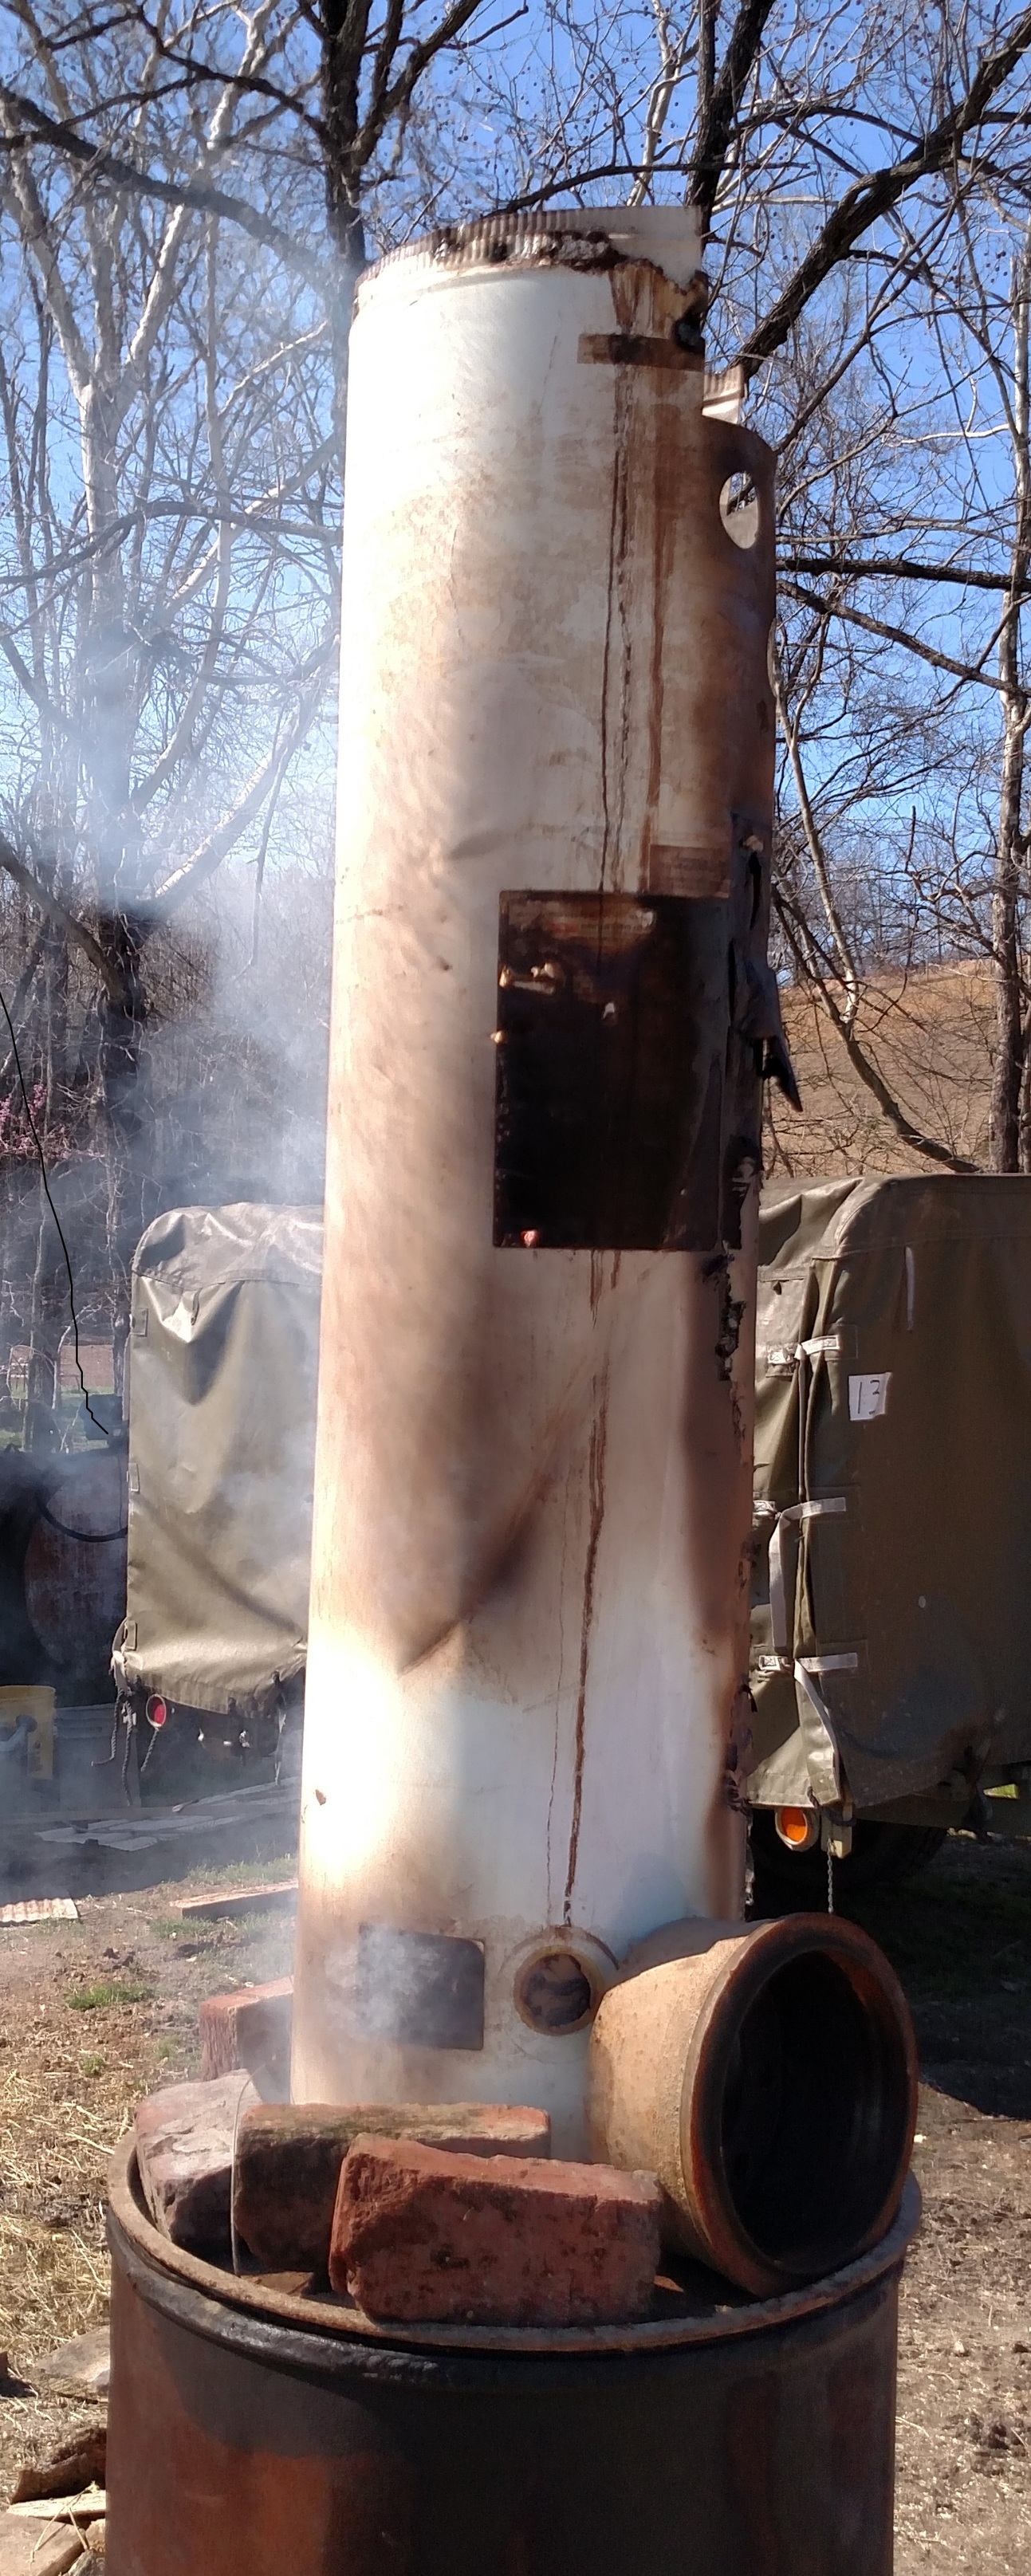
Almost similar, 2 barrels retort.
The inner drum is completely closed, the gas will force itself passing the rim, as you can see on the picture…
Temperatures measured on the outer shel = +850°C
Last run , i did melt the drum inside… so, 4 run’s and a new barrel needed ![]()
I have more pictures and movies, will post them soon…
Another Run
Last night, I decided to do another run of charcoal. This time, I just cut the wood into 2 foot long strips, and packed them tightly in the grease barrel.
It was fun firing the retort at night. I could see the flames and the glow of the barrel much better.
I could also see the gas jets shooting out from the bottom of the inner barrel better.
The only thing I did differently this time is that about 1:15 into the burn, I removed the chimney and added some more wood to the outer fire. I was hoping to make sure everything completely charred inside. This extended the total burn time (including gas venting) to about 3 hours 15 minutes.
I was also tired, and we had to get up early for Sunrise Service this morning, so I decided to do a final test. I left the retort intact, and just blocked the main air intake hole with a piece of tin. It was not airtight by any means. I wondered if the charcoal would burn up overnight since the inner barrel was still sitting on the bricks.
I opened it this morning after Church. This is what it looked like.
As you can see, there was some light ash on the very top (the bottom, while in the retort). However, it didn’t amount to much. Perhaps a couple of ounces of ash. The yield also appears to be somewhat greater than the first run, perhaps because the wood was more densely packed.
After I stirred the charcoal a little, and broke a few pieces to see how it felt, this is what it looked like.

My preliminary conclusion is that this turned out to be even better charred than the first batch, and that the “long stick” method works, so there is no need to cube up the wood.
Still, there is a lot of labor involved in wood prep., and this method isn’t really practical for continuous operation. I am going to have to reduce the prep. time considerably, and increase the batch size. What I am thinking about doing is using a 55 gallon drum for the inner barrel, with a bigger surround of some kind around it. I hope to be able to put 3’ sawmill slabs directly into the 55 gallon drum without any extra processing. If that works, then I think it would be a pretty efficient system.
I also think that adding burn-wood half-way through helped. This is somewhat wasteful of wood, but makes it more likely that I won’t end up with uncharred pieces. However, if it wasn’t for the fact that I have more sawmill slabs than I could ever burn, I might lean towards the direct burn method like Gary and others use, since it is probably more wood efficient.
I now have enough charcoal to move on to crushing, screening, and building the gasifier for a test.
Hi Kyle, great results! It must be so nice to use formed lumber and get it so tight.
My only thought on going bigger with the inner retort is you risk having the outside layer of formed charcoal Insulate the inner layer of wood from getting enough heat. Might not matter you’ll just have to try it. Some people have experimented with the inner chimney for that reason bruce Southerland comes to mind.
Best regards David Baillie
Processing
I started working on my charcoal processing setup this afternoon.
I made a couple of screens.
The first screen is a fairly fine mesh (between 1/8" and 1/4" but it is flimsy. So, I backed it with a slightly larger diameter piece of expanded metal.
I made the screens so they would stack together. The top screen is a 1/2" x 1" rabbit wire screen, because that’s what I had on hand. The third or bottom is a solid box to catch the fines. Here’s the stack.
I am planning on making a jaw crusher to sit on top of the stack. Hopefully the vibrations from its operation will be enough to work the charcoal through the screens. The whole thing will be set on a 5 degree angle. But, if that doesn’t work, all the components can be used manually and separately.
However, on the back porch this evening, I discovered an even more important use for the home brew charcoal. ![]()
David - Yes. It was convenient to use formed lumber. I did this because I wanted to process it with my table saw in these test batches. Fortunately, I have access to formed lumber that is rejects from the sawmill (too thick or thin, saw running in or out, etc.).
However, I don’t see this as a practical way to process wood in the longer term because it takes a long time. Also,my supply of this type of lumber is not unlimited. And, it is useful for rough construction projects (dog houses, etc.) so I hate to burn it.
That’s why I hope to be able to simply burn slabs, cut to length, in the longer term.
I see what you mean about a larger diameter barrel possibly causing me problems. I guess I will just have to try it and see what happens. I recently parted out an old gas hot water heater. It has a nice chimney up the middle, so maybe I will have to use something like that for the inner retort?