Any updates on the Mazda project?
Hi Garry,
Well, I can start with a couple of excuses.
Winter arrived a little earlier than usual this year. Both snow and cold temps. Also I’m working daytime now until summer, which leaves me with weekends for playing. Long story short I haven’t got as far as would have liked on the project.
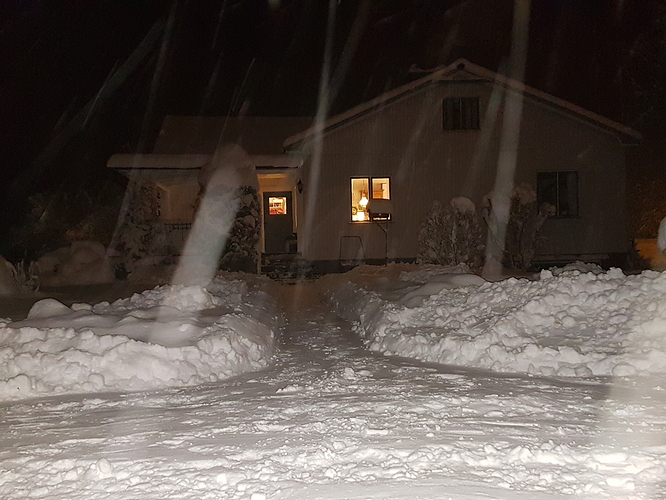
However it was mild -17C (1F) today and a total of 4 hours of daylight so I got some cutting and welding done outside in the snow pile 
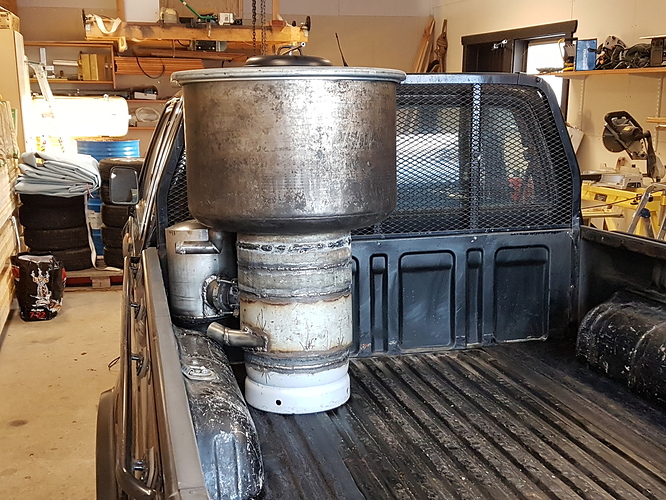
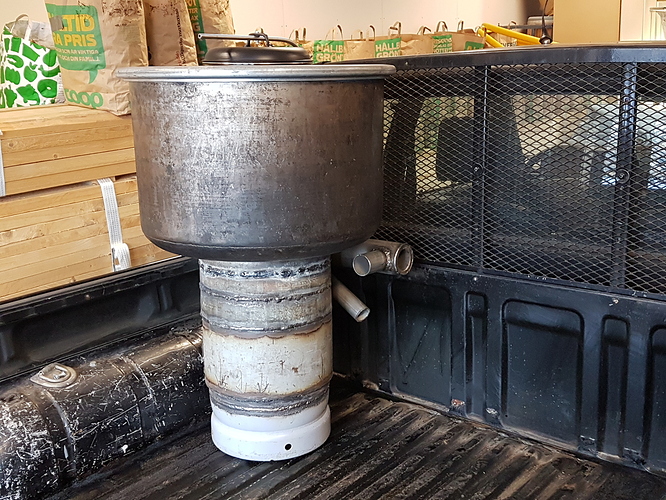
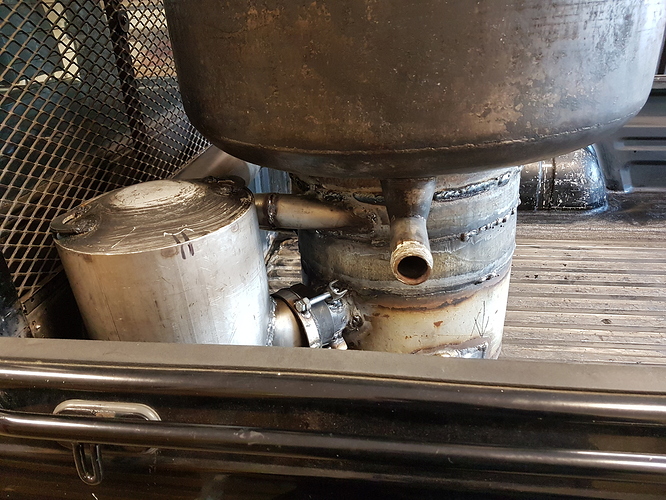
These are some of the pics I’ve taken so far.
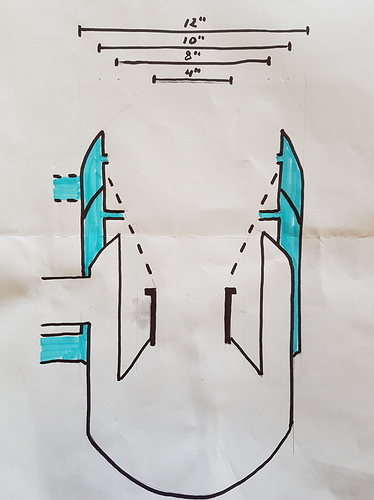
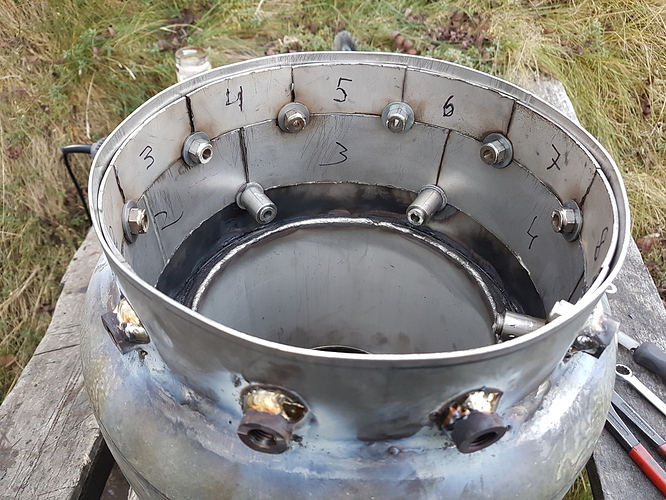
Nice JO, you are moving right along on the gasifier. I like the big hopper, Are there primarily and secondary nozzles in the new design? Also I like the heat shields around the nozzles. You are designing this gasifier with alot of thought going into it. Looking forward to your progress.
Bob
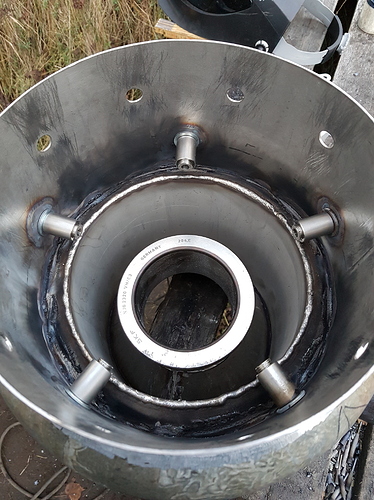
Is that an outer race from a bearing you’ve got welded there on top of your restriction?
So you have two rows of air jets?
I think that big hopper should produce a good monorater condensing effect!
Looks good!
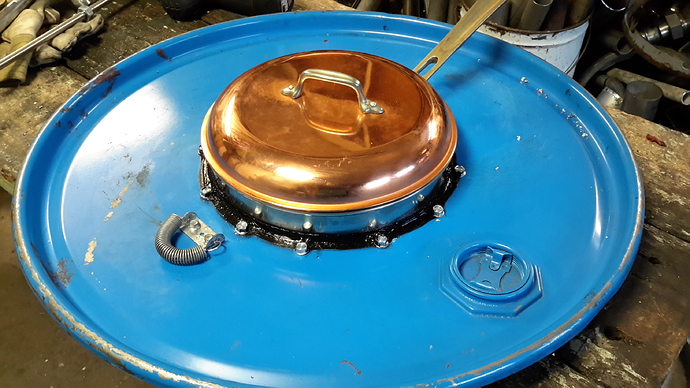
TomC’s questionnaire! I’ll hold my questions until others have a chance. Very impressive construction so far. I believe this is the first build I have seen with a true ''moderator ‘’. What is the hopper made out of? It looks like the lid is held on with a lock like we are using on 55 gal. drums. A little info on what you used for the hopper filling lid. A picture of the inside of the hopper would maybe clarity how a ''moderator ‘’ works. TomC
A thing of beauty JO. Appears to be SS? What happens to the condensation from the hopper? I didn’t see how the condensation drains out.
A very nice compact setup.
Right, my thinking is to use only the lower five nozzles at low demand to prevent constipation. At open road speeds I’ll open the inlet to the additional upper ten nozzles. I’ve found with the Rabbit, running hard for longer periods of time, I’m not producing enough char.
Yes it is, but not welded. The bearing part is the actual lose fit restriction. I use about the same, only smaller, in the Rabbit gasifier and it has worked well. It’s great termal mass for idling purpose.
It’s an old ss wood heated wash bin. I cut the bottom out and bolted it on today. I haven’t yet made funnel and inner silo. I’ll take a pic of the inside before I do.
It is a 55 gal. drum lid and lock ring. It actually fitted right on, only I had to add the upper flange from a drum to get the right spacing.
I used an ss frying pan. It happened to have a copper lid. Pic below.
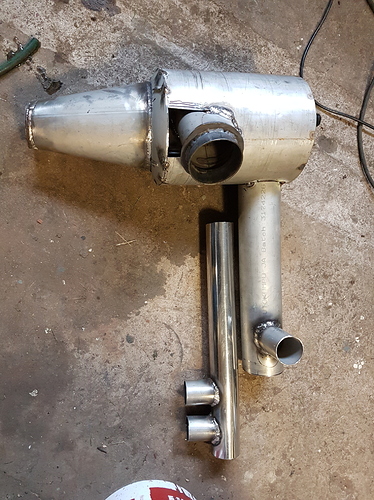
If you look at the pic no 5 above you can see the drain right in front of the cyclone heatex. I will be using a plastic container right on top of the wheel well. I need to be able to bring it indoors for tar draining during the winter months.
Very nice work JO 
Thank you, Wayne! Means a lot, coming from the Master 
Agreed, excellent work Jo. Given the quality of your building and the careful calculations behind it, I am very optimistic about the dual air inlet approach and your over all design. Looking forward to progress reports.
I hear you about the early winter, it fell 2 weeks early here, left me unprepared on a few important projects. Working dayshift in mid winter leaves little opportunity for outside work.
Regarding no cutting or welding in your shop, that’s understandable. I take risks, watch where the sparks fly, and use a welding screen and welding blankets / tarps to cover sensitive things, otherwise very little would ever be done from November to April.
My biggest issue with welding grinding and cutting in an airtight space is the mess, welding smoke and dust get in everything and condense on the walls and ceiling. I have installed an air filtration unit, and next want to make a heat recovery ventilator. For clean up I wait for a breezy day, open up the big doors and entrance door, and loft the dust with a leaf blower. It’s so fine that it heads elsewhere. Far better than vacuuming or sweeping. The walls and ceiling benefit from a going over with a soft shop broom first. A little crude, but… 
Edit: - I wear a high quality half mask with filters rated for lead and radioactive particles while doing the work and the dusting, otherwise a road to an early grave…
Thanks JO.
Can you give us a picture of inside the hopper? I want to know what separates the water from the wood.
Bill, I don’t envy you (Well, I do but for other reasons). I did my 70X22 ft building 10 years ago and I finished the roof last week before Christmas too. It was a constant battle against the weather gods.
I haven’t installed funnel/inner silo and gutter yet. I’ll take pictures when I do.
Garry,
Working outside is quite ok once you have all your clothes on and you can stay put. It’s the going in and out that is problematic. Dragging snow inside the shop, electric cords outside in the snow, clothes off and on again, open and close the door as fast as possible carrying equipment and so on. You know the drill.
But I wouldn’t dare grinding and welding inside since I have my saw and planer there. One spark would be enough.
I see. The condensation will drip down the walls of the hopper and the funnel will allow the water to continue to drip as it funnels the wood towards the firetube?
I think I will make the funnel and inner silo in one piece, just like in the Rabbit hopper. Only problem is the shape of this hopper. The lower part is rounded and forces water dangerously close to the gasifier housing. I’ll mount the gutter to keep the water as far as possible to the sides and still being able to reach the drain . I hope that will be enough.
You culd allso smeare the gutter with silicone, shuld work as a insulation between the hot metal and water.
I´ve heard silicone swell and make a mess if used in that area. Maybe Carl? I don´t rmember.
Oh! Had no idea. Worked ok on my alubox gutter… well, the silicone, not the gutter 
I think with that vast hopper you shuld collect loads of water anyway.
How do you plan to make the gutter anyway?
Well, I´ll start with just a rubber seal pressed down with a metal ring for a devider. Should keep the water away from the center, but if that will be far away enough from the heat, that´s the question.
