This really sums up my experience with building charcoal kilns - they rarely work right the first time, and modifications keep making it more and more complex. They are hard to make completely smoke free without adding blower fans, which is not an insurmountable problem, but annoying. Also, any mild steel surface that gets even to a dull red heat is going to buckle and/or oxidize away sooner than you would like. The only real advantage to a kiln vs a controlled open burn is that the charcoal comes out much harder, in larger pieces, and without all the dust and ash. For BBQ grade char, I think a kiln is the right way to go. I think Kristijans idea of a consumable firebox inside the main drum is smart - (the chimney will likely also be consumed). I suspect there is a magic ratio of heated surface area to wood volume, and this first design came up a little short. My experience has also been that small pieces of wood will char much faster and more thoroughly; best is probably to keep the thickness of the pieces to 7-10cm max. Looking forward to seeing what you come up with!
Hello Steiner , nice looking rig you have built , if i can mention something that happened to one of the retorts i built using pipe work to send the gasses down to burn off .
I noticed that i had very little gasses coming out of the pipe underneath my retort , and what i found to be the problem was tar , if you dont get enough heat into the retort very quickly the pipes that carry the volatiles that are on the outside and uninsulated get gummed up with tar very quickly and can lead to blockages , maybe try checking your nozle pipe work is not gummed up and maybe even put a layer of insulation of the distributar and pipe work
I like this design. Good exposure to heat all around. The site details the materials and dimensions.
This one is on the same track, but trailer-able. I think the biggest bang for the buck is to use removable lid barrels to contain the wood as a disposable/ replaceable item.

If a barrel handling system is used, one barrel could be taken out and changed for another while the system is still hot. Or if 2 sided one side could be charged half way through to utilize the excess heat better.
Ideal barrel handling:

I built this system it works very well. Just don’t connect both wheels on a solid axle it makes it hard to turn but it still works.
Hey Guys what I like about both of these systems is portable taking it to the woods inputs sources. And up on wheels easy to show NO ground contaminations left around.
The heats and tars/soots staining show that these have been much use-proven.
Unfortunately. Not completely visible emissions free. To the Greens even visible water vapor steam is a man-activity pollutant to “their” Gaja.
I am not complaining. I am just saying for many of us even technically Rural, great portions of the year due to Wildfire Seasonal Shut Downs we must always be visible emissions free.
For me I could still use one of these q.t. in the ground mists rainy days. Ha! Ha! 'Bout 100 days a year here of those.
Regards
Steve Unruh
I just stumbled on this video, had not seen it before, 827 views and low subscribers. Interesting retort design!

I wonder how much all that stainless steel cost… that is like the Cadillac of charcoal retorts! The Hookway design is clever, and once it gets up to temperature they do run very clean. I feel like they smoke a bit when they start, but didnt Bruce build one with a blower fan that was smokeless? At some point I am going to run out of charcoal for my grill, and need to make another retort - but I think this would be out of my price range 
Here is the page from the James Hookway website, where he will build a retort for you. There are some dimensional details. There is no price, but an email address. You know the old saying: “If you have to ask…”  Note that plans are also on offer at the website, and some YouTube links.
https://hookwayretort.co.uk/shop/retort-builds/hookway-retort/
Hey CarlOr,
James Hookway caught my attention back about 2010.
I corresponded with him then. His first system were hand-tools built from band top carbon steel barrels.
I have his 1st plan-set published book version of these.
Would you like my copy? PM me a mailing address and I’ll send it to you.
This latest video shows pretty much the same internal lay out and firing techniques.
The video is much more developed in the chimney section. Probably to quicker up draft super heat. And within the chimney pipe secondary smoke burning for least visible.
Regards
Steve Unruh
I made some biochar for the garden with some punky wood I needed to get rid of yesterday.

Don; How thick is the metal in that concrete spreader you are using to make charcoal? I am wondering if an old combine hopper would work and how long it would last. TomC
Tom, I don’ know the gauge but it is about a sixteenth of an inch. I think a grain bin would work.
My Hookeway design styled retort was made from a 44 gal drum with insulation around the outside secured with a metal cover and a 6 inch stove pipe vertical from top to bottom, with slots around the bottom part of the stove pipe to allow gassing from the bottom of the drum , i then sit the whole barrel over a small fire pit and light , once the gassing stops i lay it on the side and block of the stove pipe both ends and leave to cool , i can convert a whole barrel of dry wood in less than 2 hours with only a small amount of scrap wood to start it off , and using a mild steel drum its light enough to move around for me , lasted nearly 2 years sat out side in all weathers . does look a little worse for wear though right now ! lol
Dave & Brian,
Do you have any photos of your set-up? Sounds simple. I like simple.
I will grab a few photo’s when i go over to the yard in the next few days . but yes it is simple , just a straight stove pipe and no bends going from top to bottom of the drum with some insulation on the outside , sat over a fire pit and then filled to the top with wood , place the lid on and lay some more insulation on the lid and light , as it so light when finished its easy to lay on its side to block off the stove pipe both ends with some insulation . shovel out into another drum when cooler or leave till next day before emptying it .
here you go Steve , i did say it was simple didnt i, note the lovely rust effect of 2 years of burns and rainy days

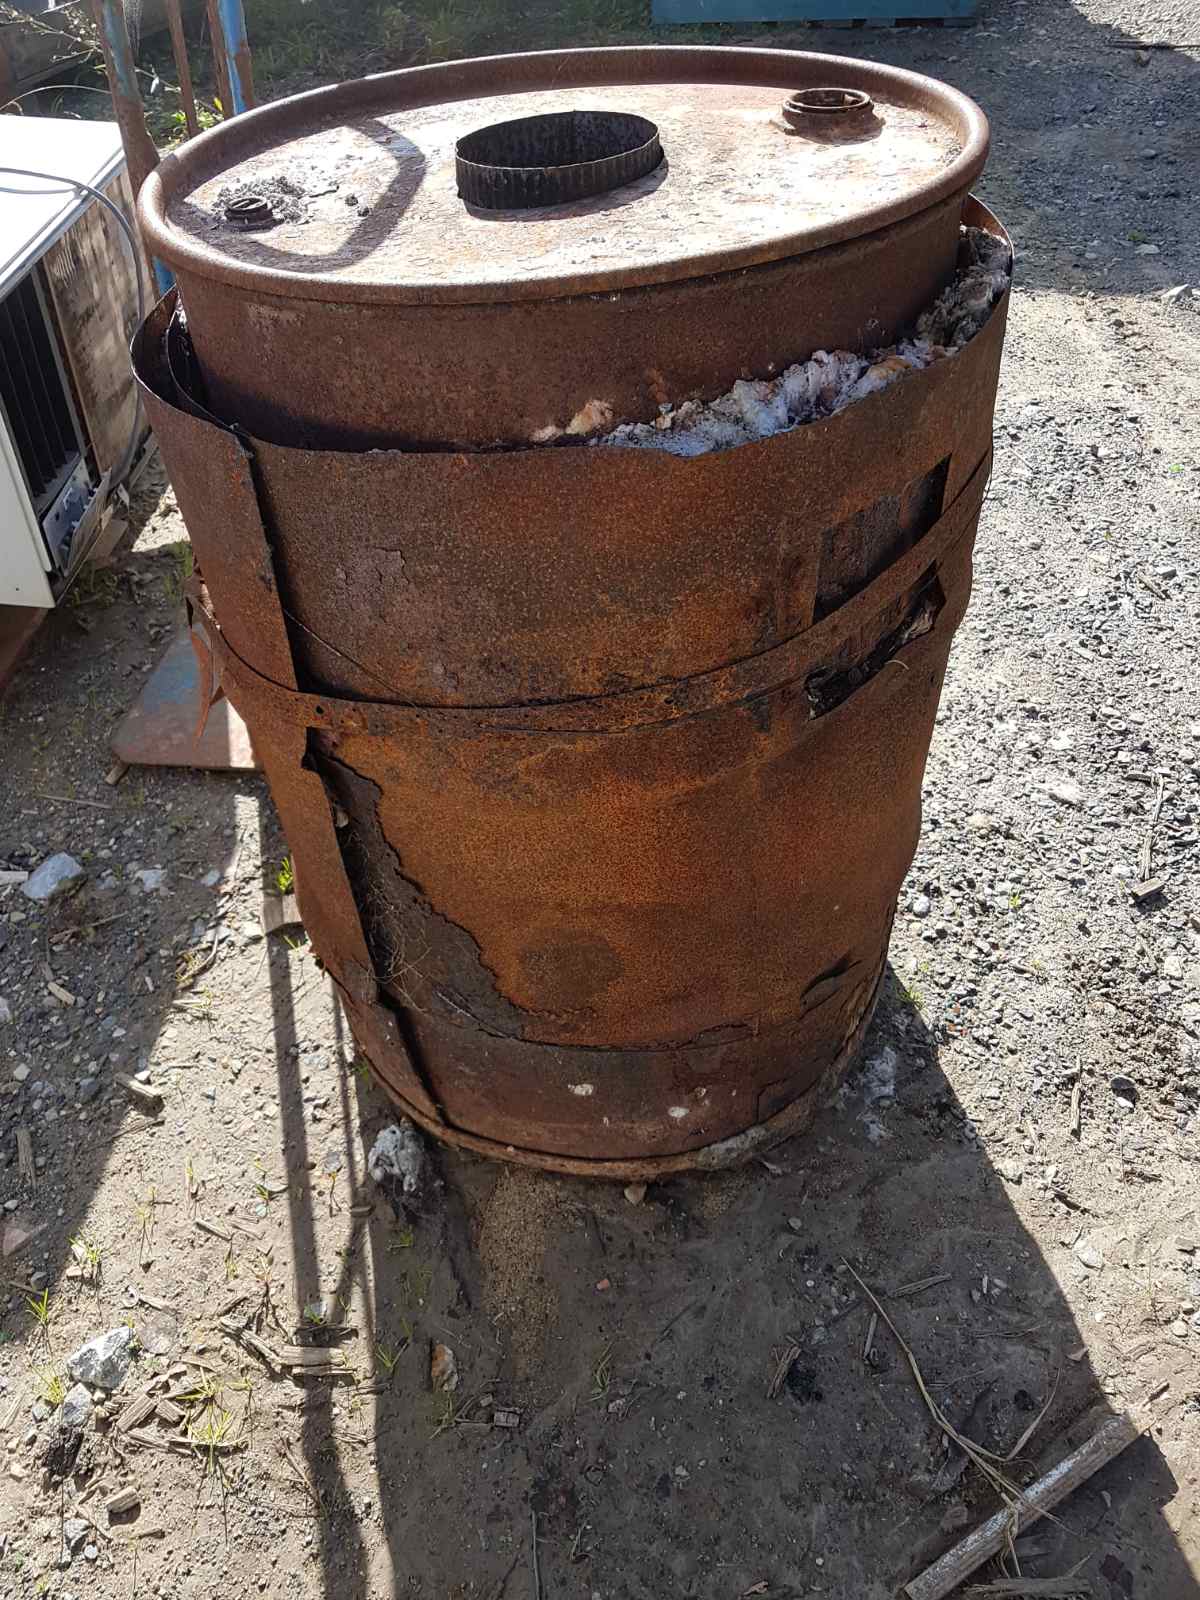

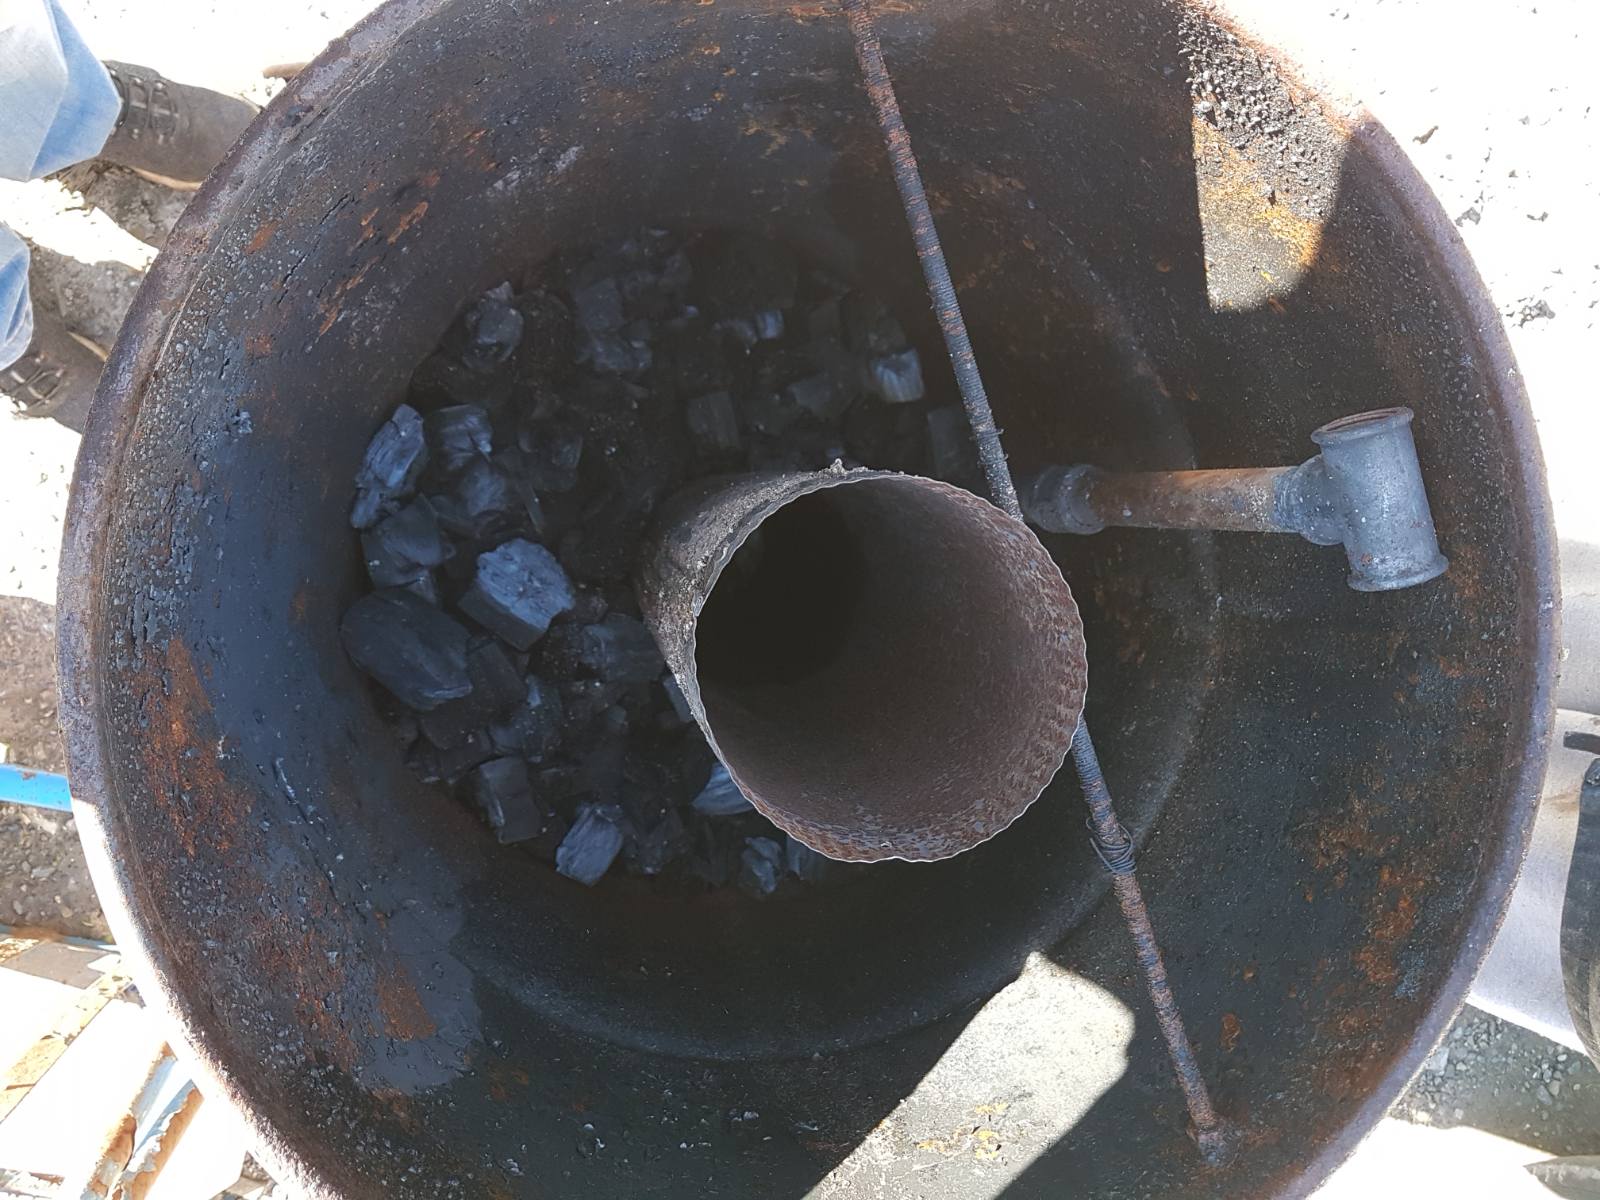
I forgot to mention i welded the stove pipe against some all thread just to keep the pipe centered while filling it so it lines up with the hole in the lid , i also used a 1 inch pipe to help more gas escape out the bottom should ever the slots in the bottom of pipe got blocked up .
Dave & Brian,
Thanks for the photos and further description. Can you describe in more detail how the stove pipe is integrated into the bottom and what do you use for insulation? It would be great to see a video of your process, if you can make one the next time you are doing charcoal.
Steve , 6 inch stove pipe has a crimped end allowing it to slide into the next section of pipe and a smooth end with a bead around it on the other end , so if the hole in the bottom of the drum is a little under size for the 6 inch pipe it will squeeze into the hole with a tight fit and the bead will stop it from sliding all the way through so allowing only a inch of pipe protruding out the bottom , its not even welded in place down there just a snug fit works good enough , the hole on the top lid is a little over size as the pipe is crimped that end and so i just fill in the gap with some rockwool insulation same as what was wrapped around the drum , but 2 years outside the rockwool around the top of the drum has fallen away , but i just cover with some lose material when its burning and take it off before i tip the drum over to empty it .
Hope you can picture what i am trying to describe , if i get a chance one weekend i will try and upload a short video to show you .
Dave & Brian,
Your description is good enough. It would be nice to see your operating procedure sometime, if you get a chance to make a video when you make charcoal again.
I like your design Don. A couple of years ago i just used a 55 gallon drum and just kept feeding brush in it. Much easier