Not to be putting anyone down but there is a reason Mr. teslonian has comments turned off. He is highly criticized for putting on a show in the simplest ways, and many have discovered this. I assure you, his gasifier is a tar making machine. Does it make gas? Yes, but not clean gas. It does not get to the correct temps, the grate drops out way to large of pieces and it will only run for very short periods of time. No condensing hopper means wet gas means colder char means bad gas. The very best systems take a few minutes to produce clean gas that is tar free, and his videos are heavily edited to make things appear to be almost instant. Around here though, we have members that actually daily drive on woodgas and have for many many years, millions of miles collectively. Proven designs here, not youtube gimmicks. and i also assure you there is not one person here on this forum that wants to see you fail, we want to see you succeed! here is a video of mine from light up to start in real time.
even here you see a few moments waiting for temps to rise up to make clean runnable gas. temperature means everything in a gasifier, without correct temps you have nothing but a wood burning tar maker. to big of wood, to cold of char, to wet of wood, to loose of char bed, to big of holes in grate, all will lead to taring the gas and cause major problems
On your thoughts about oxygen, let me just throw up this video. Not the purpose of why i took the video, but when I open up the hopper you can HEAR the engine start to idle down, this is a direct result of to much oxygen getting down into the hopper and passing through the char bed, leaning out the fuel air mixture at the motor. To add to that, you will see I stand back and wait for the hopper to breath dragons breath out, this is because the hopper was full of woodgas and as soon as oxygen gets in there it will combust and flair off that hopper gasses out the top of the barrel. We call this puff the magic dragon, and its a good way to loose arm and facial hair. It does not always happen, but its a “feel” thing. Nn my truck I can tell by the color and density of the smoke that comes out when I open up the hopper if it will breath fire or not. Then when I place the hopper lid back on after refueling and no extra oxygen can get into the hopper in a few short moments the idle starts to come back up as that oxygen has now been depleted and the fuel air mixture up at the motor comes back to normal
Good Morning DerrickD.
Don’t be too hard on yourself. There is actually some credible work being done by some of the only youtube presenters. The problem is you’d have to actually know and be good at woodgas for engines to know how to sort them out. We did a bit. Read here:
Only two of these would have the life span to work annually for a real households needs. 2-4 hours morning. 2-4 hour evening. 365 days of the year. 1460 to 2920 working hours a year.
And made up and proofed as a needs must ice-storm/hurricane/forced brown outs back-up’s: woogasifers “rest” poorly. Anything moving rusts up, will be movements frozen. Thin metals rust thru. Woodgas is corrosive.
Here on the DOW we have a woodgas introductory-needs summery here:
Mine only seems overly simplistic.
You can cut up your wood fuel any which way and you will still just be making tars-smoke. A meats smoker.
My advice was getting you that glowing HOT char bed from the get-go. Without a charbed hot and glowing you will never have a gasifier converter. TOO much air, uncontrolled, and you just are making a charcoal burning heater.
Read. View. Compare to your actual experiences so far and learn.
Regards
Steve Unruh
Thanks for the videos that everyone is sharing and all the comments. Its a lot to take in, but I have been watching them all, admire those of you guys that have gotten this thing working right and really do appreciate it. Part of the reason I am needing a good education is possibly because of some of the “bad” education and misconceptions that I have already been exposed to.
Case in point, as I mentioned at the very beginning I was first introduced to the concept of gasification on an episode of “Mountain Men” on A&E several years ago. In one particular episode Eustace, the guy with the gasifier truck, runs out of fuel on the side of the road and gathers up some sticks and twigs and whatever “junk” he can burn, and away he goes - now I realize from all of your comments this was probably not realistic and just made for TV, but it left me with the impression back then that gasification was like “Mr. Fusion” on the “Back To The Future” Time machine Delorean where you could throw any junk in and get power out - clearly not the case.
And yes, I noticed that too, about Mr Teslonian not being available to be reached via commentary, which does reflect poorly on him. I wish I had found you guys before I found some of those you tube videos that I watched, I have learned more just in the past few days since joining this forum and I am very grateful for it.
The good news is, any rework on my shaker grate is minor and is probably the easiest to rebuild and any major modification won’t be the end of the world either. I purposefully made my gasifier very modular knowing that I might not get it right on the first try and even if I have to do a major rework of my reactor or reduction zone or whatever, it is all removable easily out of the top of the drum and I can go back to the chalk board if I need to at some point. Like I said, I will experiment with my fuel a little more this weekend first to see if I can get a better char bed. I might even buy a bag of pellets to play with since I don’t have any real good small chunks of wood processed yet. I do have a wood chipper, but I wonder if that would be too small for fuel? As soon as I have any success you guys will be the first to know!
Wayne you had asked whereabouts am I, I’m in middle Tennessee about an hour west of Nashville, if any of y’all is near by I would love to come check out your rig and take a ride along!
You can also add a central nozzle like Steve mentioned.
What was the diameter of your reduction zone, and the diameter of your restriction/choke zone?
Or is it like a FEMA and combines the reduction and restriction.
If your reduction is a decent size, 6" or bigger in diameter, you can run a variety of engines depending on what size restriction/choke you go for. Just take a piece of 1/4" or thicker steel plate that will sit over the reduction tube and weld a lip around the center hole so it can collect ash to insulate the bottom.
If you wanted to power a 2 liter engine for example you could use a 3" hole.
For the central nozzle I’d go at least with 1.25" steel pipe or bigger. Cap the end with either a pipe cap or weld it shut, and drill a ring of holes in the pipe. Depending on the engine you want to power would depend on the jet size, same for how far away from the choke/restriction the nozzle needs to be.
The central nozzle can be inside the hopper area, don’t make it any more complicated than it needs to be. I believe one guy welded a central nozzle to his lid but I’d want it independent of the hopper lid.
Hi Cody, it started out based on the FEMA model, but then I kind of went all Frankenstein’s monster on it and didn’t stick exactly to the FEMA plan, but kind of went with some of what I had on hand and wonder if my reduction zone and choke area might not be sufficient.
SO basically the hopper is an old air tank 12” in diameter, then I reduce it down to 10” in diameter by about a 4 inch depth, then it gets reduced further at the bottom of the 4 inch drop down to a choke of a 6” diameter by about 2 1/2 inches deep - so the final opening is a full 6 inches and the shaker grate is about maybe 3/4 of an inch below that.
So maybe I built the choke point way too big? Also another variable I have been wondering is if I should add some insulation around the reduction zone in the form of some hydraulic cement to make a hotter burn - what do yall think?
One other question I though of based on what Wayne had said above - we were talking about a “low oxygen” environment, which I think I misunderstood by thinking that the burn had to be somewhat oxygen deprived. I have run a wood stove to heat my house for years and to my understanding this was like a “damper” but from what Wayne said, am I to understand correctly that a low oxygen environment is achieved not by depriving oxygen but that the hot char bed acts as sort of an “oxygen filter” burning up the oxygen but letting the syngas pass by it - am I understanding that correctly?
Nothing wrong with building with what you have on hand. Most of us here are building with whatever we have available. Some of my build was laying around other parts came from scrap yard… but nothing was purchased new.
You are correct that ur char bed is deep enough that as the oxygen passes through it, it will be burned up. Leaving only syngas to pass through to your heat exchanger. That is were you my run ito issues if char bed is to lose or to dence(constipated) if O2 makes it threw the charbed you then have a volatile mix were you dont want it.
I think the gasifier reduction zone is too big for that engine, you have to size them appropriately for the engine draw, and wood itself is hard to get running on small especially single cylinder engines because the draw is only 1/4th of the time.
For that size engine, you will be much better served with a charcoal gasifier. What you have with consistently sized fuel may actually work a larger engine. I wouldn’t scrap it just yet. There is a whole section on this site for making, cutting/crushing, and sizing char. Which for the most part isn’t a huge financial investment and breaking up char is easy. But don’t breathe the char dust, and be careful with it, it ignites easily. (and keep it dry and sealed. it soaks up water/humidity easily.
Also remember that the generator is not going to produce nameplate power because the energy density of wood gas or char gas is significantly less then gasoline. It just isn’t going to happen. Until the whole process gets fine tuned it may not run smoothly, which is still okay for filling up a battery bank and several other applications. It can take some fidgeting to get it all working right.
Ha! Ha! NO Cody I was not recommending a center down air jet. But a simplified “Mako”. Air in tube at the edge going down to a peripheral jets inward distribution ring.
My prejudice. I do not like the problems a down center air nozzle introduces.
But DerrickD, these have been, and can be made to work.
The youtuber doing the most detailed work with this is Flash001USA.
I really, really like this guy personally. He lives Rural. He foods gardens now.
He does youtube communicate and encourage others to build woodgas-for-home-power back up.
He has 31 woodgas videos up about his 6 years development journey 2012-2018.
Here is his last put up in Apr.7, 2018
We don’t want you taking years to get to this capabilty.
S.U.
Insulating around the whole reactor is a win Derrick. The more heat, short of metal melting temps, the better. I think you meant refractory cement and that is fine for a stationary unit. I have used it as well, but the weight would be an issue if you wanted to use it for a vehicle. Ceramic fiber blanket would be a better choice. I wouldn’'t want you to slow down your fabricating, but so much information on all these topics is available on the site it’s almost mind boggling. Use the spyglass thingy up on the top right corner and search out key words. Probably better ways but I’m not an adept with tech.
Good Morning DerrickD,
Now here’s the thing about Flash001USA . . .
he is 100% dedicated to small home woodgas back-up systems. Even though his main youtube channel doesn’t show any “new” woodgasing since 2018 he has not quit and disappeared. Still helping worthy fellows. He’s been actively commenting as late as 3 months ago.
Since 2016 he has hosted his own www.miniwoodgas.com site.
On that in his PDF downloads references he has a link up to a Netherlands download from 1979 that has lots of woodgas systems comparisons in it. Groeneveld79gas.pdf
In it on pages 173&174 it shows a single central downjet system into a narrowed waisted restriction. Expanding out reduction zone below. Below that a movable grate. Gas collected down in this lower section after dust settling.
Nearly exactly how Australian Kurt Johanneson (sp) built his decades earlier Dodge car system. KurtJ. used upright edged stacked shaped cut refractory bricks to line his and make these internal forms shapes. Smart, always very practical man. Just use wooden poker rods.
As I said to make real safe engine grade fully converted woodgas you will have to do some interior work.
S.U.
Well, I thought before I do my next fuel test I would pull the reactor out of the drum while its cool, because every time I do a test and it fails I have to wait a while before it cools down, so I figured I would pull it apart and post a few pictures so y’all can get a better idea of what my reduction and choke zones realistically look like because I have a stinking feeling that I will likely have to rework these.
You can also see the air inlet system that I tried to pipe in, so here’s the pics.
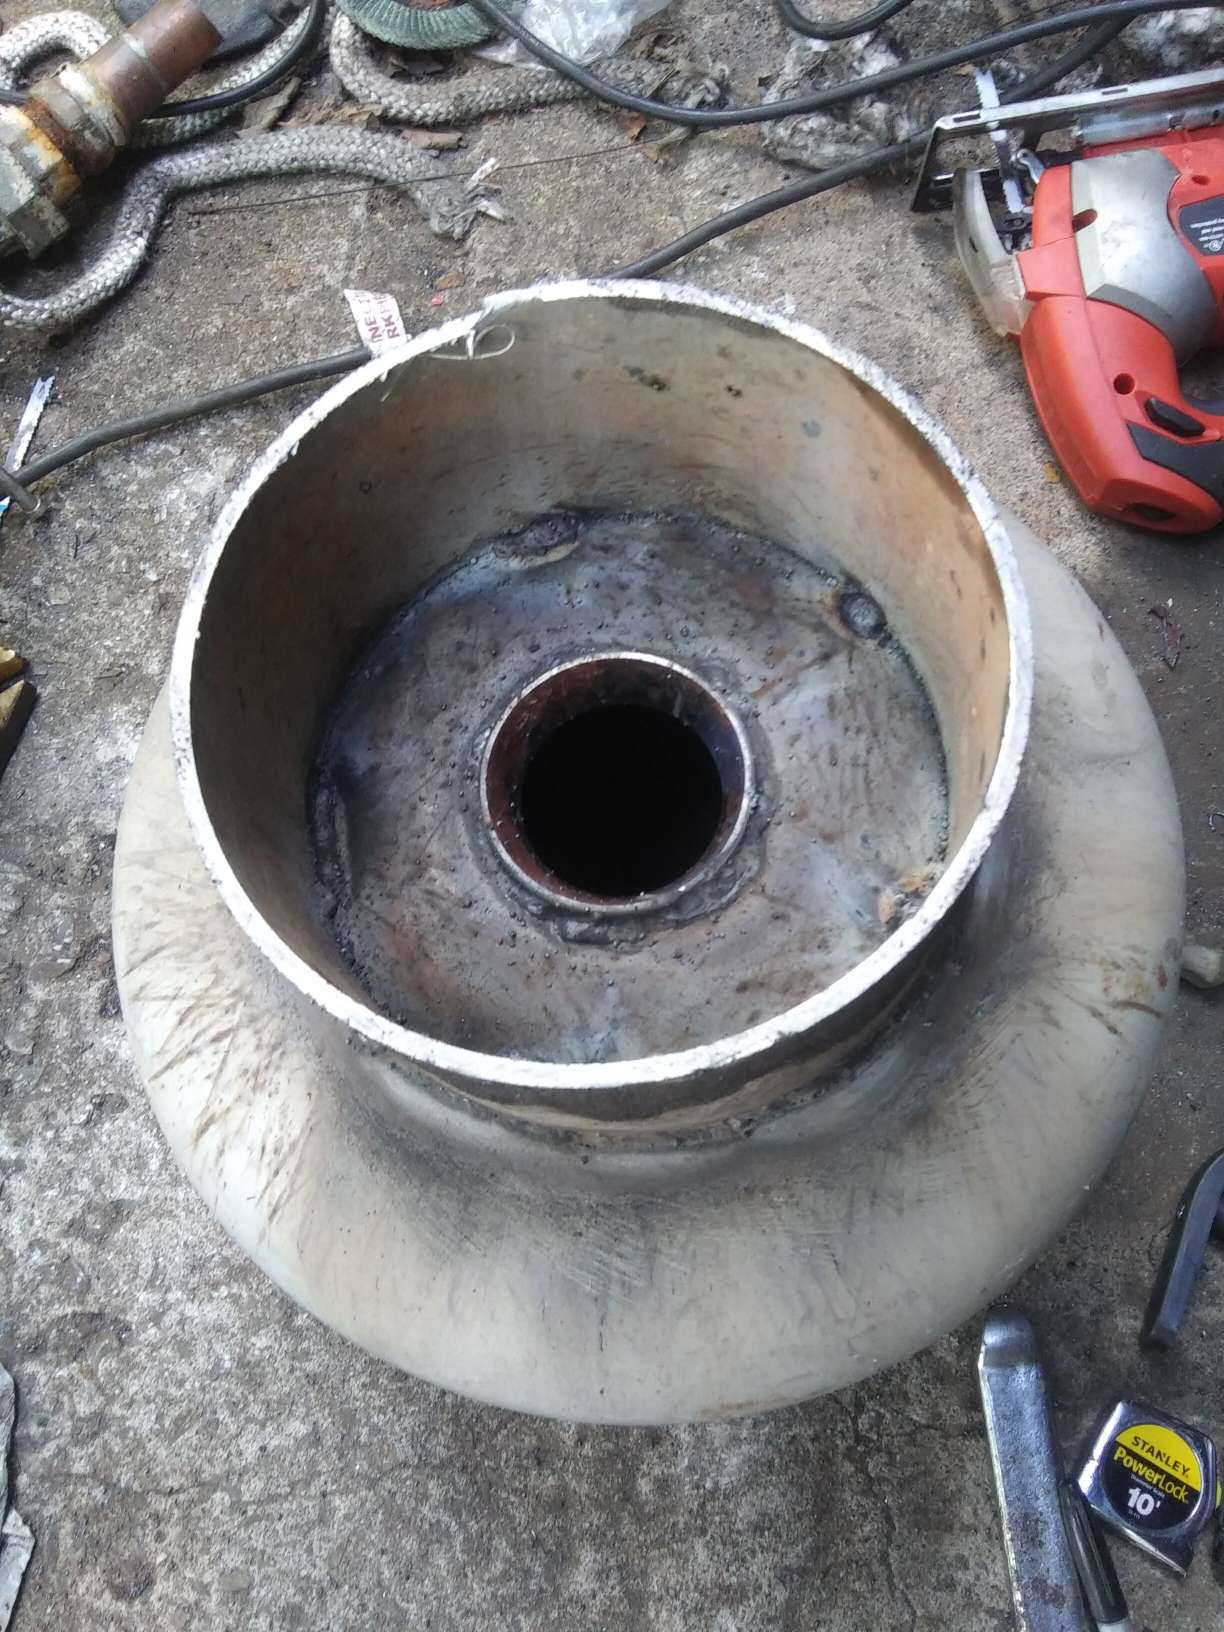
Here is the whole hopper/reactor - there is a 1” hole for my ignition tube to insert into. basically everything above the hole is 12” inside diameter (the hopper) everything below the hole is 10” diameter (reduction)
This shows you one of the two air inlet pipes to the reduction zone, they are equally spaced (there is one on the other side) and both “T” into the valve up on top that can be open or shut or partial open.
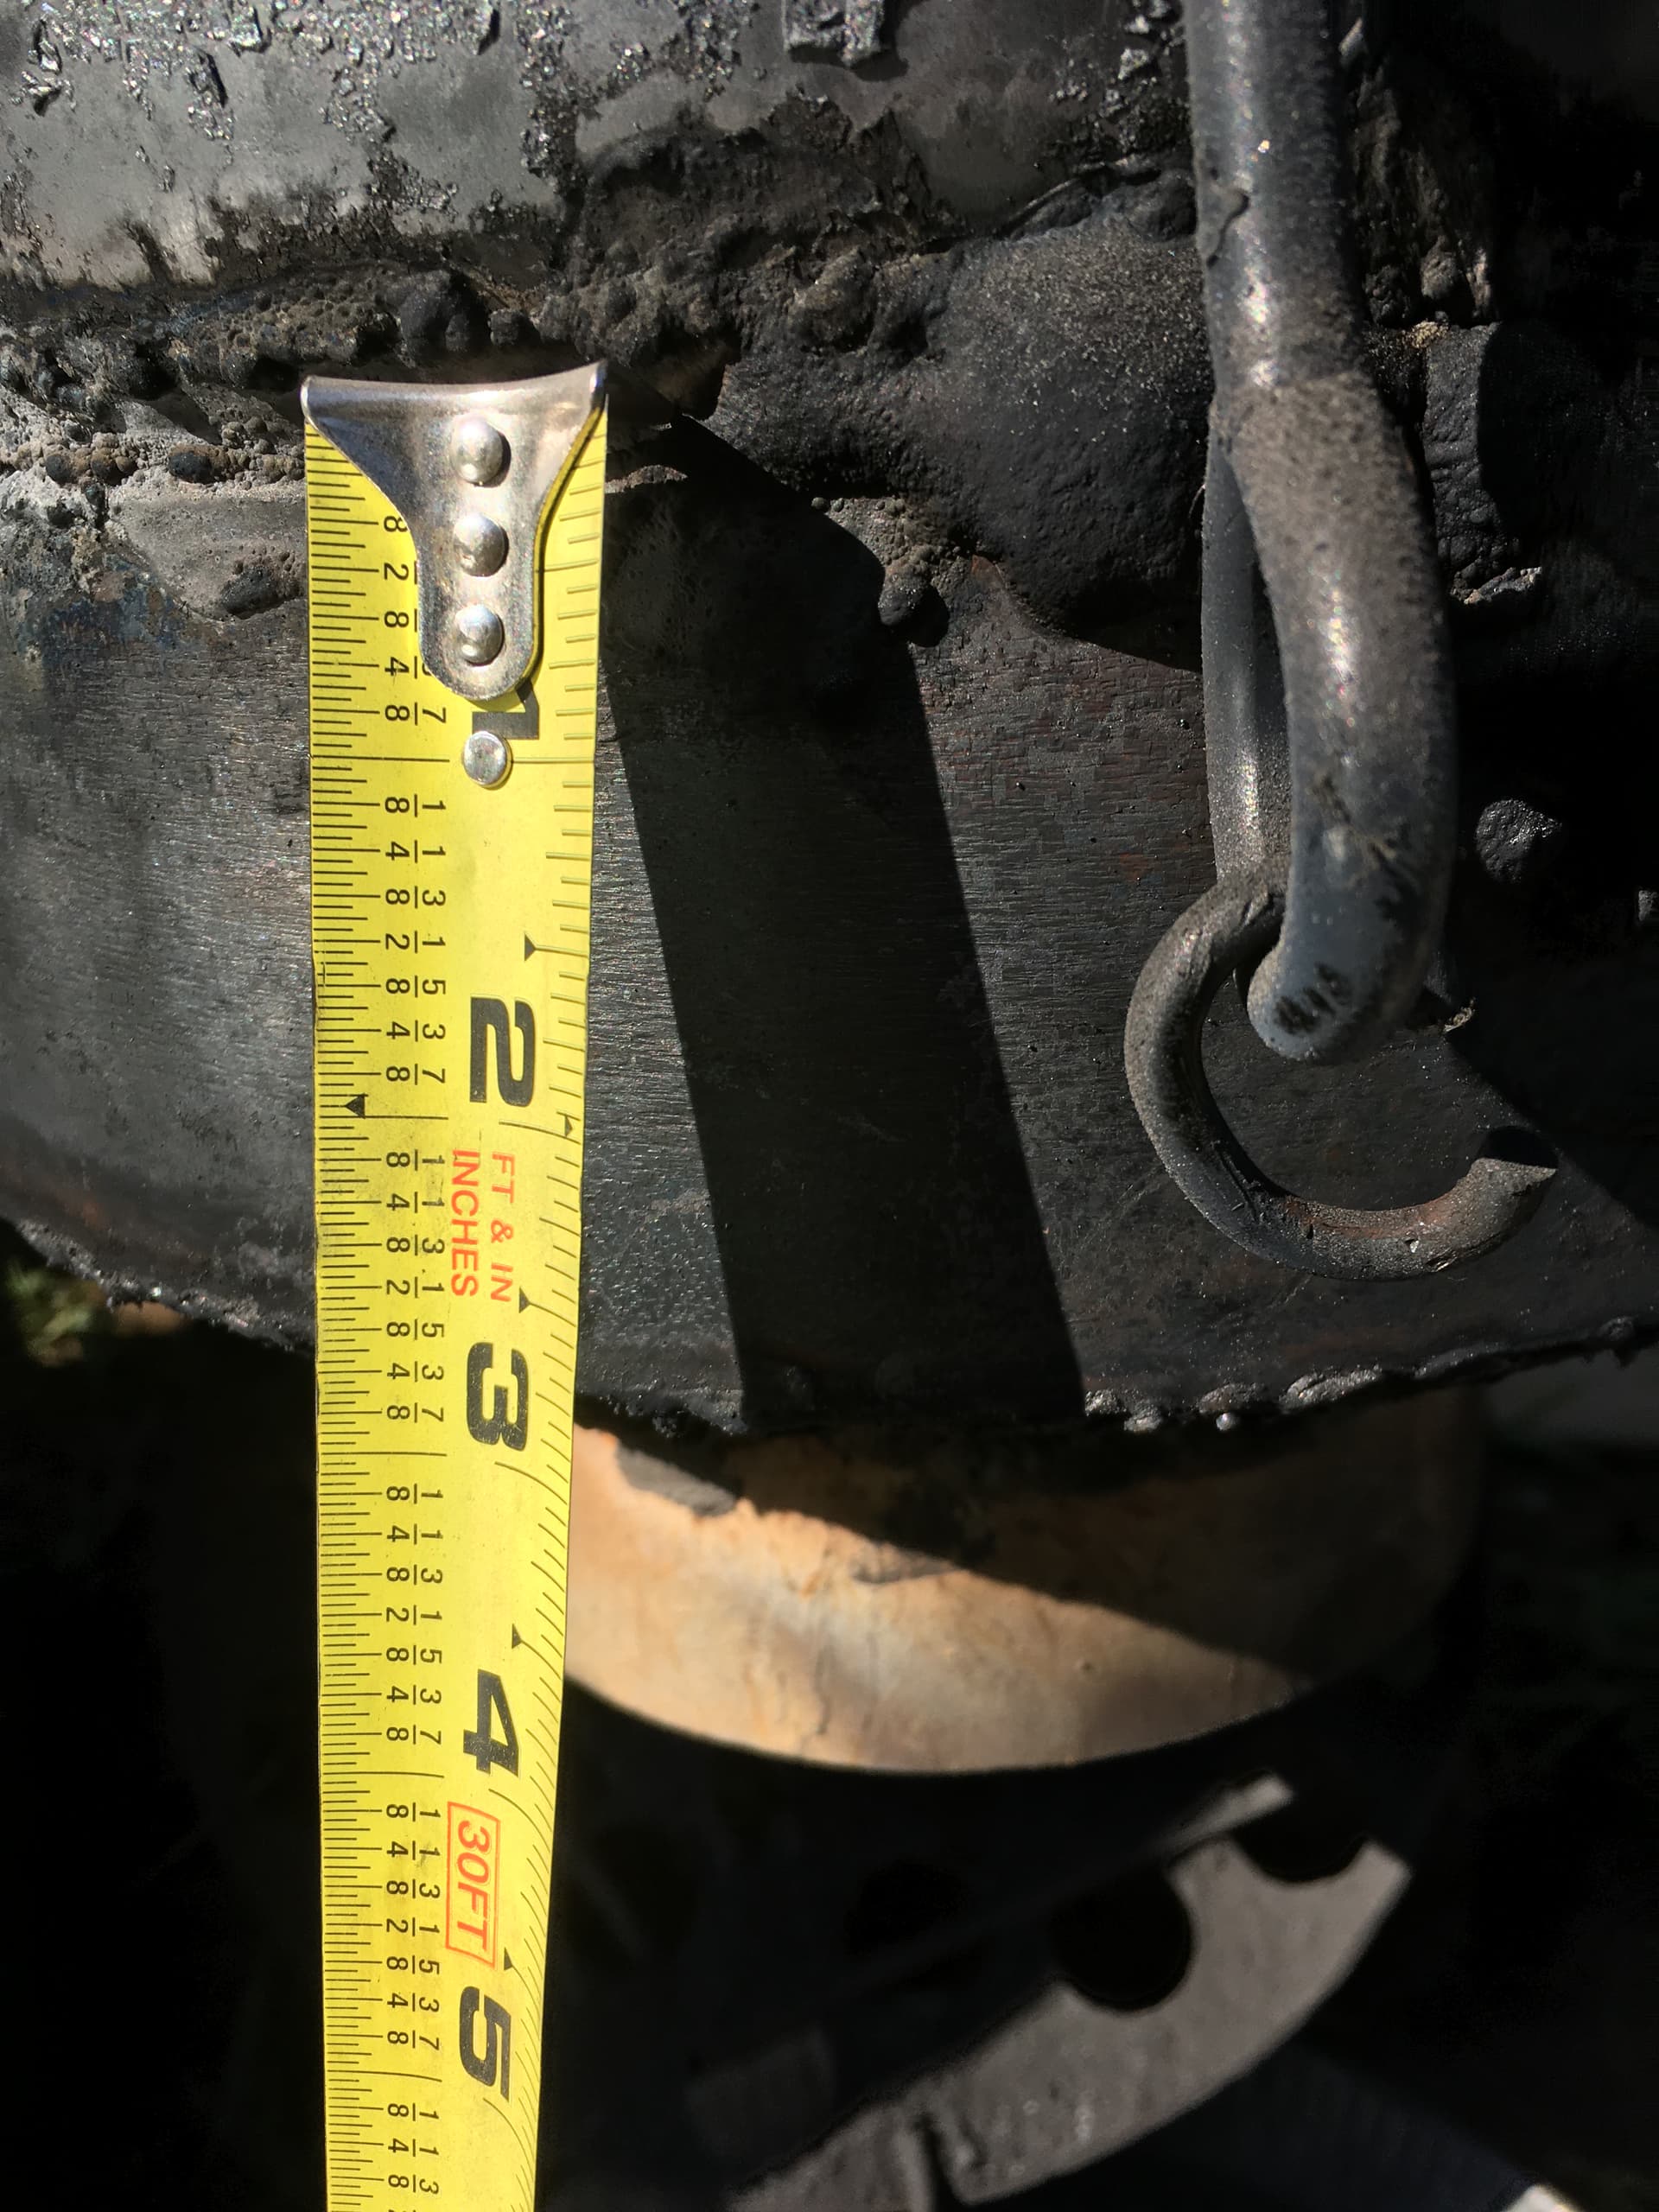
The next 4 pictures give dimensions to the reduction and choke zones
Basically the reduction zone is 3 inches deep (sorry I had said 4 before) by 10” diameter and then it reduces further and chokes to 2 1/2’ deep by 6” diameter opening.
I saved my char in the choke tube because I thought it would help me make a good starter for my next test.
I probably won’t be able to do any more on it for a few days because I have to go to Chattanooga later and then tomorrow it’s back to work, so I might do a little here and a little there, but my plan is I think to first of all rework my shaker grate after all the feedback I got about that, insulate around the choke tube and reduction zones. But I am really curious of your opinions - do you think I need a total rework of the reduction zone? I am wondering if my reduction zone is too small (not deep enough) and my choke area too big? I had always thought bigger was better in the sense that I could run a bigger engine off of it if I wanted too, but is it possible that it is too big? What do y’all think? Can this thing be reworked with minor modifications or do I need to totally redesign the reduction and choke zones?
That ignition tube hole is a big point of concern. It isn’t sealed up, so any oxygen in the hopper will mix with any gas made in the barrel. A gasifier has to be air tight to not allow any oxygen after the gas is produced.
Also depending on the engine you need a much tighter choke. I would make drop in plates from drum brakes or 1/4" thick plate steel. They will seal with ash.
You can add a series of nozzles to this gasifier with relative ease. Weld in to the burn tube at least 5, maybe 10, 1/2" pipe couplings, this way you can screw in pipe nipples for nozzles. If you want super simple you can run each nozzle out to the lid individually, or make an air jacket that goes around the circumference of the tank with one air hose that runs out, I’d use the lid so the hearth is still removable for maintenance. I don’t know what engine you want to run so I can’t give specifics to jet size and number of them.
Don’t worry about a lighting port, it just adds another avenue for air leaks.
Thanks, guys, that’s actually what I was thinking Cody, about the break rotor since I’m trying not to spend a fortune buying metal for this, I have a brake rotor that could be made to fit near perfectly and I could cut out the diameter of it to fit the 6” tube that I was using for choke. Should I have a larger (as in longer) zone for the choke length wise? That would be easy enough to achieve. Also it would be easy enough to narrow the final choke - I think was it you that suggested welding a 1/4” plate on the bottom with a lip for collecting ash?
As of right now I ultimately only have a 10 hp engine generator that I was going to try running on it, but I am thinking about getting a 20 hp generator since I know that syngas only produces about 60% hp and as a twist, if it all works, I was thinking of possibly plumbing in a “T” in the syngas output so that I can run both generators (around 30hp) if I wanted to. That was why I was building bigger in case I wanted to power more.
In my thinking if I built something big enough to power a truck, it could ultimately supply anything smaller as well, unless I am incorrect in my thinking. I understand a smaller engine has a less of a draw and less demand for the output of syngas, but at this point I haven’t even crossed the threshold of producing anything flammable at the torch which doesn’t even take into account engine size since I have blower going right? What size choke do you guys use that are building these things to power large engines? And so is what you’re saying is that if you pulled a gasifier off a truck that this size would not power a smaller engine? Sorry if my questions seem ignorant or confusing, but I’m learning from this thread how much I don’t know and I’m just trying to ask the right questions to help fill in the gaps for stuff that I thought I knew what I was doing, but obviously have gotten wrong along the way.
As for the ignition port, I can see what you are saying about that, I might be able to engineer something to keep it and make it more airtight since maybe some oxygen is sneaking past it, if not I can weld that hole back up and light it with a stick and a blowtorch like I have seen Wayne do in his video. But having that ignition port does make it much more convenient. If I do decide to keep it, do I even have it located correctly or should it be closer to the beginning of the choke zone - again sorry for all the stupid questions but this is the first opportunity I have had to get advice from anyone who actually knows what they are re talking about.
Edit to add about ignition - if I just got rid of the ignition port, how feasible is it to just evacuate any syngas out with the blower prior to ignition, open the ash clean out door and light the char in the shaker grate, close the airtight ash door and turn the blower back on?
Derrick, for the restriction plate you don’t have to weld it in. Just make it big enough so it will sit on top of the restriction that you already have in there. And yes add a lip around the center hole to promote ash buildup in the bottom. It will help seal the bottom and protect your welds.
Also as far as choke size for an engine, a 2 liter engine would prefer a 3 or 3.5" restriction, and it gets bigger incrementally as the engine gets bigger.
Don’t worry about your zone under it, most have shown it isn’t a big concern.
Edit: if you’re doing a cold start I don’t think there’d be any woodgas left. A hot restart you could just open the hopper lid and light from the top. Take a poker and make a hole down to the charcoal and use your torch or a rag soaked in kerosene to light the char. That’s if it’s been more than a good while and there aren’t any remaining embers. If you still have embers you can just restart with the blowers.
Thanks Wayne, good to know. Perhaps my project can be salvaged by just a couple of simple modifications/fixes. I’m glad I took these new pics so you guys could see what is going on. I didn’t realize that that ignition port hole could make that big of a difference. That actually might not be that difficult of a fix if I wanted to keep it, I was thinking I could always weld a union to the hole so I could connect my pipe up airtight. An the shaker grate is easy enough to rebuild - again, if anyone is wondering, that shaker grate came from bad ideas that I saw on Mr Teslonians builds on Youtube.
If I do decide to keep the ignition tube and rework it to be airtight is the location in relation to the reduction zone ok?
And I just saw Cody write in, thanks so much for the info, it will be easy enough for me to drop in that brake rotor and weld on a plate to the bottom of the 6” tube and cut a 3” hole to give less of an area for airflow. Wish I had more time today to tinker with it! I have to leave for Chattanooga in about an hour so I might not be back on here till tomorrow, but I as soon as I get some mods done to this I will check back in and let you know how the progress is coming and will post some more pics, and I will still be checking in to read your comments later tonight.
Okay so here’s a little one nozzle gasifier I built. It will run between a 300-700cc engine iirc. I used a bearing race as my Restriction. I hard welded mine in but you can make a plate with either a brake drum or a 1/4" plate.
The bearing race makes the lip for ash to collect, it’ll make a 60 degree ash cone and makes a self repairing insulation.
Here’s an upside down view, this is my Recovery/Reduction zone, I used a 6" pipe about 4 inches long, also welded into place. I was going by instructions given to me.
The Choke/Restriction forces all the syngas through that hole, where hopefully it is also passing through hot char and breaks down any nasty crap.
The Recovery/Reduction zone is a char reserve to further scrub the gas and is constantly replaced by the ongoing pyrolysis of the wood fuel.
This is one reason why fuel size is important depending on what engine you’re running, I couldn’t reliably use golf ball sized pieces of wood in this little guy, the Restriction is only 2 inches. I’d have to use Jenga blocks in a half size or even smaller.
Do you have an engine in mind that you’d like to power with the gasifier you’ve already made? Like a Genset or a truck?