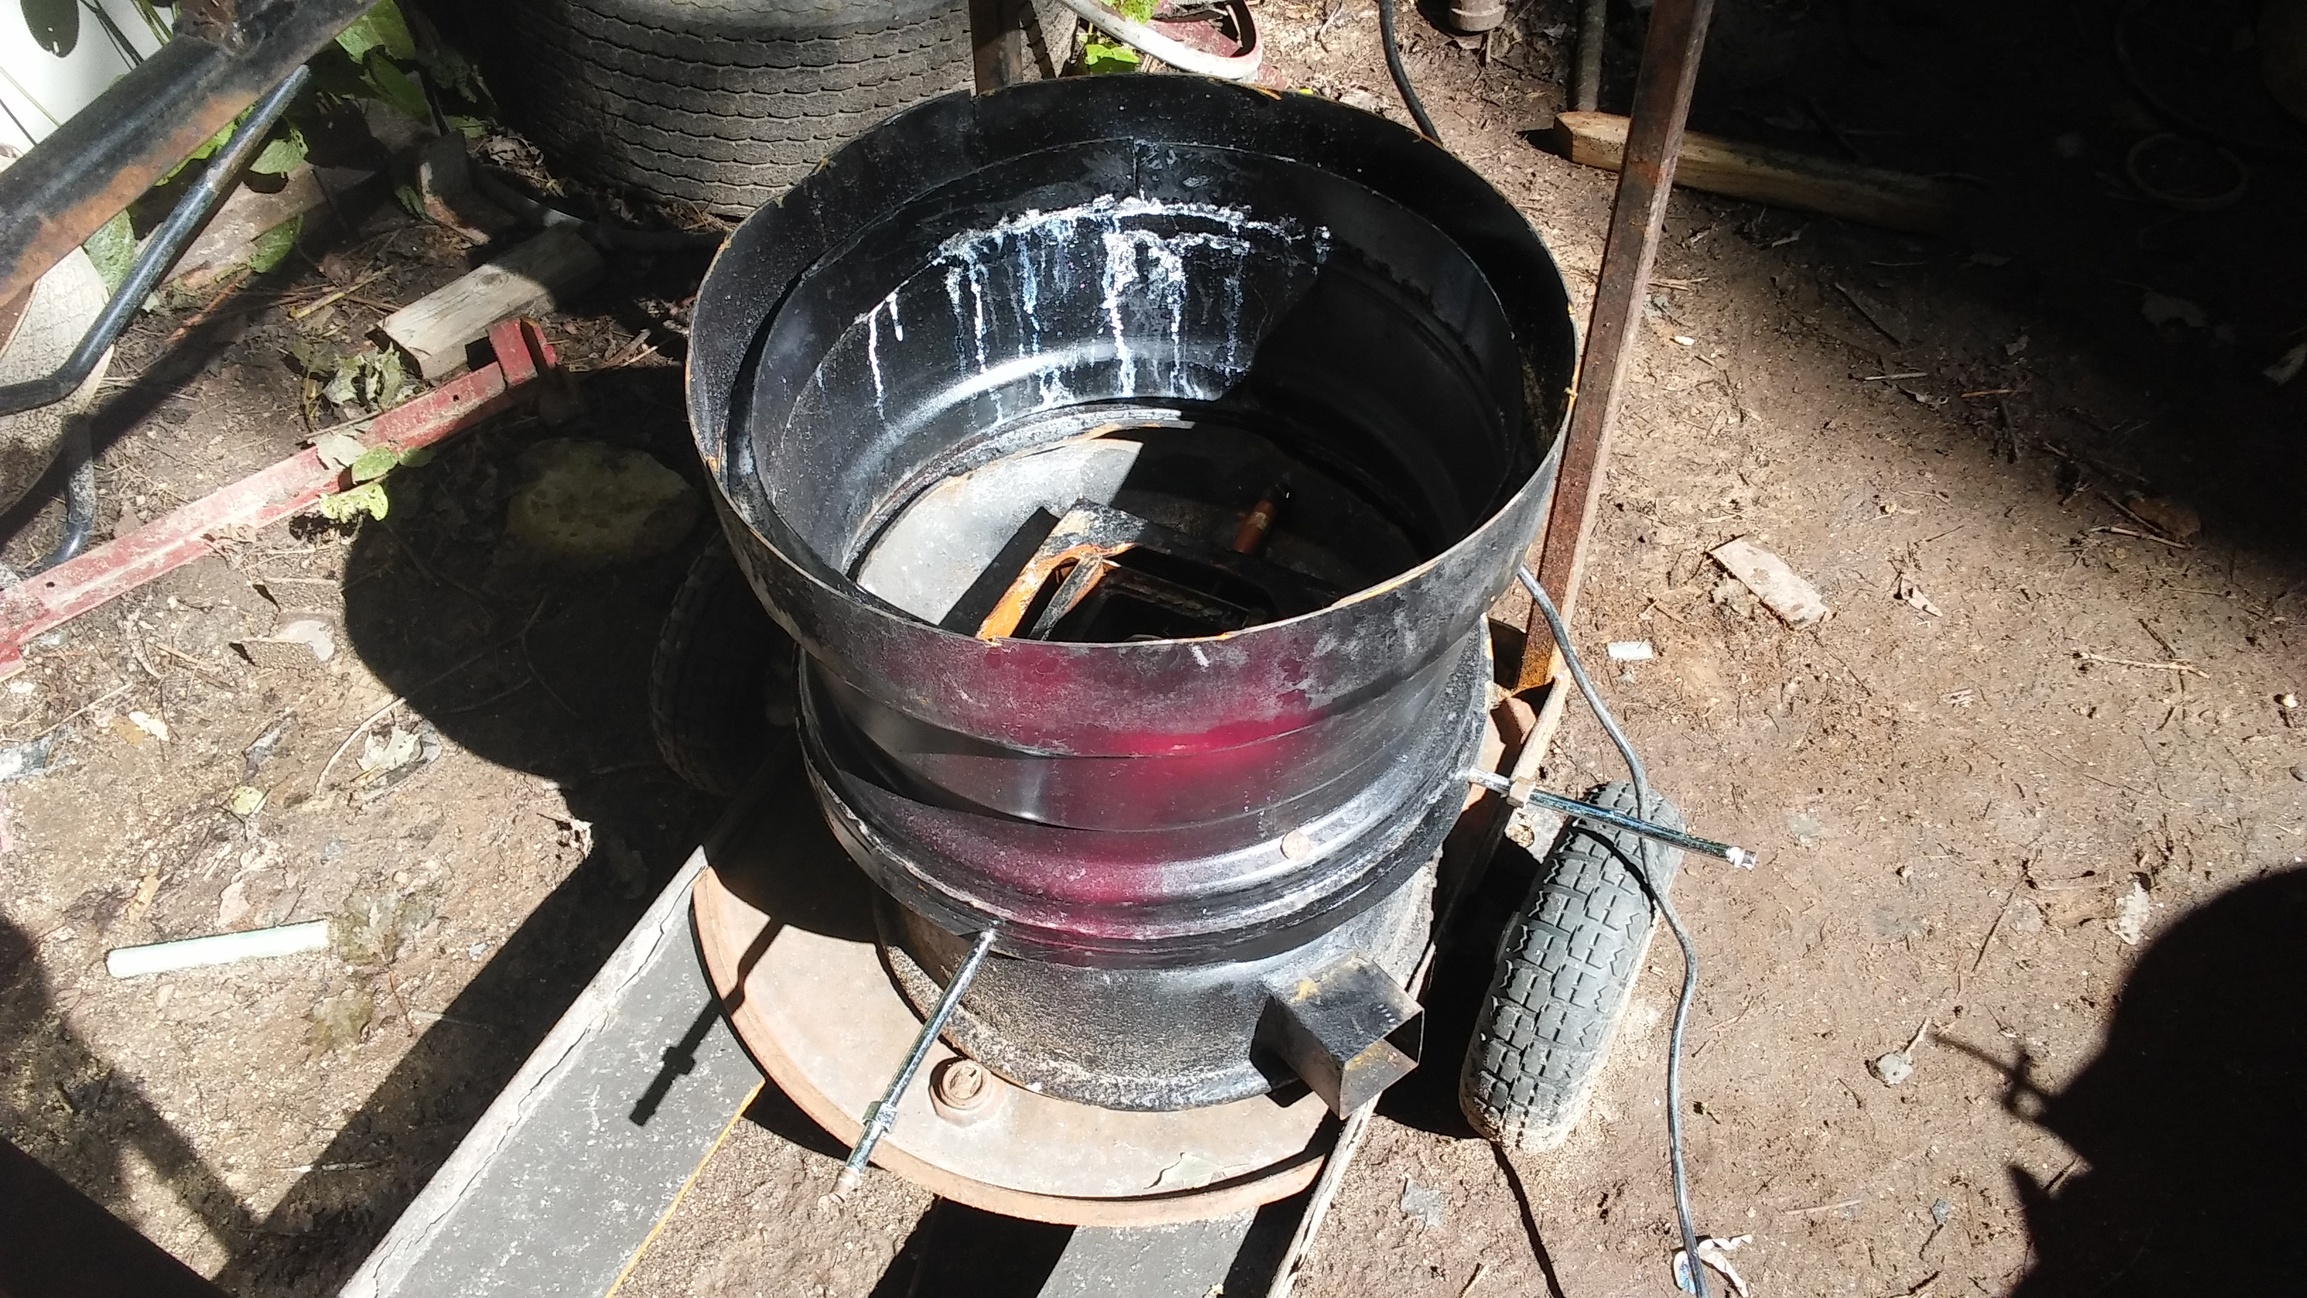
I built this thing but so far it hasn’t worked. I thought if I went though how it was built someone could figure out why. It was based on Don Mannes design but I altered the grate because of materials I had on hand. This may well be the source of the problem. I started with a fifty gallon electric water heater tank. I cut the bottom out of it and cut three, 3 inch strips from the remaining tank. I took a 16 inch wheel and ground the center out of it and welded the tank base to it. It fit exactly. I then cut the center out of a 14 inch wheel and cut it about an inch below the rim edge. This got welded to the bottom of the WH bottom.
2 Likes
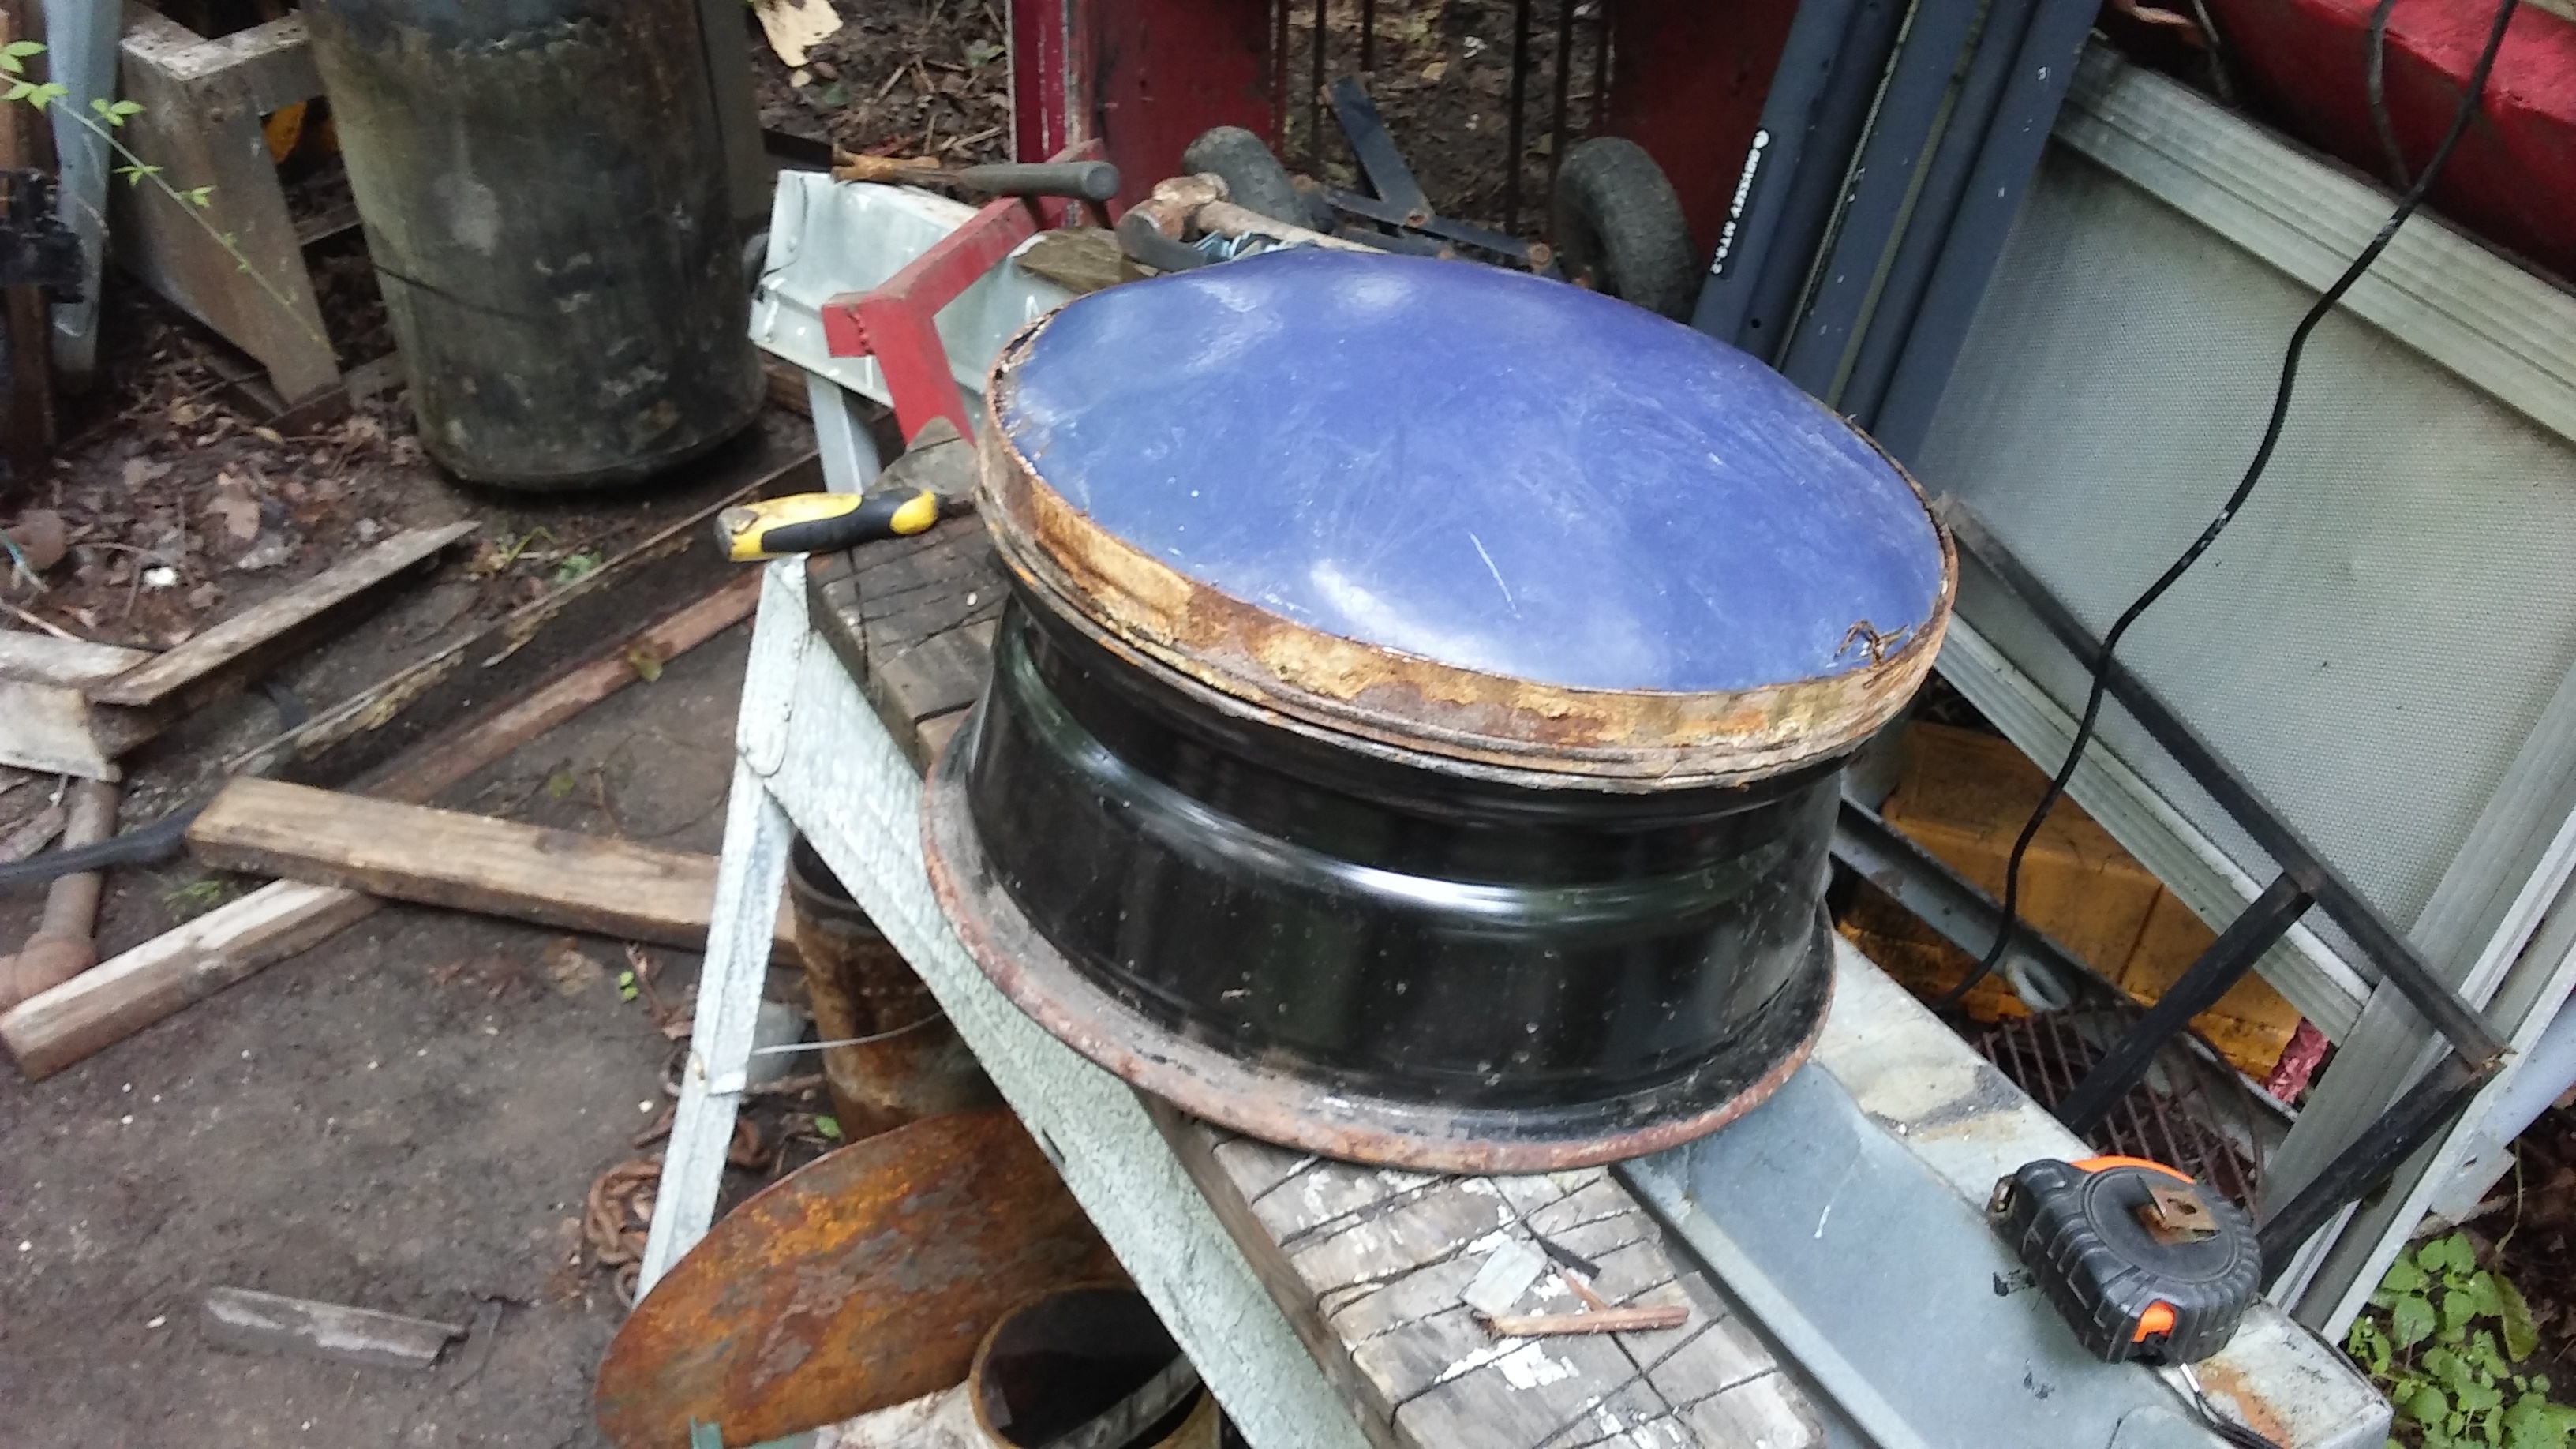
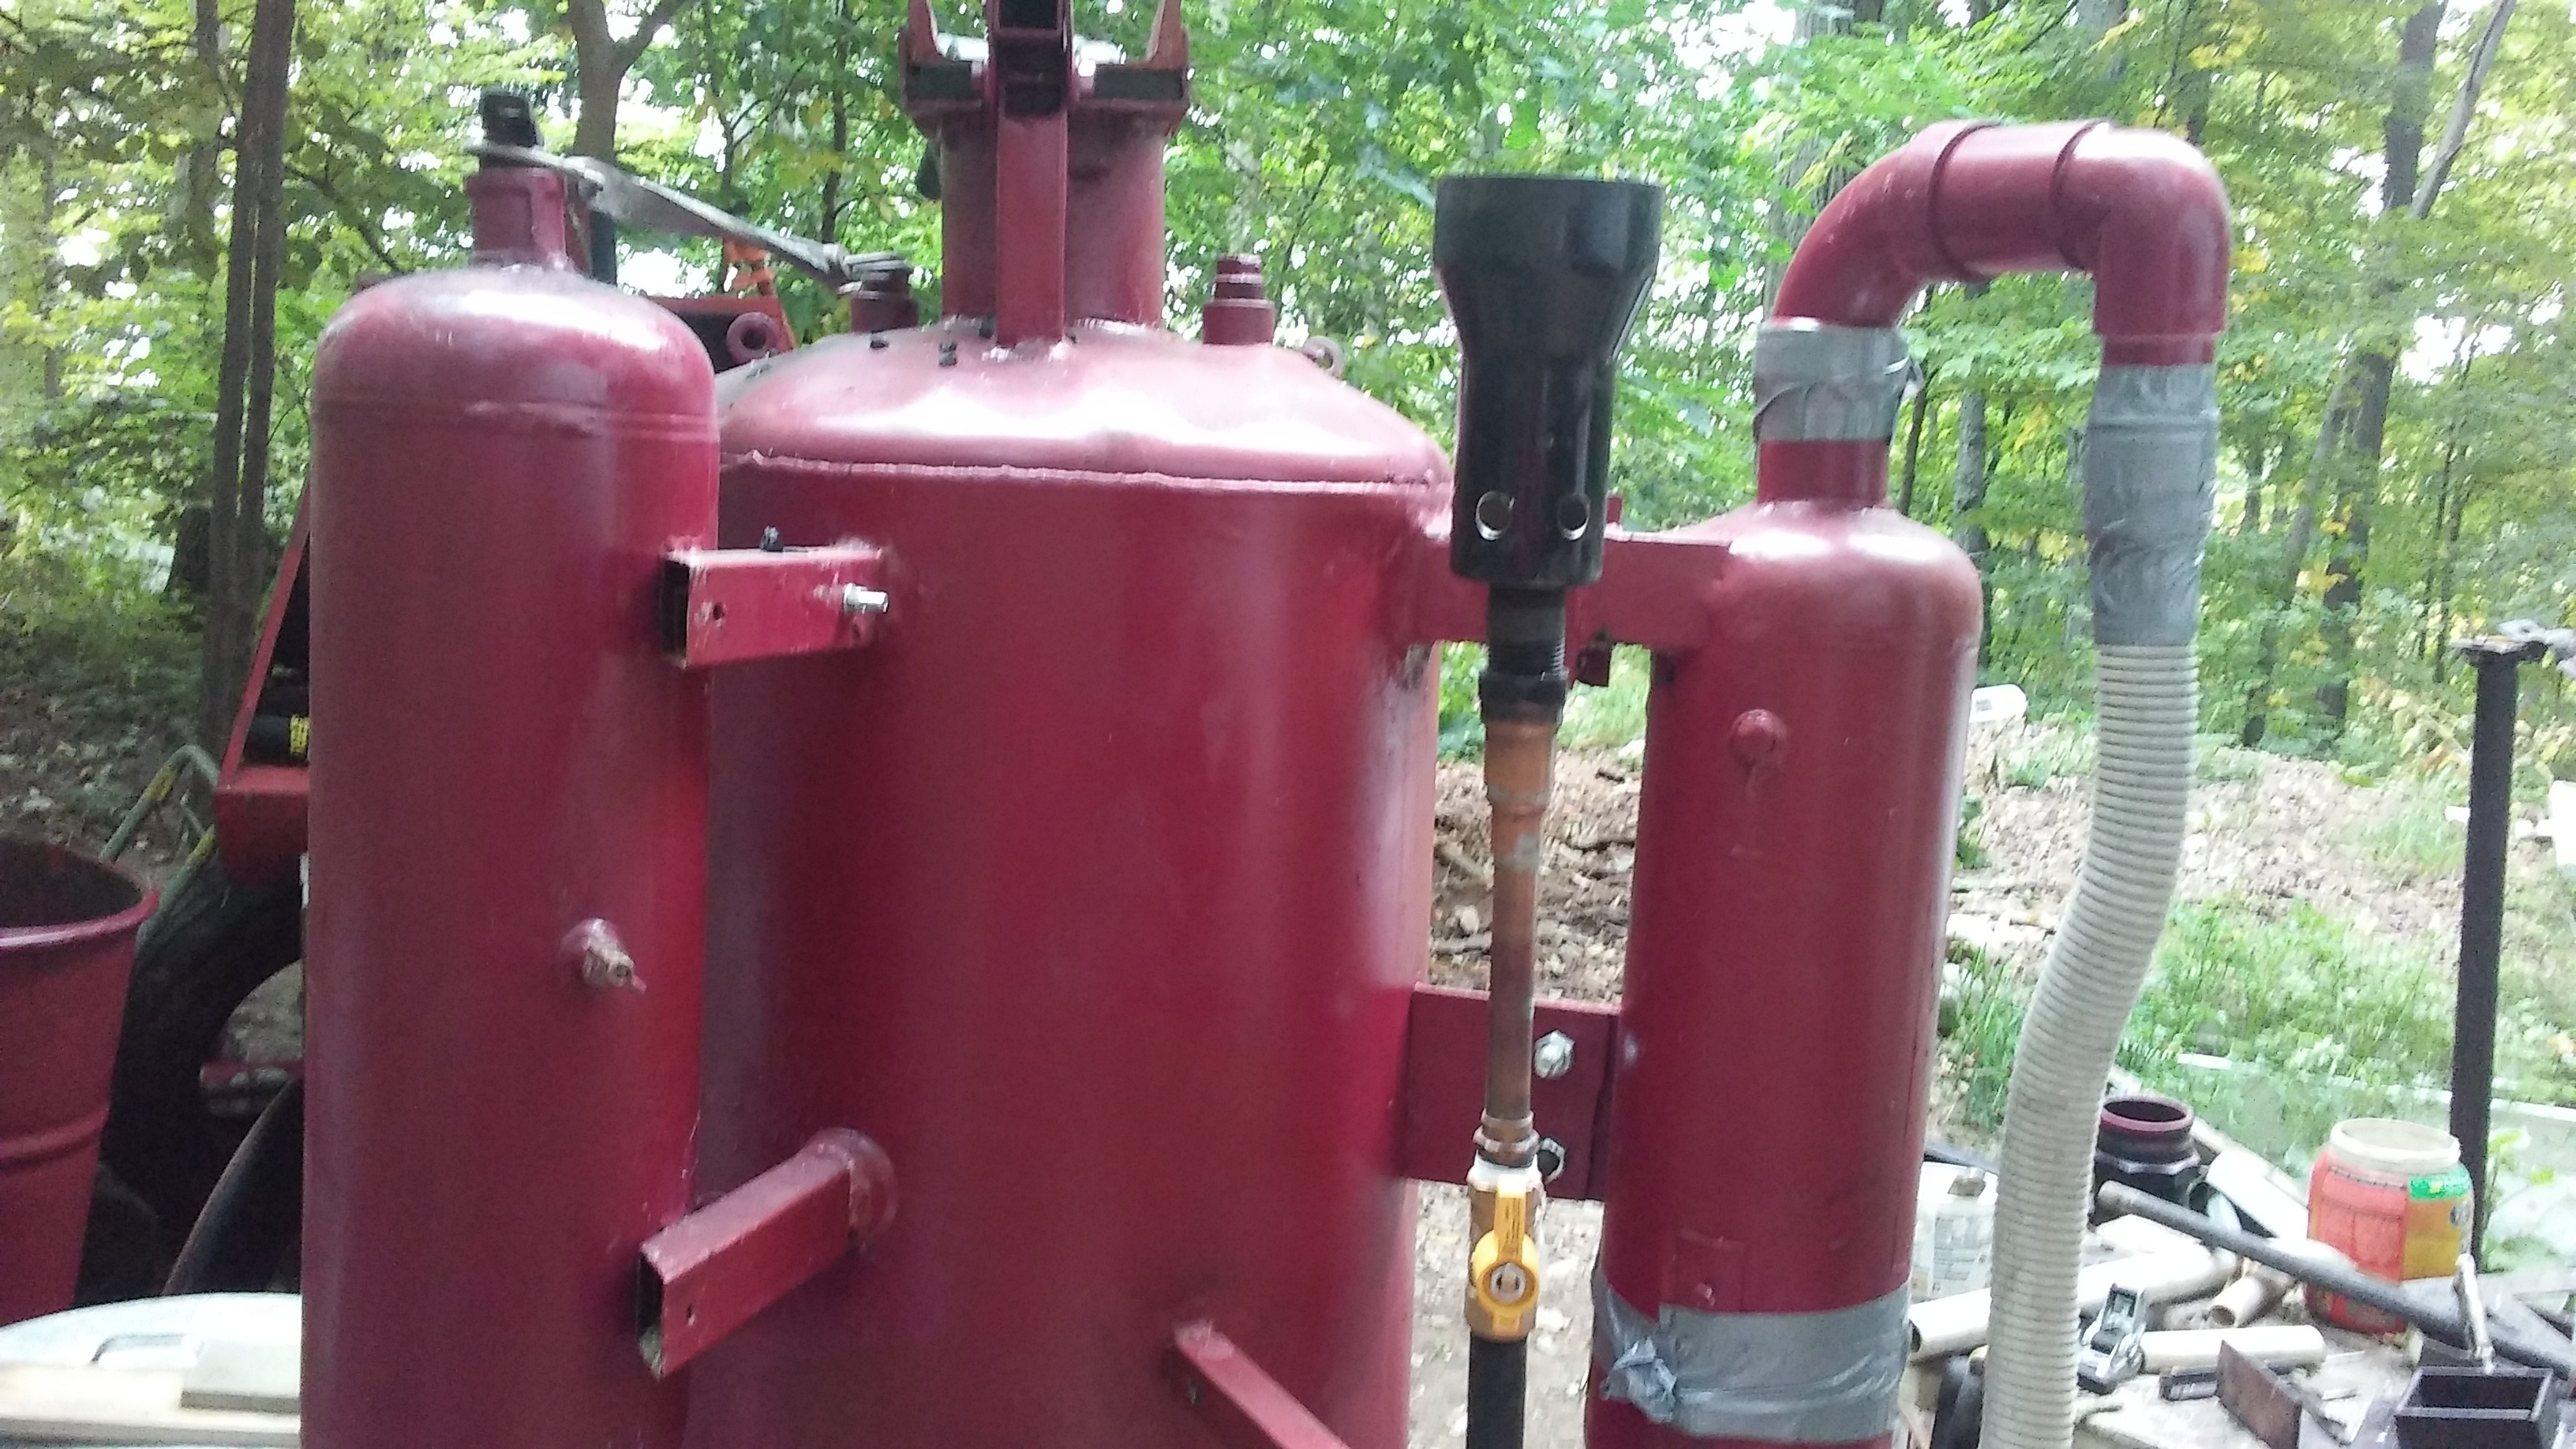
The bottom wheel section had a plate cut and welded solid and a 2 1/2 square tube was cut into the wheel as an ash cleanout. This area was to act as a plenum from which air could be drawn up through the grate. This may be where the design starts to go awry. I think Don said that he feeds pressurized air into his ammo box ash cleanout to feed the hearth. I am just sucking air through the system above the filter. The 3 inch strips cut from the WH were welded around the top of the wheel inside and out instead of regular flanges. The tank section slides down between them.
3 Likes
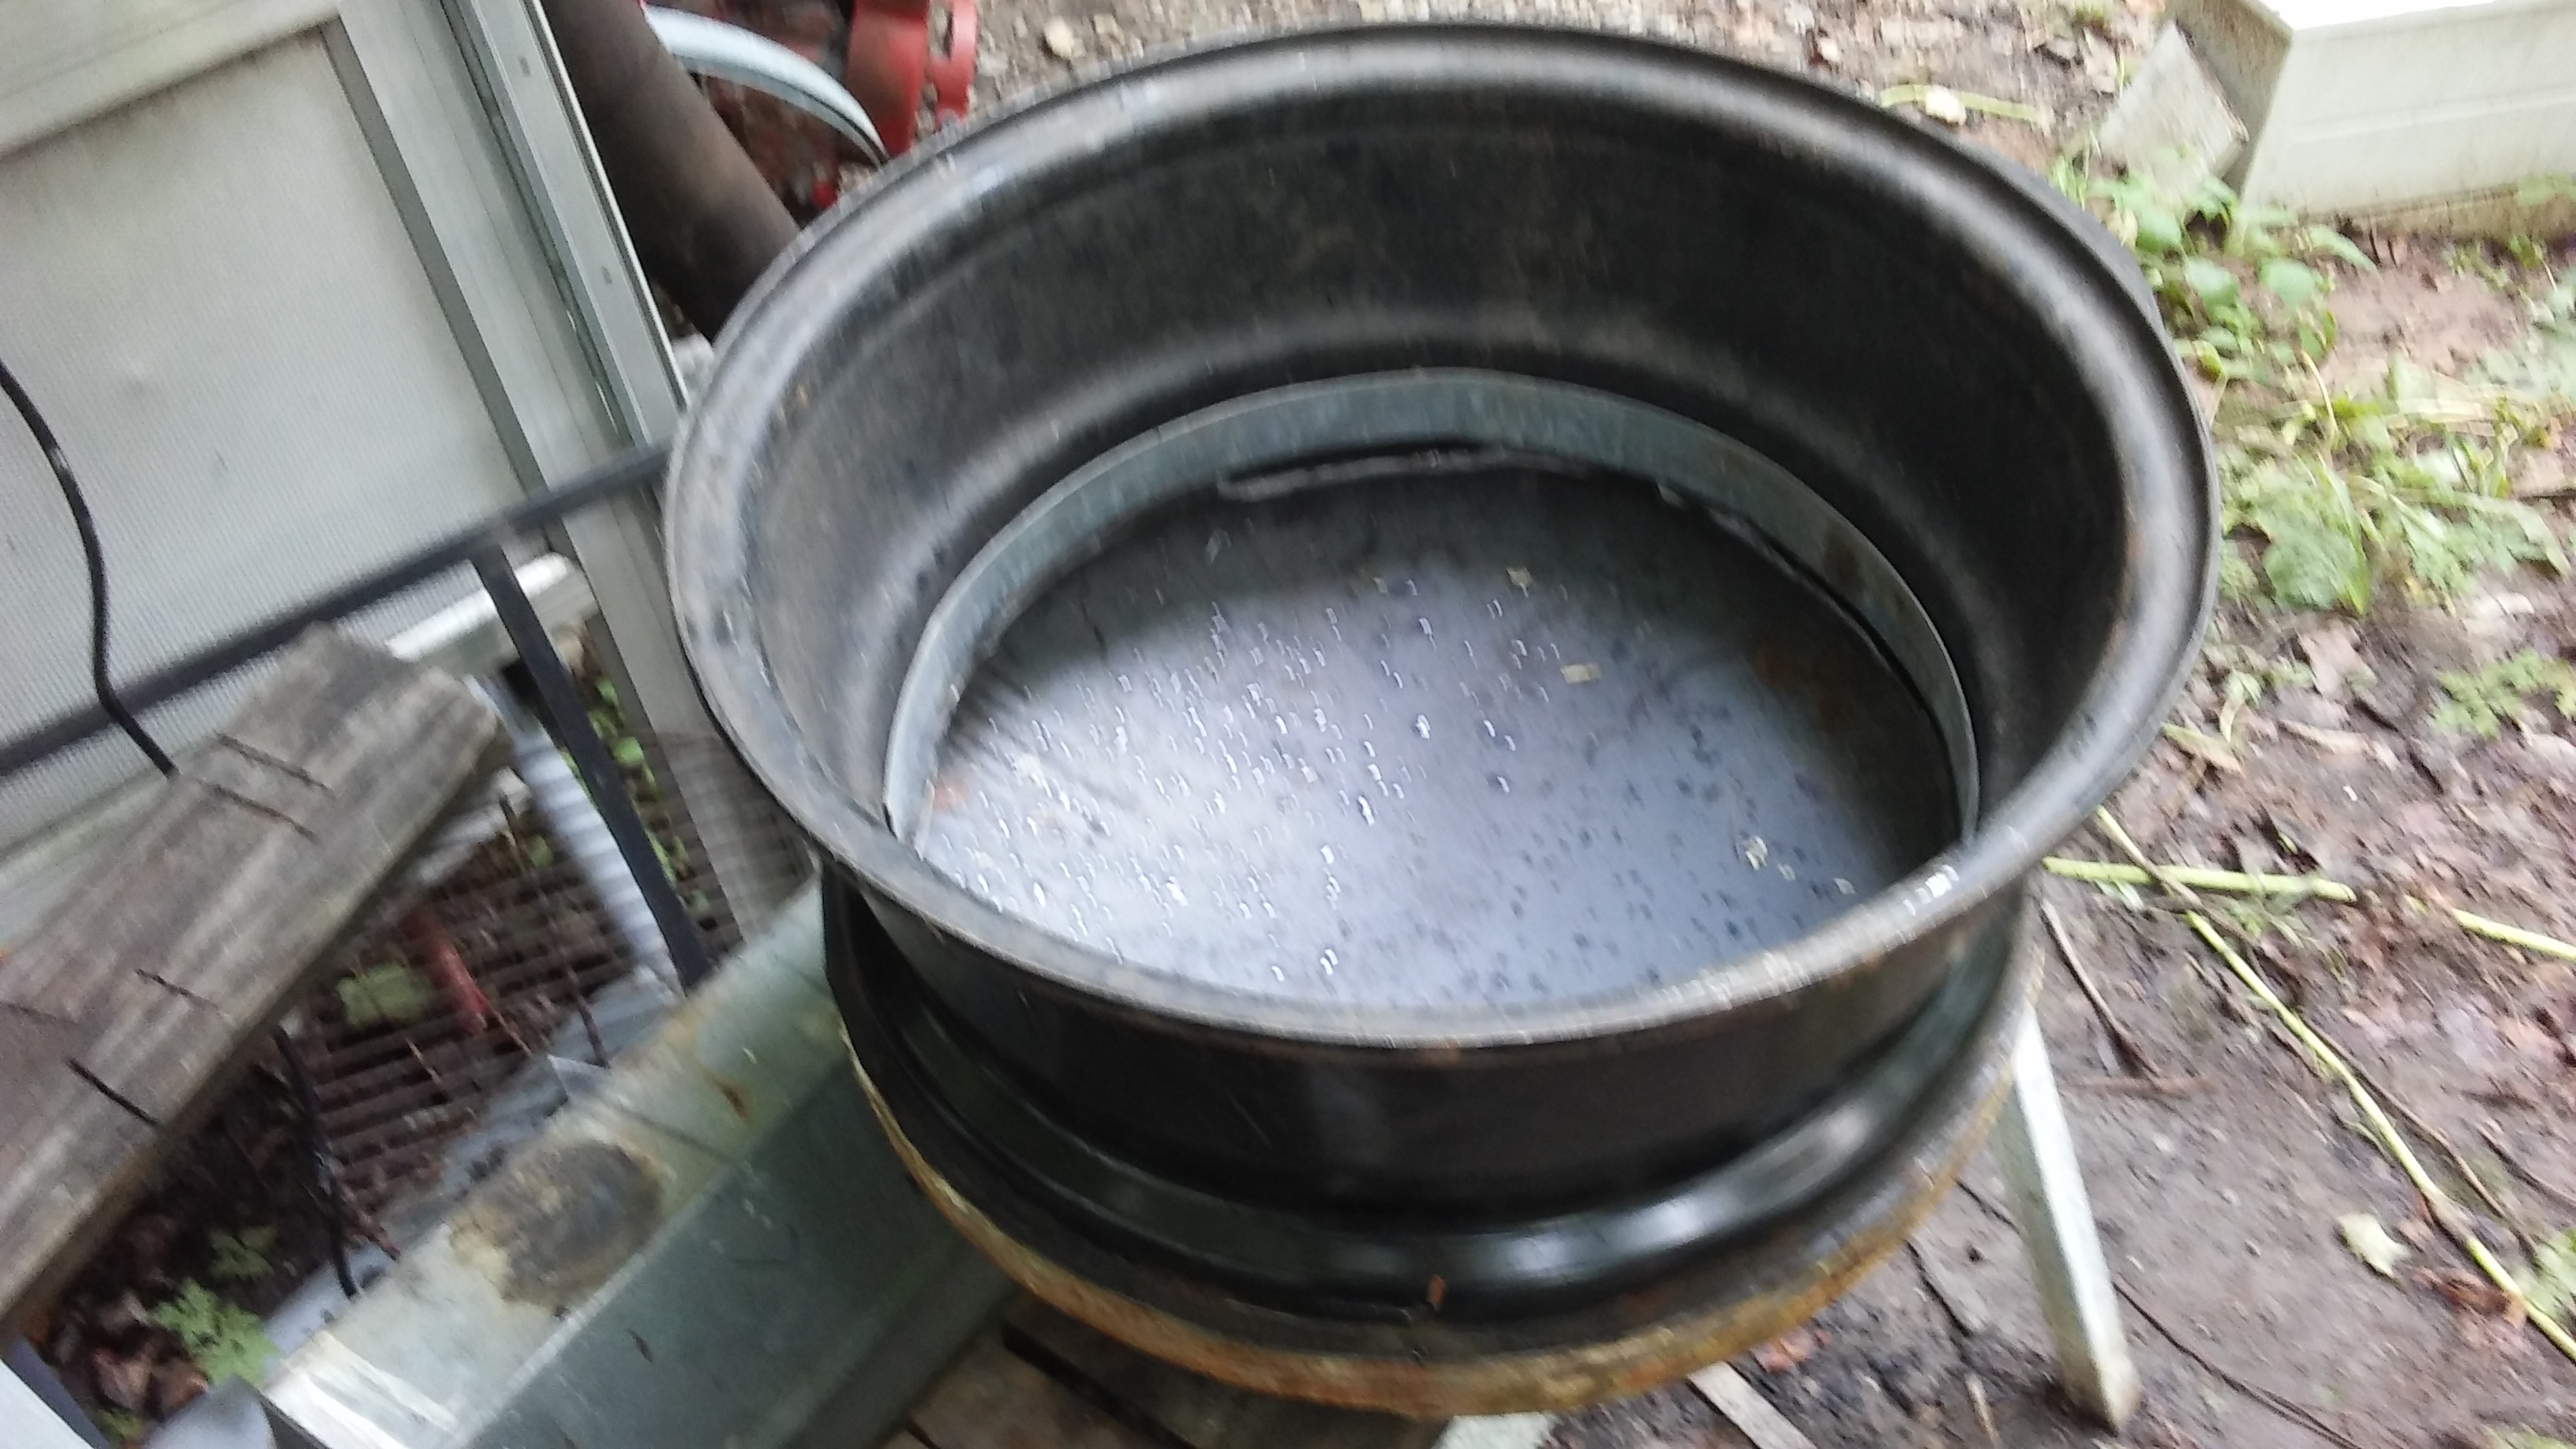
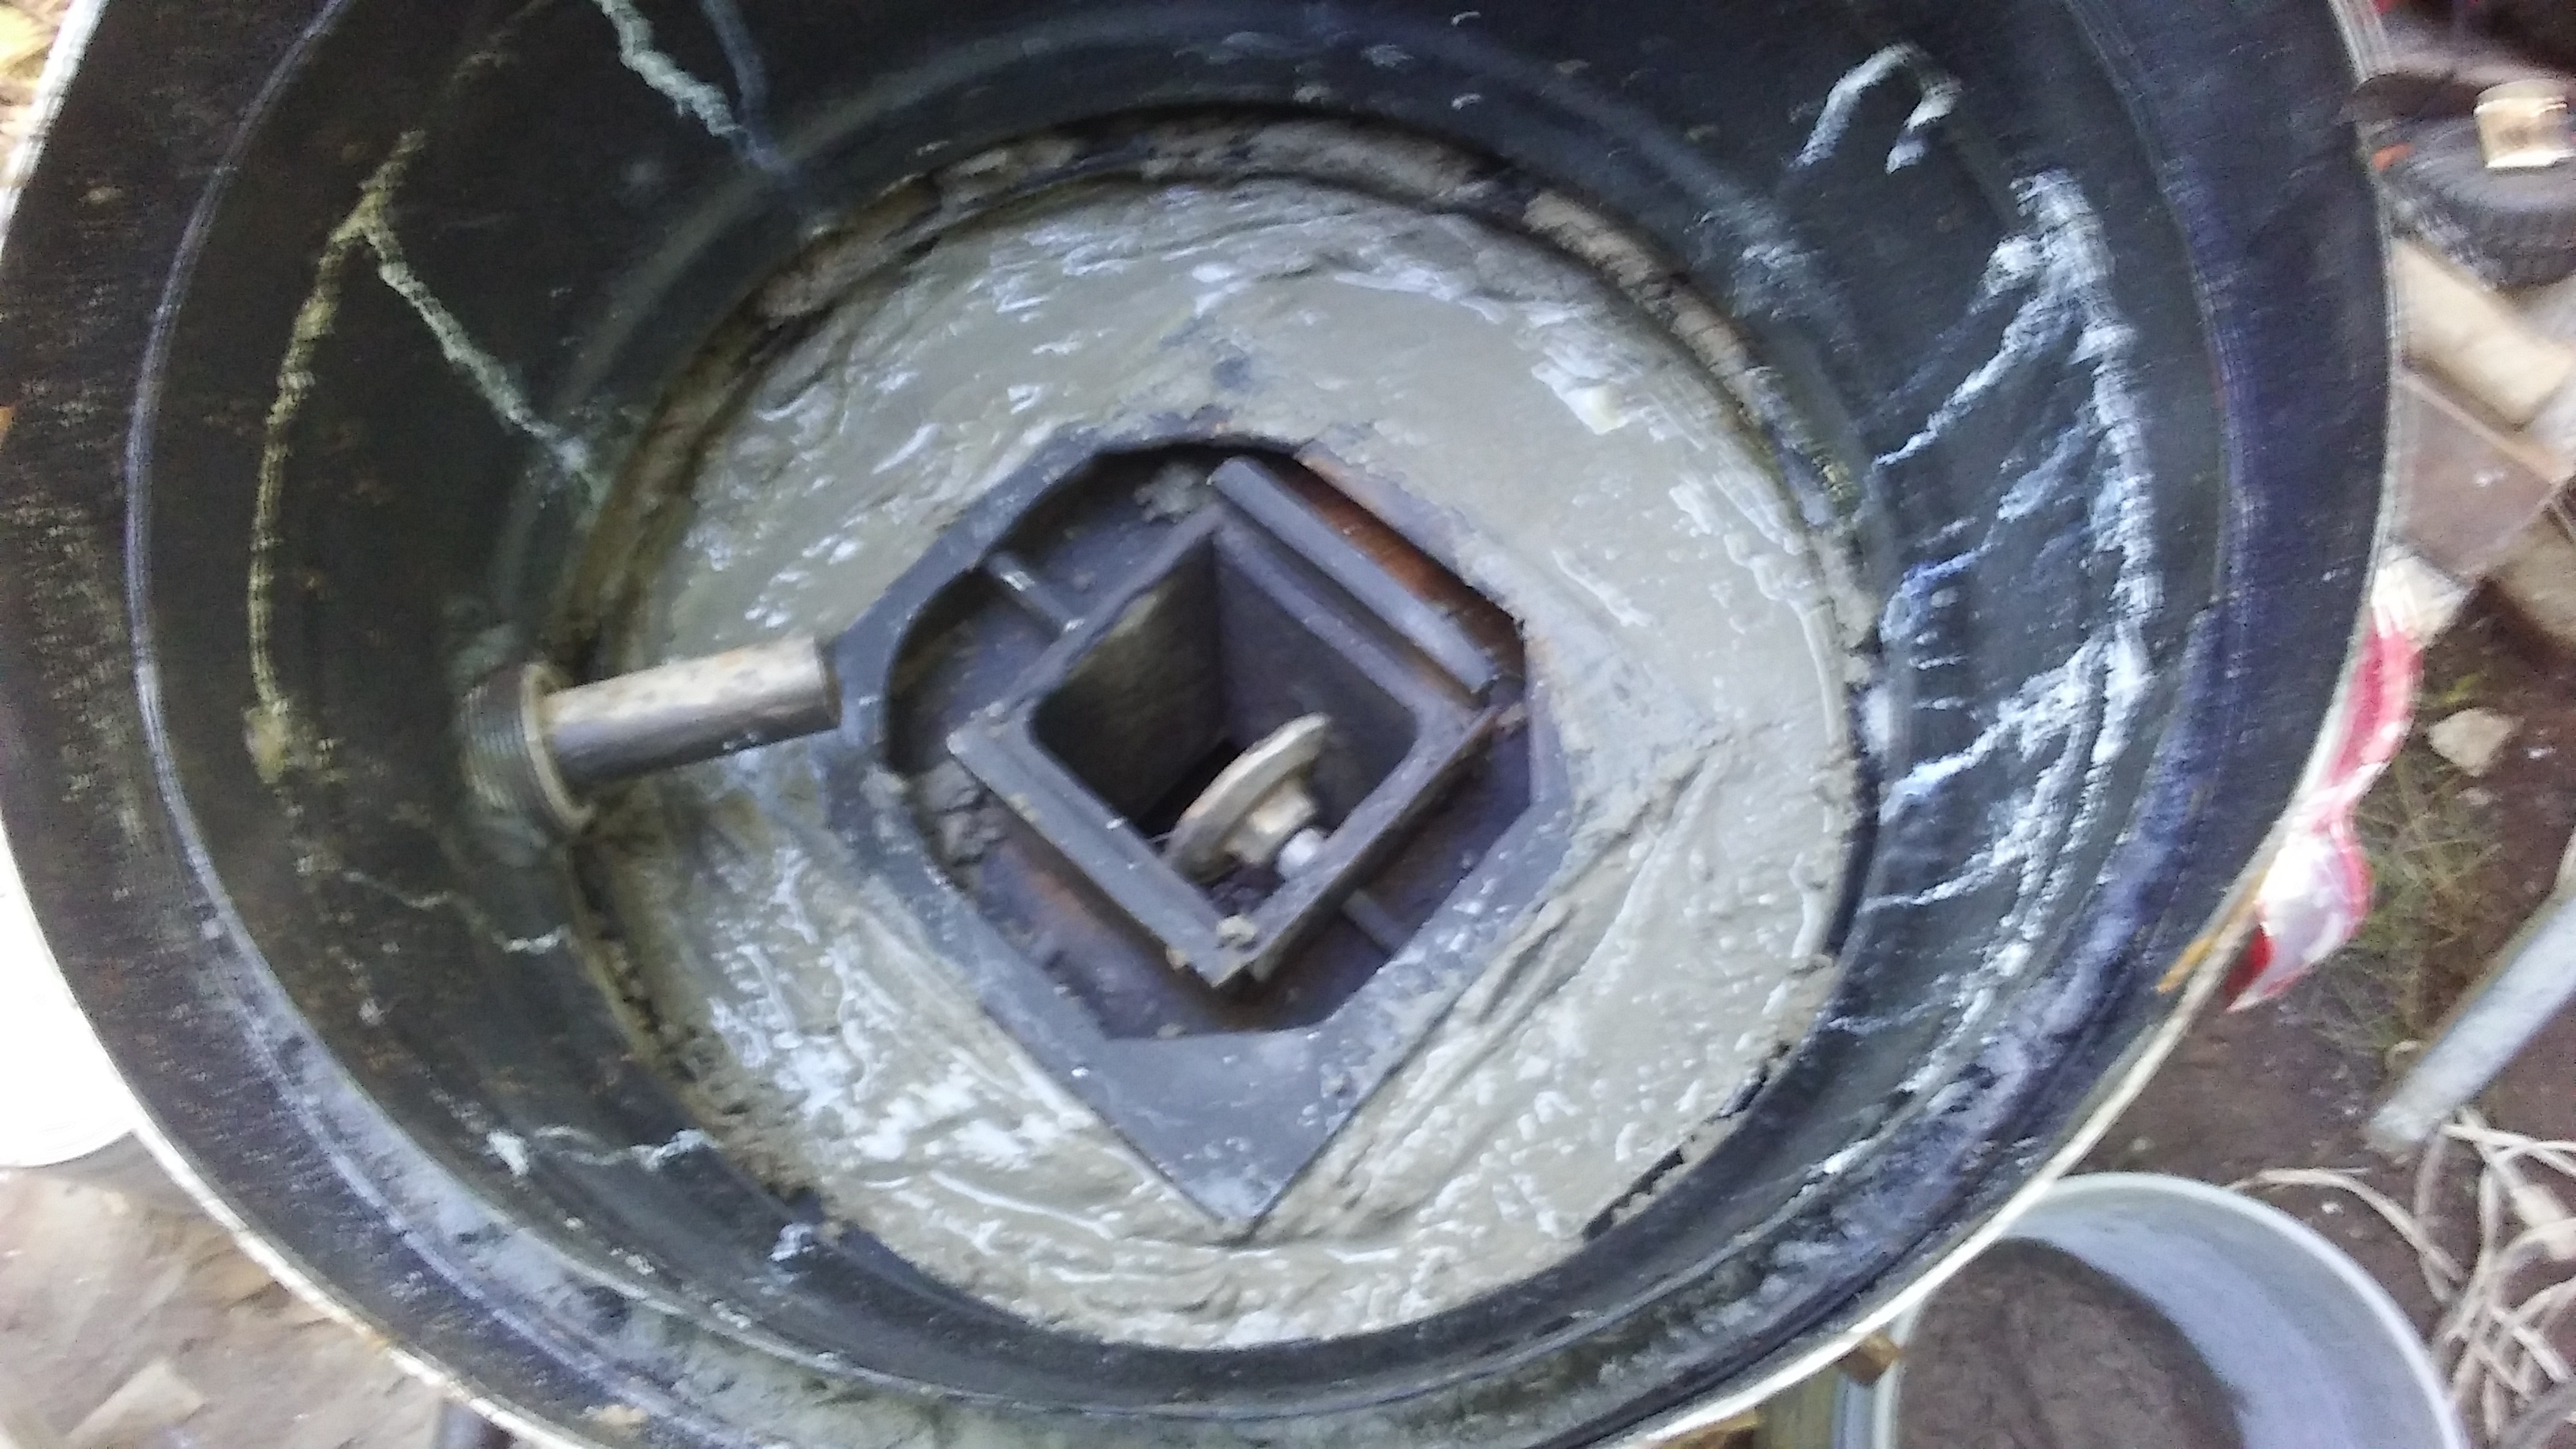
This is the hearth. It is 3x3x3/8 angle welded into a tube. Pieces of 2x2x1/4 angle were welded to the tube, welded solid to act as a water reservoir. Pieces of plate were added to close off the area when the rest of the hearth was added.
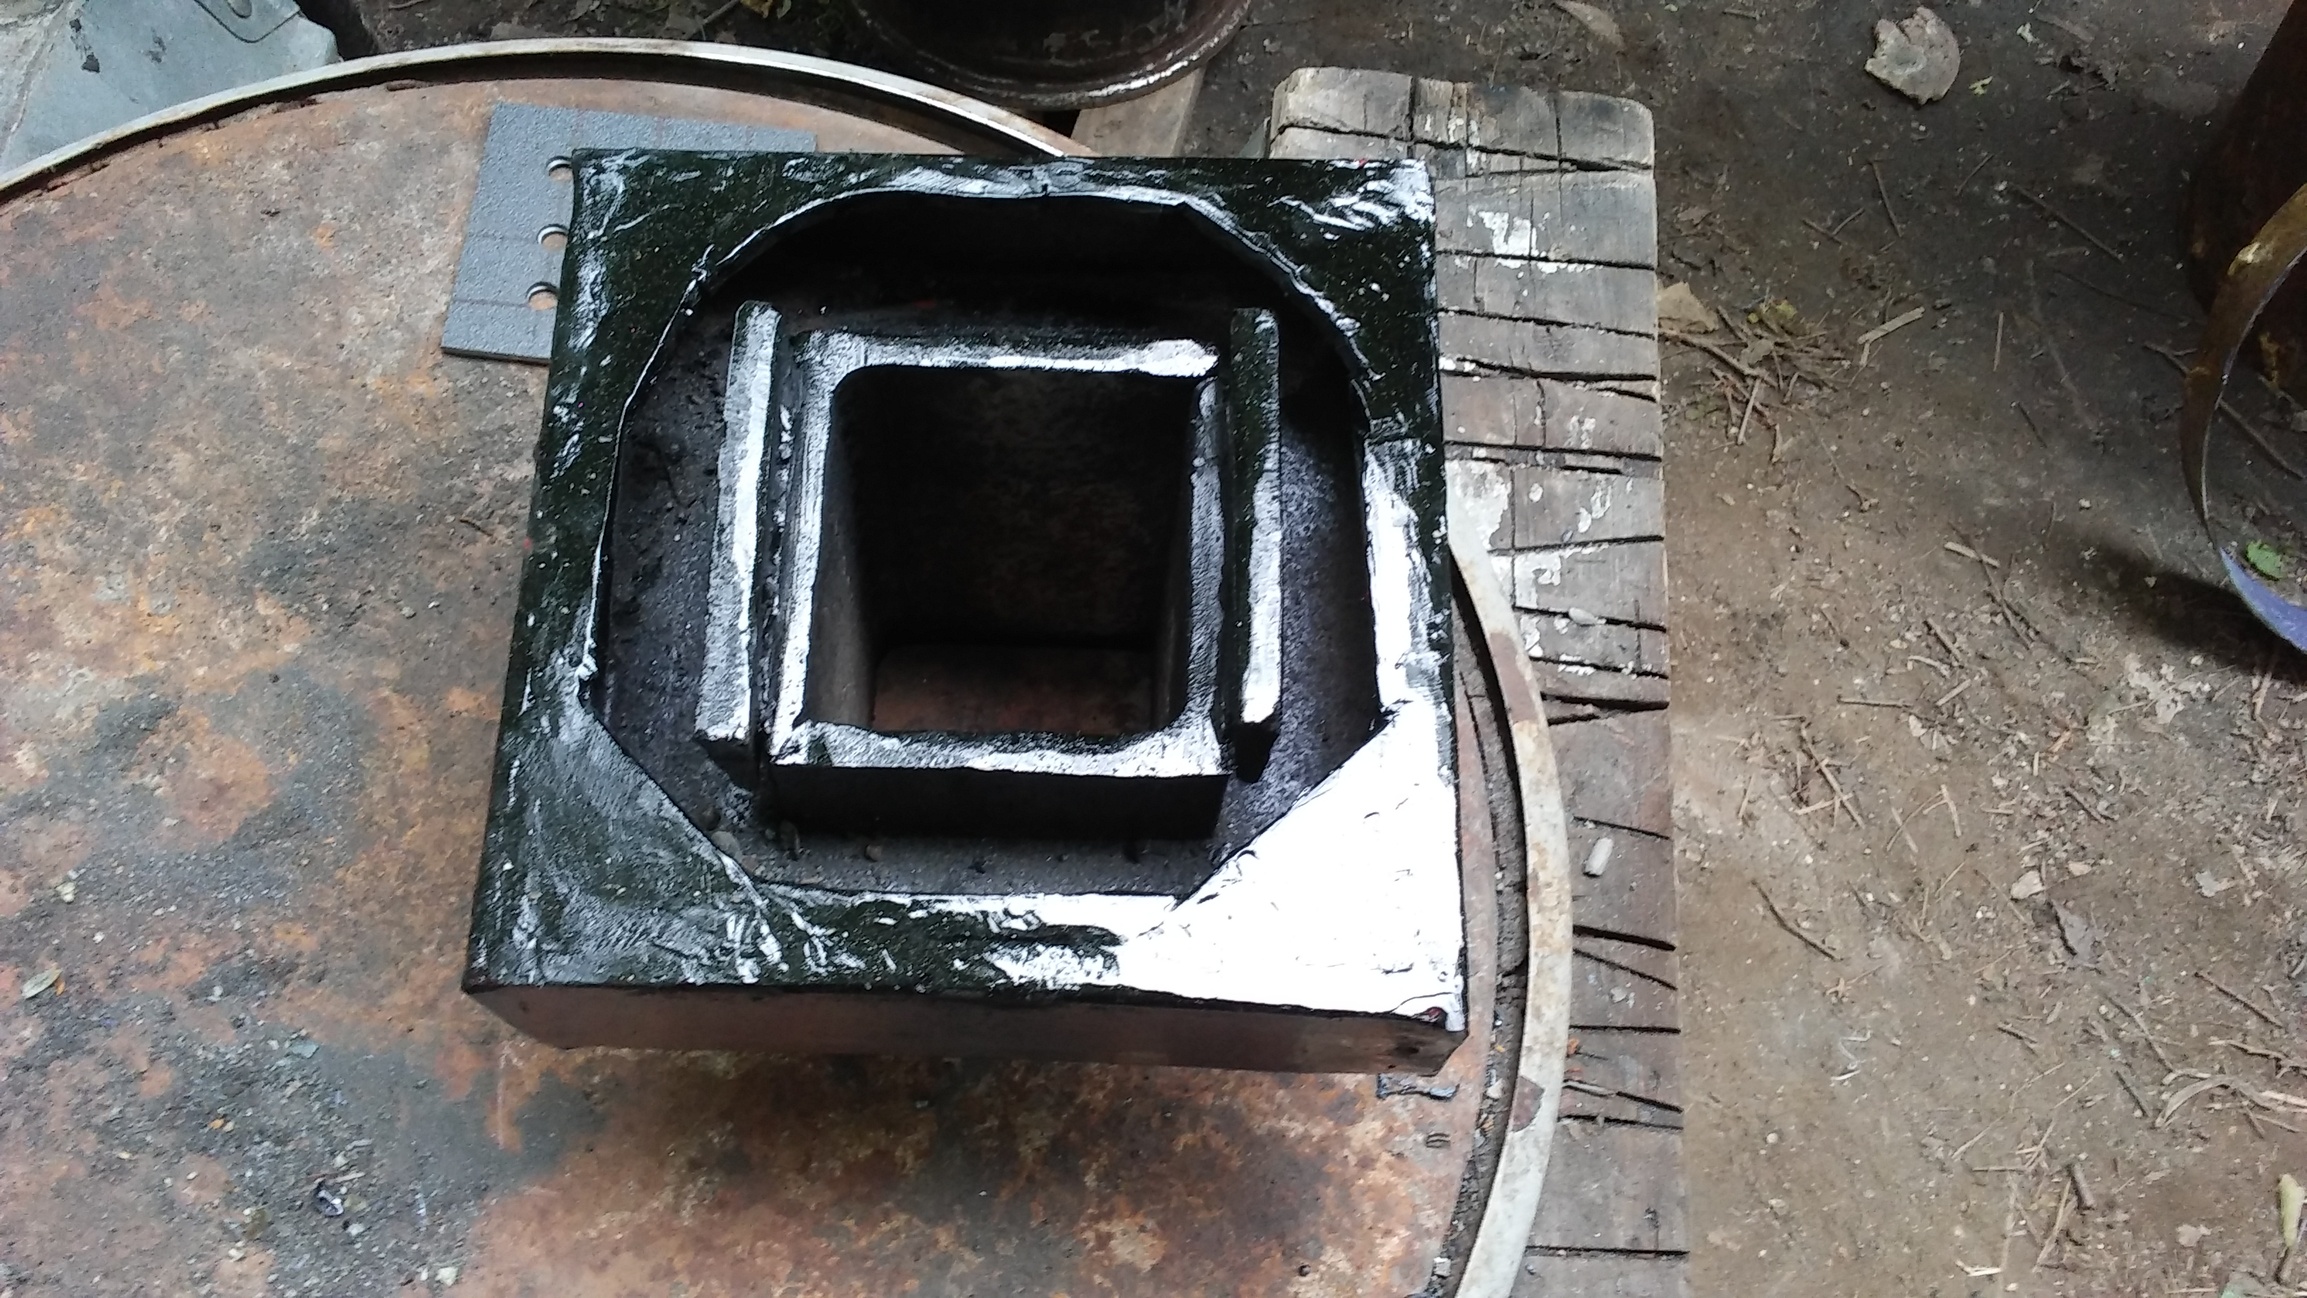
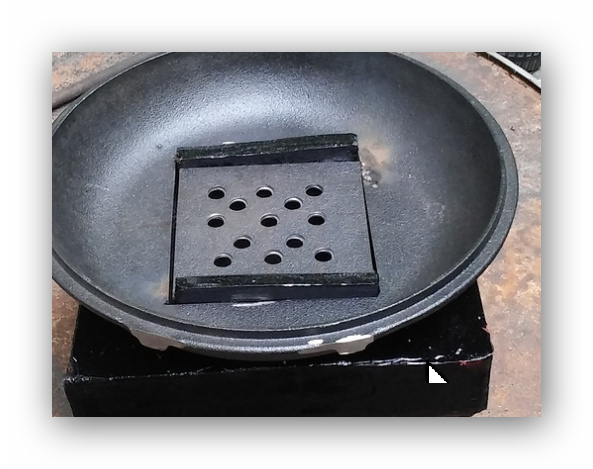
I topped this with a lid from a cast iron dutch oven cut to fit over the tube and drill holes in the cut out to act as a grate.

The bottom of the WH tank was cut to receive this hearth.
3 Likes
I usually use just the suction blowers but I can use either or both if I want to. Do you have pictures of your nozzle setup?
Is this your nozzle setup?
3 Likes
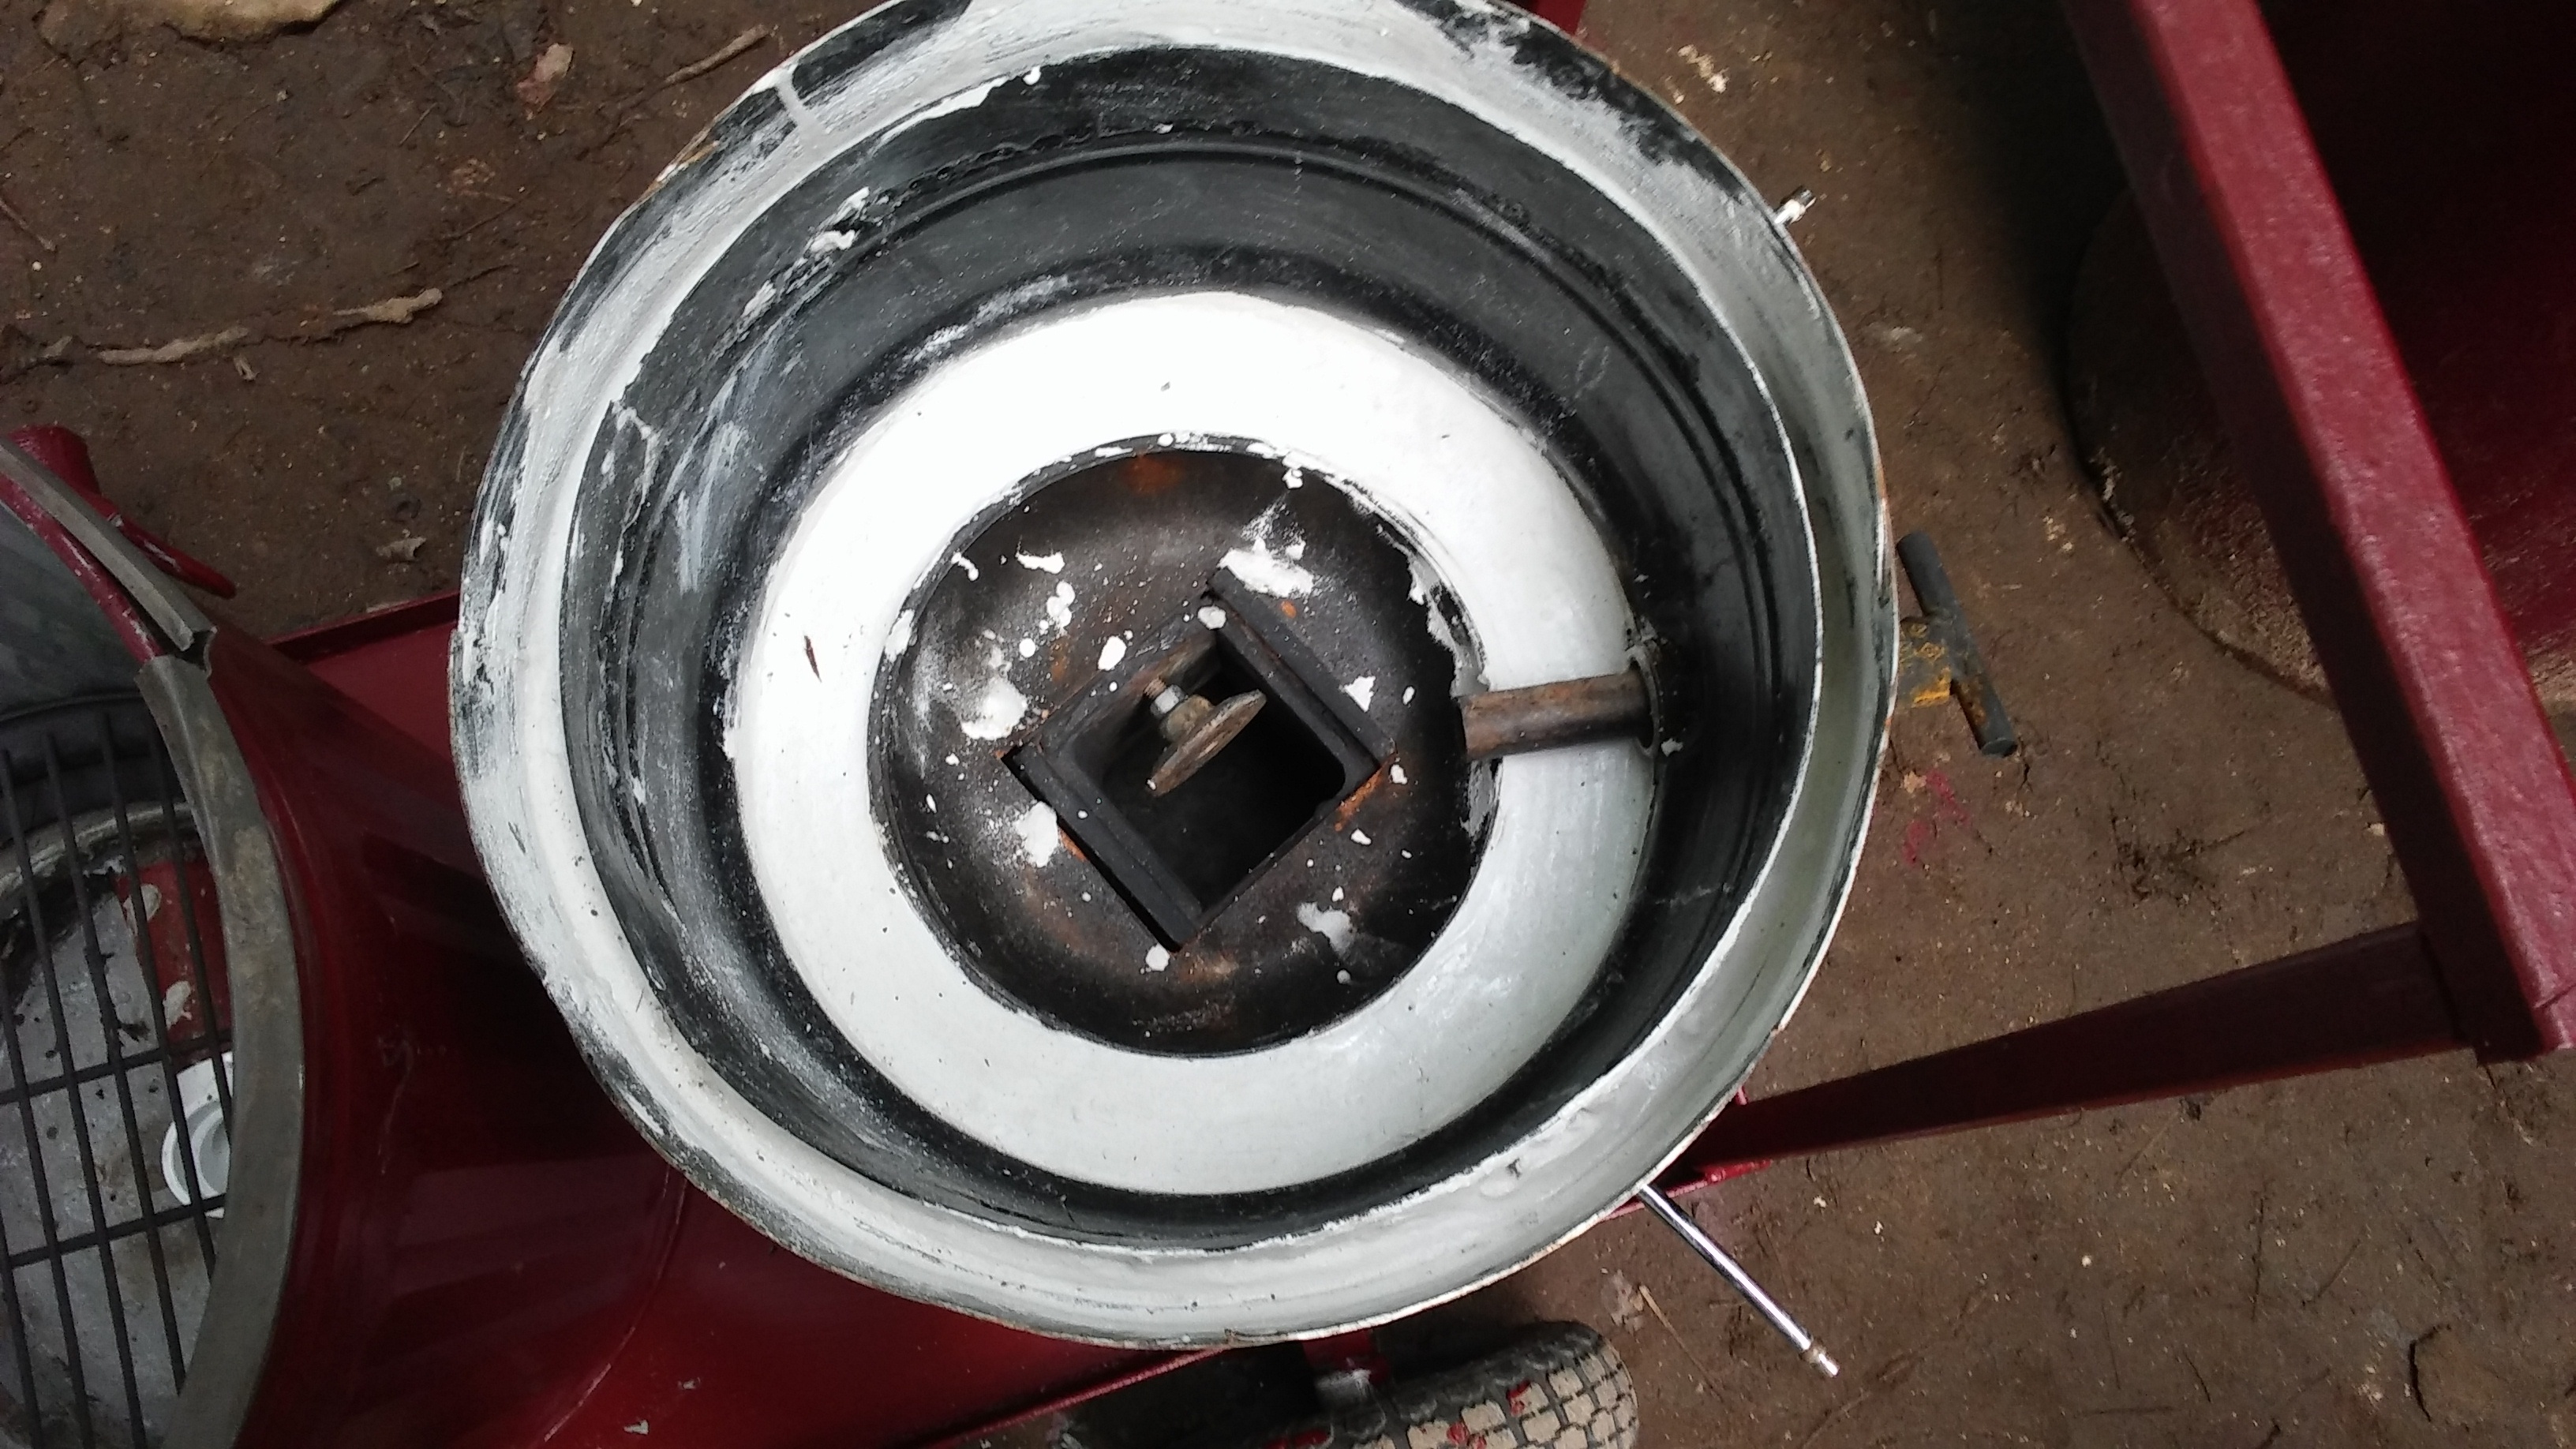
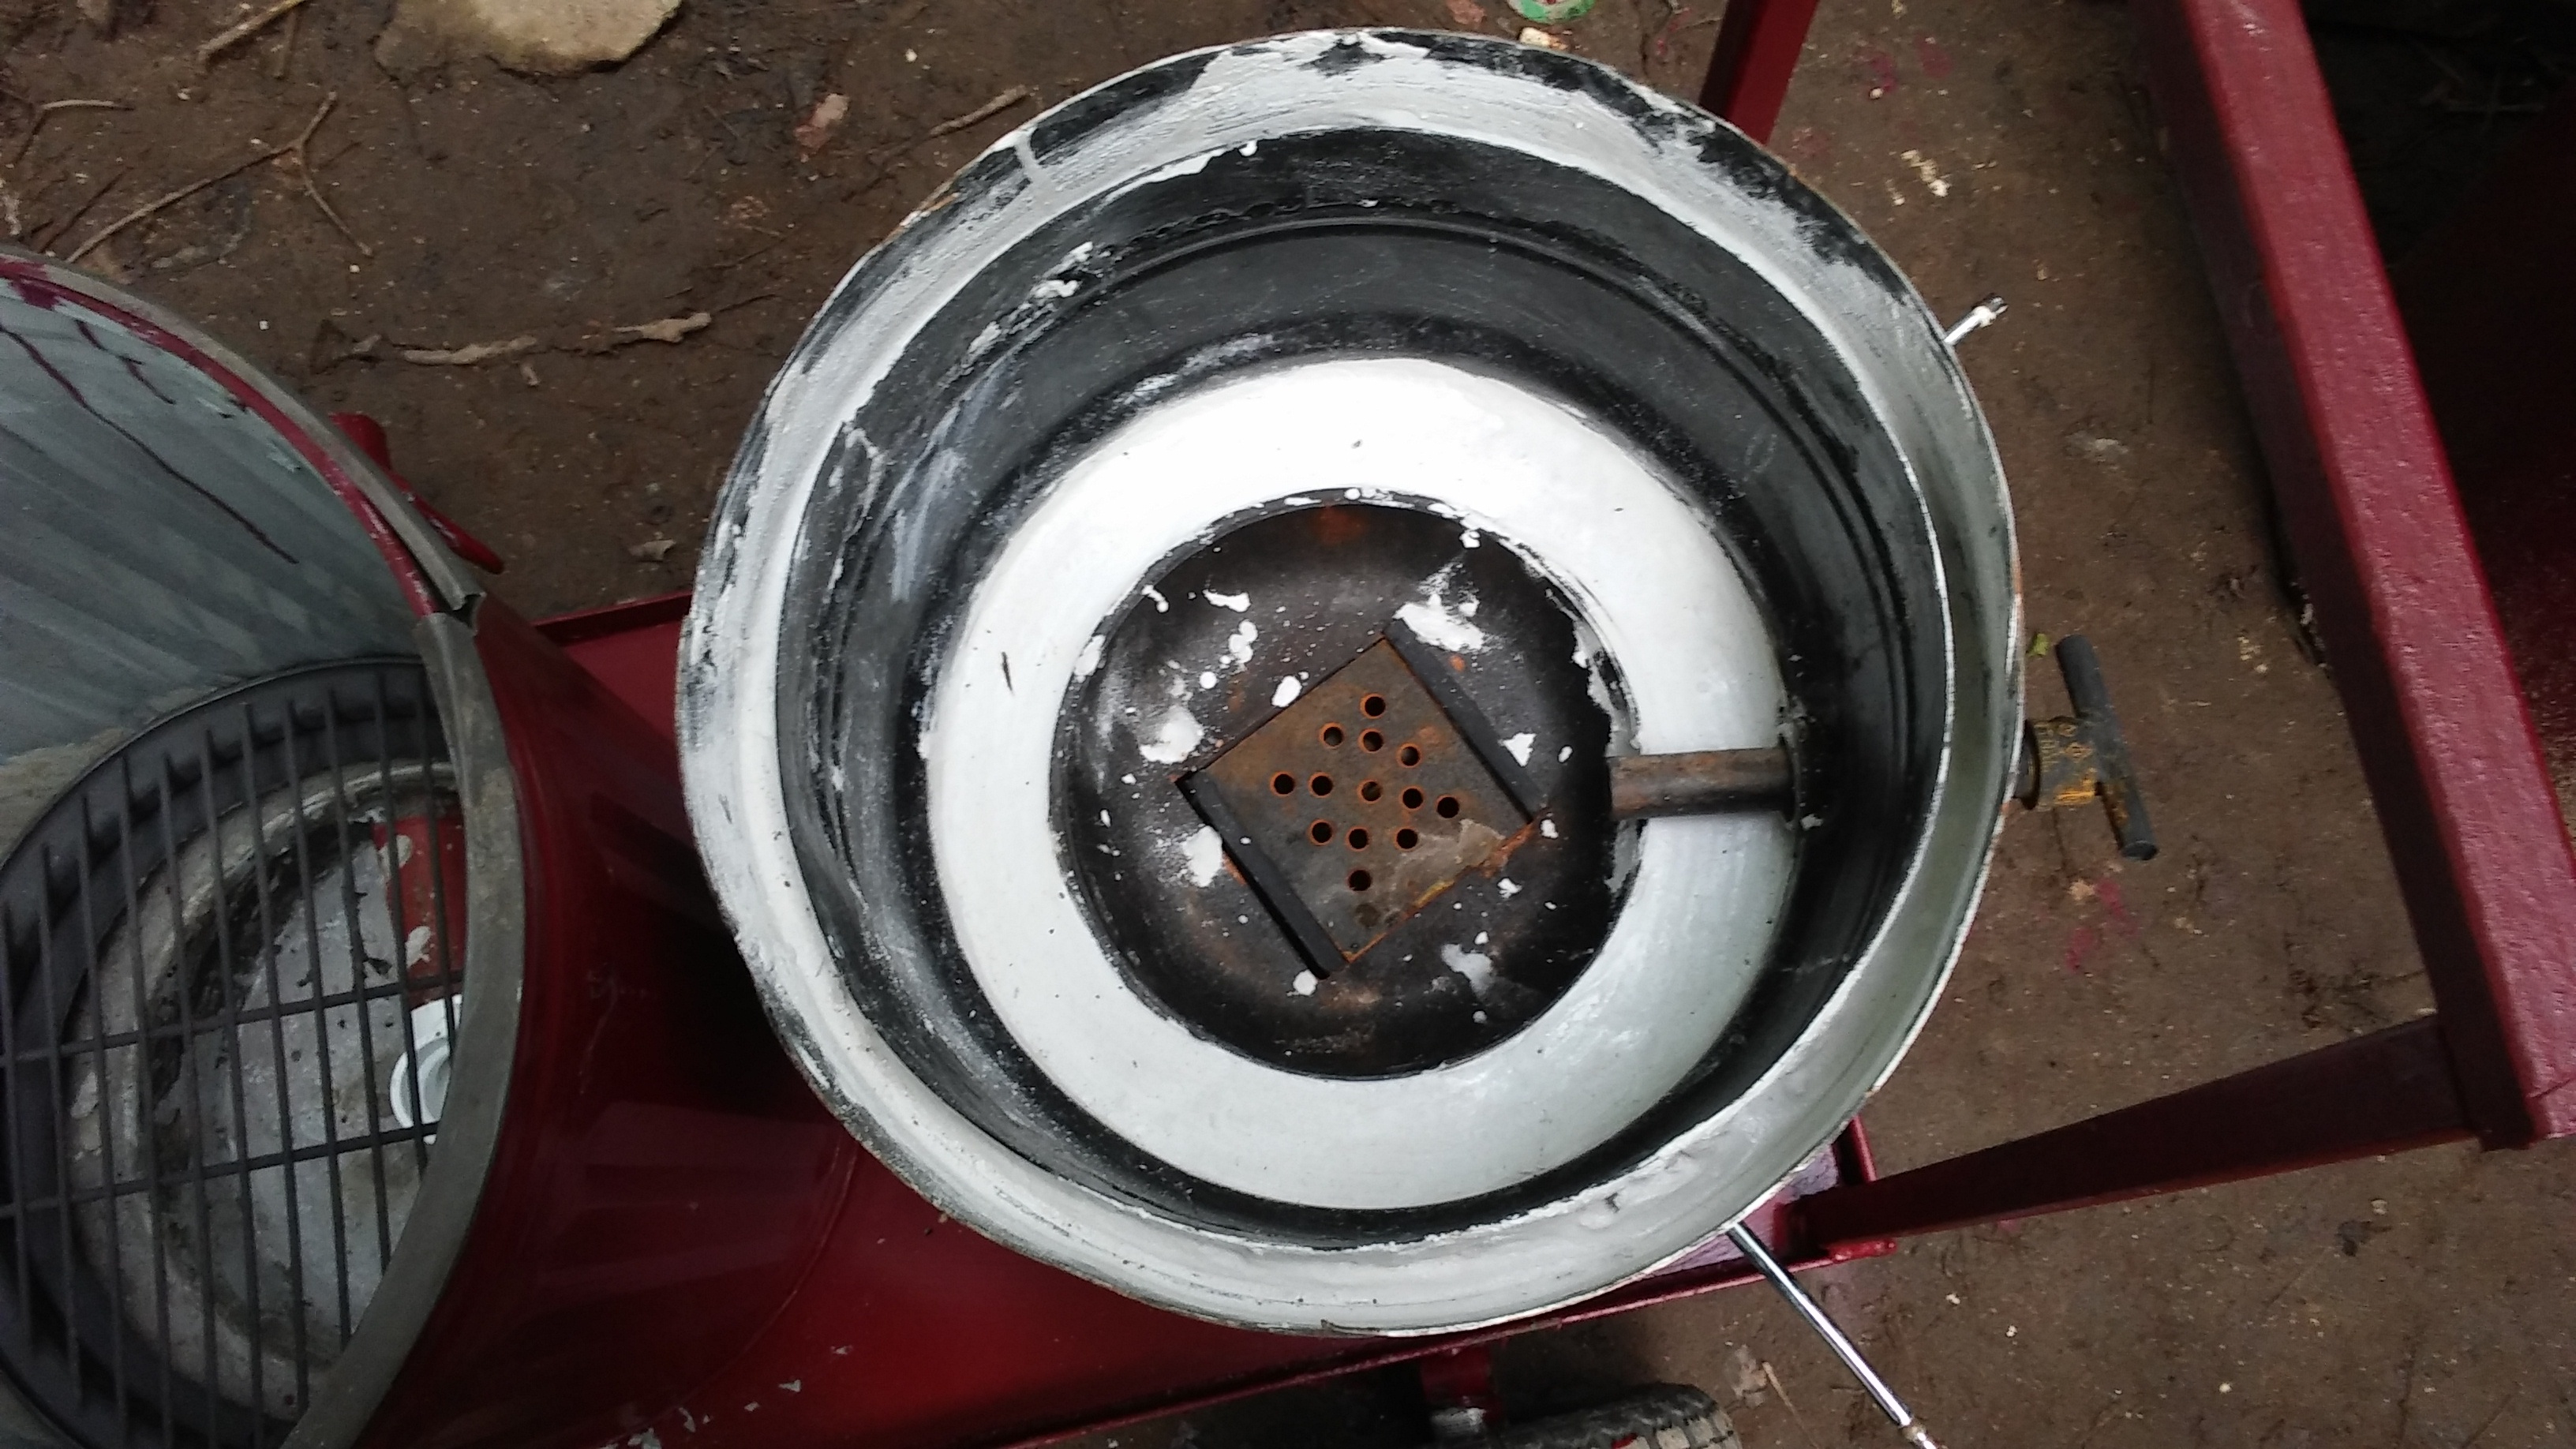
I don’t know if it’s a nozzle. The charcoal in the hopper sits on this grate and the air is pulled up through the holes. I thought that this grate should have more holes and more air flow but I figured it would not be too hard to try different ones.
Problems with this system must be at this point since everything after is pretty much the same with everyone else’s gasifiers.
2 Likes
I’m starting to think there are too many holes in that grate/nozzle. There needs to be quite high velocity of incoming air to make good gas. With a one cylinder engine pulling that air thru there with that many holes - the air slows down with that many choices of how to get there.
5 Likes
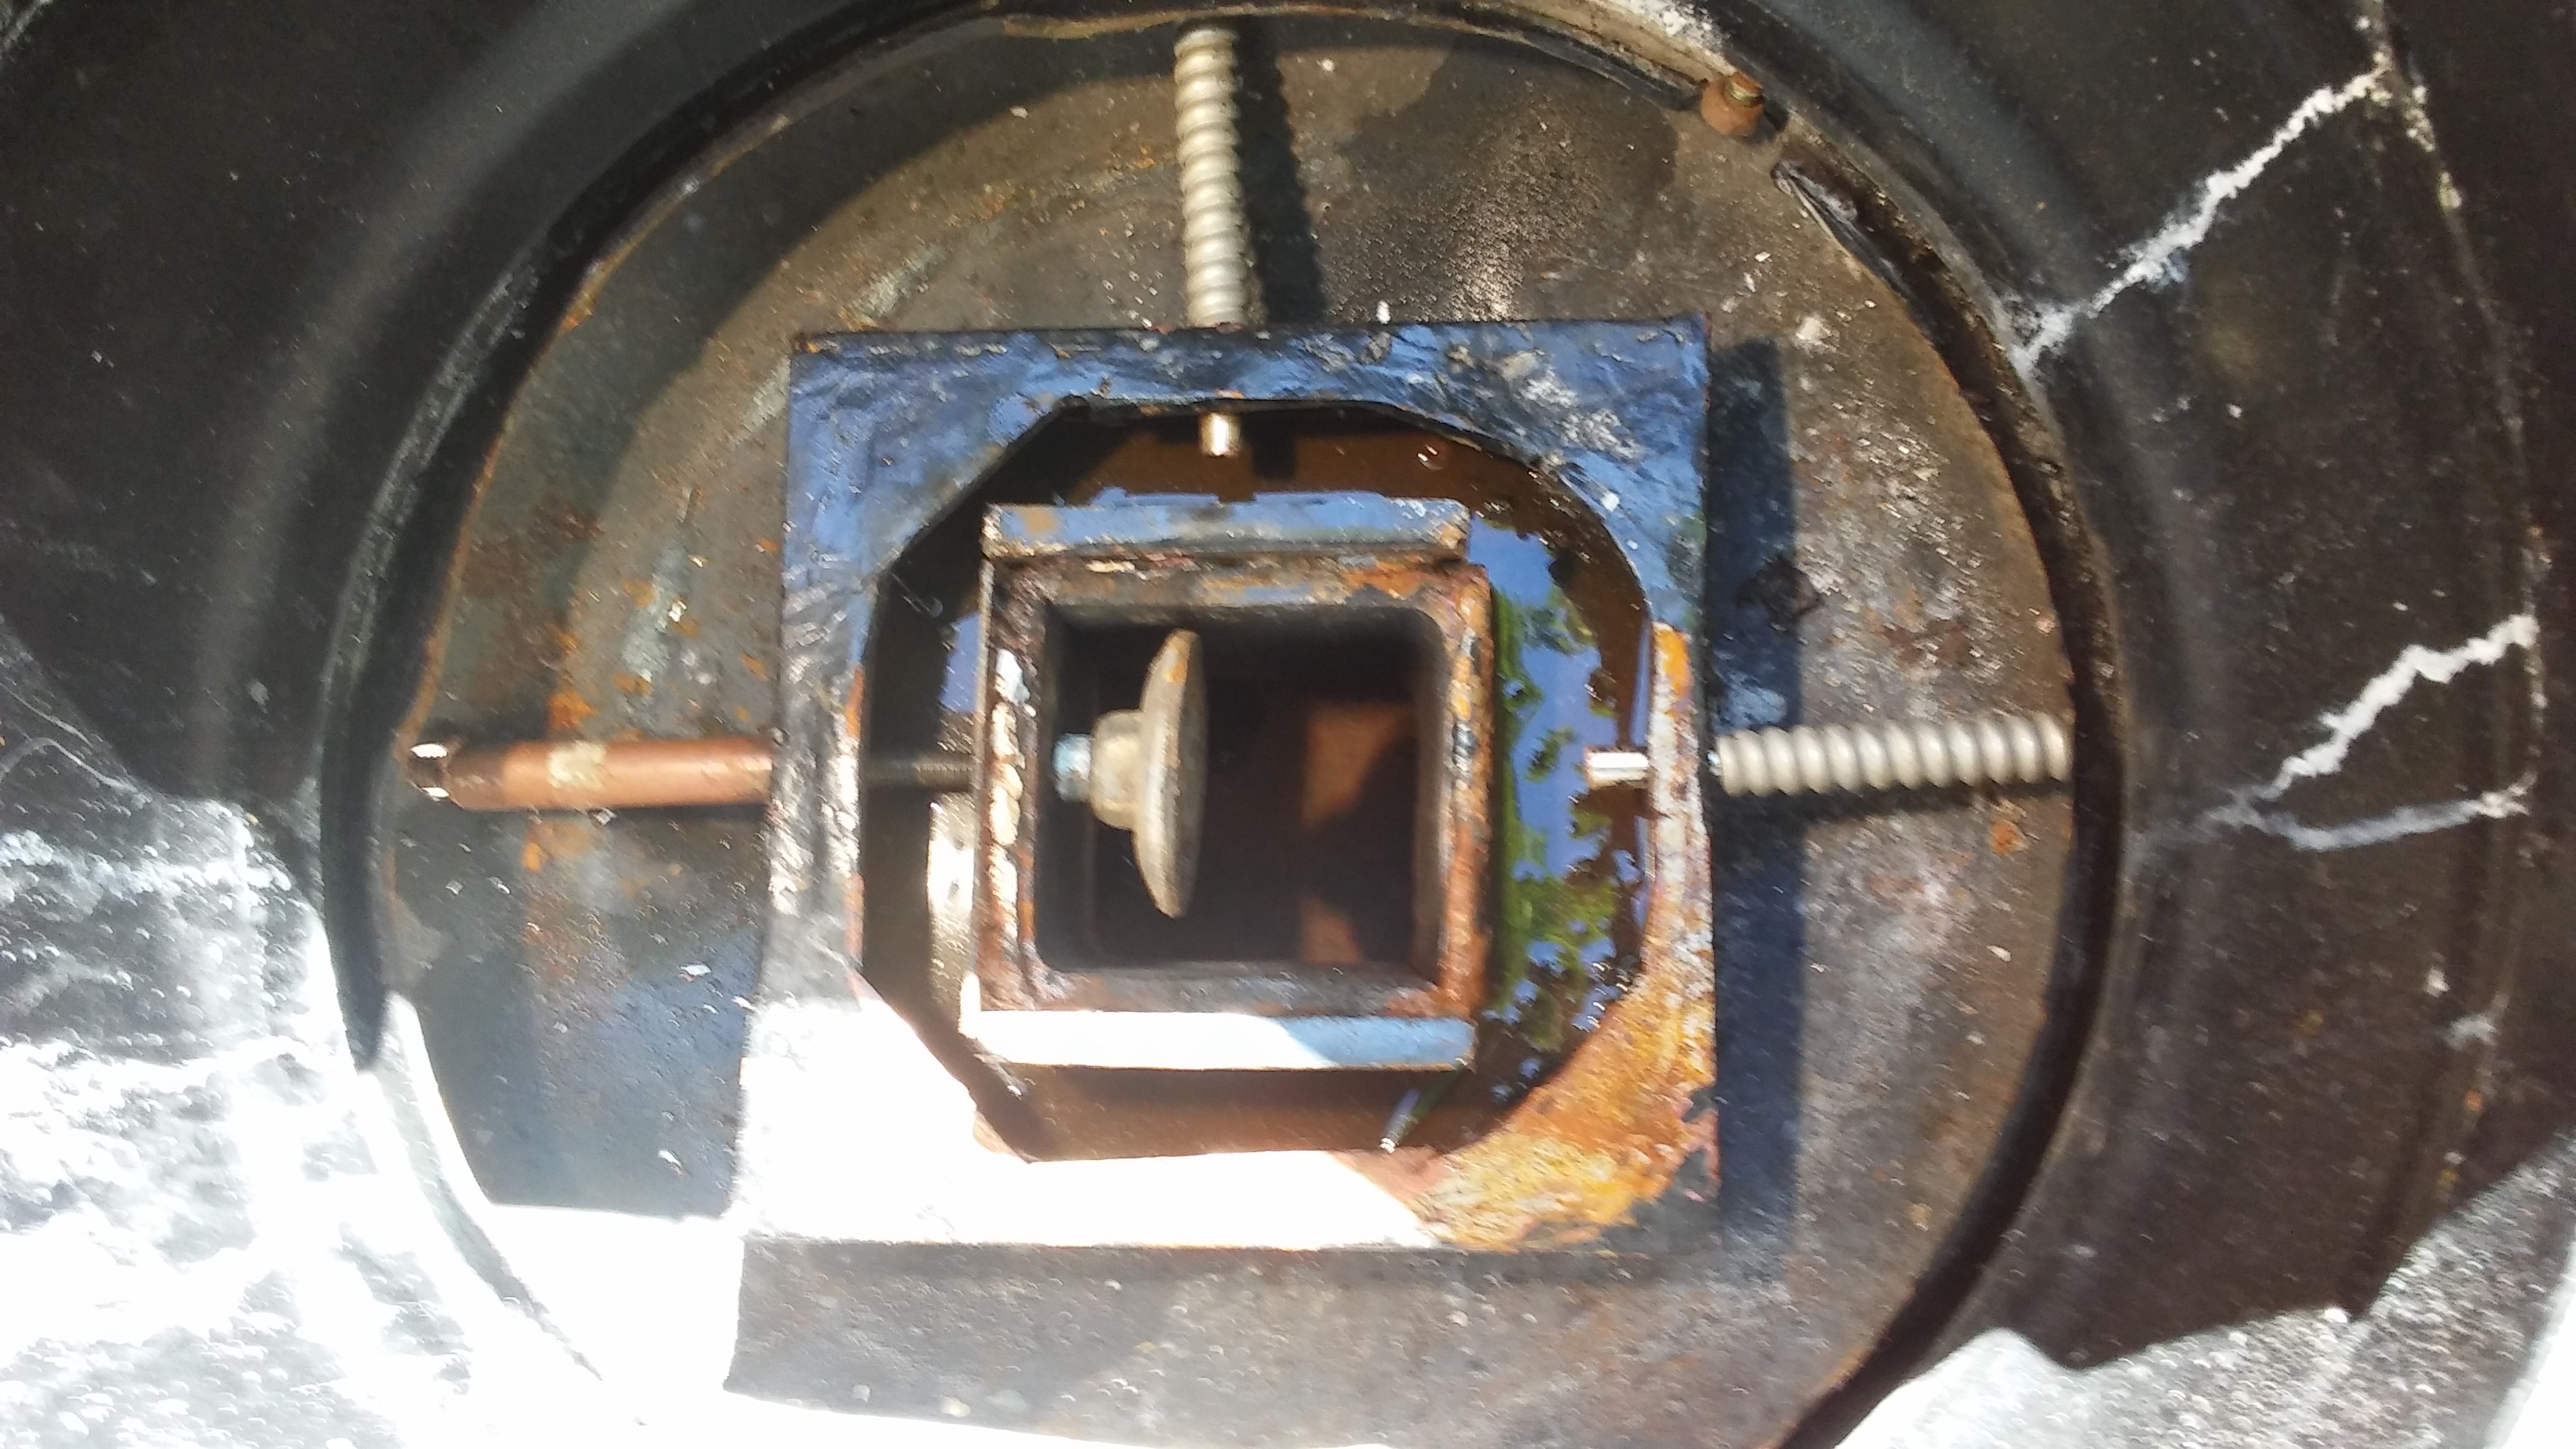
Is that cast iron lid welded to the base plate with no chance of air leaking around it? If there are any gaps under that lid, air can sneak into the gasifier and bypass the oxidation zone. That is until the charcoal around the leaking air catches fire and starts oxidizing in an area you don’t want it to. You have put a lot of work in this gasifier that needs some troubleshooting. I find myself wishing you had made a simple fire design that is “simple” and really bulletproof. Quick to make and gets you started on understanding how a charcoal gasifier works so you can build from there.
Gary in PA
5 Likes
I have pictures that show the rest of that grate section Gary. After it was all in place I filled up to the top of the angle iron part of that hearth with the water reservoir with cement mortar and then to the edge of that lid with refractory cement so everything is sealed. Part of the plan for this thing was that one or more nozzles could be easily added to make it a simple fire. Right now there is a pipe from the lighting port that extends to the edge of the hearth and it seems like if the air in the bottom plenum was blocked that it could run as a simple fire right now. I mainly went with Don’s design because I liked how he was feeding the steam into the system.
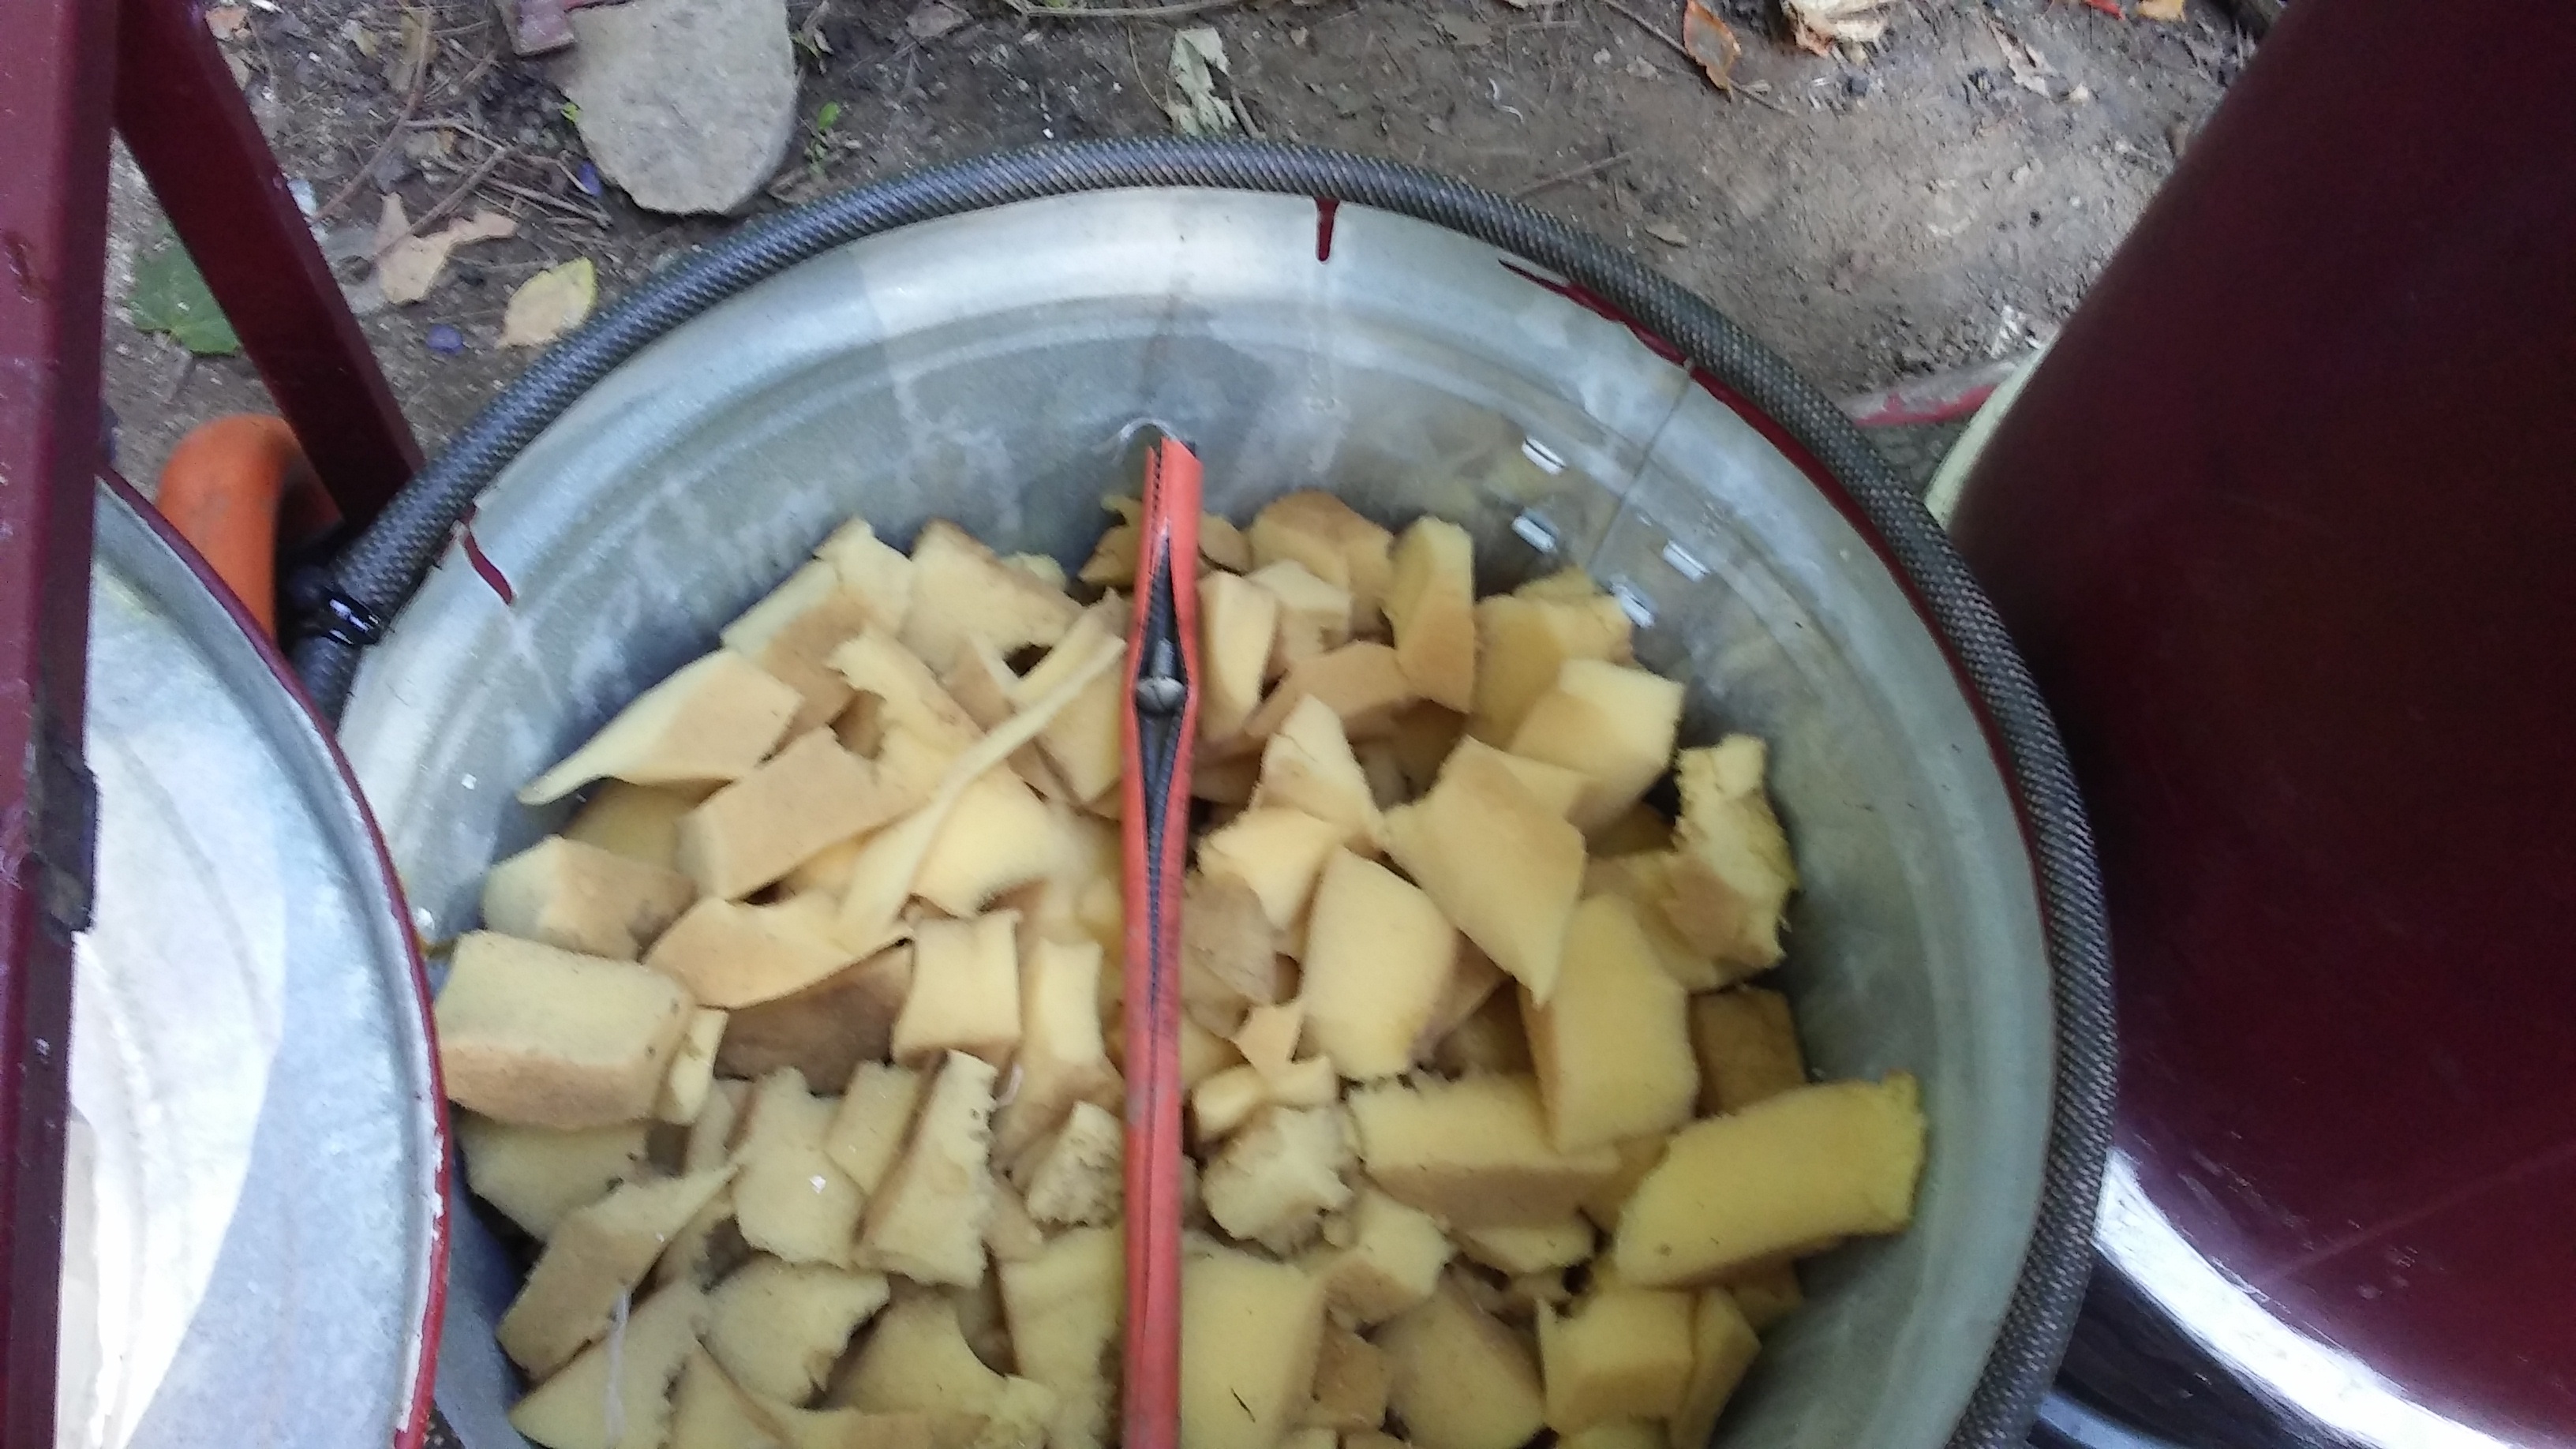
I don’t know how much charcoal I have in the hopper Don but I’m going to cut a four by four access port into it today and empty it and see what’s up with that grate. I had three feet of charcoal above that hearth when I started. I don’'t know how much is left or what the minimum is for it to run properly. I really appreciate all the help you guys are giving. Probably wouldn’t figure this out by myself. Anyway before I cut the hopper I’ll fire it one more time and bypass the filter like Gary suggested.
2 Likes
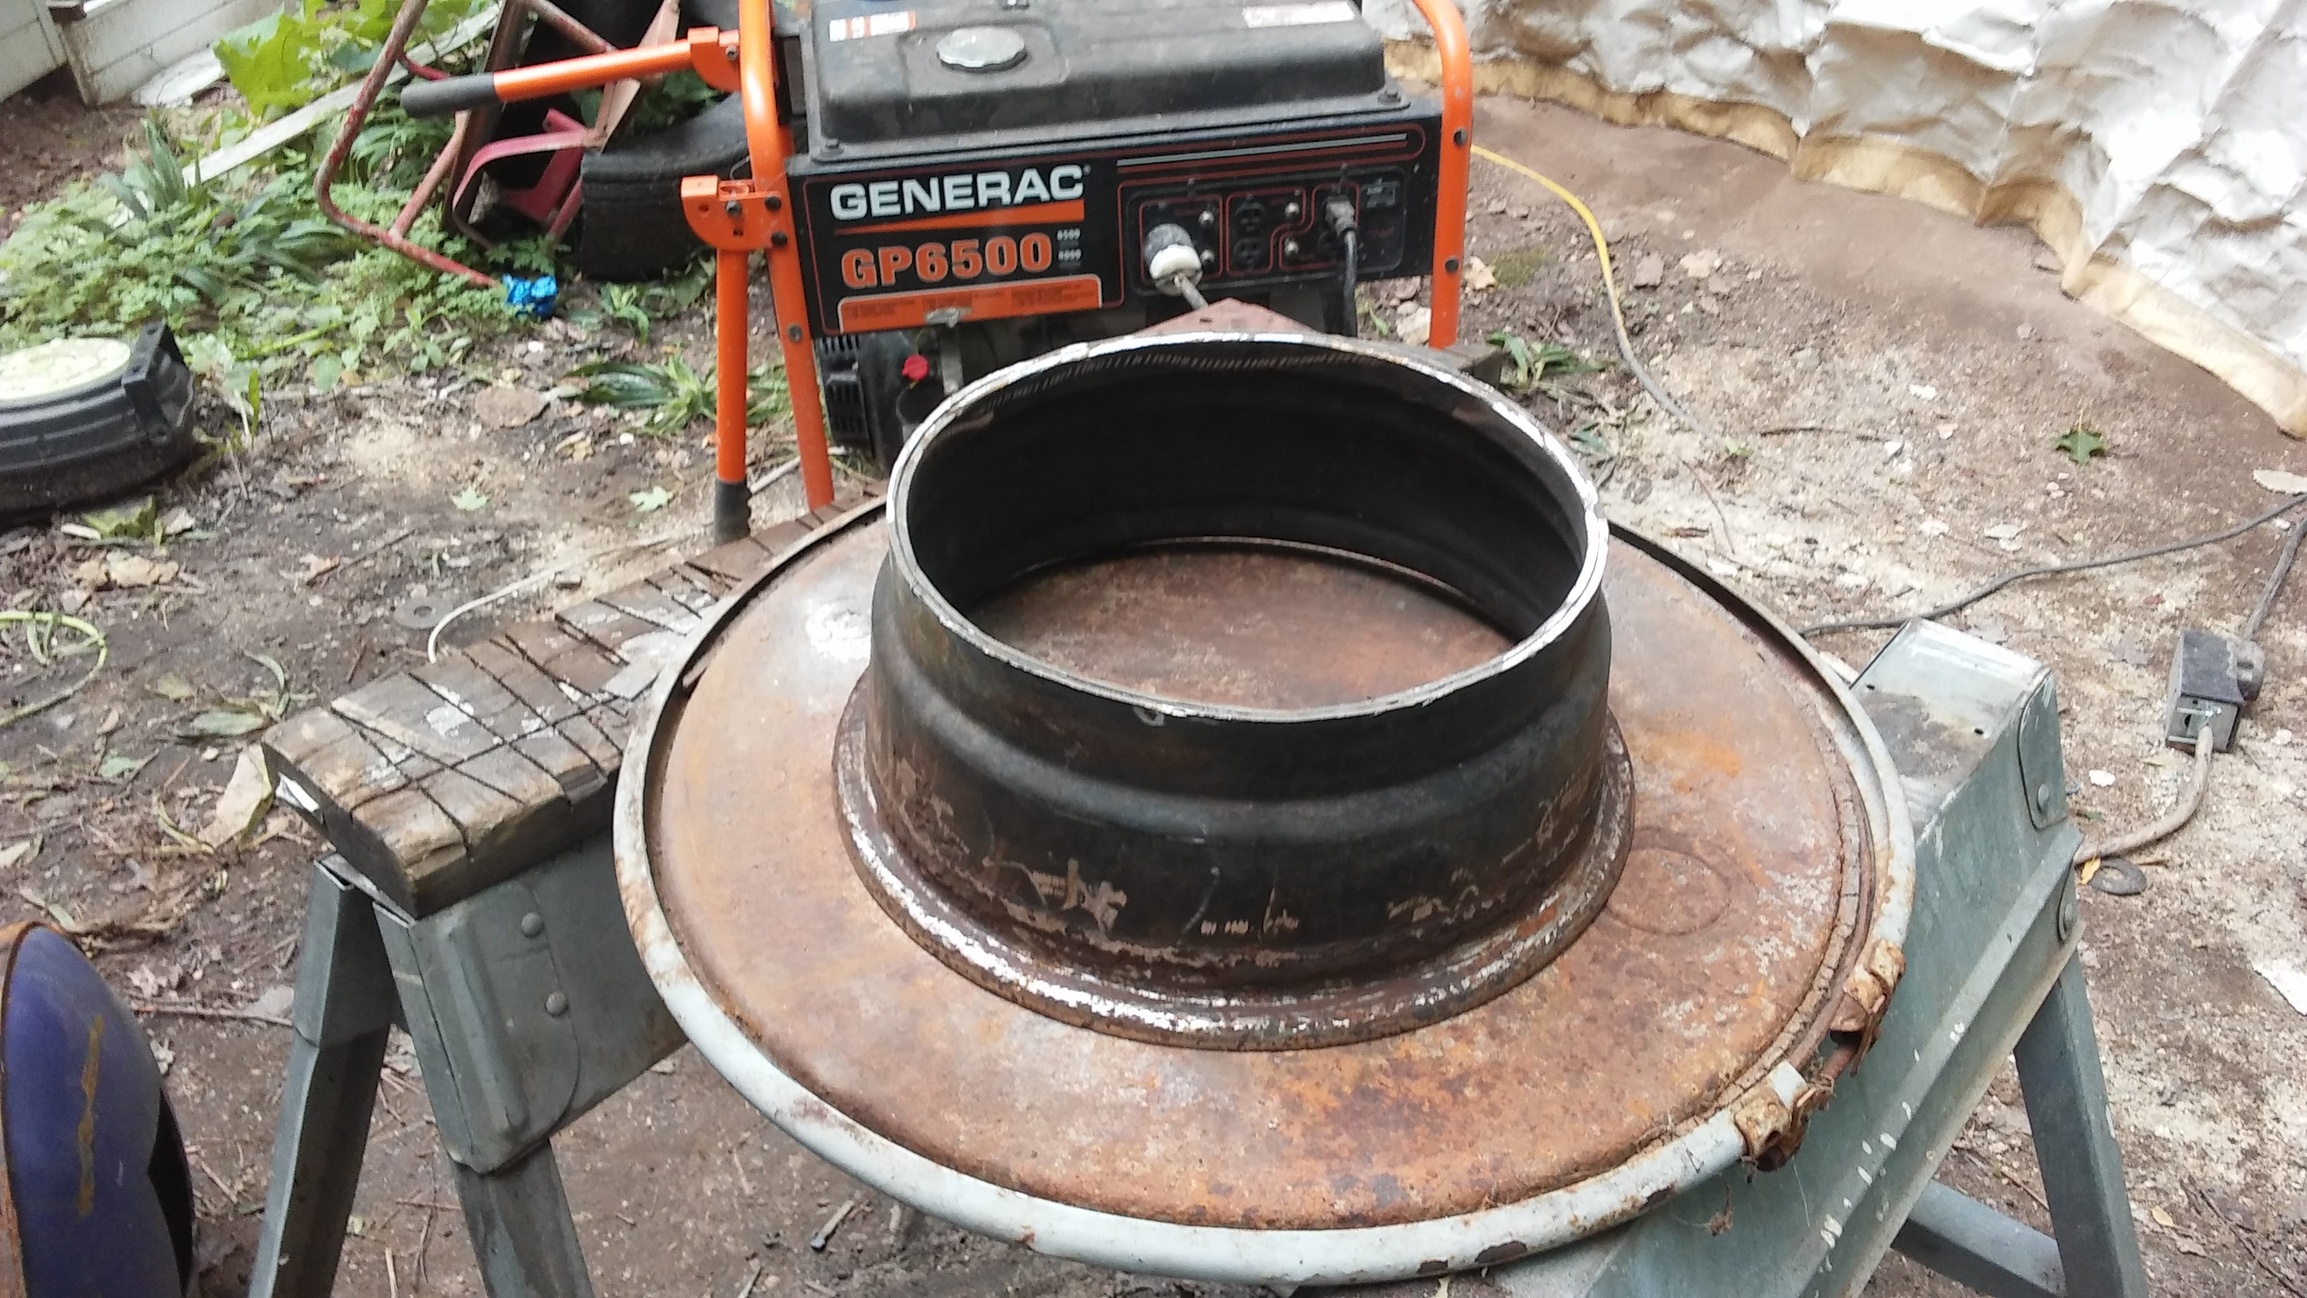
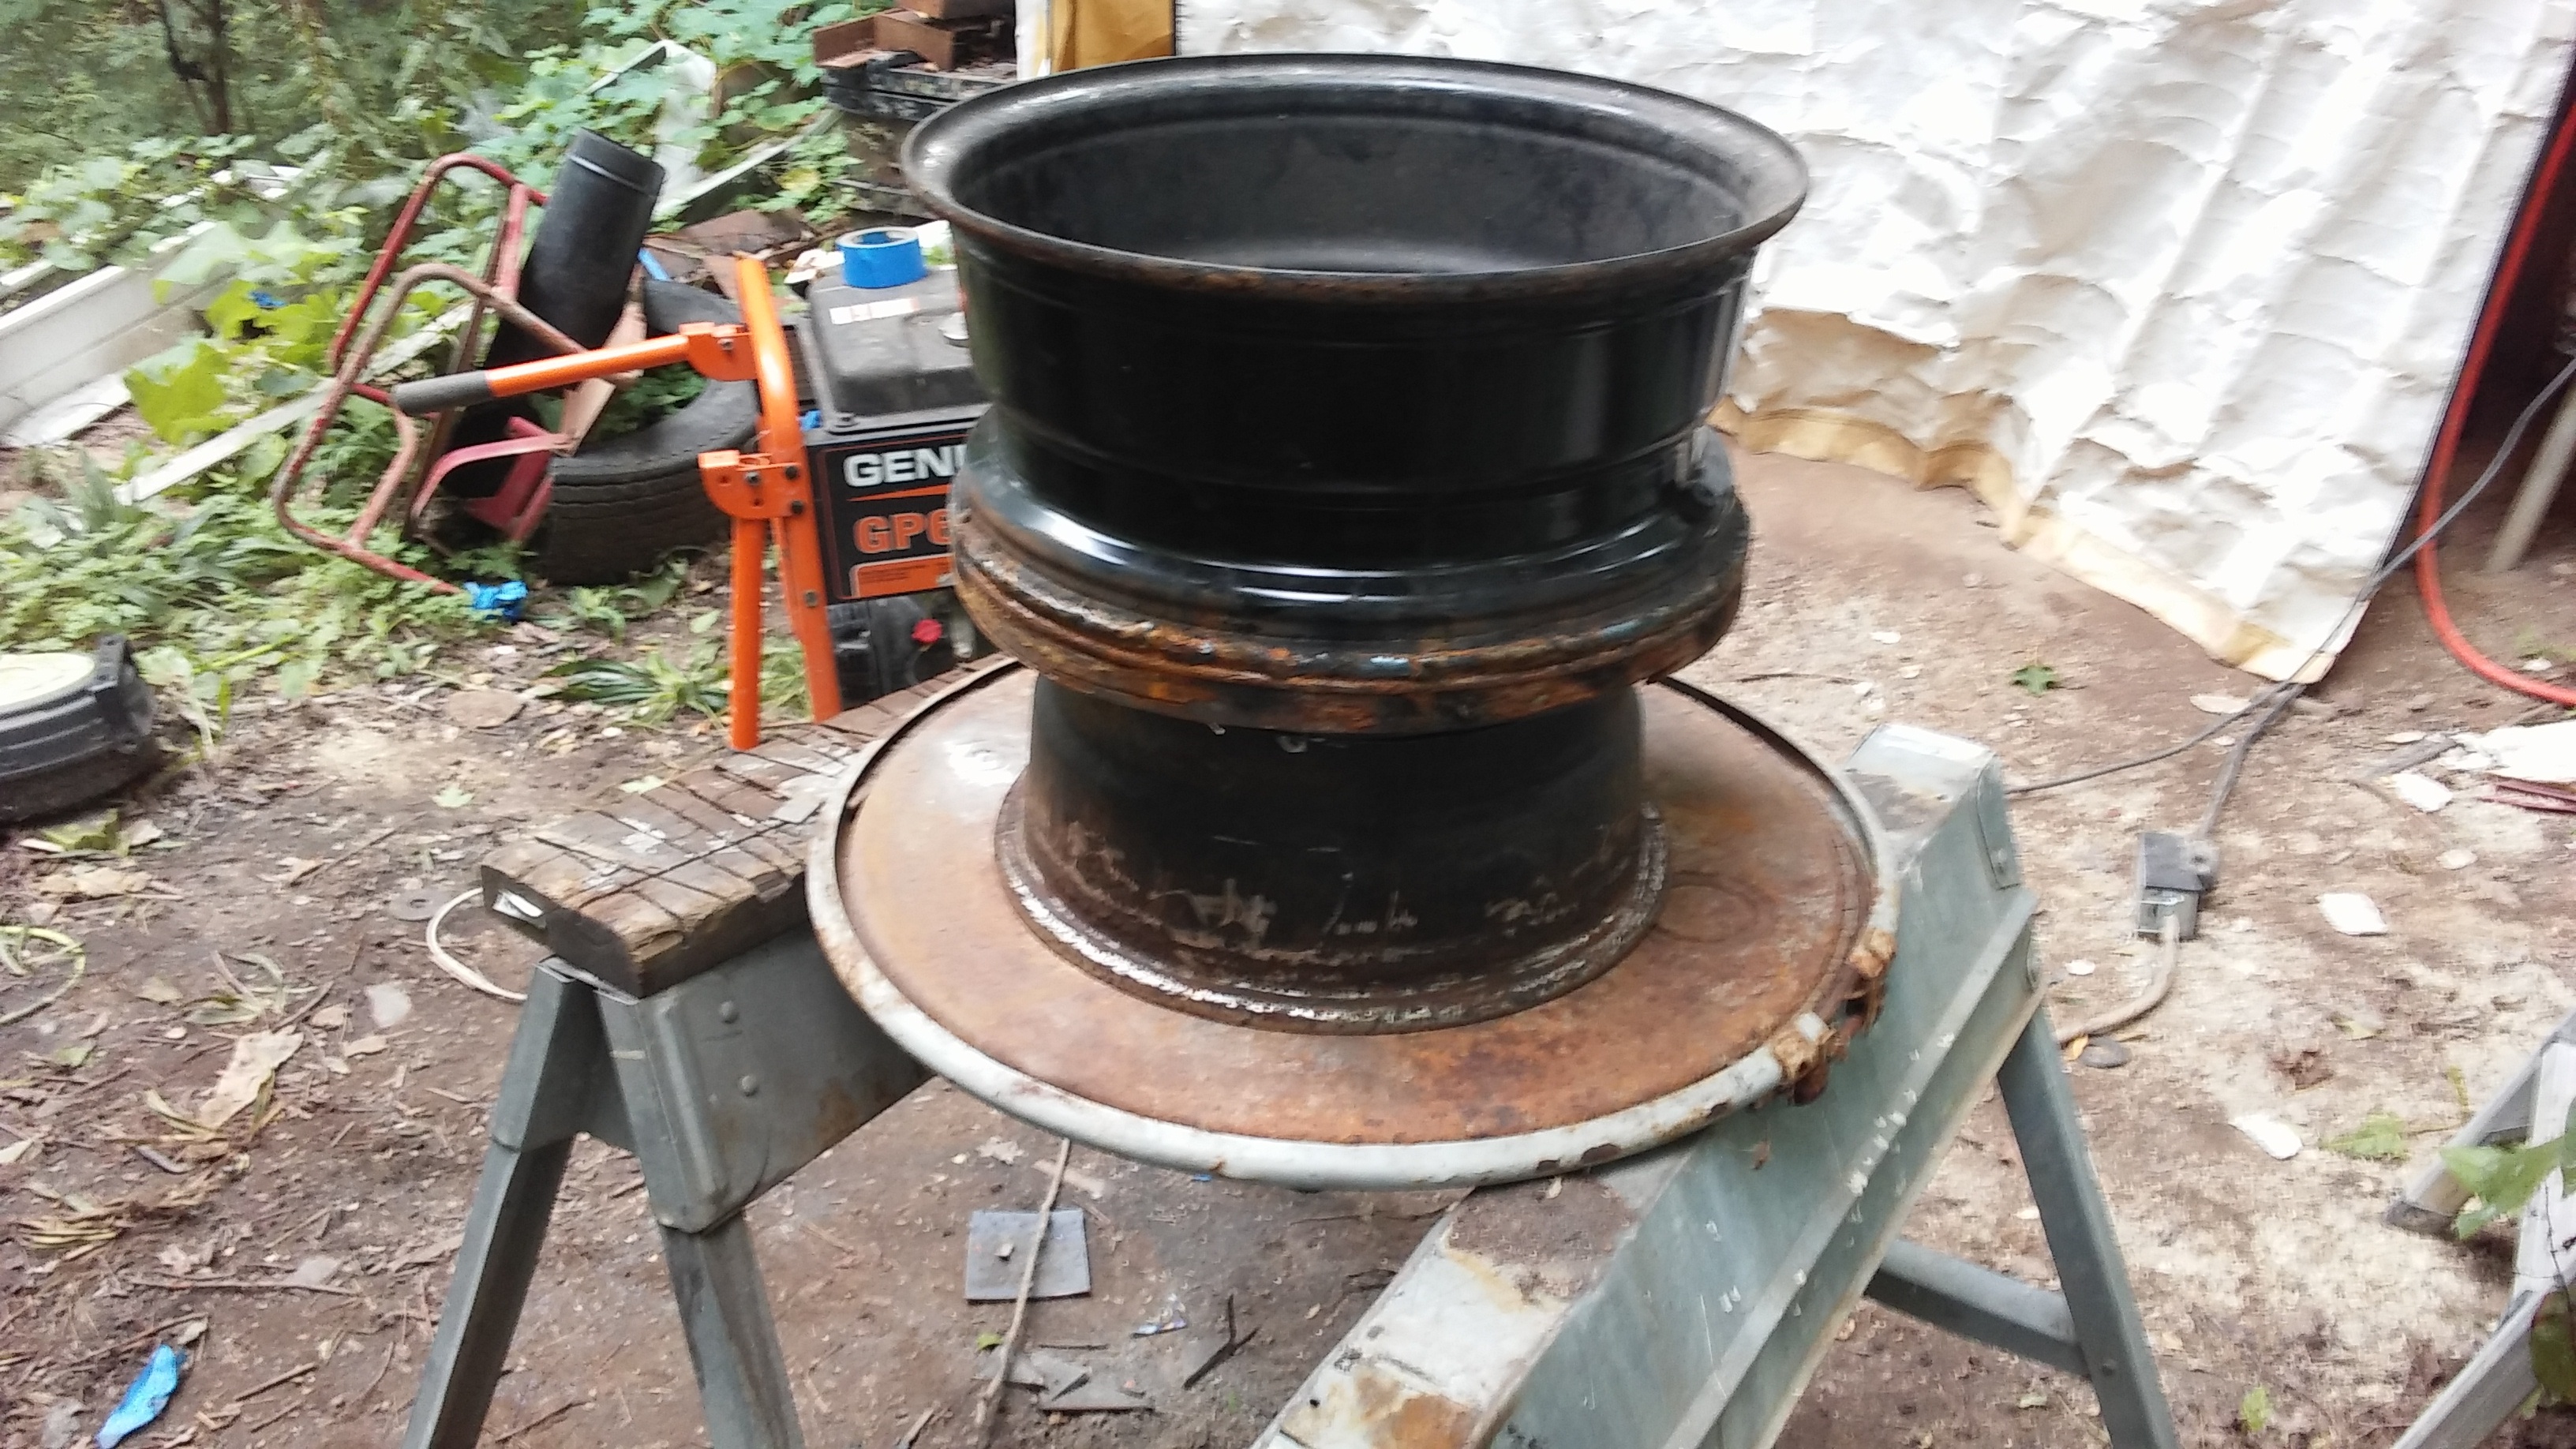
This is the hearth components in place. There is a grate shaker and two quarter inch water lines coming in from outside the wheel. One water line is to run water to the trough and the other is an overflow line in case the reservoir overfills. They were encased in tubing so that after the area is filled with cement the lines could still be changed if necessary.
The hearth with regular cement mortar to the top of the reservoir section.
To the top of the dutch oven lid. This is refractory cement. since this was never going to be in a vehicle weight was not a concern. I like to use cement on these kinds of projects because it made a sure seal. I even added some to the trough in the top of the wheel that the hopper sits into just to make sure that there was not unspotted pin holes in the welds there,
4 Likes
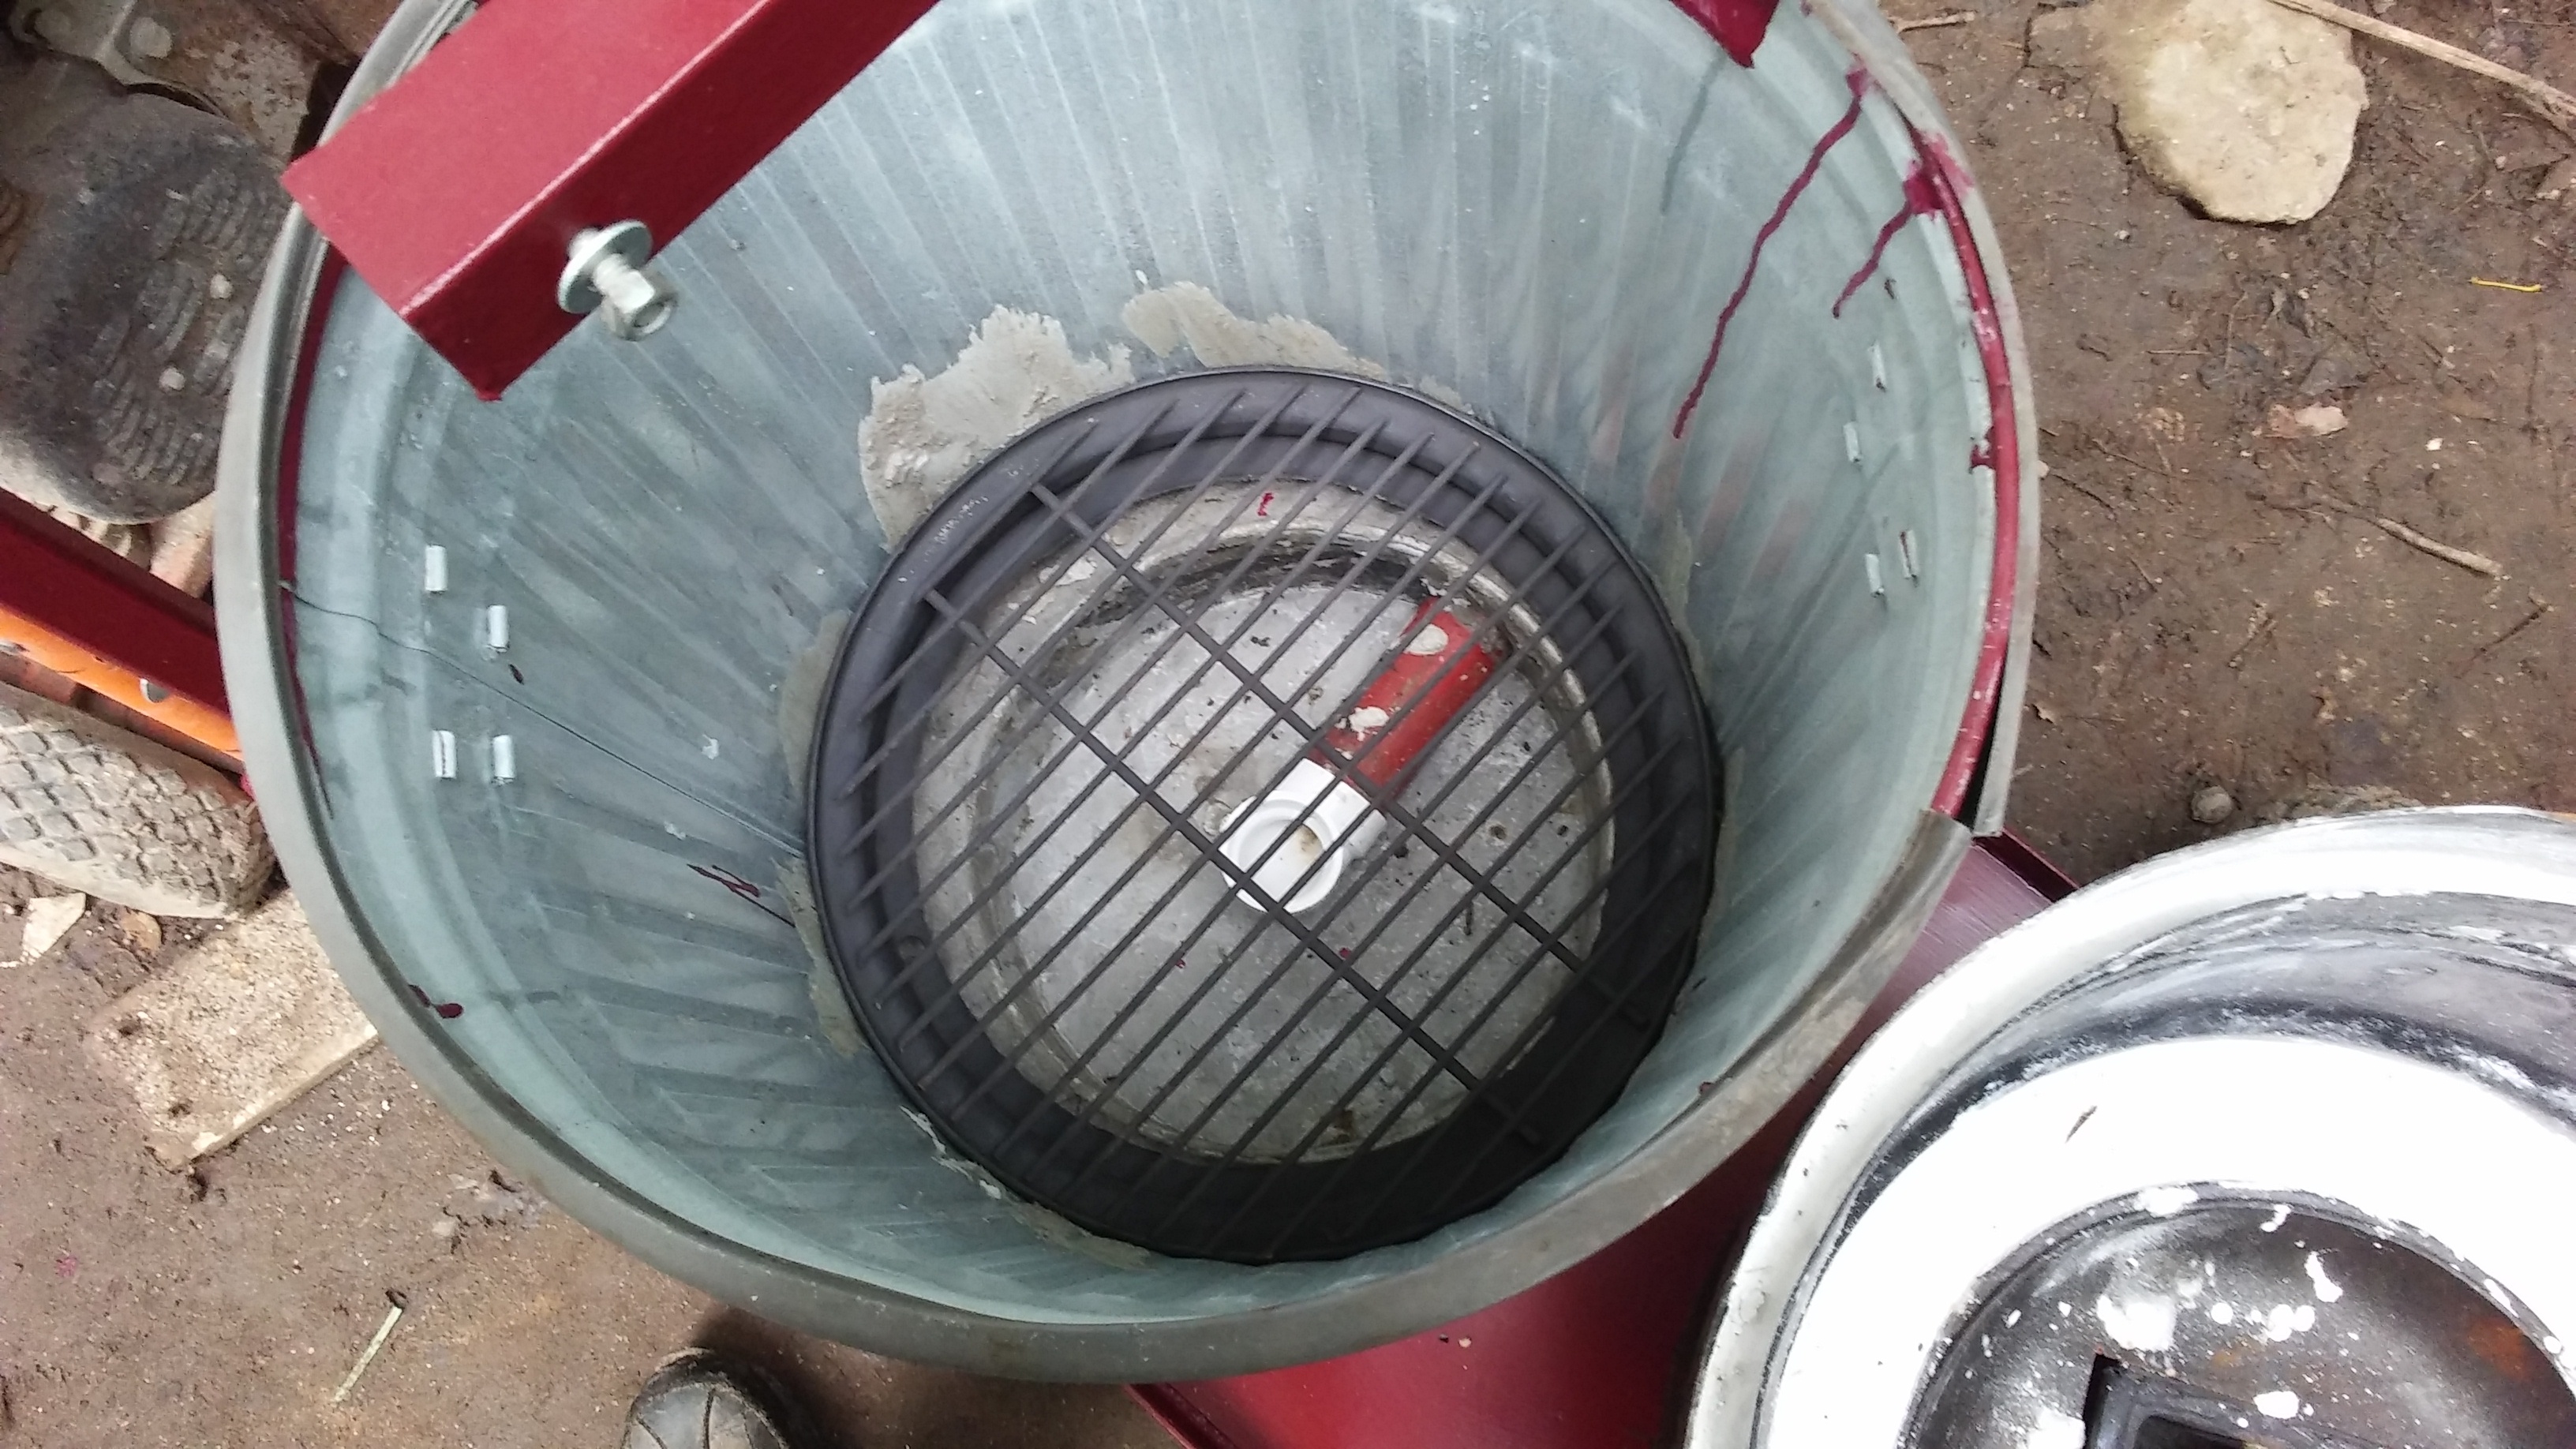
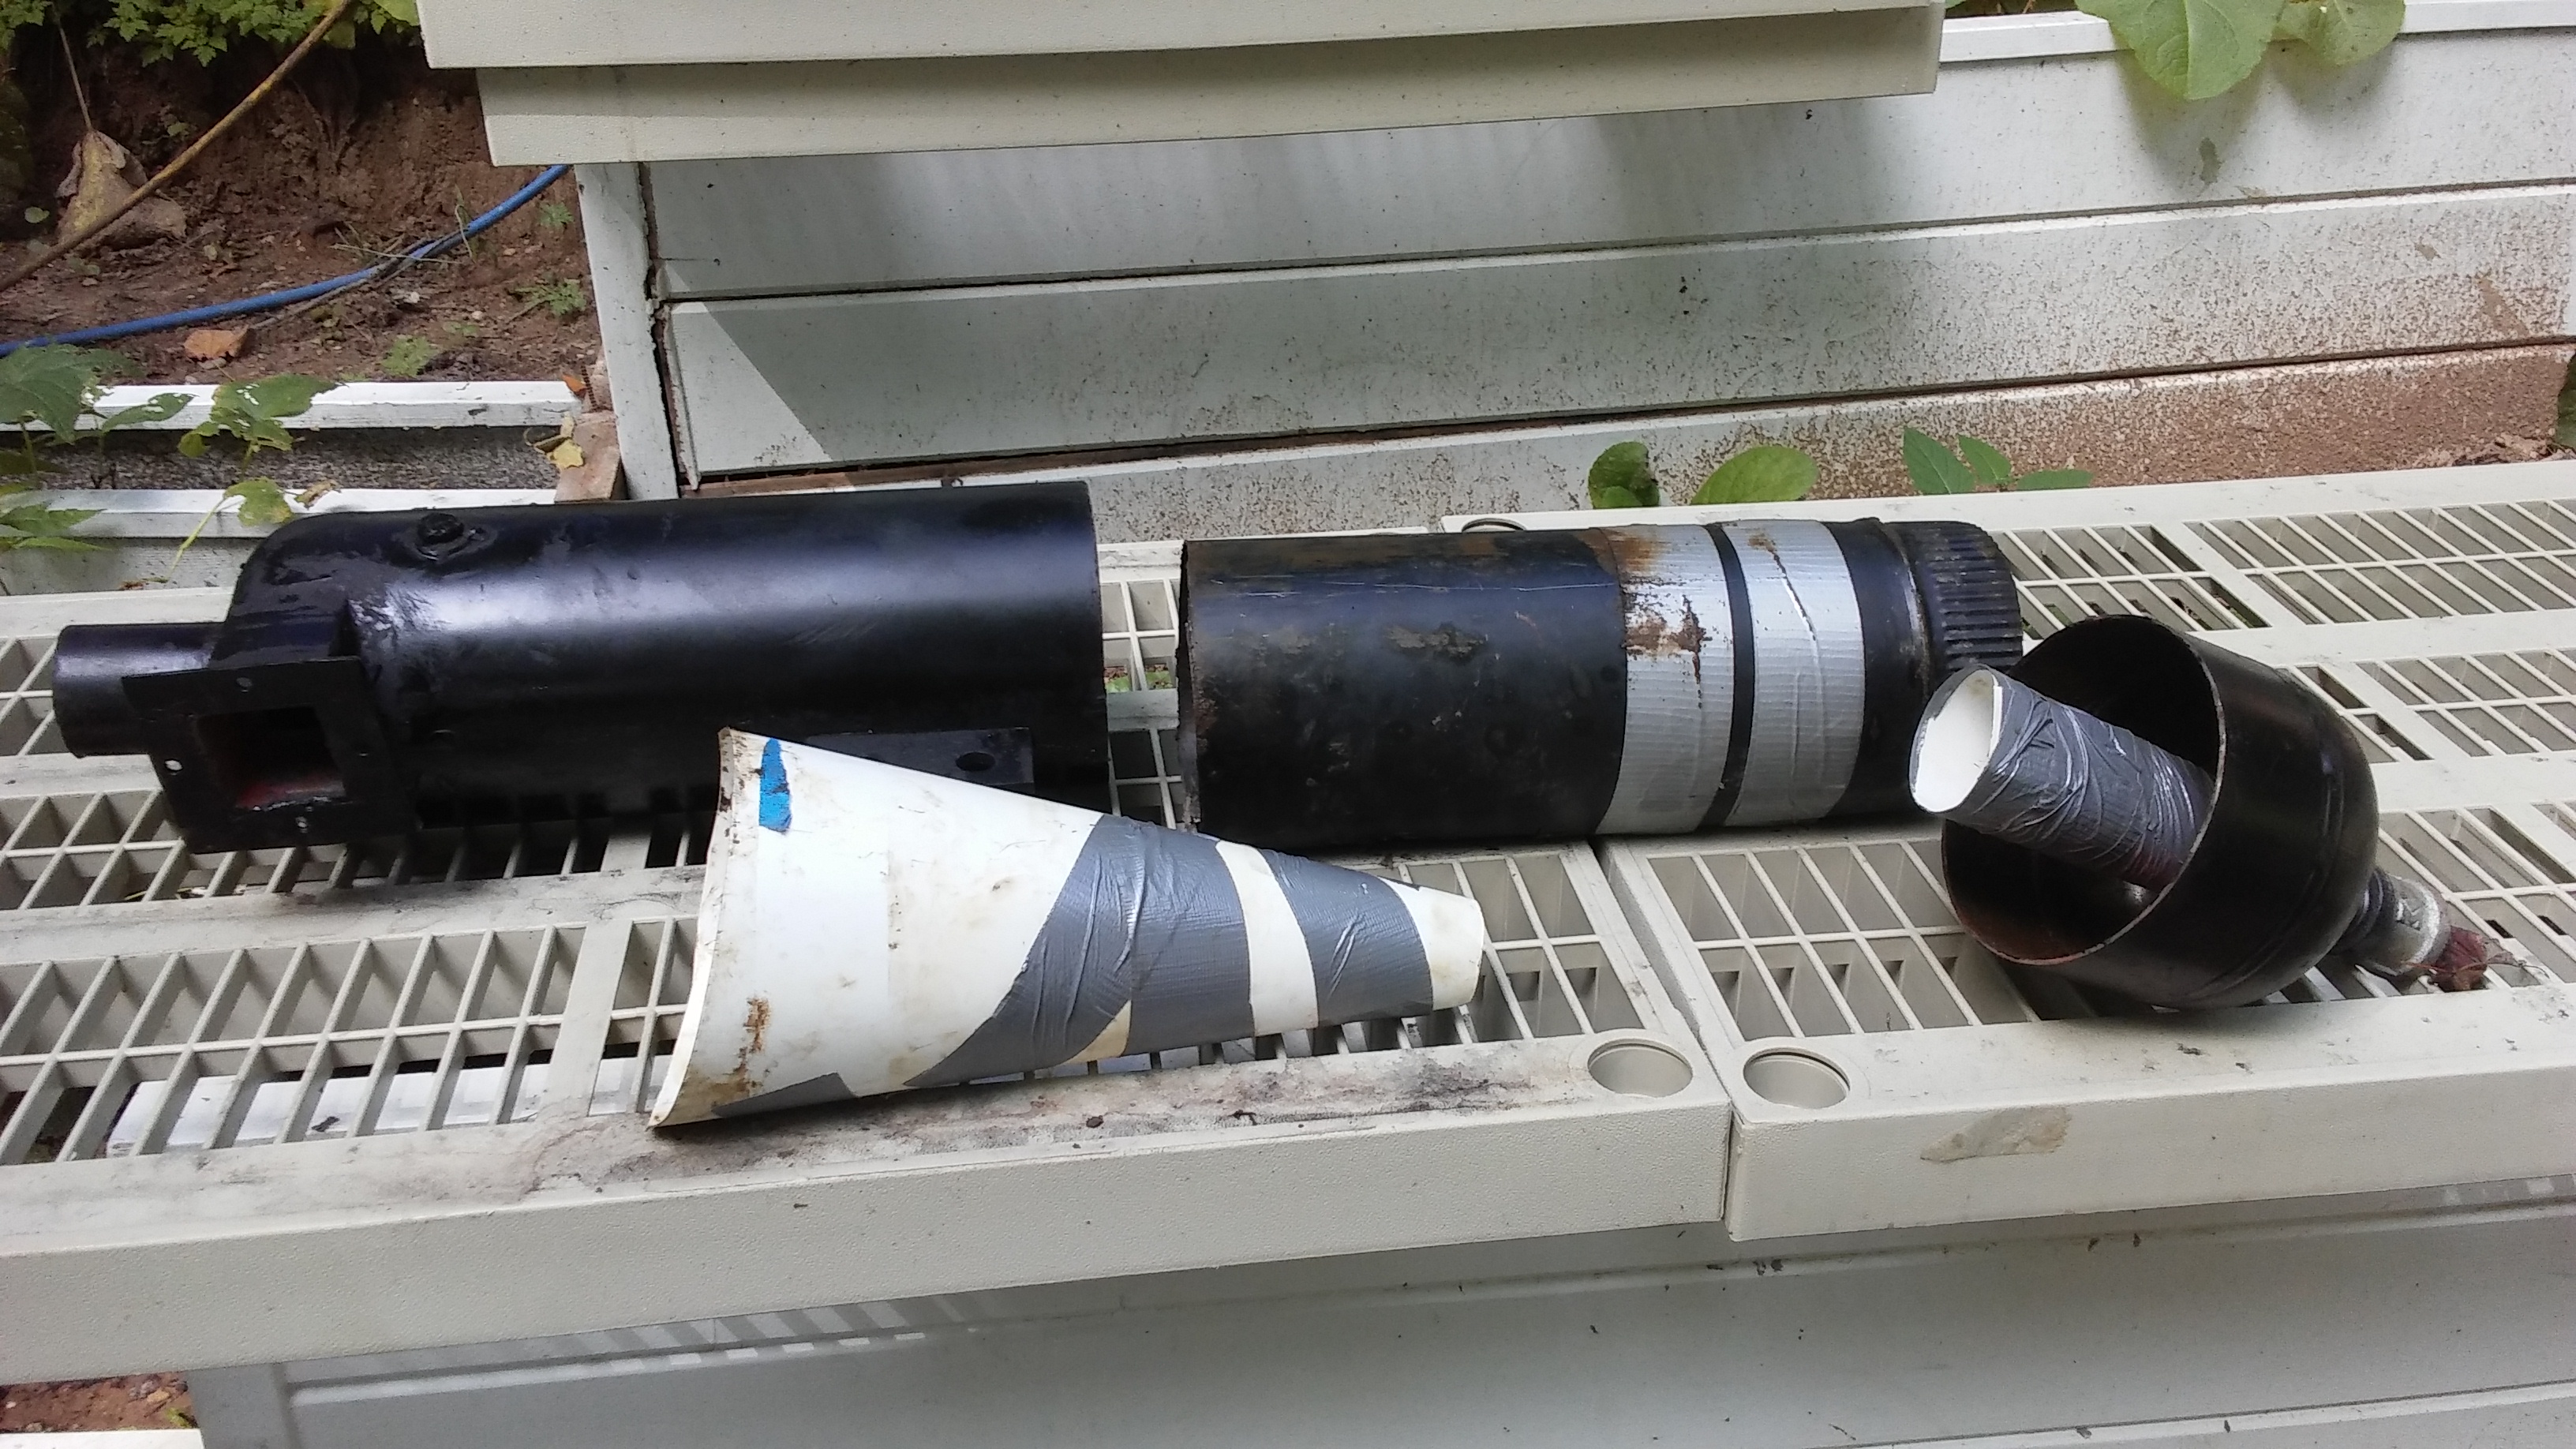
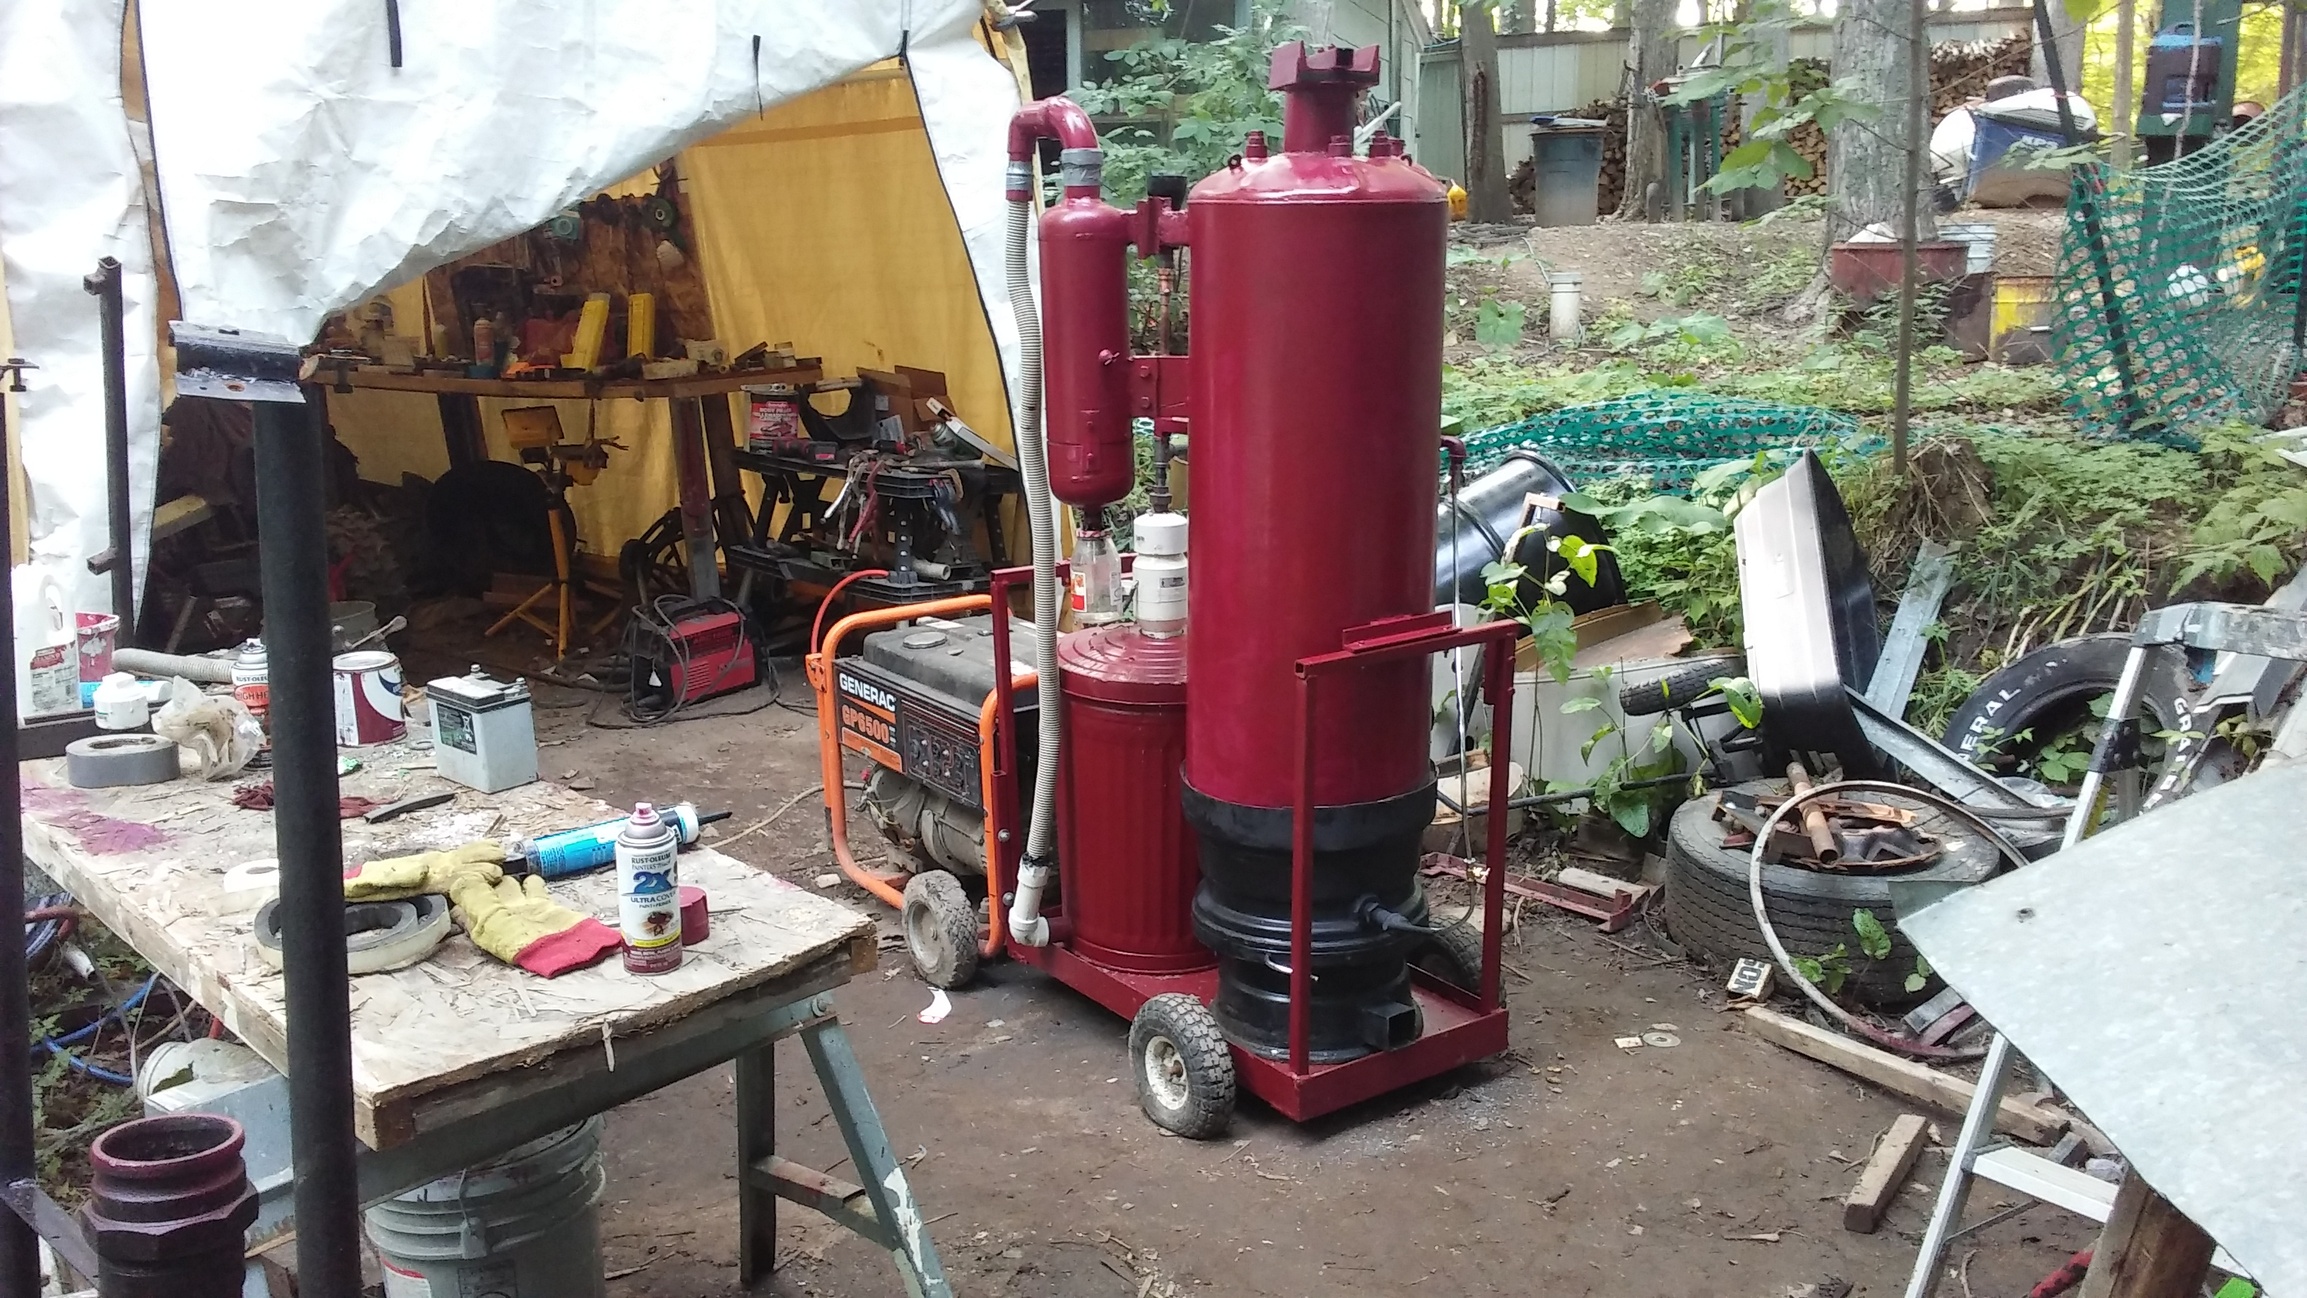
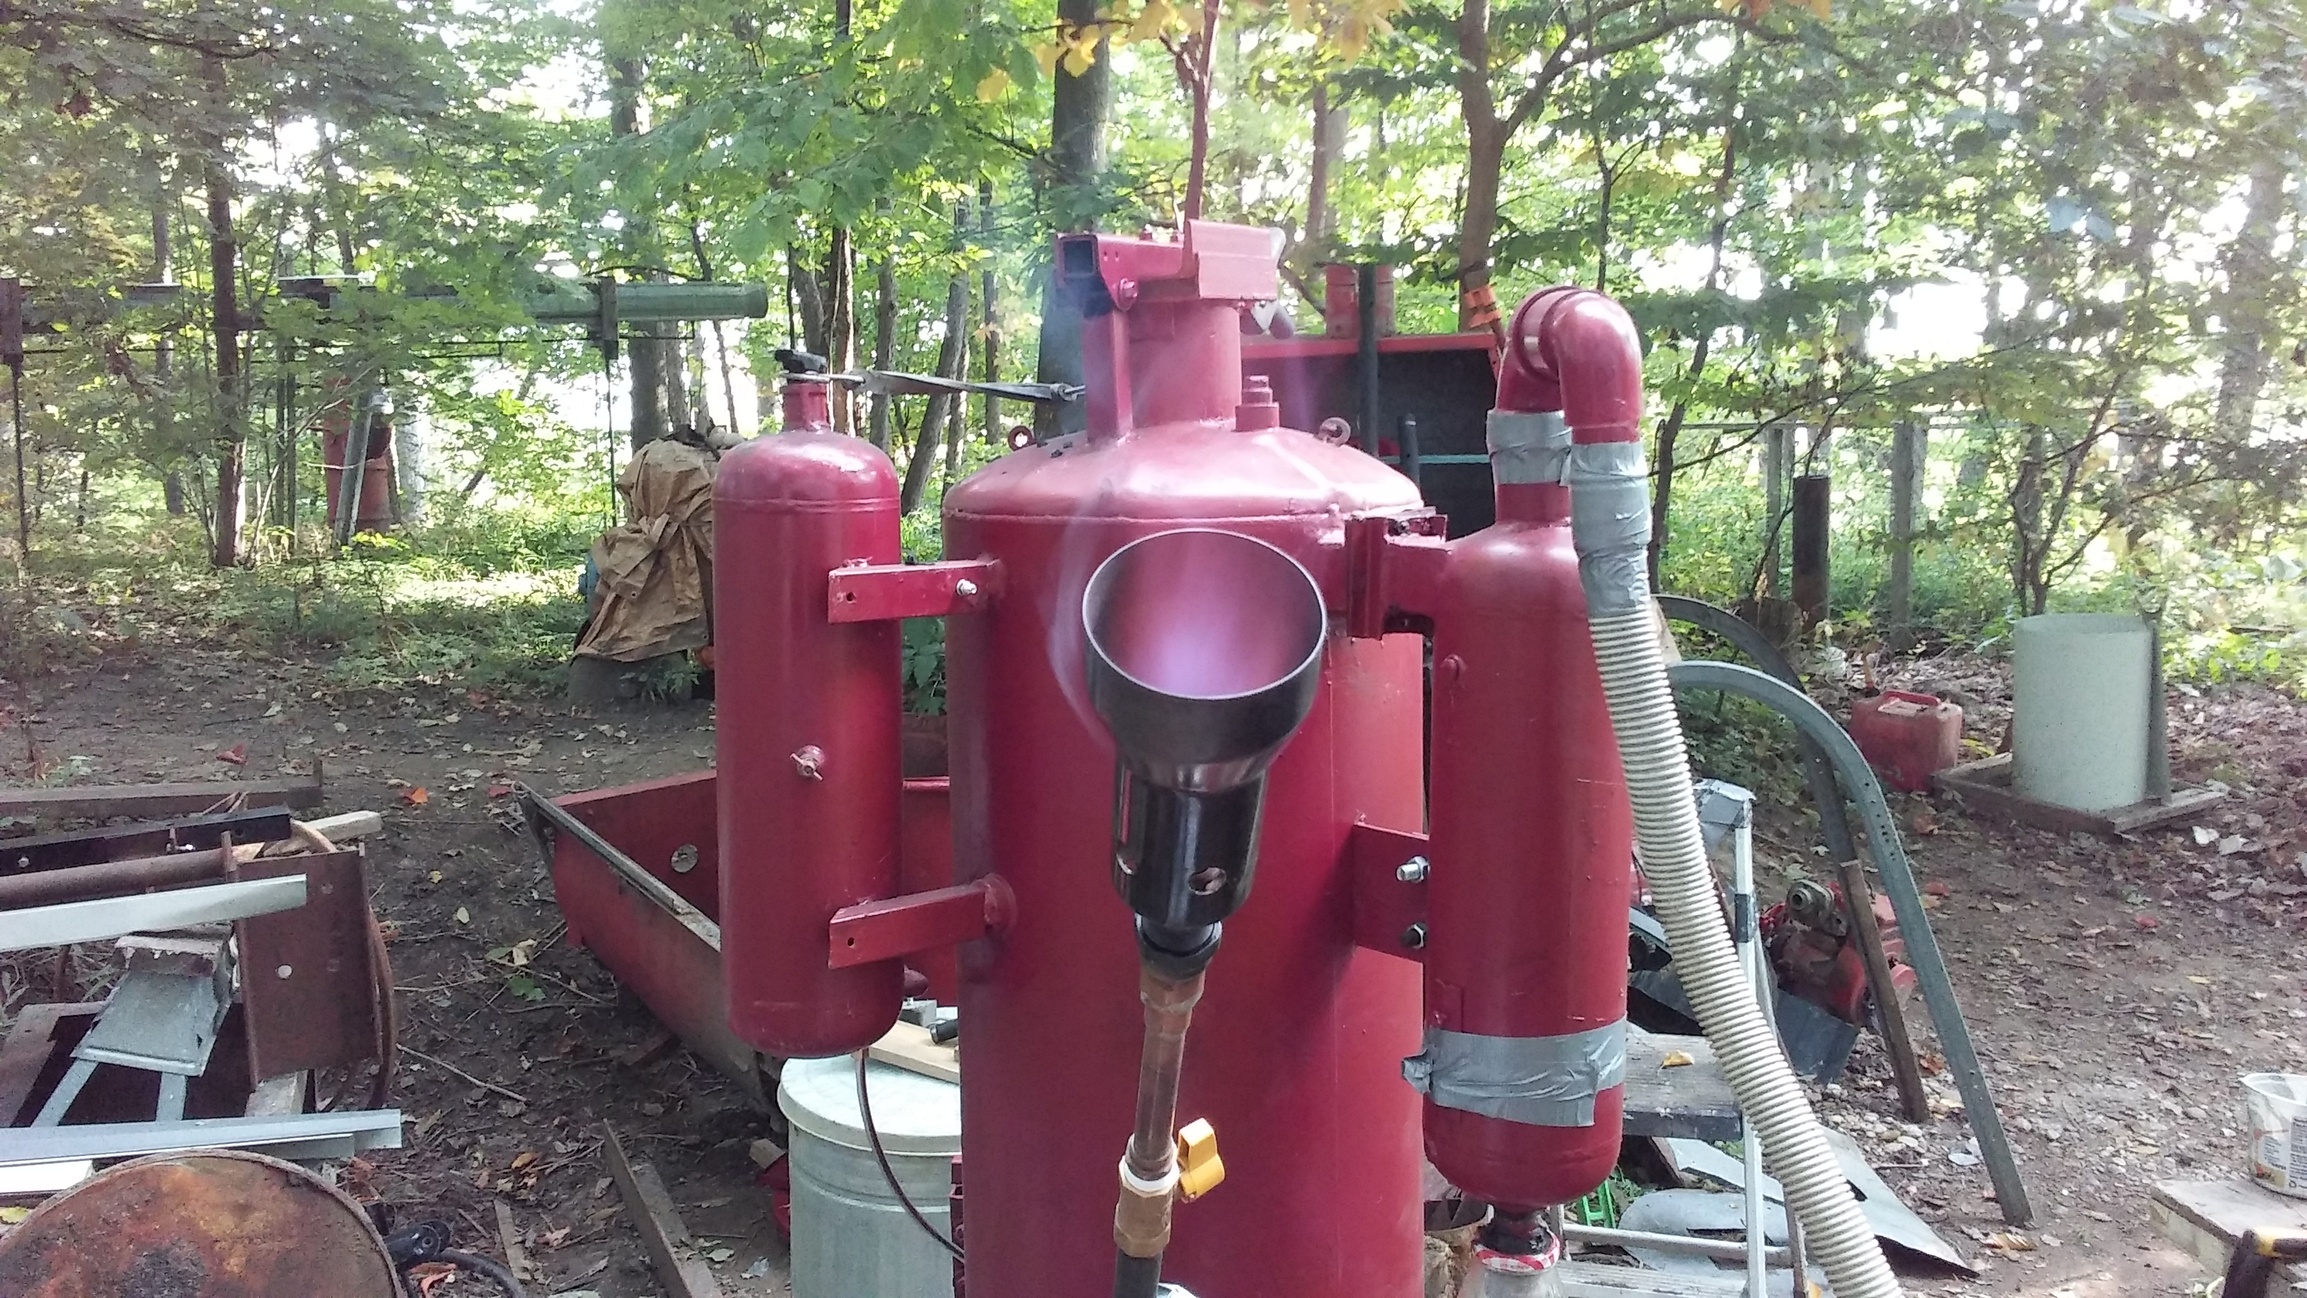
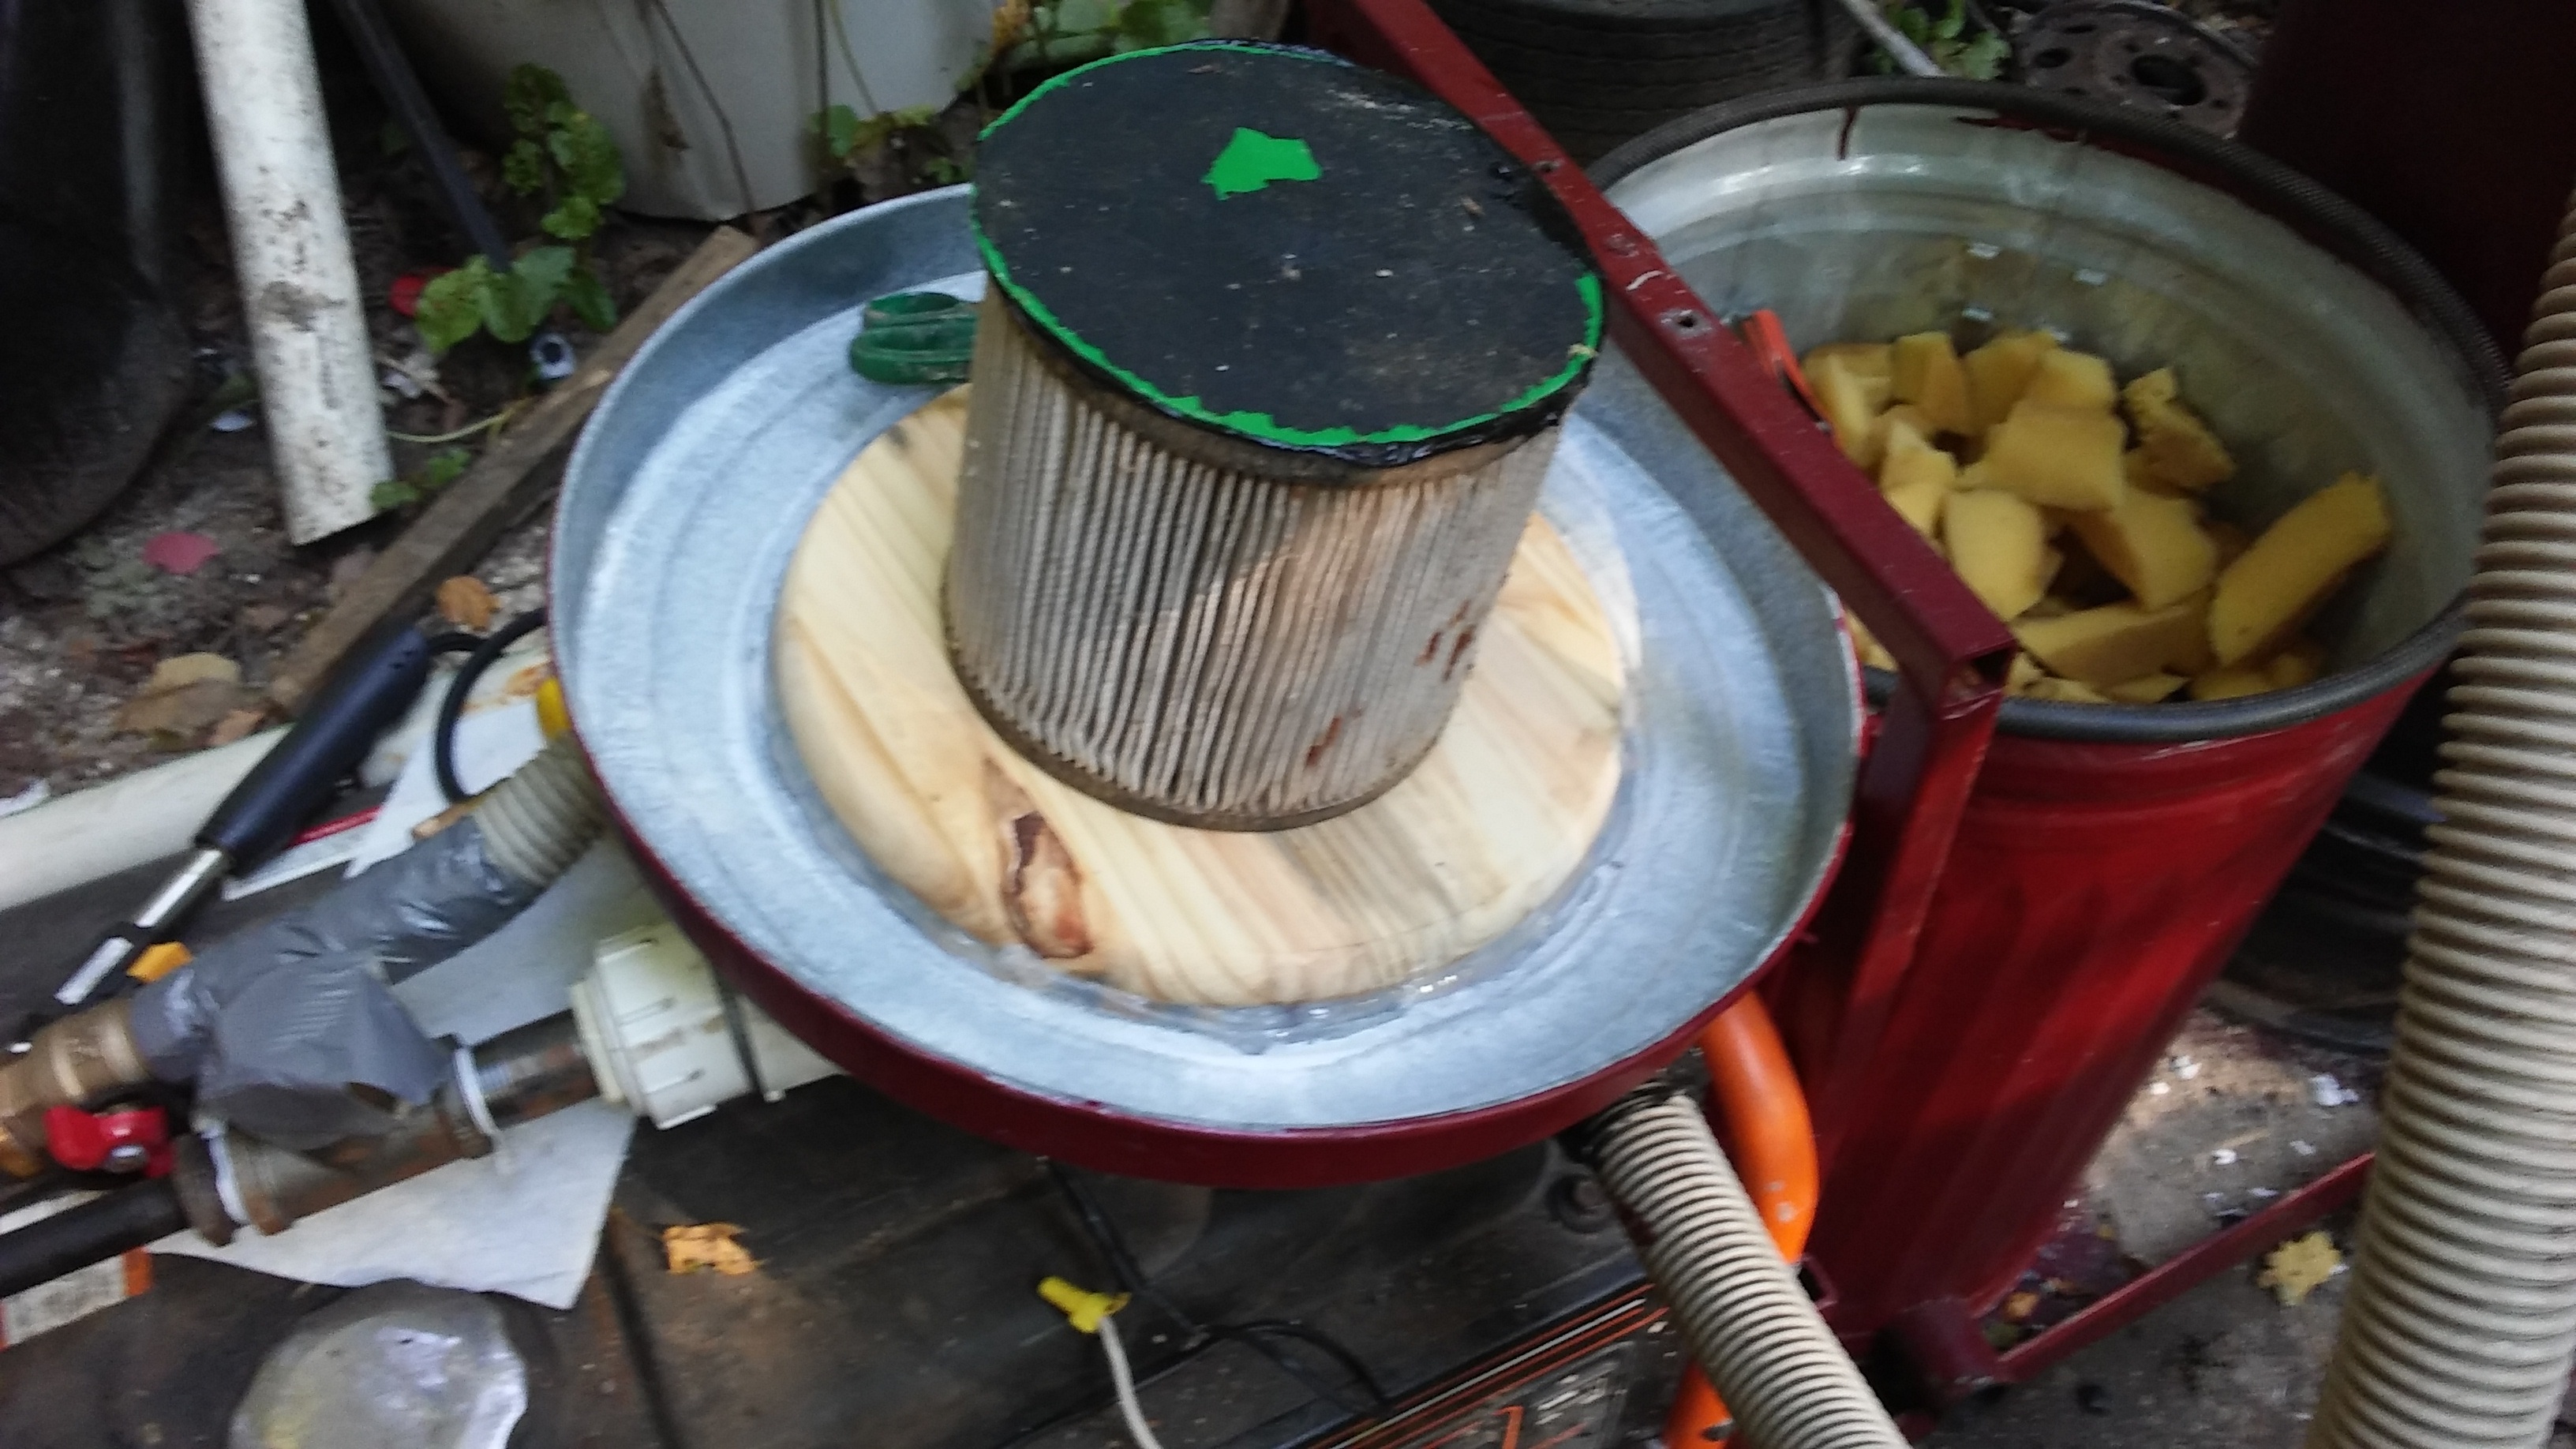
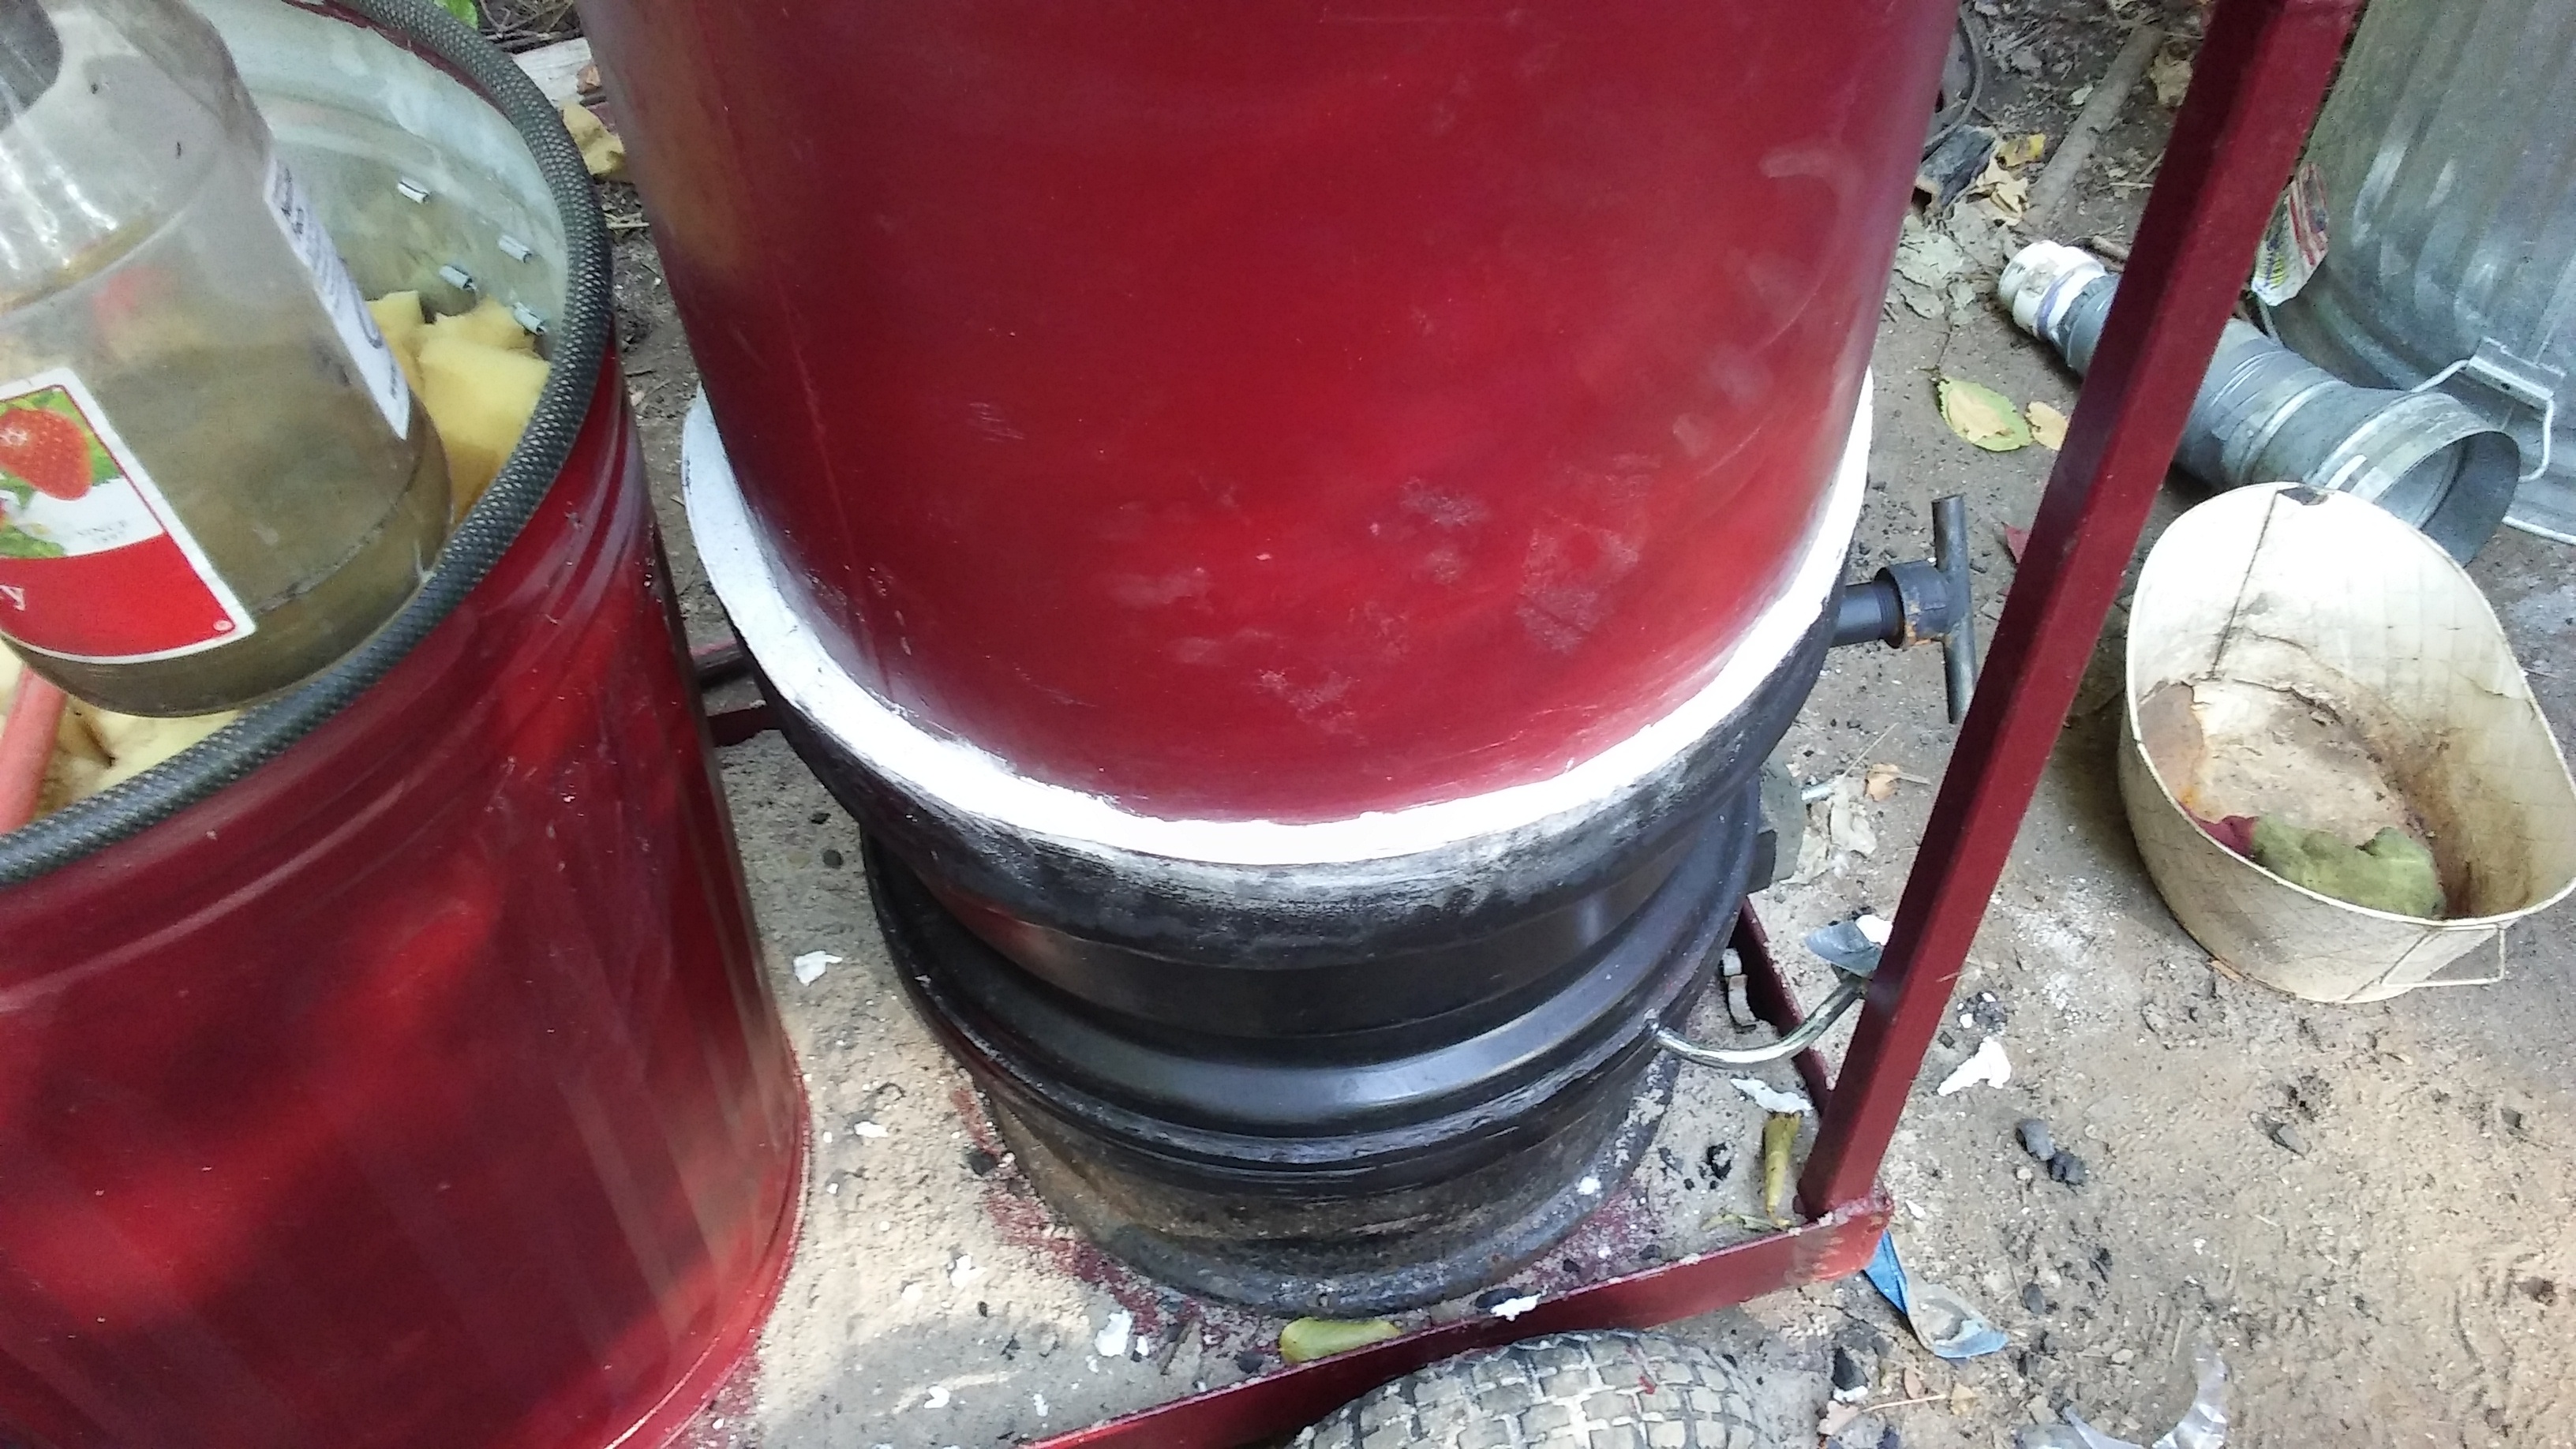
From this point on the rest of the build is pretty typical. The two tanks hanging from the hopper are for water supply and the cyclone. These were made from tanks from a Hitchi air compressor that died. The filter is just a metal trash can with an inch and a half pipe cut into the bottom. I poured a ring of cement around the bottom of the can to hold the pipe and stabilize the can. Another cut off wheel section was slide down to that cement ring and another grill grate sits on that. This was then filled with shredded up chunks of foam that some rodents were nice enough to start shredding for me where I had it stored. A twelve inch diameter piece of wood is silicone’d and screwed to the lid with a two inch piece of PVC extending a couple inches below the wood and a shop vac filter glued over that. The wood stabilizes the bilge blower and makes a good seal. The thing on top of the flare pipe is from an old desk lamp. I thought it added a nice touch.
These are the parts I made the cyclone from. One six inch diameter air compressor tank cut in half. I took a piece of aluminum coil stock and rolled that into a cone and taped it together. I slide that into a piece of six inch stove pipe just so I could pull it all apart if it didn’t work. I didn’'t want to screw up the tank. I ran a one inch nipple up through the bottom half and made a smaller cone over that, then filled around the cones with spray foam to hold them in place. When assembled the bottom cone slide over the top one and the pipe is slide up into the tank. Not the best way to do it but I thought I share anyway.
2 Likes
Gary was right. Once I disconnected the hose to the filter and ran the blower right off that I got a flare right away. I didn’t have any kind of handy weather stripping to seal the lid of that barrel so I split a piece of air hose and pulled out the core. That wrapped around the can rim. I had to pound the lid down with my fist so it may be a bitch to get it back off but it should be sealed now. We’ll find out. I have a barrel of wood cooking and I’m going to see if the engine will run. I have the fuel line disconnected from the propane regulator and the wood gas line connected to the hose coming out of the propane carb. I’m hoping that will work so that I can just put a T in the line and have a tri-fuel set-up. We’ll know pretty soon now. Feeling real good about the flare.
Trash can seal and filter media.
This is how I seal the hopper to the base. Ram damp sand down the slot and then fill the last half inch with cement. It will break right out if I want to pull the hopper.
5 Likes
Glad you were able to diagnose the leaky filter - air leaks can be a real pain. You are running a pretty small engine, right? What is the displacement? Your grate is acting as your nozzle in this design, so the cross sectional area of all those holes (plus any space that air can seep around the edges of the plate) will determine the airspeed into the reaction zone. Higher airspeeds make better gas, or at least so says the literature. In practice, it seems there is a wide acceptable range. Once you have it up and running, you could try playing with the size/number of holes. I am curious how much ash you will be able to shake through your grate, since the engine suction is going to be trying to pull it along with the gas.
I was amazed at how much ash rained down from these big fires we had. Even 10 miles away there was enough to cover every surface inside the shop where the garage doors were left open. Down at my place I was less than 2 miles from a little 10 acre spot fire, and I found little piles of charred leaves and pine needles that had been burned down to ash and lofted all that way.
4 Likes
389 CC engine on that model Generac. It sucks a lot of gas when it’s running but it took a couple minutes for the gas in the fuel line and bowl to run out when I closed the petcock today. Seems odd. I did get the engine to run on wood gas but just barely. Gary is right that I’ll have to go right into the throat of the carb. The propane carb is just a series of holes around a aluminum doughnut. I’m sure it need the pressure of the propane to function. At least I know it all works now. I can mess around to get it all working well as we go. Running on gas it seemed that the generator was rattling the gasifier enough that a grate shaker should not be necessary. If it’s too much like Steve U suggested I’ll try and and isolate the generator from the gasifier some way. Maybe some rubber motor mounts or something. I’ll cut in the inspection port and empty the remaining charcoal that’s in it, probably tomorrow. then we will see what it looks like at the grate.
About 20 years ago a big tire dump site caught fire about 30 miles from where we lived. I think they estimate over a million tires there. Took forever to get them out and it was winter so even the snow at our house was covered with black soot. Can’t dump tires in this state any more. I’d like to have a lot more of them myself. Stacked up they make excellent compost bins.
I cut up a truck load of branches and fed them into the barrel all day. It was full to the top with mostly coals when I put the lid on. Should have about 30 gallons of new char tomorrow.
5 Likes
Been raining on and off for the past two days. Haven’t been able to uncap the charcoal barrel and process that. I did get a chance to make an adapter plate for the carb and get that all mounted and plumbed back to the gasifier. I made a 4x4 inch inspection/cleanout port out of 2x2 angle and cut a hole out of the hopper just about the top wheel. Emptied the char out with a shop vac. With the angle fitted in I could not reach down to the grate so that was a fail. I’ll have to patch that hole and move the port down into the wheel, which I didn’t want to do. Hasta manana. I did get my two thermocouples delivered a couple days ago. I could use some advise on where to best locate them.
1 Like
Hi Tom , i have never used a thermocouple on my charcoal gasifiers , but i think the best place would be towards the top of the hopper to let you know when your charcoal is running low .
and one down by your hearth where you inject your water maybe
Dave
4 Likes
Made some additions to the gasifier today. The only dry day for this week. I should have did this earlier but got in a hurry to get it working. Cut an access hole in the hopper but it was too high to reach in and get at the grate but I already had the frame and lid made so I stuck it in anyway. Then I cut a round opening for a four inch pipe ring and put it in one of the wheels right at hearth height.
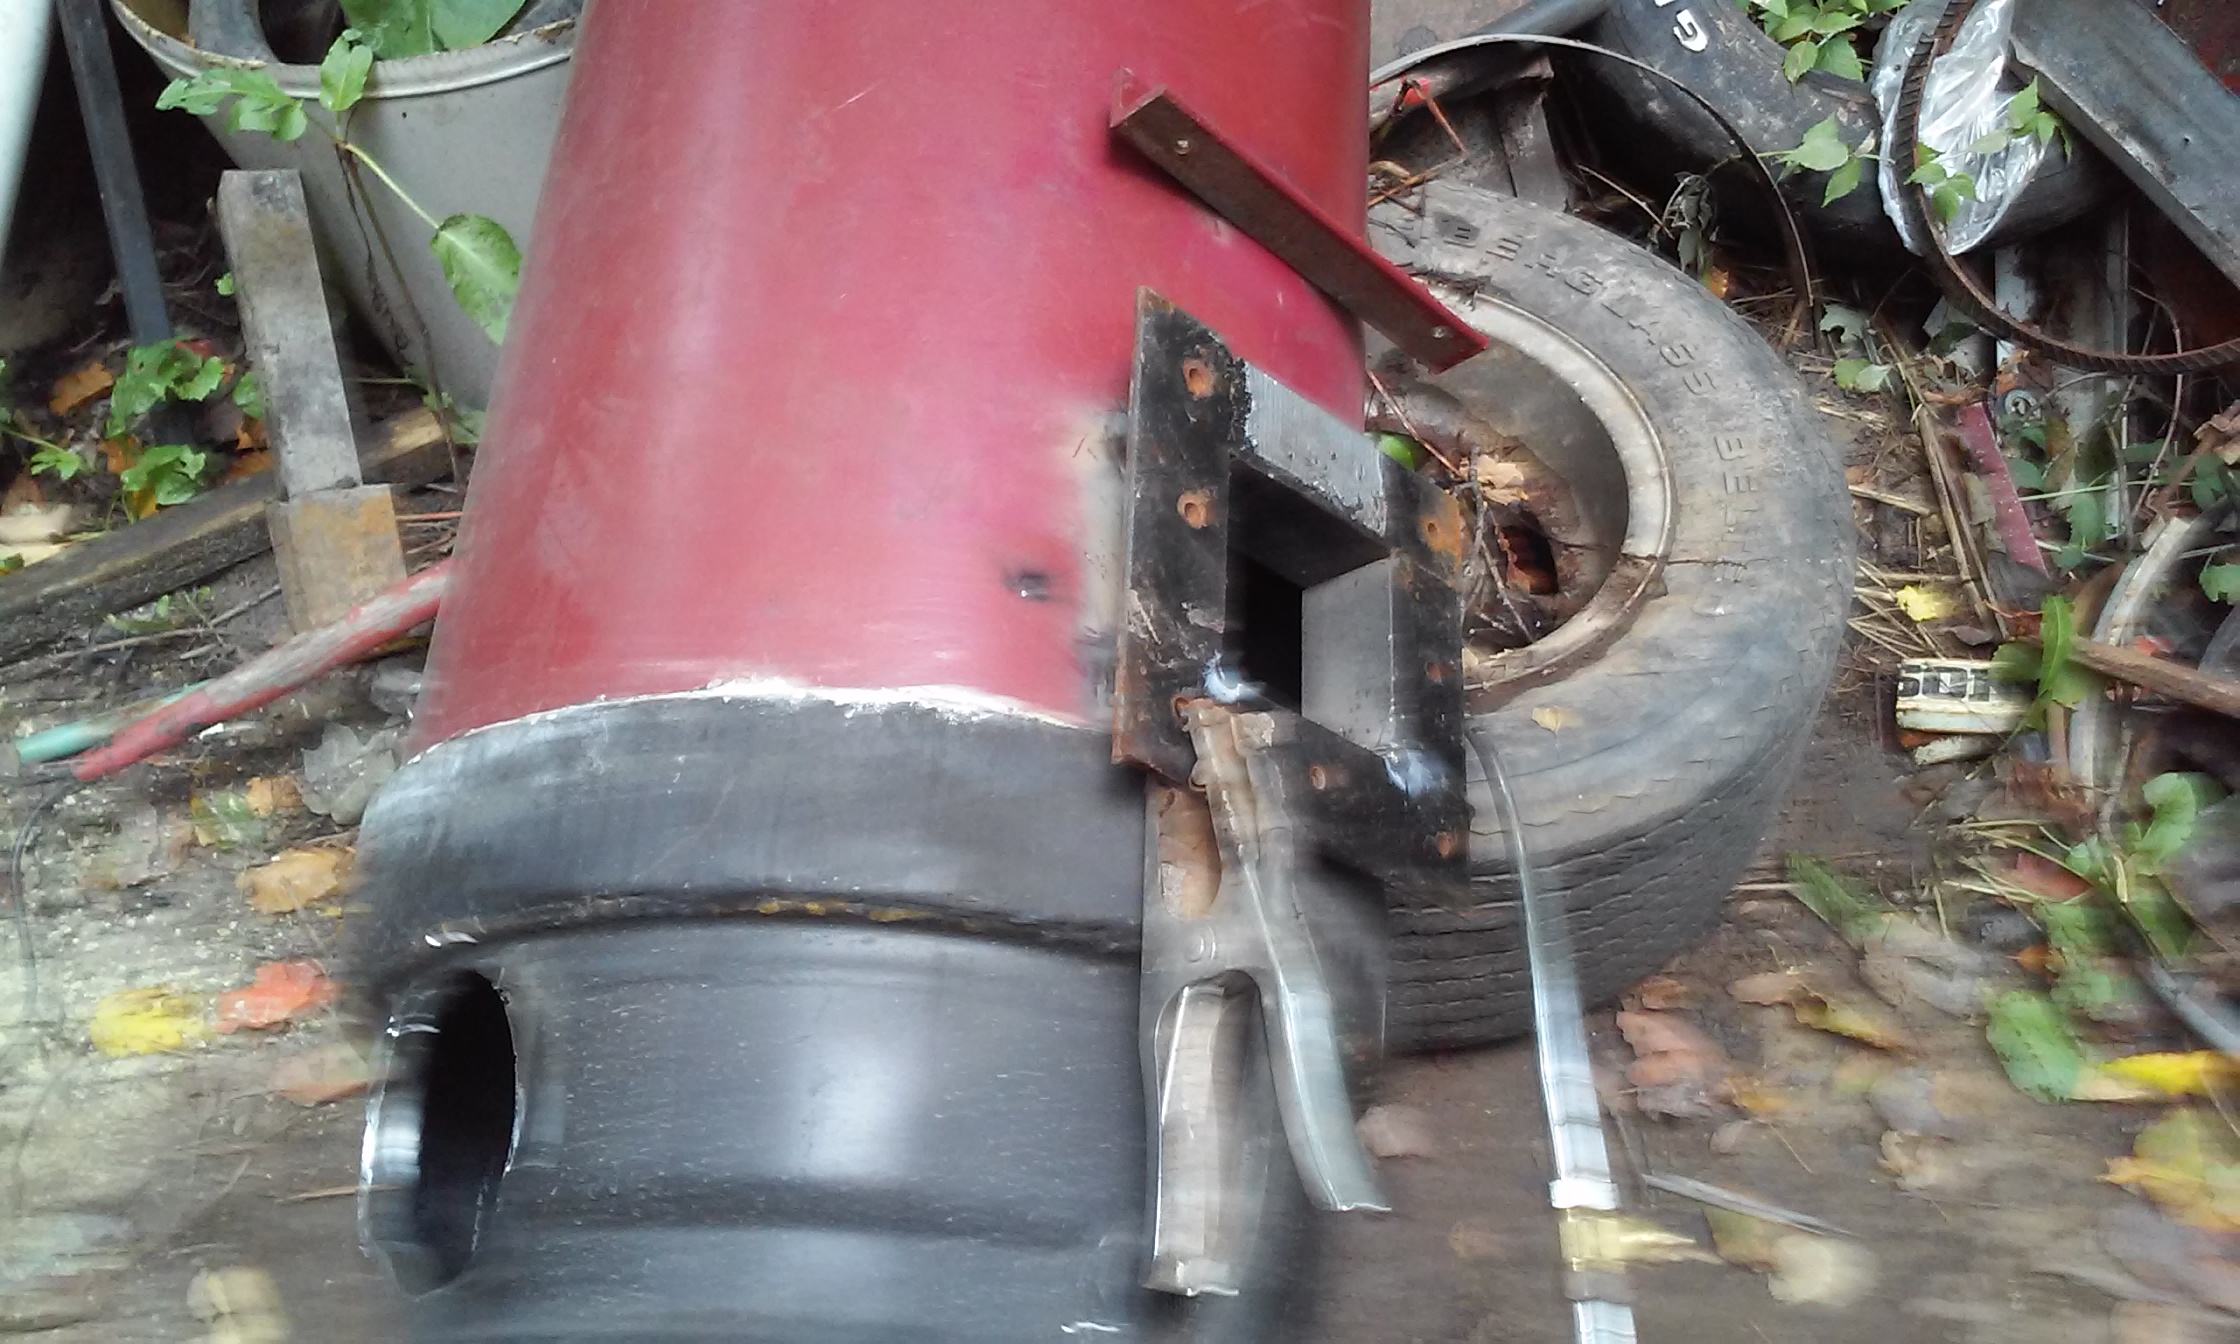
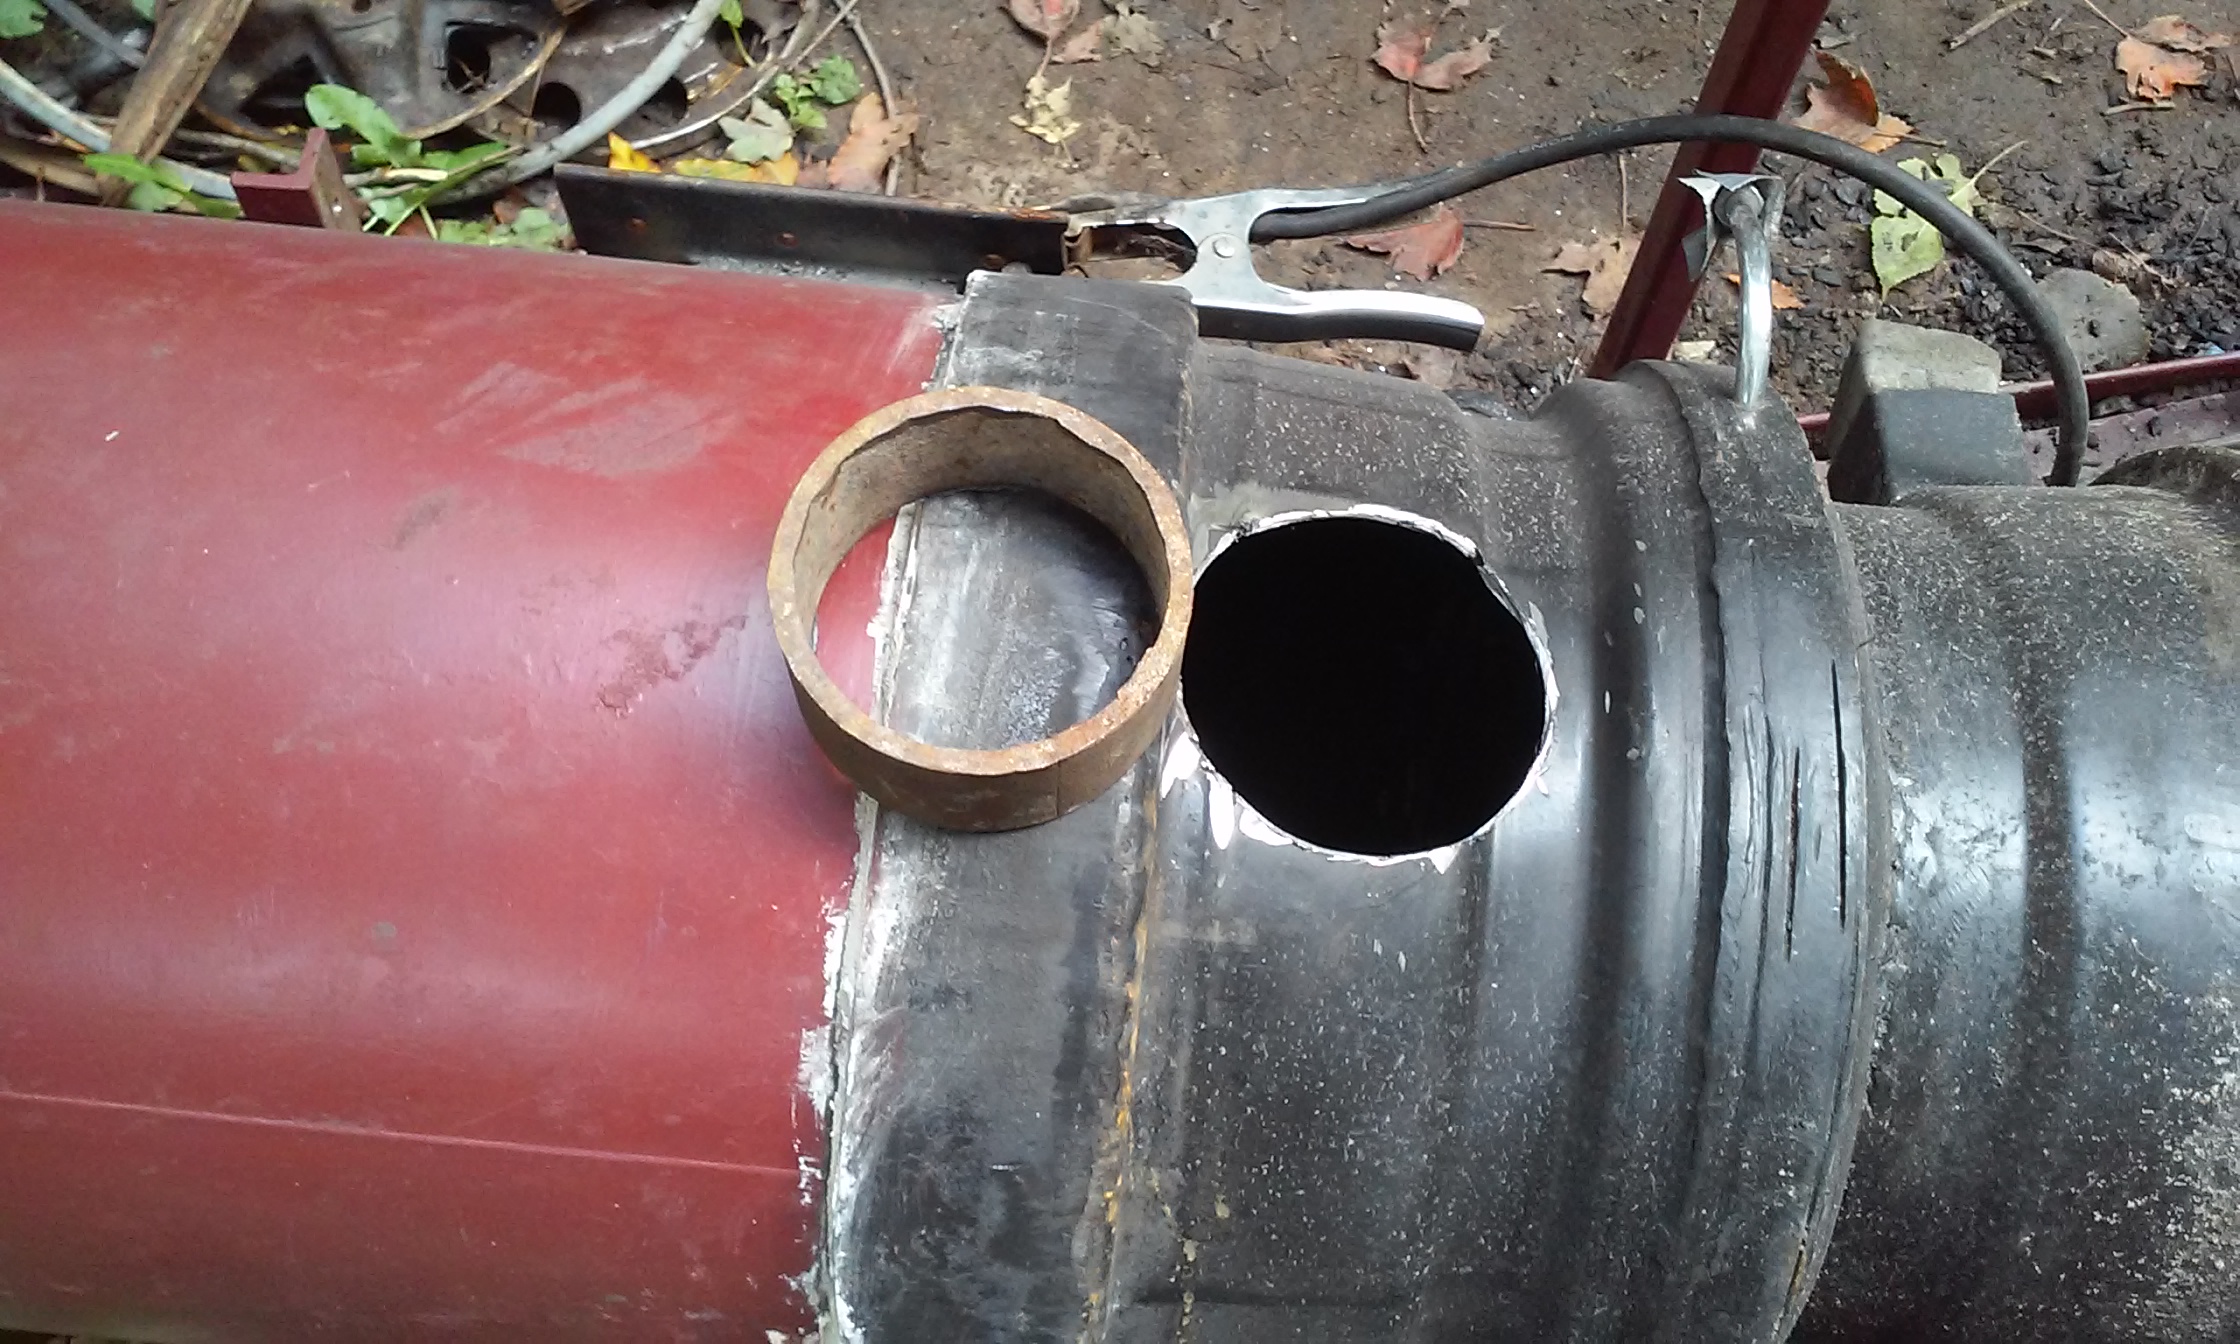
This took a 4 1/2 in hole. I don’t have a hole saw that big. I know this isn’t news to some of you long time fabricators but in case your experience level is less, here is how I do these. I trace around the piece I want to put in and then drill a million holes around the perimeter just inside the line. I make some close enough to open up a slot big enough to get a metal recip blade in and cut from hole to hole with that. Then with a angle grinder and grinding wheel I smooth out the edges until the piece fits perfectly. Seems like a lot of work but it took me ten minutes to cut this hole.
7 Likes
Ordered this today to read my thermocouples. I ordered some high temp ones a while back and this one comes with four that are not high temp. Still the reader needs to have all four pin ports filled so I guess I plug them in somewhere. I don’t know what they are supposed to tell me, but monkey see, monkey do.
4 Likes
Well Tom if i were you i would put 1 in your tea cup ( hate tea getting too cold )
another one, out side the work shop ( to let you know its time to light the fire )
I guess you could always put the 3rd one in the top of your fuel hopper just to give you a heads up its getting warm and time to take off that woolie jumper you have on so that it doesn’t get covered in charcoal dust when refilling .
As for the 4th one i have no idea at all , maybe keep it as a spare or to tell you that your chicken soup is getting cold as well maybe 
Dave
7 Likes
All righty then. I knew I could count on getting some good advise here. I remember you said you don’t use them Dave. How do you know how your supposed to dress?
1 Like