For me, that is sawdust. Available in large quantities and dry, ready to burn. But no so easy to gasify or more people would do that?
3 Likes
Has anyone duplicated the Missouri sawdust gasifier?
1 Like
Think not. I would rather buy one, that saves a lot of time. Sorry Matt for off topic
3 Likes
Rotary dryer and hot air is a way.
2 Likes
Matt,
As you consider using charcoal for fuel in the future, do you have in mind a strategy for engine grade charcoal being commercially available like pellets or are you figuring on the gasifier user making their own?
1 Like
I haven’t thought that far ahead. But there is a big market for it.
1 Like
3 Likes
Yep, just like green wood.
1 Like
So ran a test to see if this thing could machine aluminum or (Al* you* mini *yum for you guys overseas 
It did quite well, I was probably a bit too aggressive taking off 30 thou pr pass. Plus this cutter is just a four flute finishing end mill. But anyways considering this is for wood router and jet cut applications I thought it did quite well.
5 Likes
Yum yum it is! Having fun! Looking good
1 Like
Thanks Steve, Yup you get it, this is an extreme versatile platform frame work to build just about any type of bike with out limitations current offerings have that can fit to any budget.
I just completed revision two of the mag wheel and this version works. I am going to look into having the spoke sets laser cut out of aluminum and also carbon fiber. Might have a good product here by it self. 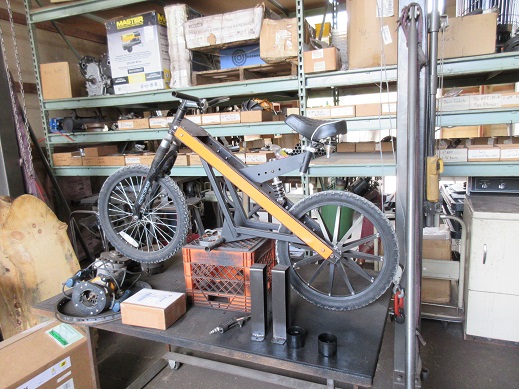
10 Likes
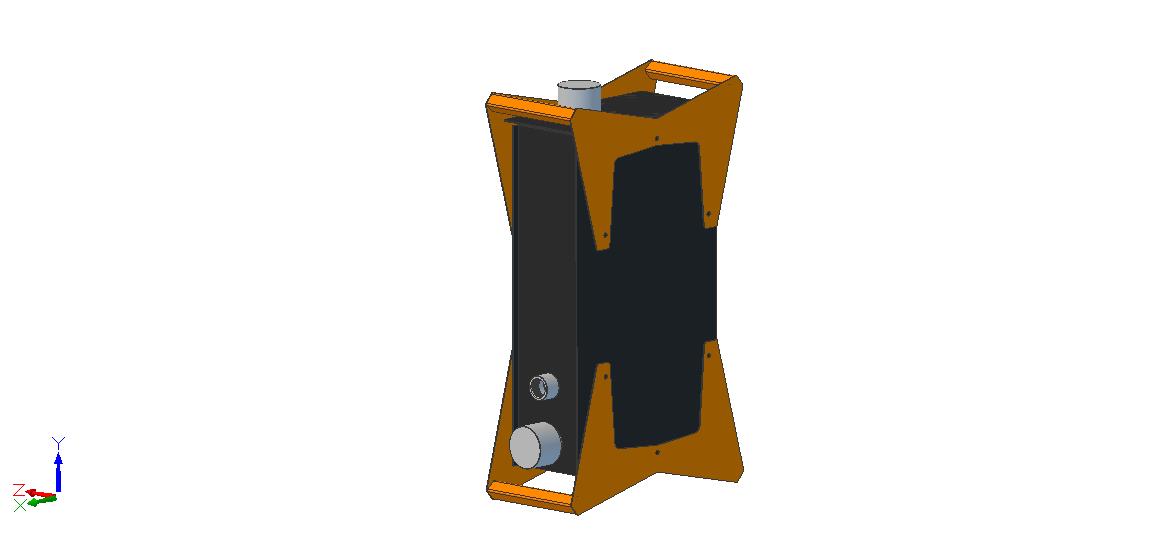
The M-1 Gasifier is back!!
However it is now in a charcoal format. I will supply a lid system for converting steel 5 gal buckets into a retort system. This lid will have a short 3 inch flew pipe with burn cross for cooking. You just fill it up with foliage get it lit and you can cook on it. When your done cooking or making charcoal you will place the retort into a second bucket to cut off the air intake at the bottom of the retort bucket and then simply cover up the exhaust outlet. Should have ready to run fuel with very little effort while out in the woods on a camping adventure.
Im working on the portable battery storage system right now. As soon as Im done with that Ill be cranking this out.
4 Likes
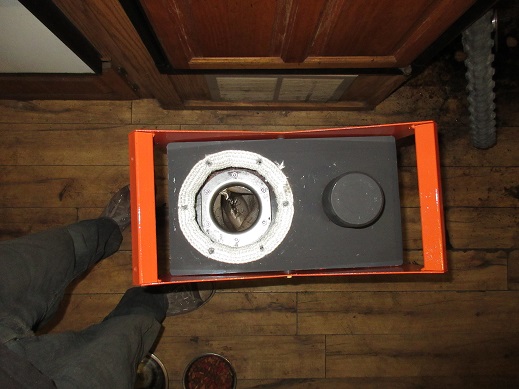
So busted this thing out today. Paint is still drying  So I have to wait before I can play with it.

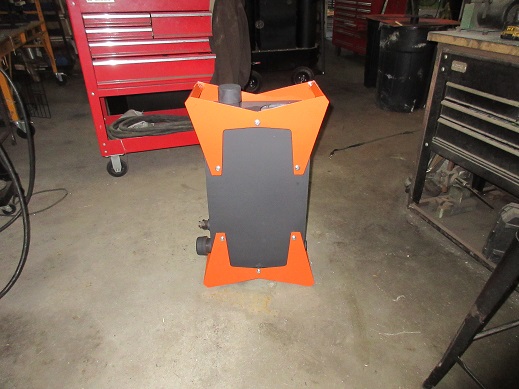
8 Likes
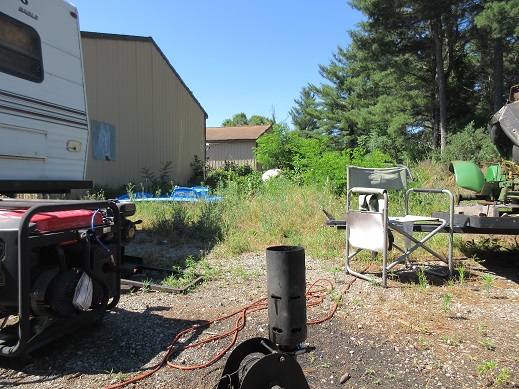
Bag filter is installed this baby is ready to rock!!
8 Likes
Success!!
Fired this thing up in less than a minute. Realized real quick I had to go to high temp hose, no biggy. Swapped that out and went straight to engine run. I think I got maybe a 1/2 hour run I did not really keep track. I will next run.
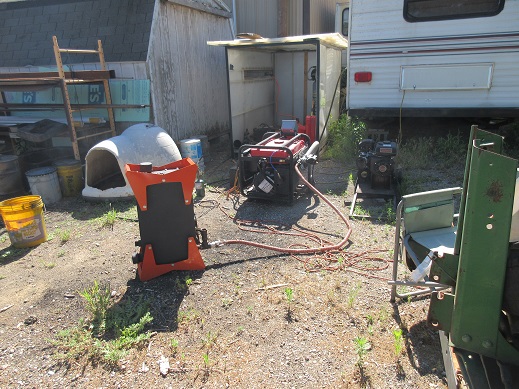
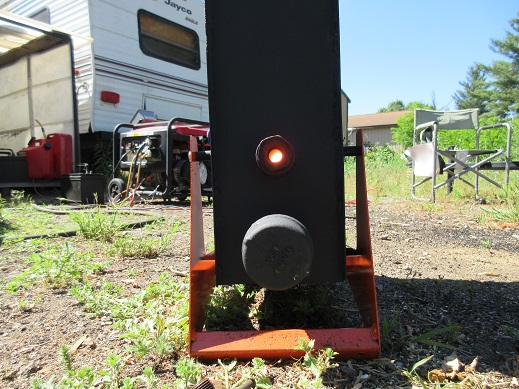
The Flare is lit here. Trust me it is!! haha
8 Likes
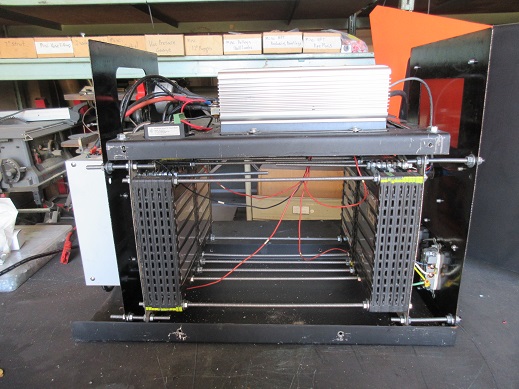
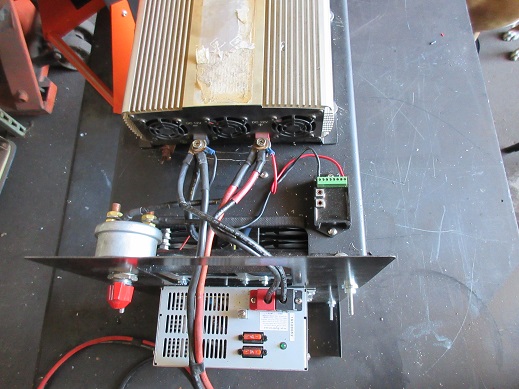
This here is the DIY “solar generator” / “portable power unit”
Ill have the build video up in a few days.


7 Likes
Are those the batt packs? I really like them. They are a lot easier to work with then 18650. I want to build the same with pieces from Victron. Expensive but very good and it is possible to program for your own situation grid/ off grid and so on. Here are still 3 -300 W panels waiting … Can become a beautiful power-pack.
3 Likes
Im going to offer a customizable controller for this eventually. .
2 Likes
Rather than use Victron, look into getting a blue tooth battery monitor. I have a Thornwave inside this and have a cell phone app that works with it. These have outputs to control an external relay for high and low voltage cut offs. I use this output for input into an Arduino for generator autostart systems.
You still need a BMS or you create a fireworks display. The more batteries the bigger your display. These cells are no joke, very powerful cells in a tiny package.
Working with these cells is still a job. I did eventually get a system down. If you use threaded rod, use aluminum rod and hardware. Get nuts that are a size larger than the rod; these will act as bushing separator / spacers between the cells. So these larger nuts will need to slip over the threaded rod. You assemble the stack one cell at a time. You may need to add washers to keep the spacing uniform. Then once you have all the cells in place you use a nut on each side to tighten everything up.
Yeah these are nice cells to work with. I am going to change this design so it stands 90 degrees from this one and add a set of wheels. It is a beast to carry by yourself.
You can also use LifePo 4 cells in this kit. I will be designing the power tower around these cells and also a version using the Headway cells. No plans for the 18650’s they are too difficult to work with and second hand cells you have a good chance of getting a dud. So the cells must be serviceable.
1 Like