Hi Jim,
How well I know the scenario. Just get set up and “ring, beep, tada or whatever” ring tone is set up interrupts an idyllic shop hour. Screen the calls. If it’s the pita bored neighbor looking to be entertained, don’t answer, keep the shop door locked. Tell them you’re working on an invention and want to keep the details secret. Yes, they’re white lies. Hard to do, yes, but you’ve got to put yourself first “some” of the time. Everyone knows how important my shop time is to me and pretty much respects it. If they don’t, they soon do. I’m not bashful, not a p…k, but I drop some heavy hints that this is not hang out time. I have to stay focused on my work and conversation is a real distraction. They get the message after a half hour of silence, lol. I, uh, well, uh will see ya later, Pepe. Huh, OK, whoever, see you later. Invite them to the flare or engine start later, so they don’t take it too personally. Family calls get answered asap, of course. Sometimes I think I’m too much of a hard ass, but that goes away as soon as I strike an arc. At 72 my time is sacred. I often wondered why my grandfathers got grumpy sometimes, now I know, lol. I hope you see some humor here.
Pepe
This just reminded me of my brother’s encounter with a customer when he first started his small engine business. A guy brings in an old non running camp lawn mower. After a bit of discussion about costs to repair an “old” lawn mower that “I only use on occasional weekends”, my brother counters with,“oh, so you only need it to start part of the time”. Enuff said, lmao!
The guy took his junk and left. My brother didn’t lose a “customer”.
A Colombo moment: Oh, one more thing readers, I worked QA in receiving at Bombardier in Plattsburgh, NY for 2 years. The sign next to my desk read, “if you don’t have anything to do, don’t do it here”. The inspector from Montreal liked it and told me so. No, it’s not brown.
Hi All,
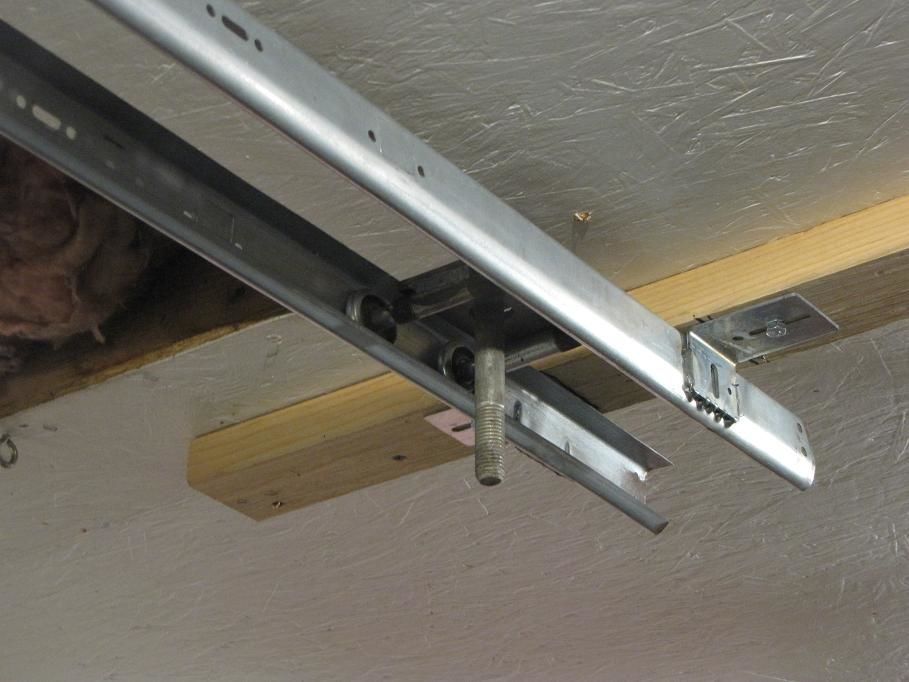
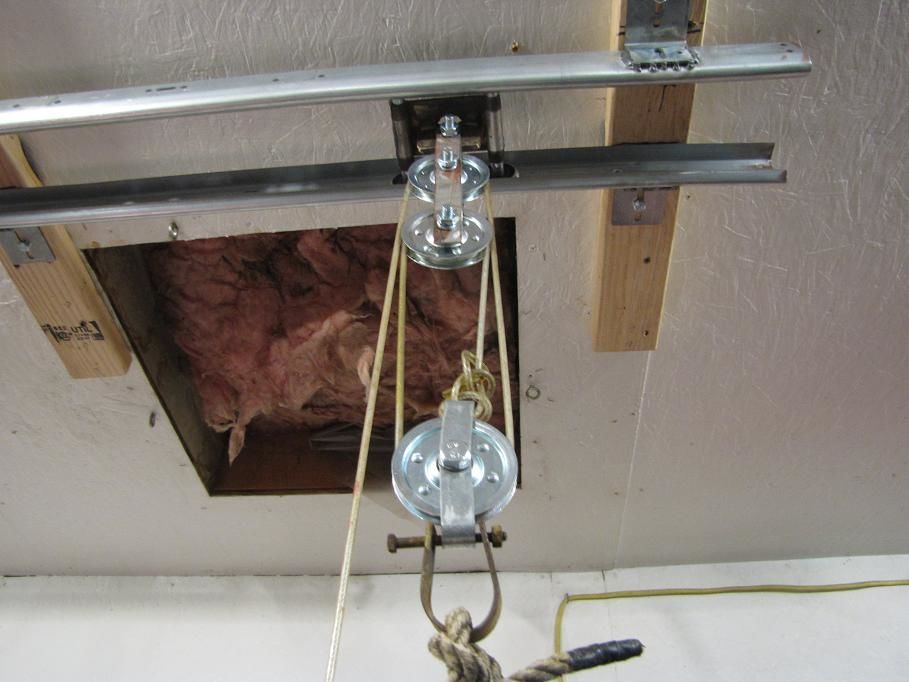
I decided to up grade my pulley system for aiding in removal of gasifier components. More importantly it will aid in controlling the assembly process when working alone. You don’t want to mess up a gasket on reassembly.
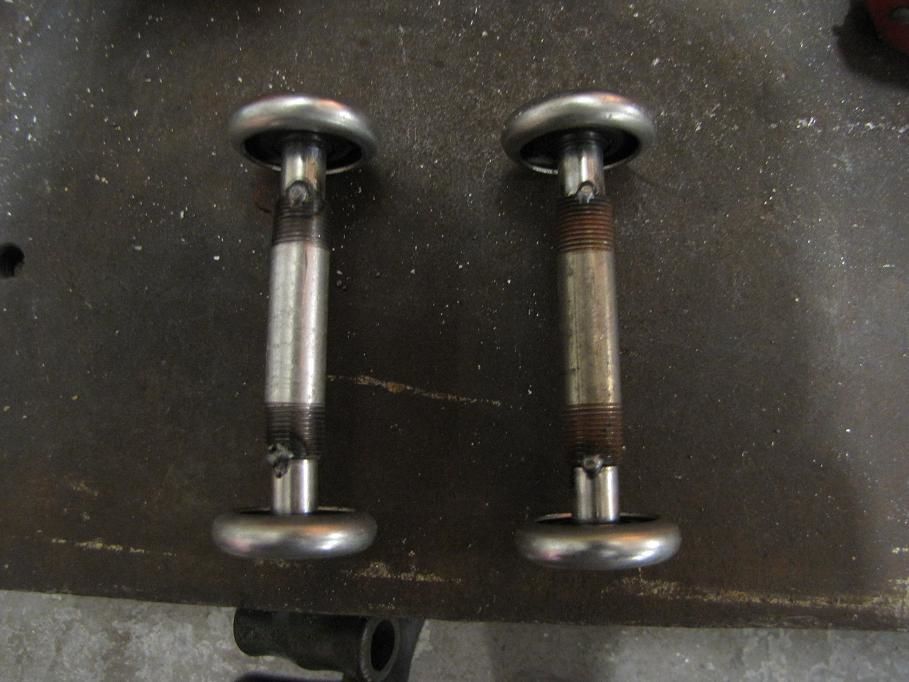
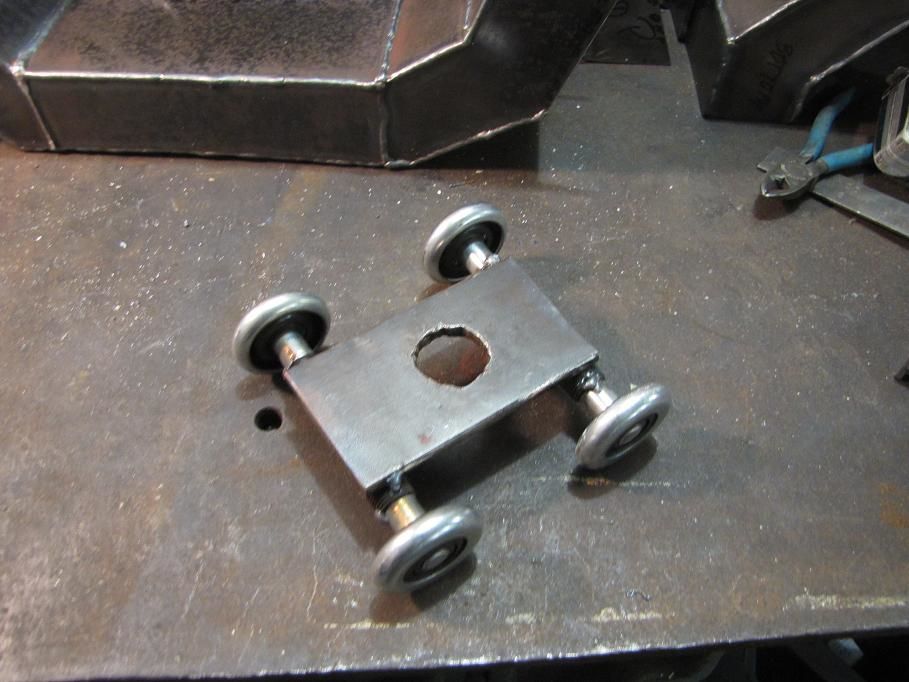
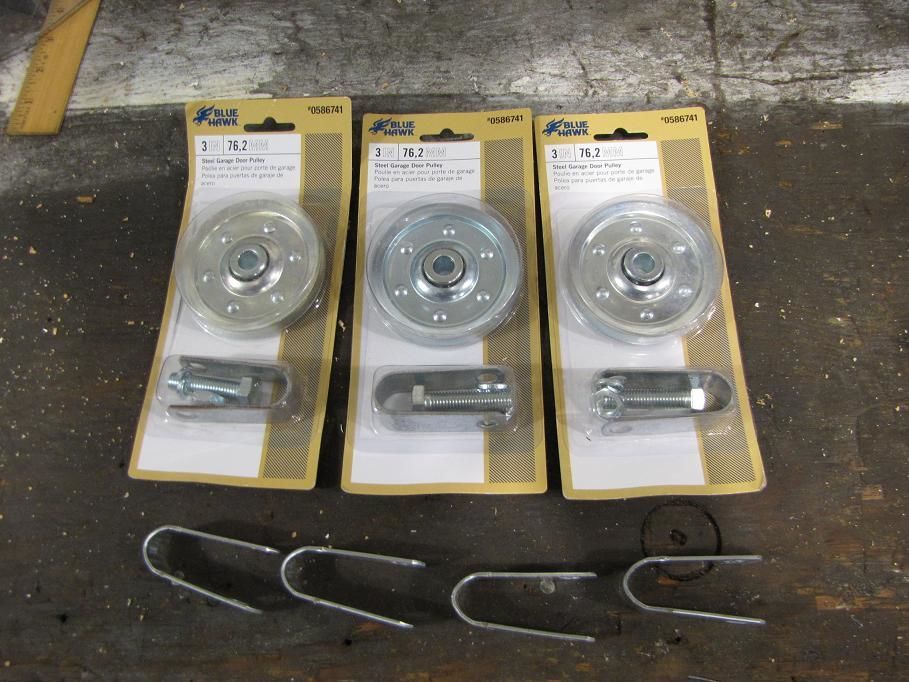
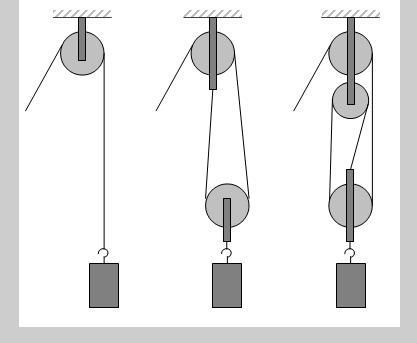
I simply cut the stems of the 2" garage door track wheels so they would butt up inside the 3/8" pipe. They butt up to the shoulder on the stem and to each other inside the pipe for best support. I tack welded them to keep the unit together. Then I welded a platform to the dollies to form a trolley car from which will hang a series of pulleys for lifting the components off the gasifier. Then simply roll the component to the work table. I will use the middle configuration for this disassembly. For larger sections I will use the right assembly, more MA.
Thanks, Guys,
I was thinking about getting a garage door for the shop (was framed with that in mind). Then the trolley replacing the door idea popped into my head. Glad you like it. I enjoy sharing via the “how I did it” posts as I’m sure you all do.
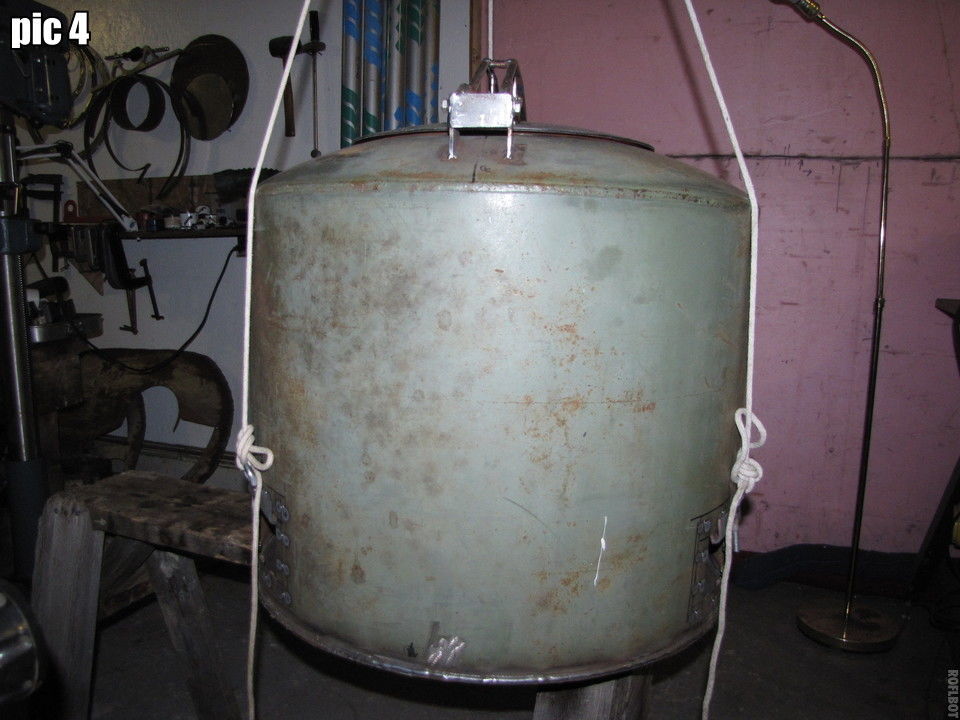
Gordon, I’m with you on the lifting thing. Also, the machine is just bulky to get a real safe grip on. Please, everyone, feel free to use anything I post. The cleanout ports (3 equally spaced for balance) double as a lifting point with these clips.
Pepe
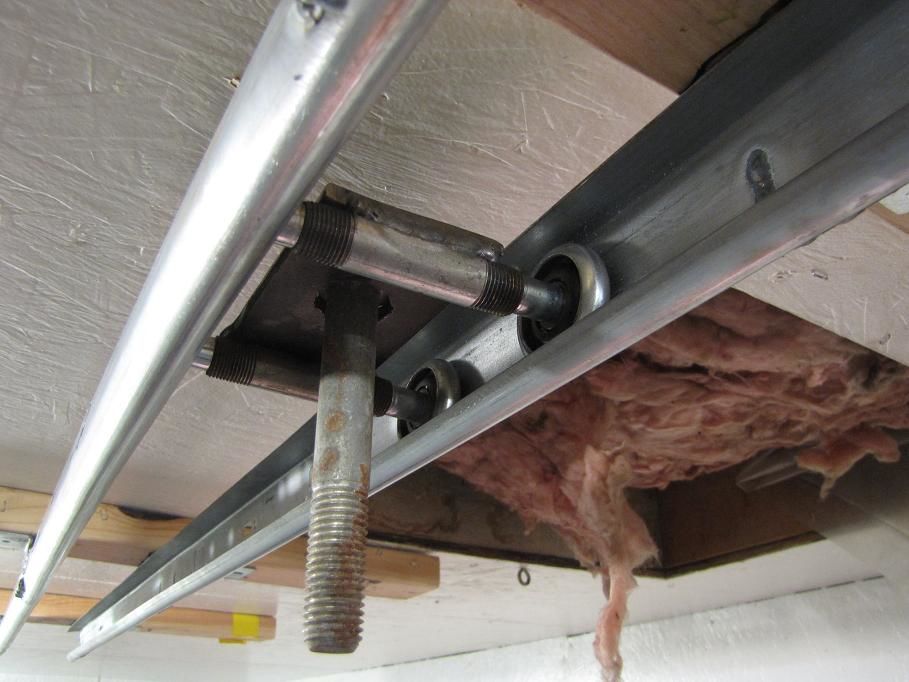
I just went out to the shop and put the trolley in the middle of the span and did a chin up holding on to the trolley. No deflection or twisting in the rails, none! 165 lbs. I easily used my foot on the bench to roll me along, weee. Reminded me I need stop blocks on both ends. Almost!
Pepe
Hi Carl,
Thanks for the thought. I presume you mean something like a trolley on a trolley with a lift on the latter. I’m not thinking truck mount as I’ll be running a stationary unit for emergency power.
Pepe
Hey Everyone,
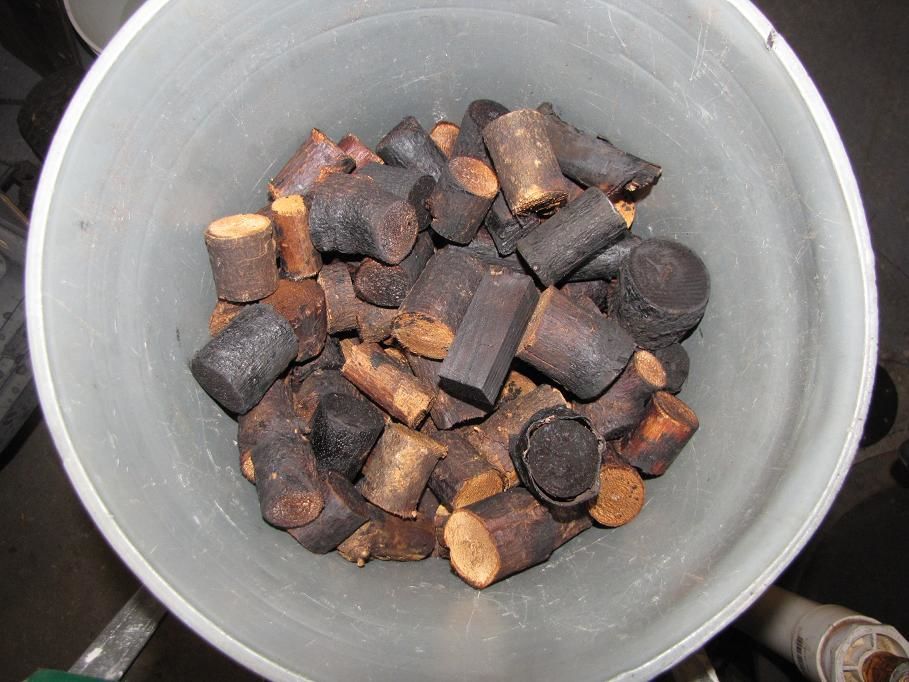
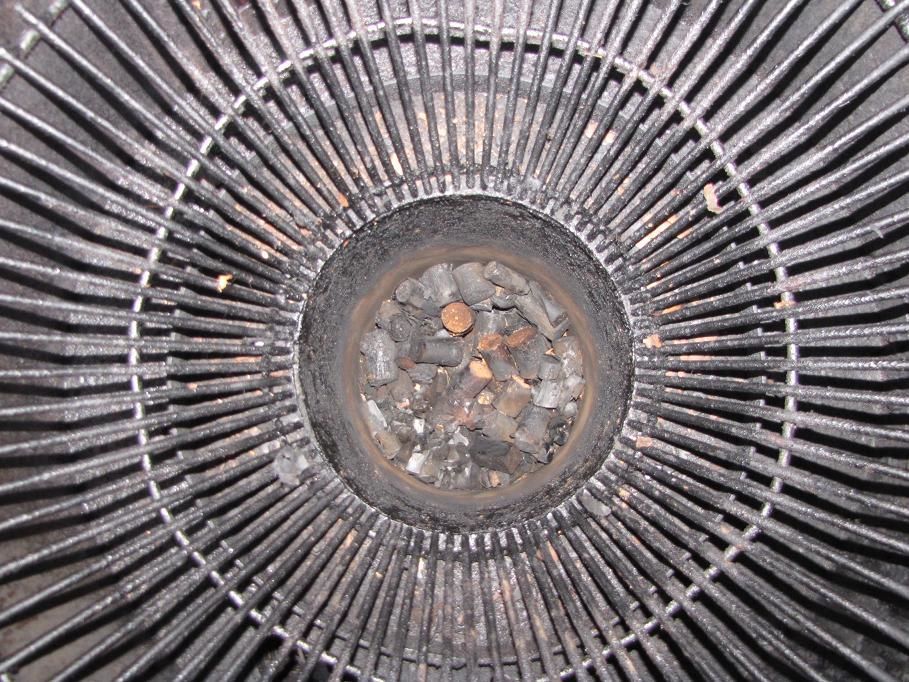
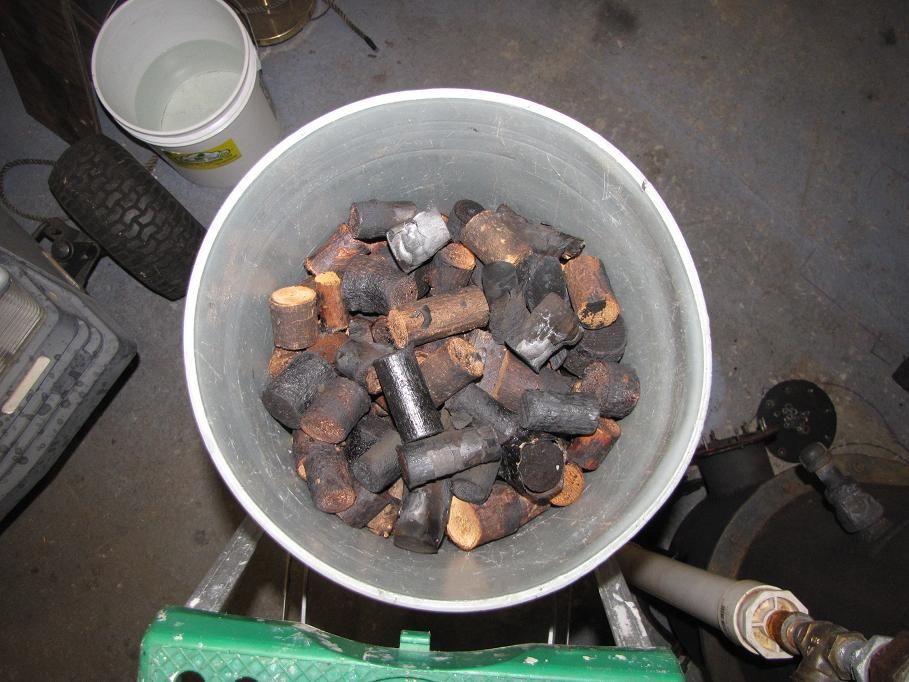
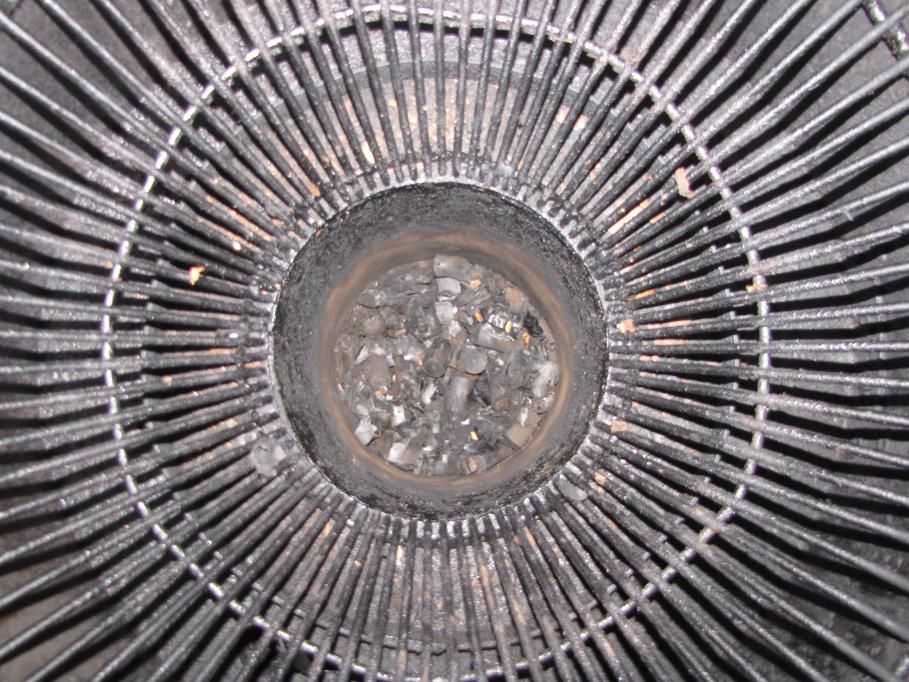
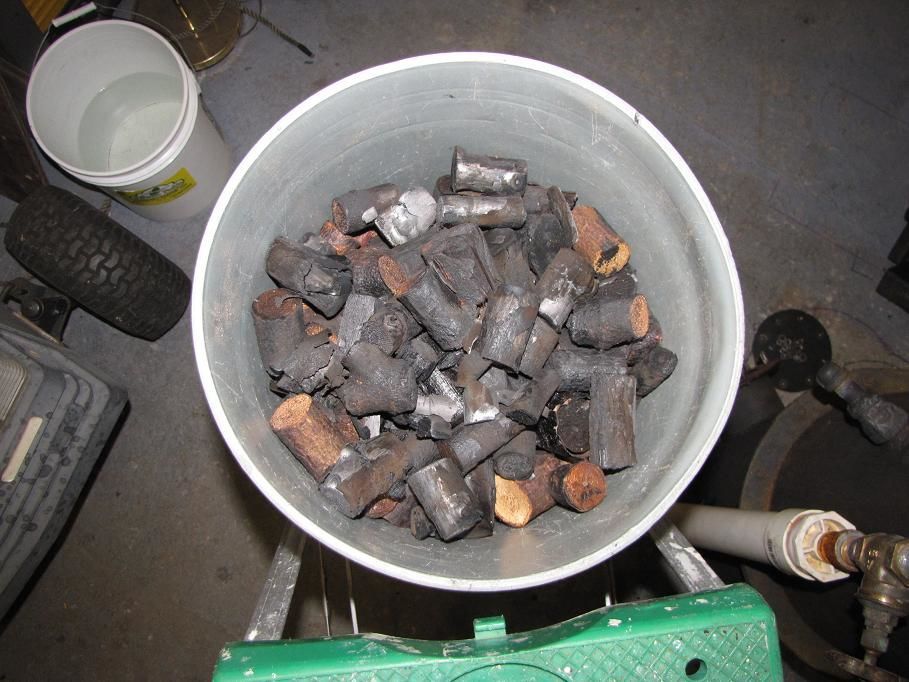
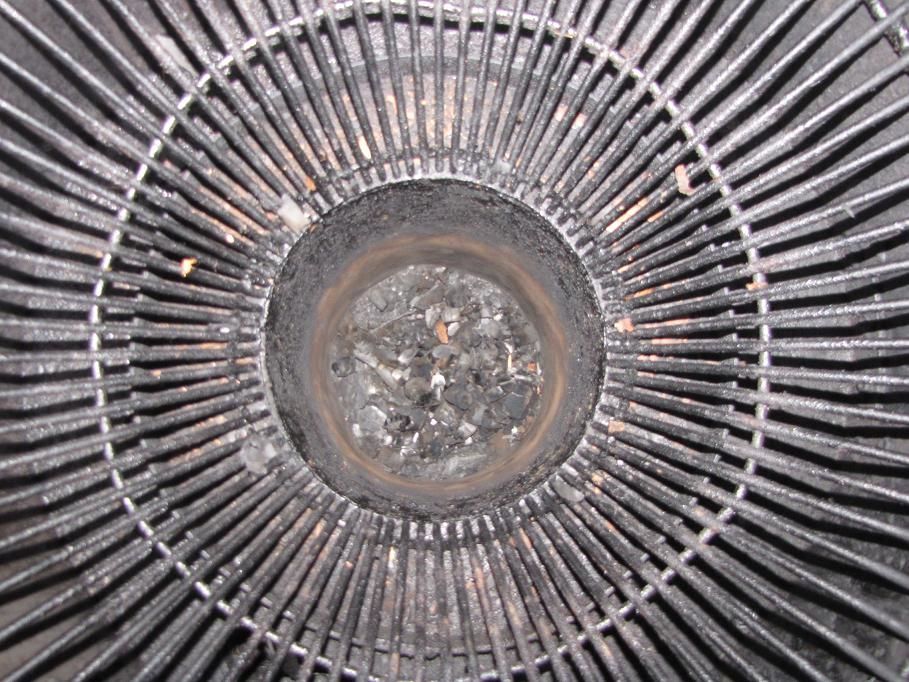
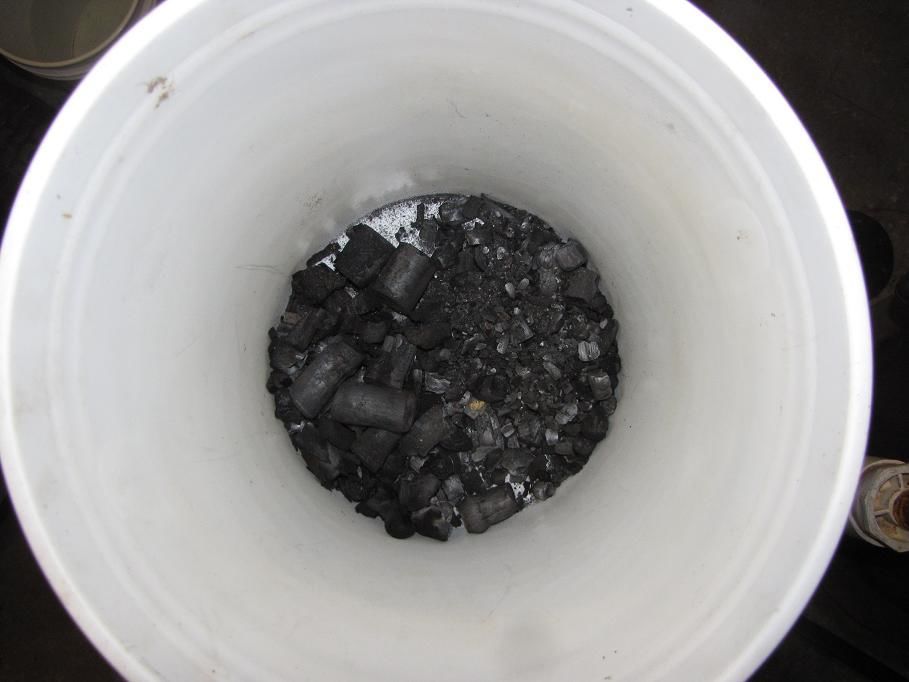
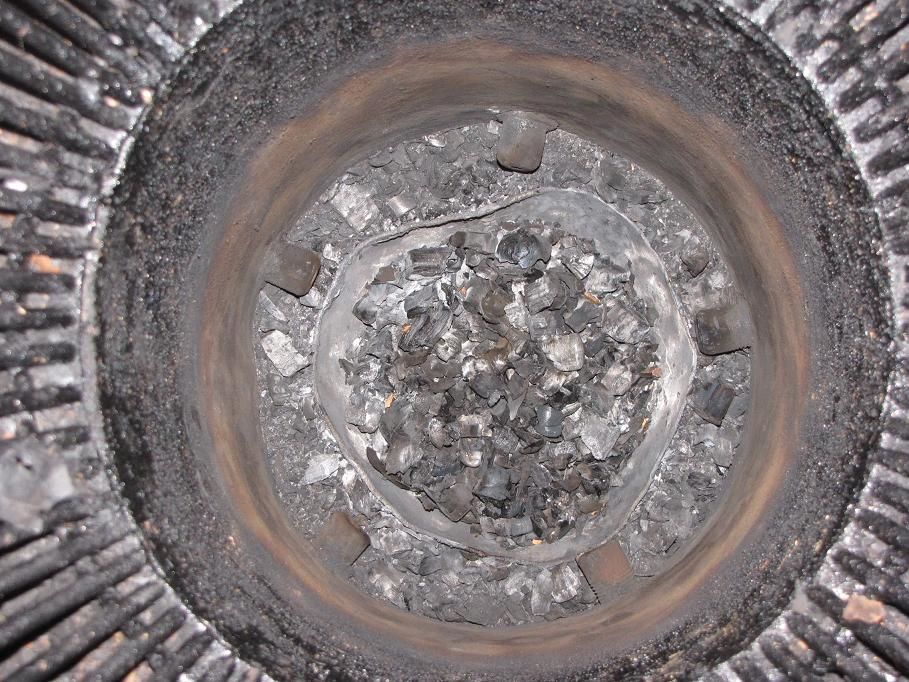
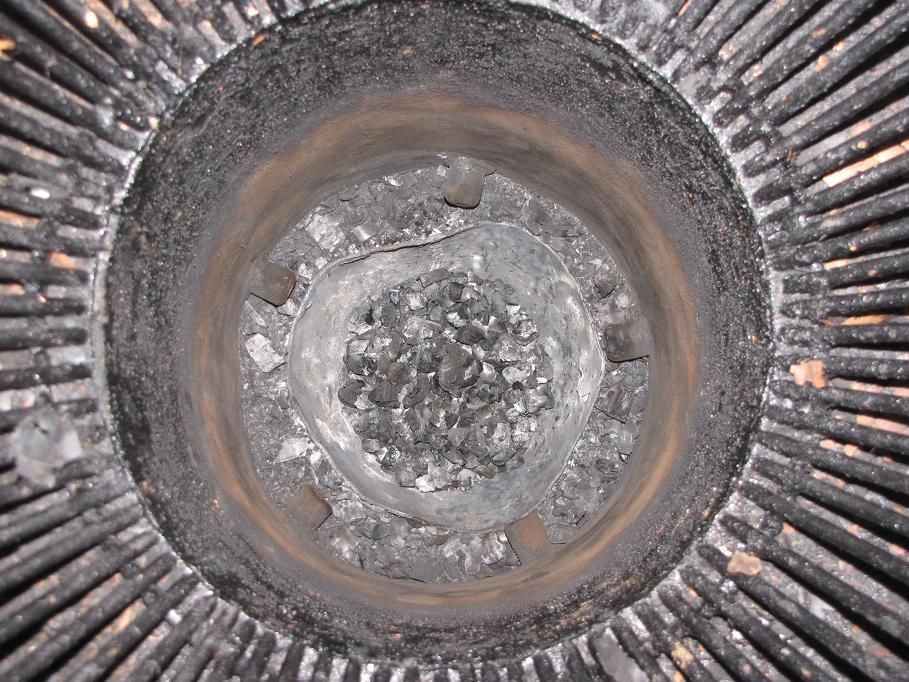
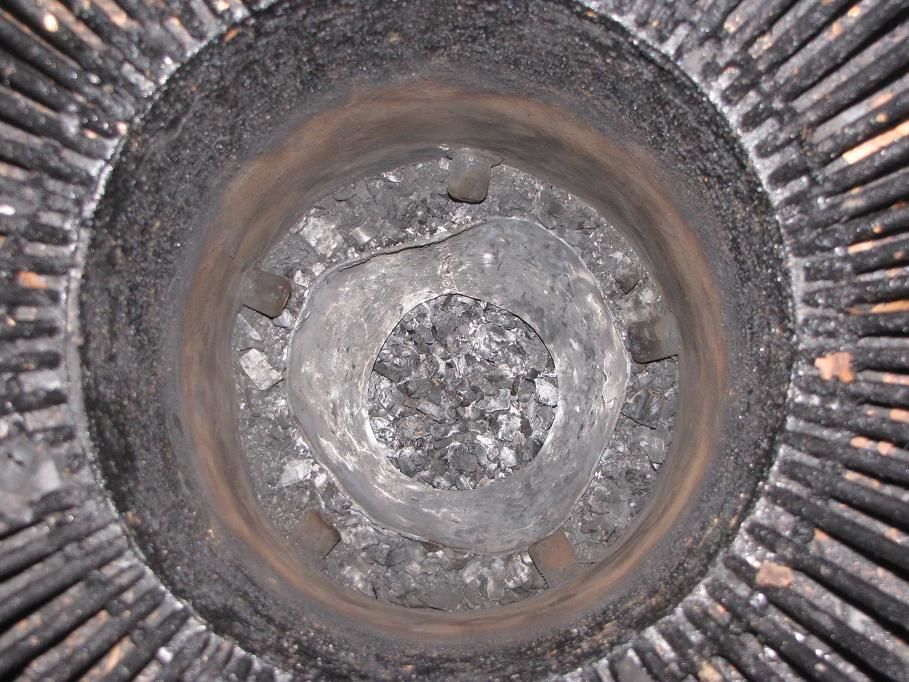
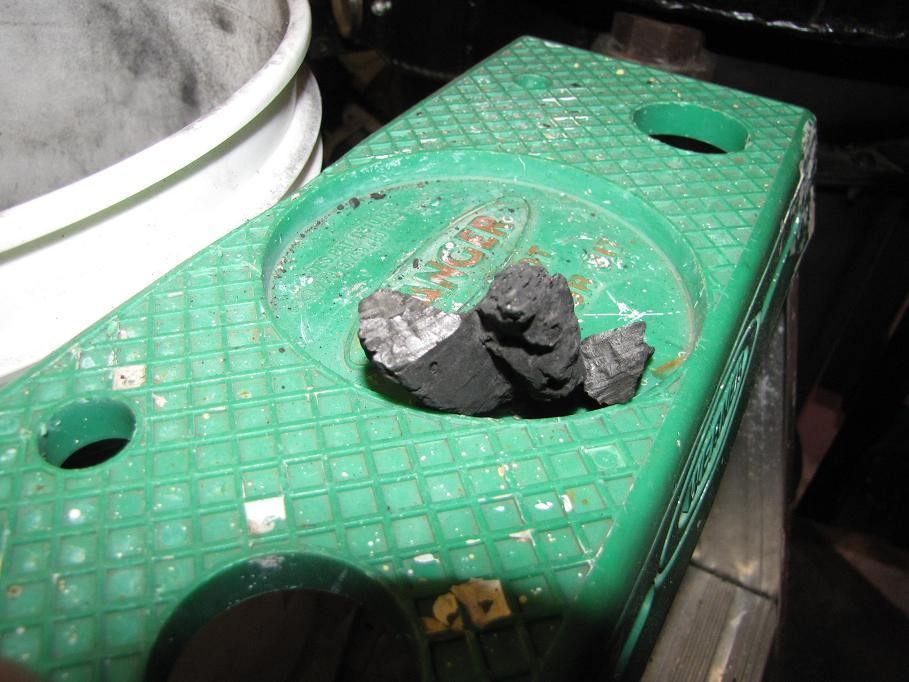
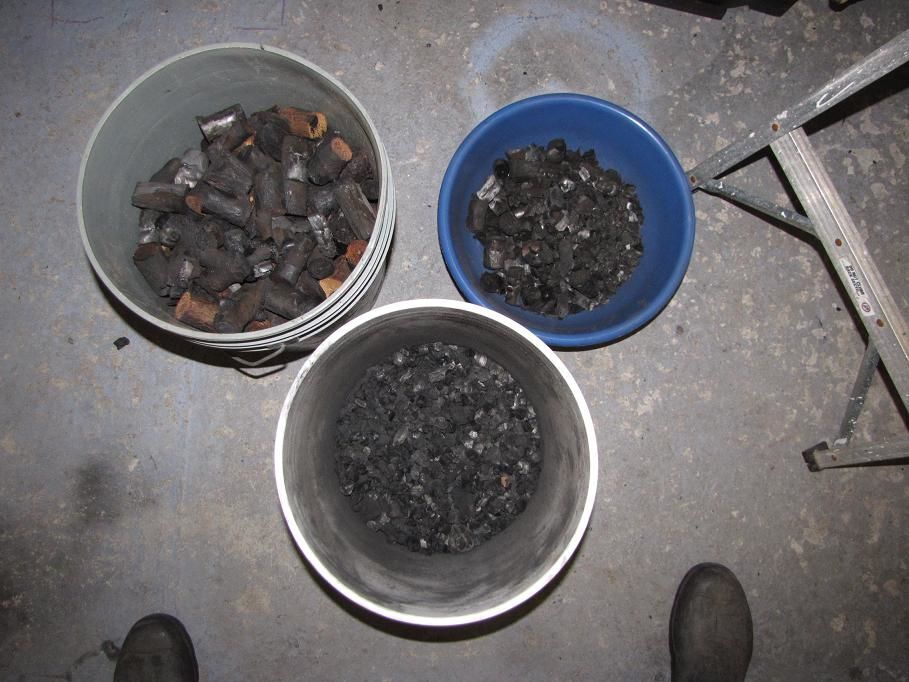
Or, getting to know “your” gasifier. I used my vac to remove the fuel layer by layer. Yes, it was tedious. I moved down about 1 1/2" or so at a time. I wanted to identify the pyrolysis zone and how far it was above the C/L of the nozzles. I did this by observing the condition of the fuel. When it changed from really dried looking to looking “roasted” with some charcoal spots, I had found it. I then continued removing fuel in layers down to the grate. The charcoal really takes off 2" to 3" above the C/L of the nozzles and continues to the grate. It is all very uniform in size and structure.
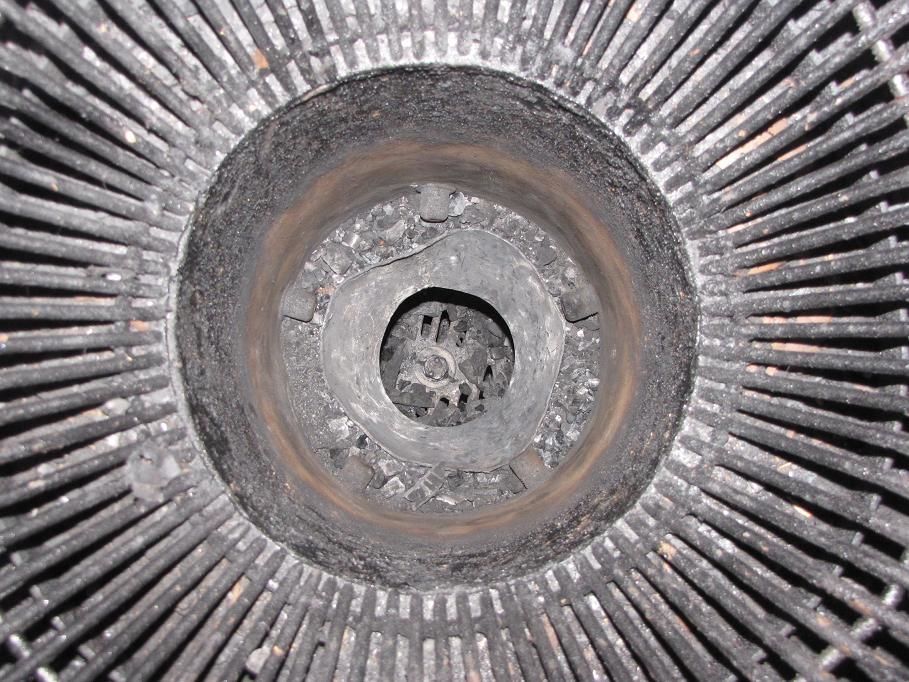
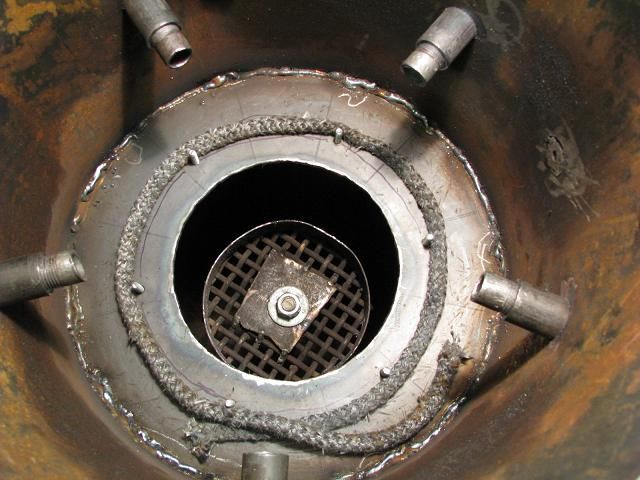
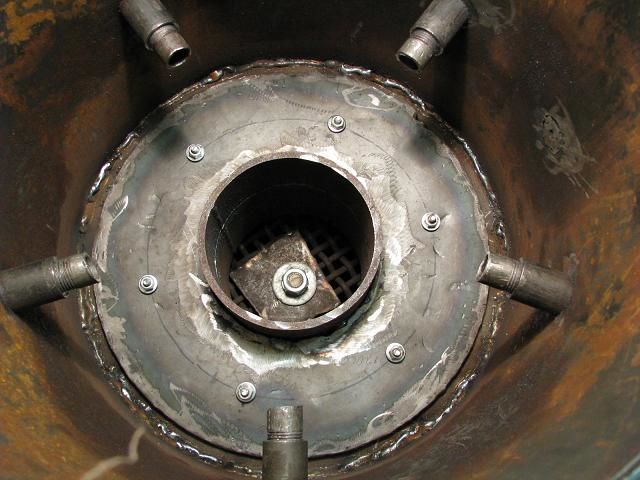
My hearth is gasketed and bolted to the flange on the bottom of the firetube. The top of my hourglass hearth (only 1/16" thick) has spots that reached the melting point as you can see. Good to see those temps in the oxidation zone. My next one will be at least 1/8" thick. It will also be located further under the nozzles to escape the blast area. The area between the hearth and the firetube wall is filled with sand. I’ll use a thicker material if I can find some way or someone to roll that thickness for me. I only found one clunker. It has a metallic sheen on the broken face. Next to the last pic.
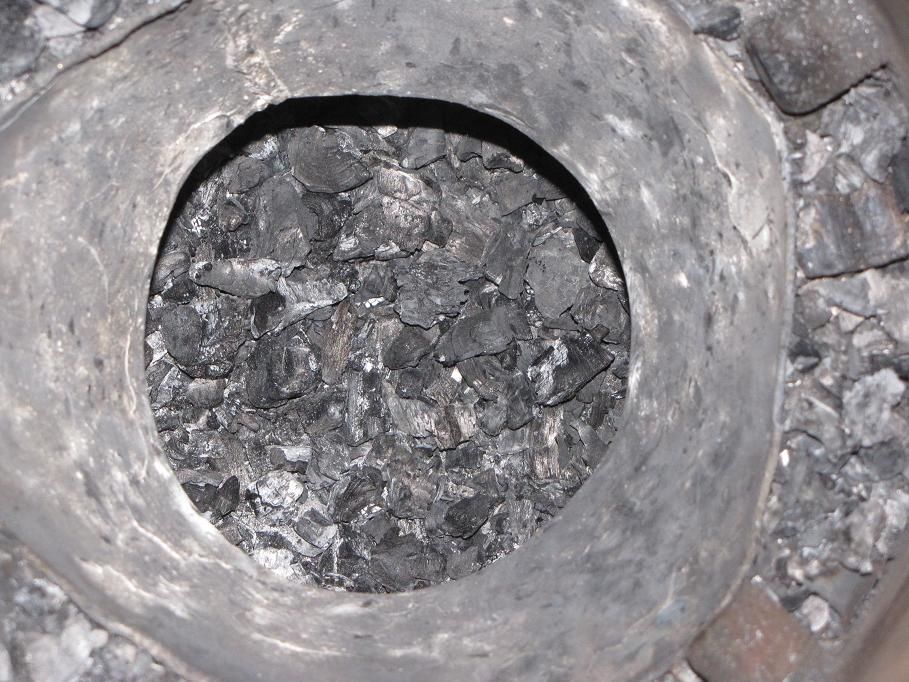
The pictures may seem not to change much, so use the burn rings inside the firetube to gauge the amount removed. I start with an inside view of the layer, then I show the removed fuel in the bucket. Note the subtle color changes in the fuel. Note where the fuel starts to become partially charcoalized. You’re near the the border of the pyrolysis/oxidation zones. Everything look uniformly changed across the diameter? Good, you’ve got good nozzle penetration then. The oxidation zone is approx 2 1/2" above and below the C/L of the nozzles. The pyrolysis zone is from 2 1/2" above and 5" above the C/L of the nozzles. Above that is the drying zone. The reduction zone is evident, from restriction to grate. The last pic CW from upper left shows the totals of the various zones.
I am really satisfied with the performance from my “numbers”.
I thought you guys would like to see this part of my study.
Pepe
Sorry about the hearth. I’m not familiar with the Imberts, so pardon my questions. It appears your air inlets come in horizontal. If one were to bring them in at an angle to point to the center of the opening, would it keep the stress of the heat off the hearth and still make quality gas?
I have no experiance from gasifiers yet except from my downdraft gasifying boiler for househeating. It has a 2" X 5" oval restriction/hole in a flat 20" X 16" cheramic floor where I put my woodblocks/logs. Years ago when becoming a bit lazy and not emptying aches above floor I noticed that aches and char formed a rather stiff nice cone down into the restriction. Nowadays I never empty aches above floor. It will only pile up so much until cone i step enough for char and aches to fall down into restriction. I only empty aches from combustionchamber below restriction. No soty char left. Just fine aches for the garden.
This is my idea: Why not scip the upper part of your cone and let aches an char form cone. You might need an insert/ring of some sturdier metal in restrictions narrowest part not to burn edges off. Saw your comment on internal leaks. I don´t know your machine well but I think insert could be loose on top of your lower cone ( with edges of course - not falling down). I don´t see where leaks could appear if stuffed with aches. Maybe even lower end of cone could be surrounded only by styffed aches instead of sand for even better insulation.
Like I said: I have no experiance yet. It might not work at all for some reason, but this is the way i planned to build. Can´t wait to get my premium to se what WK´s inner secrets are.
If it were me and I was gonna replace a hourglass I’d do something like this instead.
takes that top of the cone right out of the picture.
sorry for the sloppy hand drawing… I really need to get some french curves… the area in between the cones becomes self filling with ash so it is insulated. heck, you may not even need to use the top ring, tar fence… I wouldn’t.
Hi Guys,
Jan-Ola, Yes, I understood the design you were suggesting. Similar to the inverted V shown in the first pic below. I tried a variation of that on my fluidyne build. You can find info on it in the early pages here. It worked well, but I had one of those internal leaks where I left part of the tube unwelded. Good flare buuuut something wasn’t just quite right. I have a video of this posted on early pages also. On tear down I found the missing weld. Problem solved, lesson learned! Add it to the 75% operator’s manual. lol. I do not subscribe to or recommend the “dust will seal it” tack. Just think about this for a moment, thermal expansion(movement), cooling(more movement), shaking the grate or running the vibrator(more movement). Now consider the strength of the powder bond. Now consider poor performance and having to disassemble to fix it. I have been there, done that and will never go back. My hourglass hearth is gasketed and bolted in. The smoke cannot go anywhere but all through the reduction zone, exactly what you want for optimum gas production.
Another thing I learned was that the 1/2" nozzle holes were too big. SU suggested starting at 1/4" and adjusting up if necessary. I did and they have stayed at 1/4" for my “numbers” Line C and now line D.
Actually, Arvid, your hand drawings are quite good. I did consider that collar like that way back, but with cutouts in the top cone to fit up under the nozzles. I nixed for the easier one. However, I had just bent a cone for my cyclone so I decided to be artistic and do the hour glass hearth. I love how it works. I will however, widen the cone at the top so it’s farther under the nozzles away from the blast. I want to try a fire tube the same diameter as the nozzle ring so there is no thing protruding into the fuel flow. Probably put a few ideas on paper and start mulling it over, lol.