Well, I decided that six years is long enough to wait to build my second gasifier (I’m so lazy…or…uh…‘well researched’). I started out thinking about what type of nozzle to use. Actually, I had been thinking about nozzle types for a lllllooooonnnnggggg time. I wanted something that would be robust and give good longevity (as everyone else who builds a gasifier is striving for).
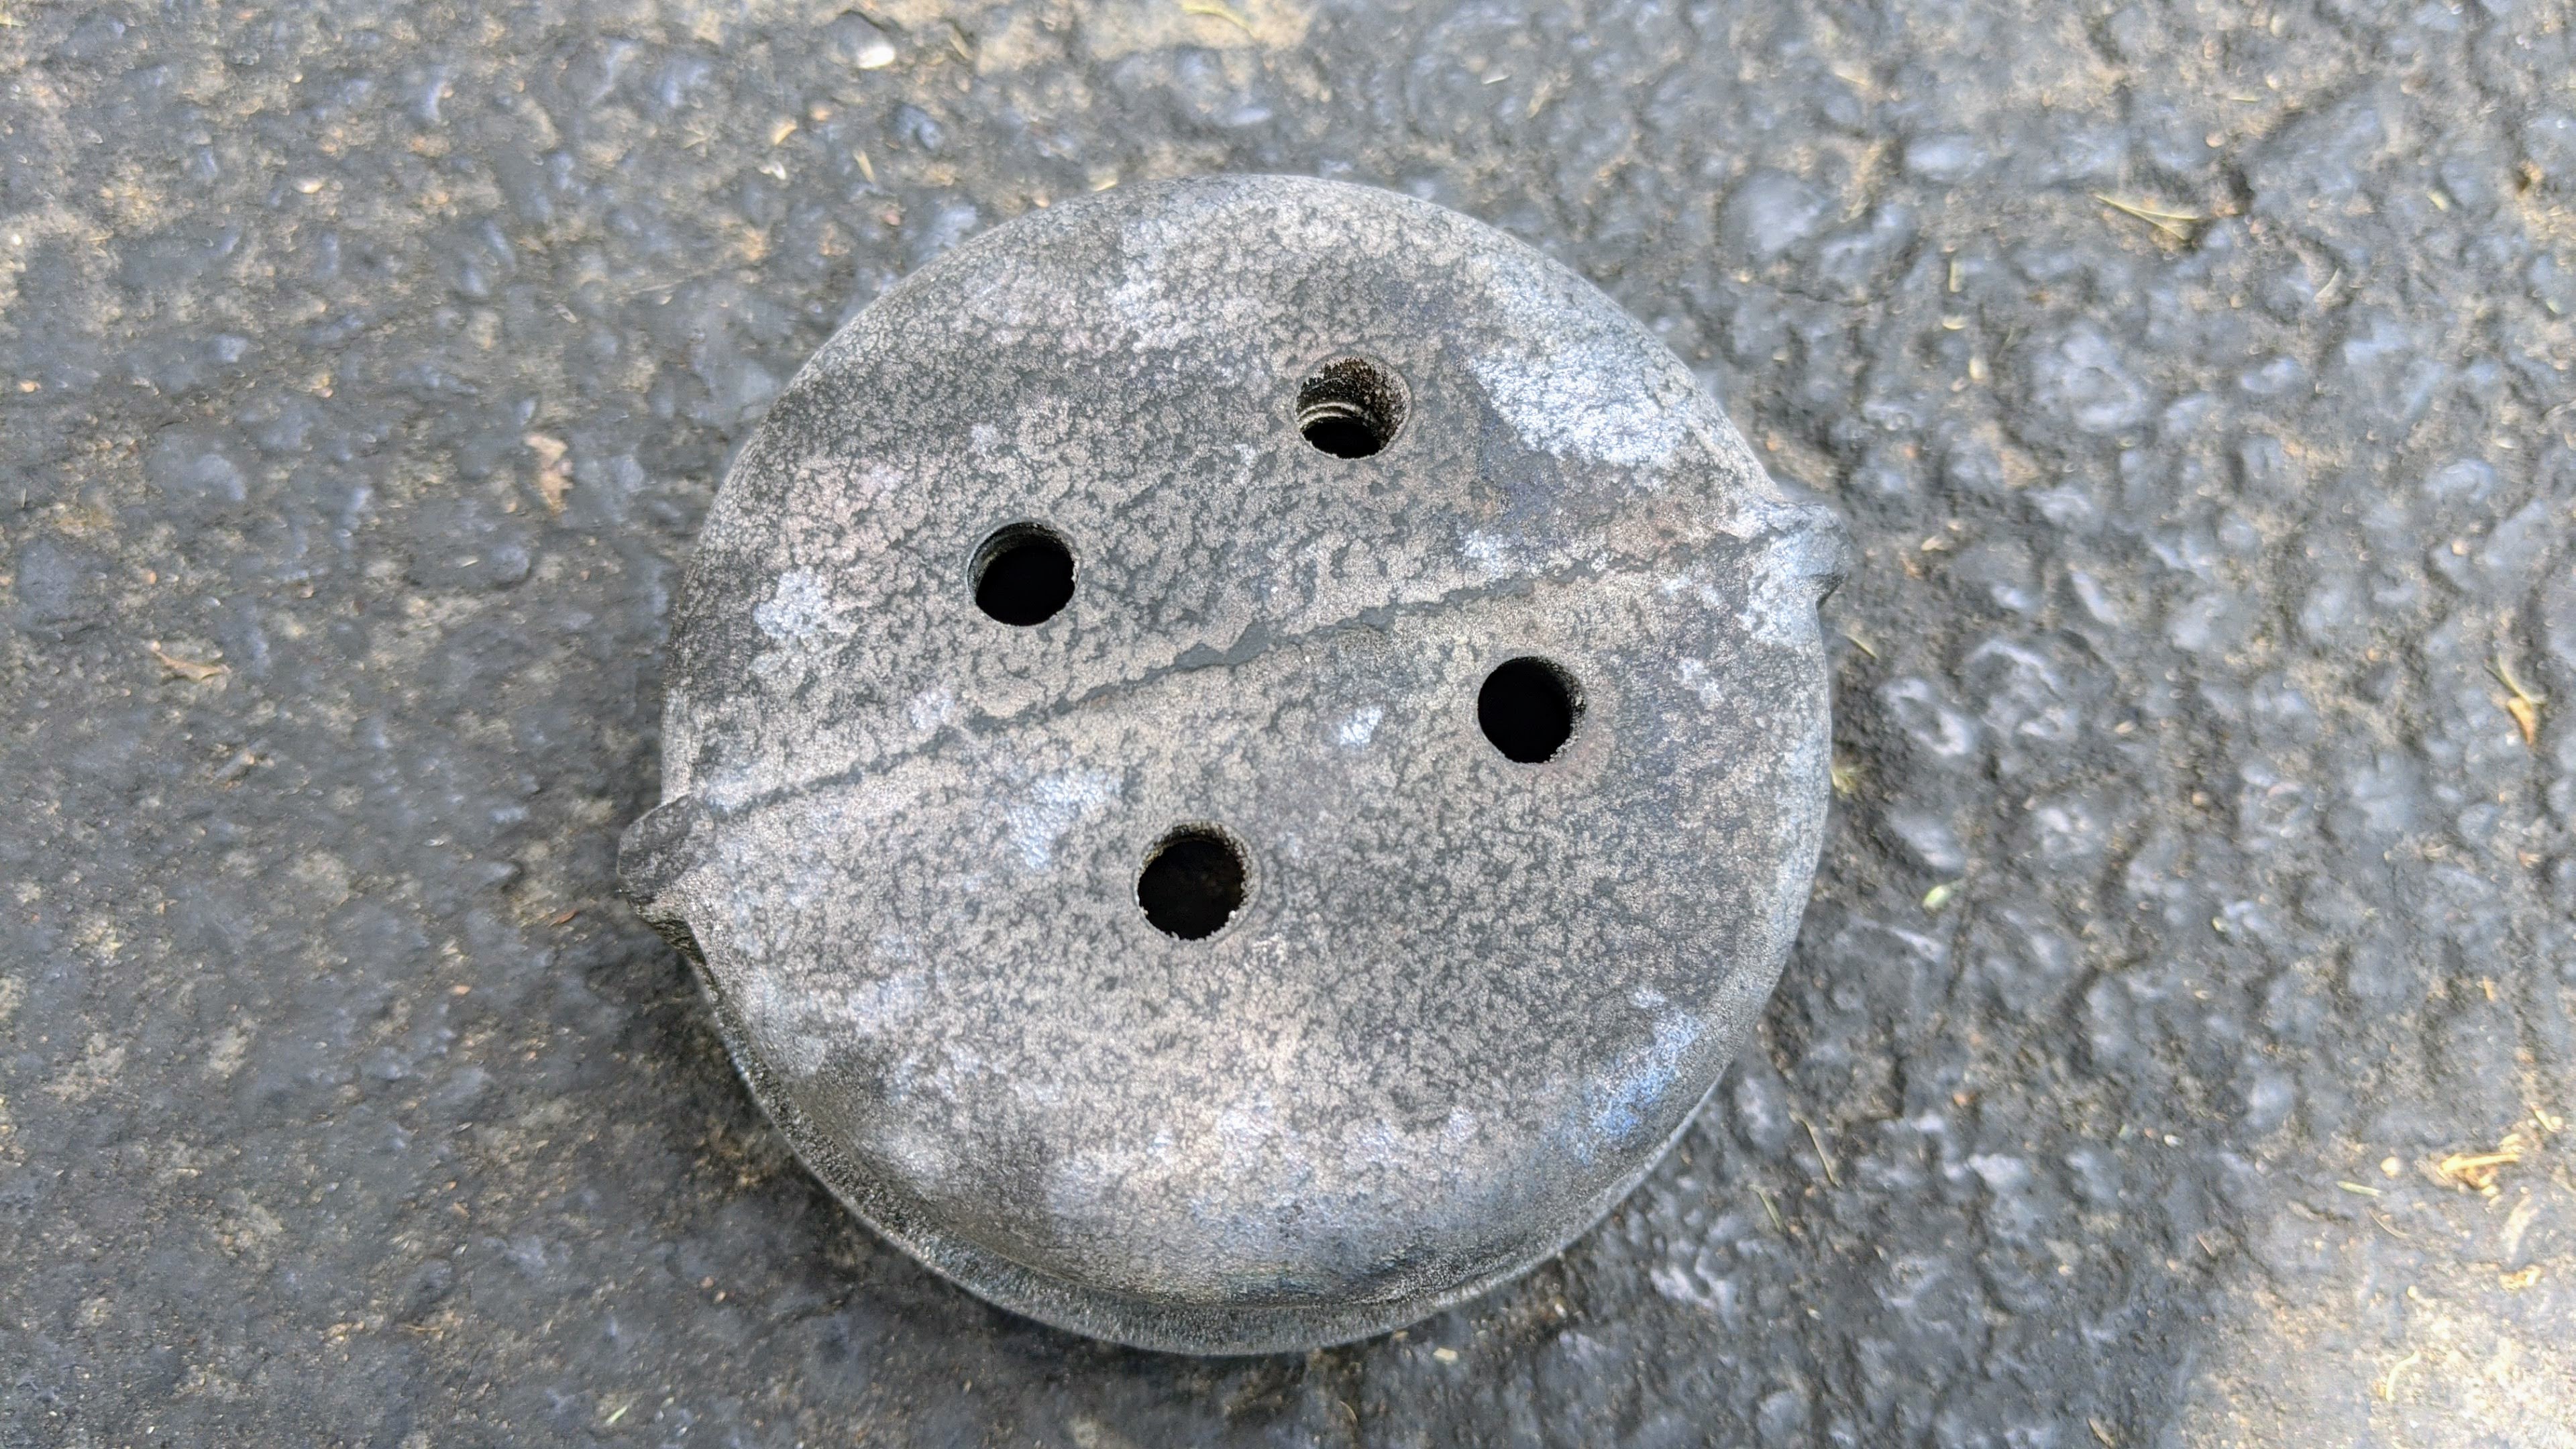
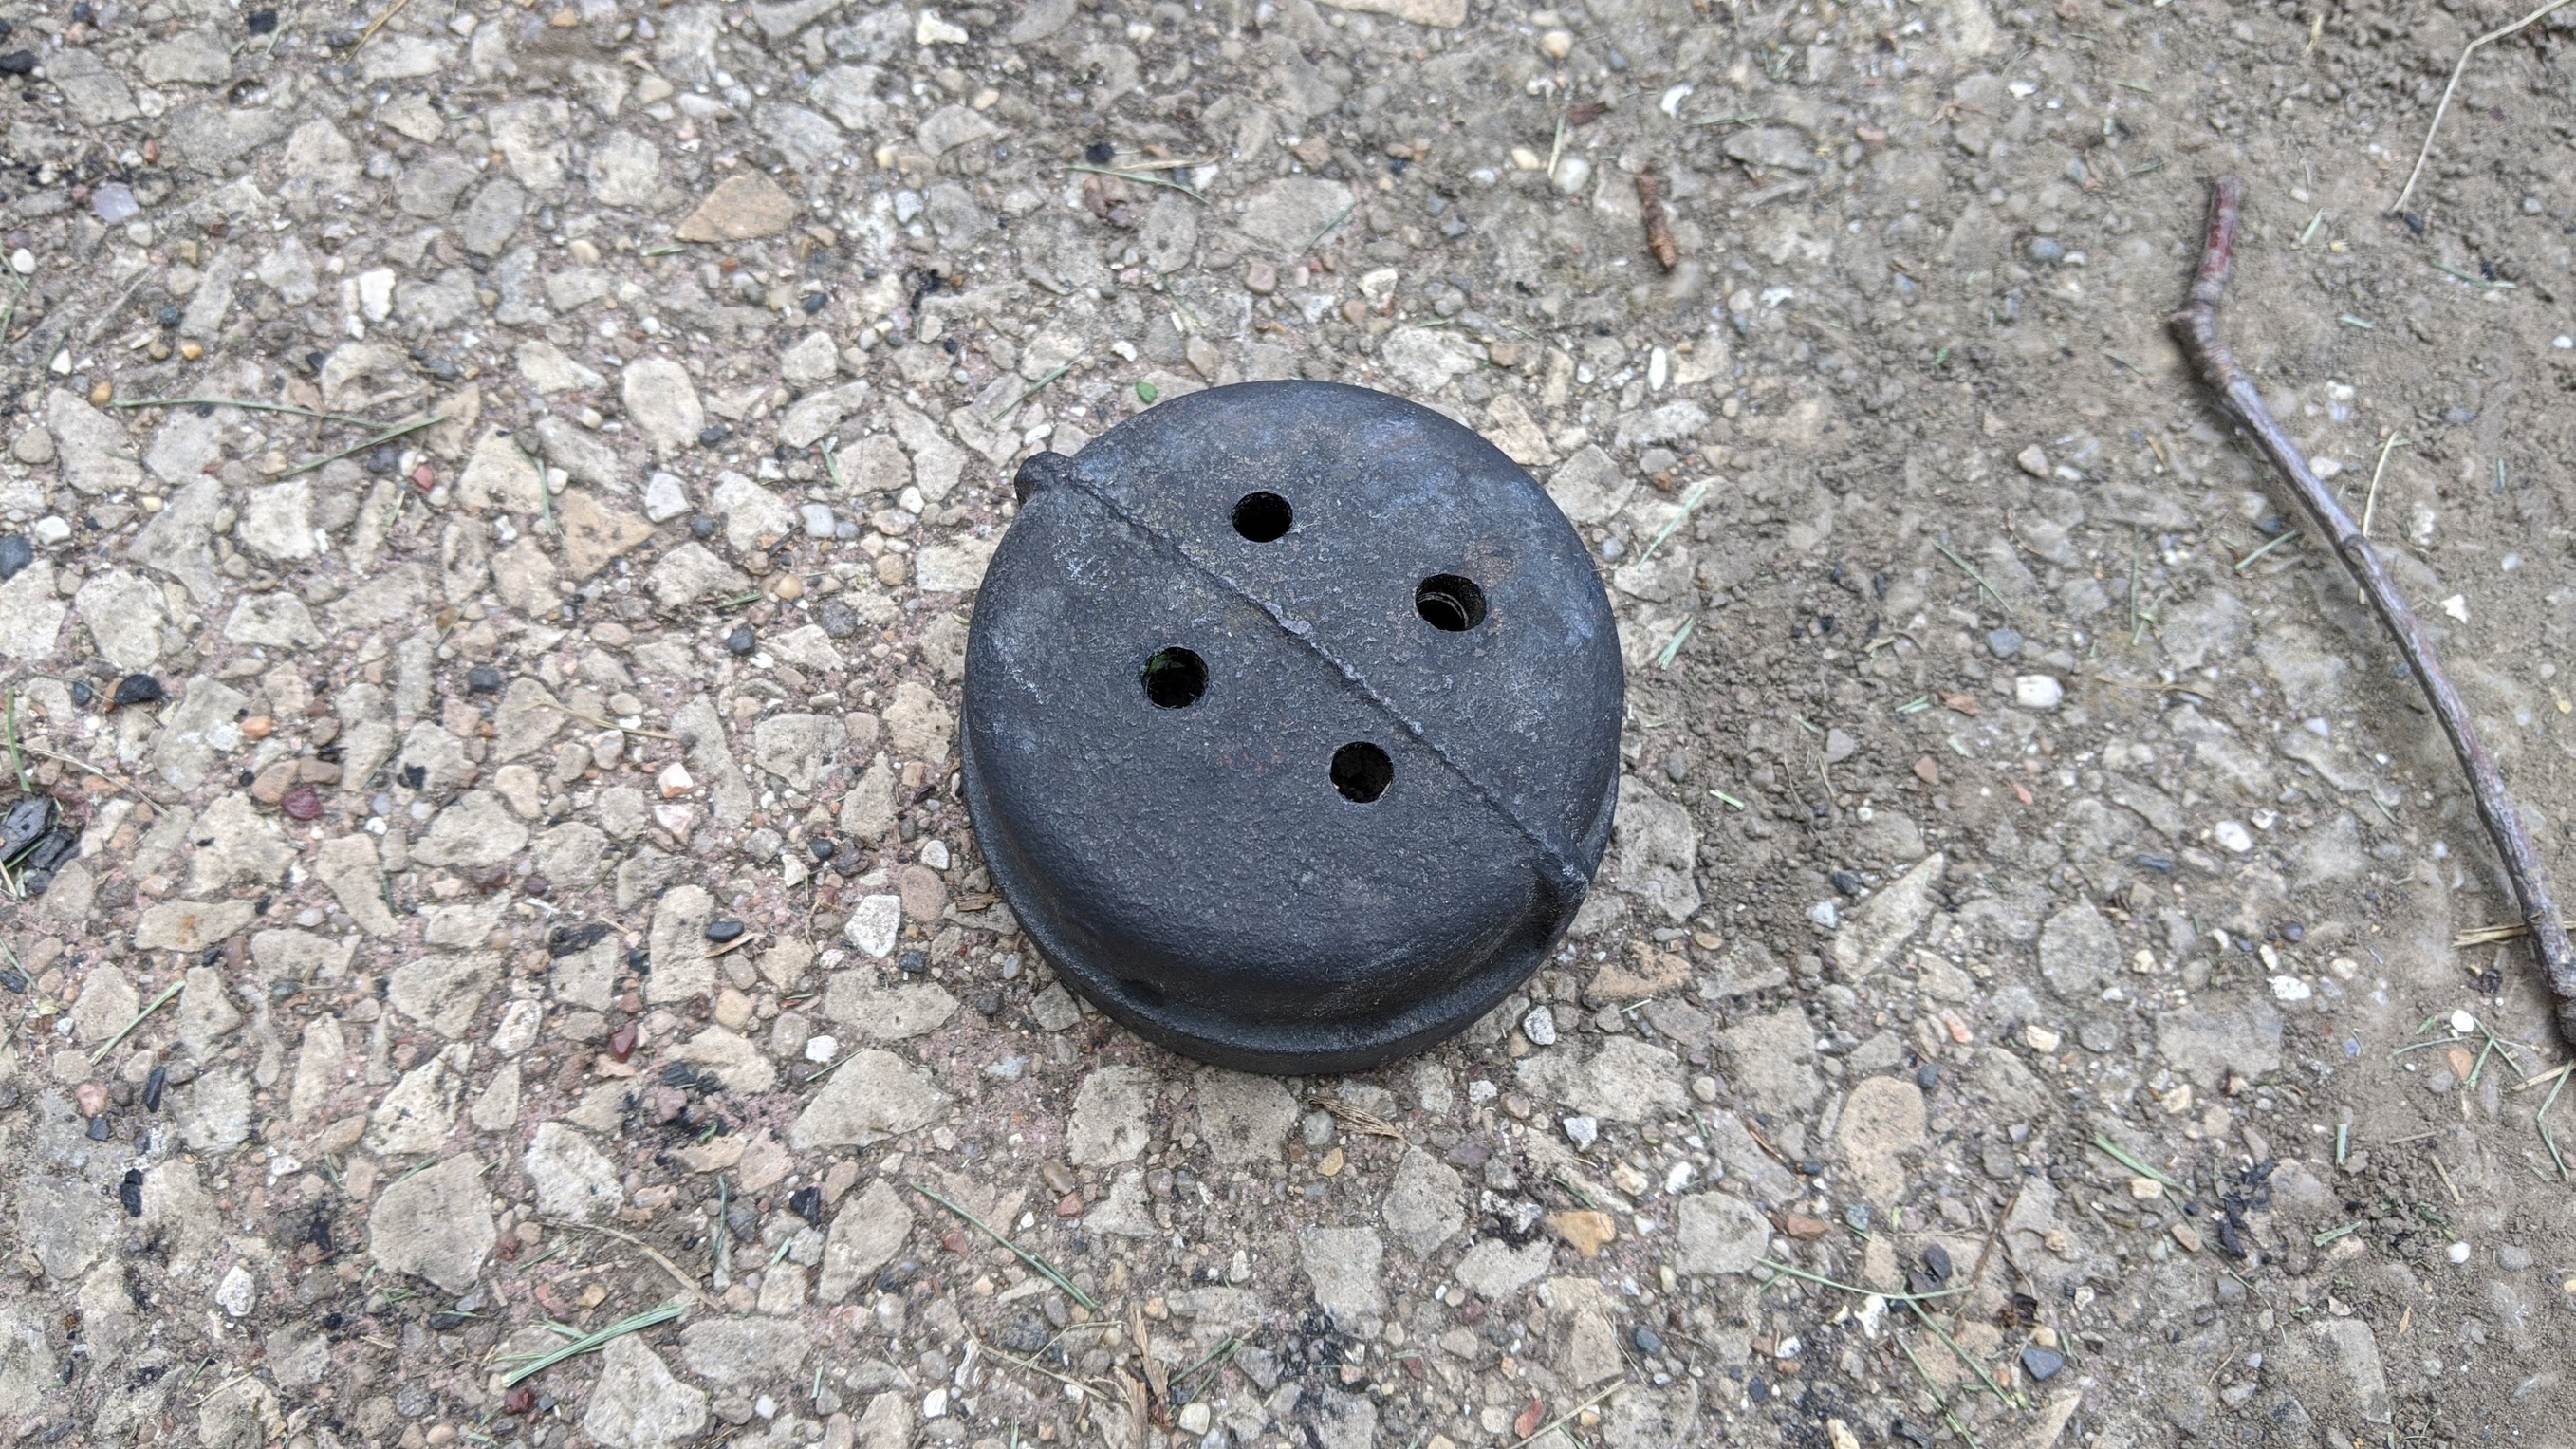
I decided to try a design similar to Kristijan’s idea where you have a larger pipe with holes on the top so the heat is spread out over a larger area and not concentrated above a single opening. I was in the plumbing section at the hardware store and just kind of piecing things together to see if something stood out. What I ended up going with was a 2 inch pipe coming up through the center bottom and using a pipe cap with holes drilled in the top. If the nozzle proves to stand up to the temps, that will be great, and being a threaded part, replacing it if it wears out will be fairly easy.
For the gasifier body, I used another of the ammo tubes that I had sitting around since my first gasifier build.
Then, I ran the gasifier for the first time. I just lit it from underneath and used my small mattress pump as the blower. I ran it at the highest velocity I could and it ran for about 15 minutes. Then the sump pump hose started to melt so I shut it down. I waited until it was cold and dumped the charcoal to check the condition of the nozzle. What I saw made me feel good. Besides being a little ash covered, it looked to be in great shape.
At this point, I am really excited about this build. It is my first time welding in a gasifier project. I need to fabricate an adapter for my lawnmower’s intake so I can test this out fueling an engine. Being that the nozzle points up, I figure lost at least 6 inches of hopper space versus the “pipe through the side” gasifier. So, I want to see how much runtime I get on an actual engine.
It is a beautiful thing when thinking a long time about something pays off so well when finally tried. Congratulations on an excellent nozzle design!
The 2 inch pipe gives you some room to work. How about running a piece of 1/4 inch copper tube from a water drip up into the pipe near to the nozzle. Bend the tube in an S shape so that the open end just touches the steel pipe. The drip comes out onto the hot steel and voila, you have a hydrogen boost. M8-M16 16-600ml Sight Gravity Drip Feed Oiler Lubricator For Hit Miss Engine | eBay
Bryan,
It is always enjoyable seeing new builds. Thanks for sharing it with us. The pipe cap nozzle is a good idea for a bottom entrance nozzle. I used Bruce’s idea of a large oiler for water drip on my 16 gallon gasifier. It works well. Mine holds about a pint, it guess. Keep up the good work.
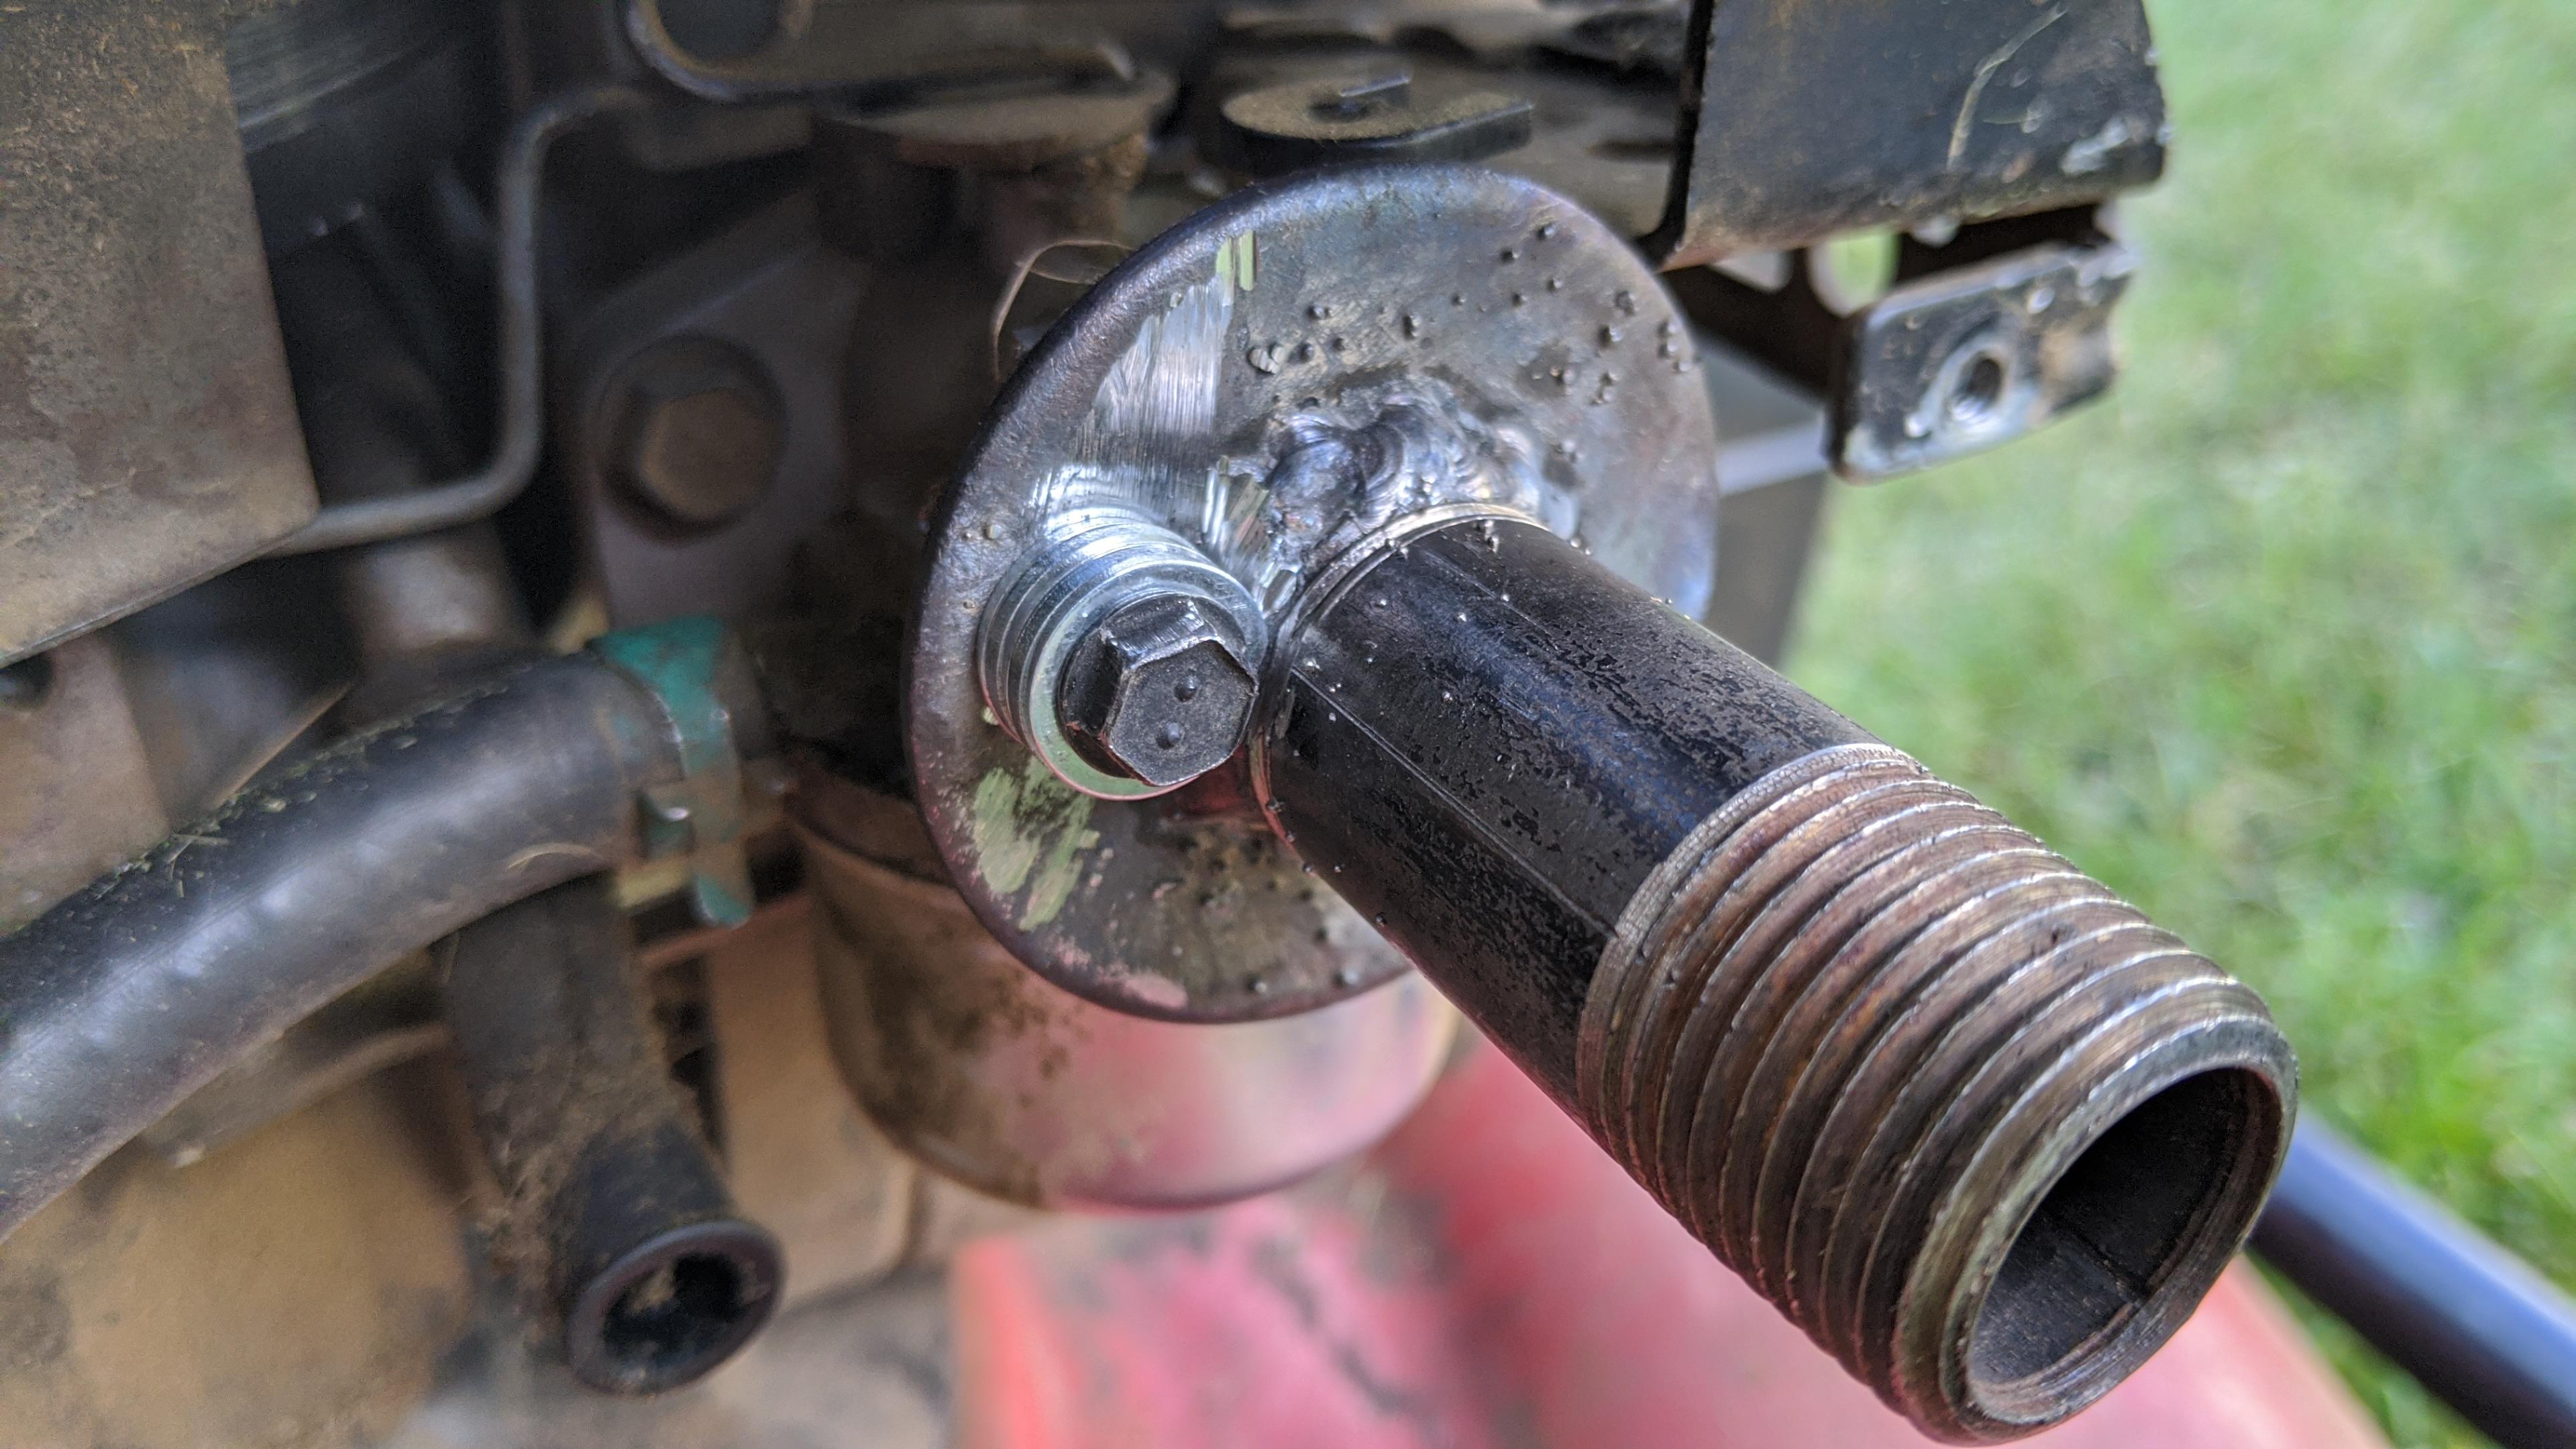
Thanks for the comment on the welds. The inlet weld turned out okay, but the outlet pipe at the top was a different story. I used a hole saw and it was too big to get a decent gap. I tried filling the gap with weld, but had a hard time since the body of the tube is basically 20 gauge sheet metal and a lot thinner than the 1" pipe wall. I kept blowing through on the thin metal whenever I would get close. I ended up with a bunch of air leaks, so I added a layer of hi temp RTV over the weld seam. The inlet pipe hole I cut without a hole saw and was much more precise resulting in a much smaller gap. Also the bottom of the ammo tube had two layers of steel so I didn’t blow through it.
That is a nice looking build; I like the ammo tube and the pipe cap nozzle is something I have always wanted to see tried. I am looking forward to seeing it do some work!
Yeah, I had a piece of flattened copper pipe ready for that purpose, but holding it where I needed it while using both my hands for welding was making it difficult. I didn’t have a clamp that would have held it in the right place, and I am not confident enough in my shaky hands to try welding one handed. Eventually, I’ll get there.
Hi Bryan , its always good to see another charcoal build on the way and i wish you luck with your nozzle cap lasting , i would like to mention to you that once you find a suitable engine to run on your gasifier to try and leave as much of the slag sitting on top of the pipe cap to help protect it from oxidizing away by running a drill bit through the holes from underneath , i would love this simple nozzle to work for you its just that pulling from your mattress pump you said you had to slow it down to maintain the flare , i think that once you have your engine set up pulling on it the temps will rise a lot higher .
Fingers crossed your onto a winner , and good looking welds btw
Dave
The first 15 minutes I ran this gasifier was at full speed with the blower, and while I was not able to light the gas (I think due to air leaks in my pump), the nozzle was working pretty intensely. My biggest issue with testing the strength and longevity of the nozzle will be that the hopper is not that big. If I hook a 6 HP engine to this thing and run at a higher throttle, I doubt I will get more than 15 minutes of runtime before the exhaust temp is too high. I will probably need a longer run to maintain the heat to really put the nozzle through its paces. We’ll see. I’ll just have to build a bigger hopper.
What Dave sayd. Leave the nozzle in between runs and let the slag acumulate on top of the cap. Eventualy you will see the cap gets cooler and cooler on every run untill it starts runing so cool you cant even see a glow.
Before every run just poke in each hole with a wire to break trugh any potential slag bits but other thain that you can leave the slag in! Just break off a occasional peace when too much acumulates.
Doing this the nozzle will probably last longer thain the rest of the gasifier
This obviously has advantiges over the flute nozzle but it allso has one disadvantige, you can drip water in a flute and it will boil to steam and cool the flute in the mean time, but here you cant. If you aim at water injection you shuldgo with what Max came up (and nobody has made yet for some reason) and install a small carbourator on the intake to meter water with the air.
I will keep the slag in mind. How much slag is “enough”? I am wondering how much more hopper space I will sacrifice if I let the slag “grow”. Will the slag stay attached to the nozzle even if I dump the ash and unused charcoal every once in a while?
Hi Bryan , why don’t you have a hunt around for a container that you can weld onto the top as a fuel hopper to extend your run time your welding skills look good enough so that should be a easy task for you, and it will save you having to build a new larger version , it will be a great moment when you get the first engine fired up and running and will bring a smile to everyone’s faces .
Dave
I have thought about adding more hopper space, but I really want to keep the lid that is on the ammo tube. It seals up nicely. So, I am looking at possibly cutting the ammo tube in half and “splicing” in something like a 20# propane tank. I am weighing the amount of welding for something like that with just starting with a larger vessel. My biggest concern is that the ammo tube wall is really thin (20ga) and something like a propane tank may be tricky to weld to it.
Hi Bryan , i understand where your coming from about not wanting to destroy your ammo tube and being so small it will serve as a show piece for a demo flare you want to show off ,
If you can get hold of a large empty propane tank and fill with water before cutting out any holes , you can make a very quick and easy gasifier , i looked mine up and its a 45kg gas bottle that stands at 1200mm high and 375mm round , if you were to weld 3 legs onto the bottom and then a vertical nozzle from below you can then cut a large 3 or 4 inch hole out on the top and weld in a threaded pipe nipple as your filler port and use a reducer to take it down to a 1 inch pipe size for your gas outlet for a quick easy air tight filling and gas outlet in one , i also made a door down towards the bottom for cleaning out slag , it only took a few hours to make everything once i had the bits .
Dave
The intake pipe is half inch, so it’s definitely a choke point considering the throughput potential of the gasifier. The half inch goes to a 1/2 x 1 inch pipe tee. I was so excited to try it that I skipped making a filter and hooked the gasifier straight up to the engine (for testing purposes only ). I ended up using a piece of gorilla tape over the other side of the pipe tee to use as a choke.
It’s alive!!! This is a proud moment.
I found some good scrap recently with which to make a cyclone filter and cooling rack. That will be the next step for me I think.