Hi Cody, on my truck I use a 2" gate valve and a brass 1" ball valve in parallel for fine tuning the air.
I open my two 2" wood gas valve when driving on gasoline or close the 2" gate valve when driving on wood. My auto mixer valve goes the rest with a 1:1 air/woodgas ratio. I use the ball valve to adjust my mixer when hybrid driving on wood/gasoline for more air. The 2" gate valve is hard to adjust for air mixing it also makes a whistling sound that Drives Me Crazy. DOW yes but not DMC going down the road.
Bob
1 Like
Hello Cody .
I’m with Mr. Bob .
I think it would be very difficult to control the fresh air mix to the motor with a 3 inch value .
2 Likes
I’ll try to step it down to a 2" valve. I just hope it doesn’t throw off my MAF sensor.
Cody, the MAF only cares about flow. When running gasoline, a downstream restriction may decrease power - but not alter the mix. More important is to make the woodgas valve seal 100% - or air will bypass the MAF through a cold gasifier and cause a lean condition when running gasoline.
I agree with Bob and Wayne that 2" should work better for a mixing valve , but I’ve used 3" as well and I couldn’t tell much difference in “pickyness”.
Btw, a long tube from MAF to throttle body is perfect for woodgas. Then you have plenty room to install both mixing valve and woodgas entrance.
2 Likes
I have plenty of real estate to plumb in my producer gas lines that’s for sure.
It’s one reason why I keep coming back to my Sierra. The Mazda has a piling number of issues with it that need addressed before I can put a reactor on it. In the end for the Mazda I may go straight chargas no guzzoline for that one. The air filter adapter for the Weber is leaving clearance issues with the hood but I could just reattach the original carburetor and plate off the mechanical fuel pump, and drain the fuel tank of course. Could give me room to make a taller unit and integrate with the bed if I remove the fuel tank all together. The Mazda doesn’t have much value to it besides personal attachment.
1 Like
Cody if you drift back into through-a-carburetor for the Mazda watch, look, listen carefully to Eddy Ramos’s now in English video for a practical example:
Watch especially toward the end to see how closed he is operating his carburetor choke flapper to get the suction, gas flow, and runnable mixing ratio.
S.U.
2 Likes
I really like the way Eddy has done it. I’ve been watching his videos over and over just for that reason. Him and Bruce are both pretty slick with their approaches.
2 Likes
Watch out for plastic intake manifolds they have been known to catch fire especially when running woodgas.
3 Likes
Hi Bruce.
I reference to your post # 270:
I was not satisfied with this method (I called HAR), that is why I did not uploaded to the web, not even into this forum. I only shared with you just to know your opinion. Since it did not worked es I expected I uploaded nowhere because I do not want peolpe lo spend time and money on something that I do not feel confortable.
But since you brought it up, may be it may be good for somebody.
I just want to make clear that I do not backup this kiln.
On the other hand, I am very pleased witht the HCC kiln (my topic: “Hi-Temp Carbonizer for bio-waste”) also posted by Cody in the next post # 271, which I am still using and improving.
As always, Bruce, truly yours.
Eddy Ramos.
2 Likes
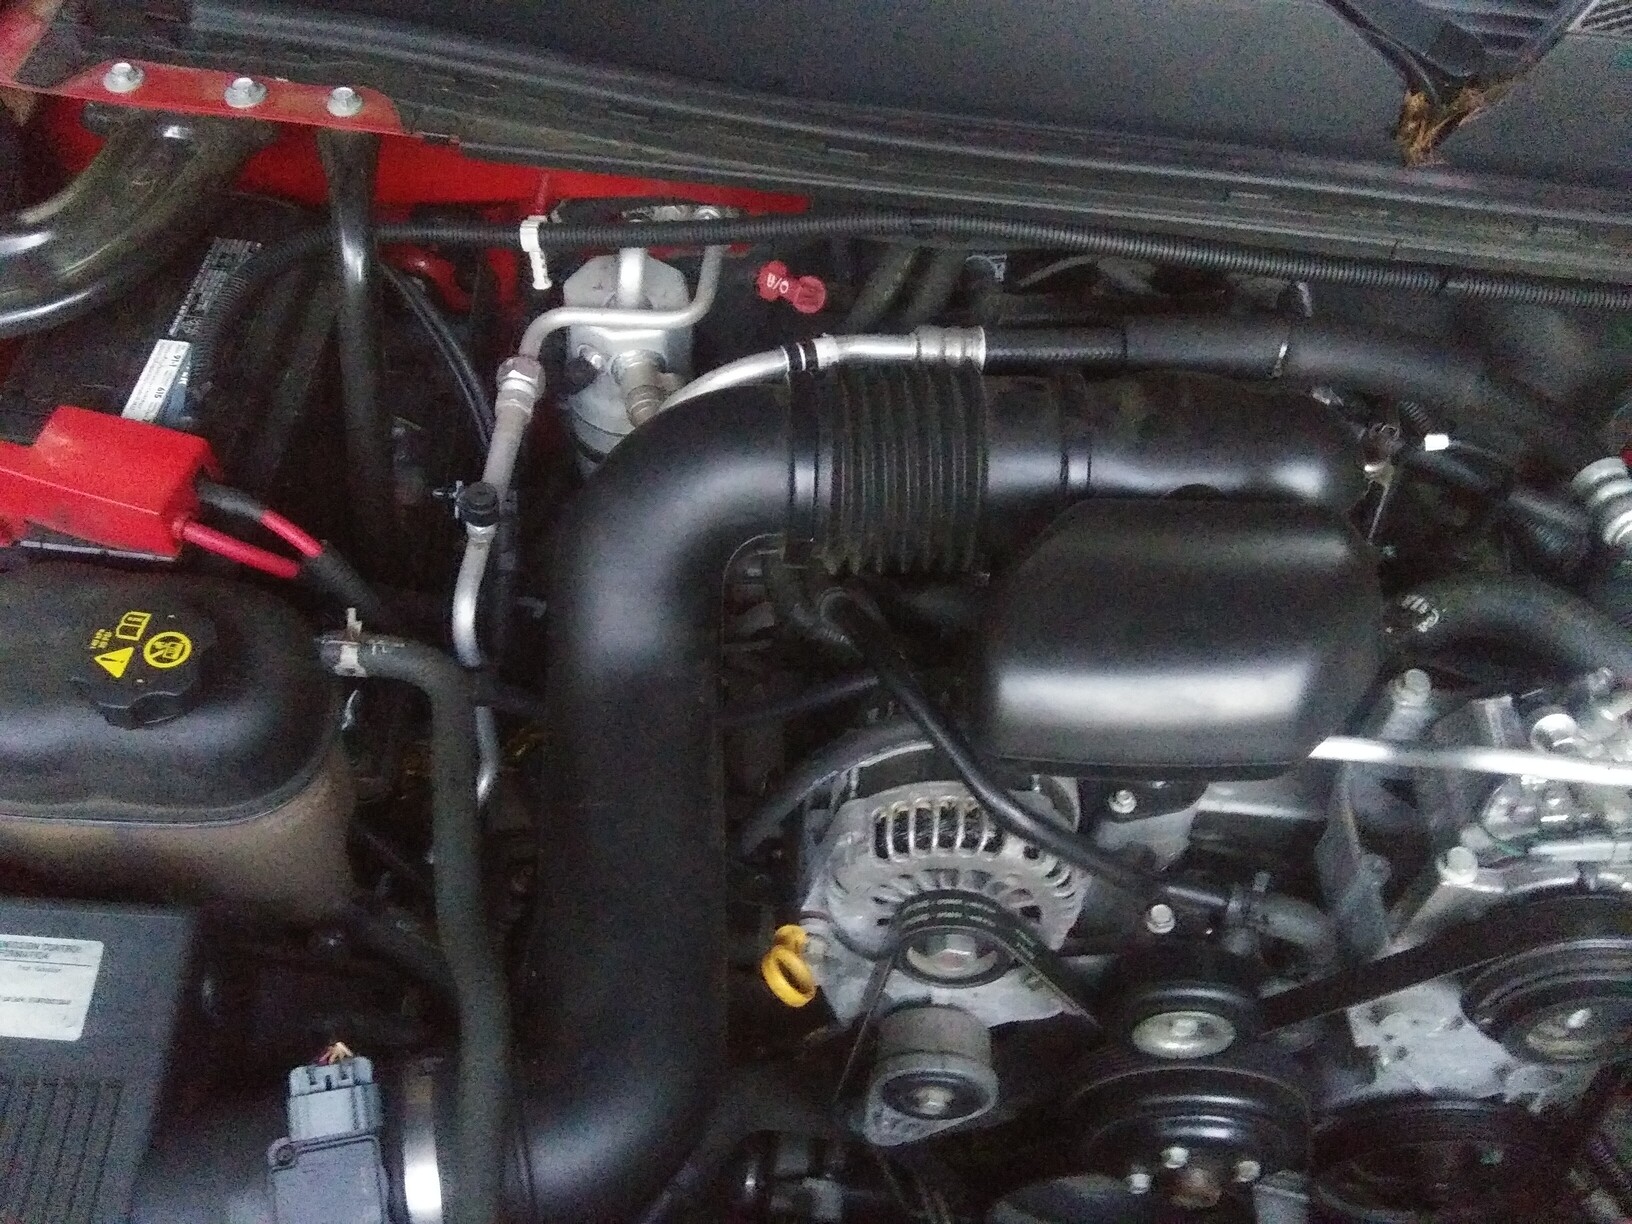
Wow, that is a clean engine compartment. Something I don’t see in the wild. ![]()
4 Likes
I work in the Detail department at a GM dealership and I can’t stand a nasty engine bay. My Mazda is nowhere near as clean and it drives me nuts. When I get the Buick I’m going to have a field day lol.
1 Like
LOL, both of my cars are soaked with Fluid Film and that was done by the garage detail man. 
While I’m waiting for opportunities to find the materials I need in the Svedlund prototype, I’m piddling on my goof off reactor. Nothing has been welded together and nothing is final.
1 Like
Fluid Film, is that like an engine shine or something?
I spray down my engine with Nitro which is just a paint safe degreaser and I pressure wash it off. I don’t like engine shines it can mess up the vinyl of the wiring and make your belt slip.
That is a like an undercoat for rust. I think it was designed for the military a long time ago. Makes a real mess.
2 Likes
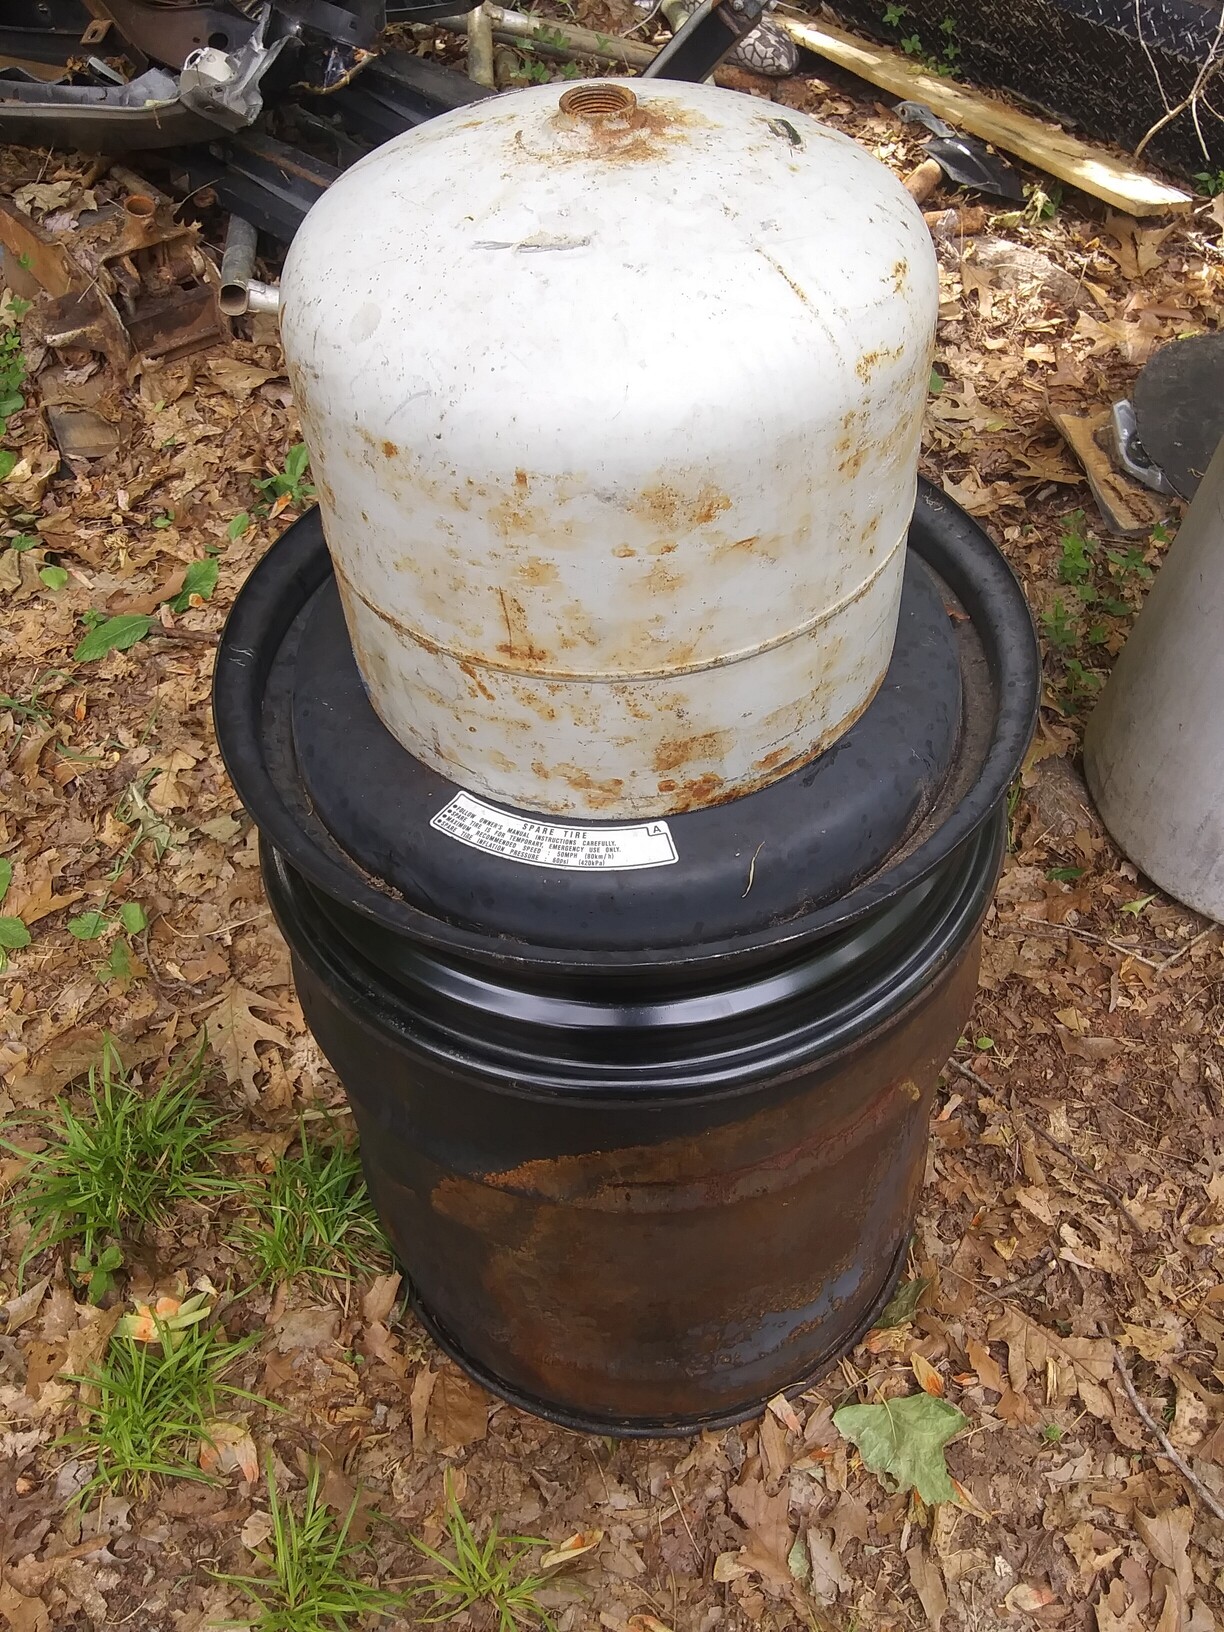
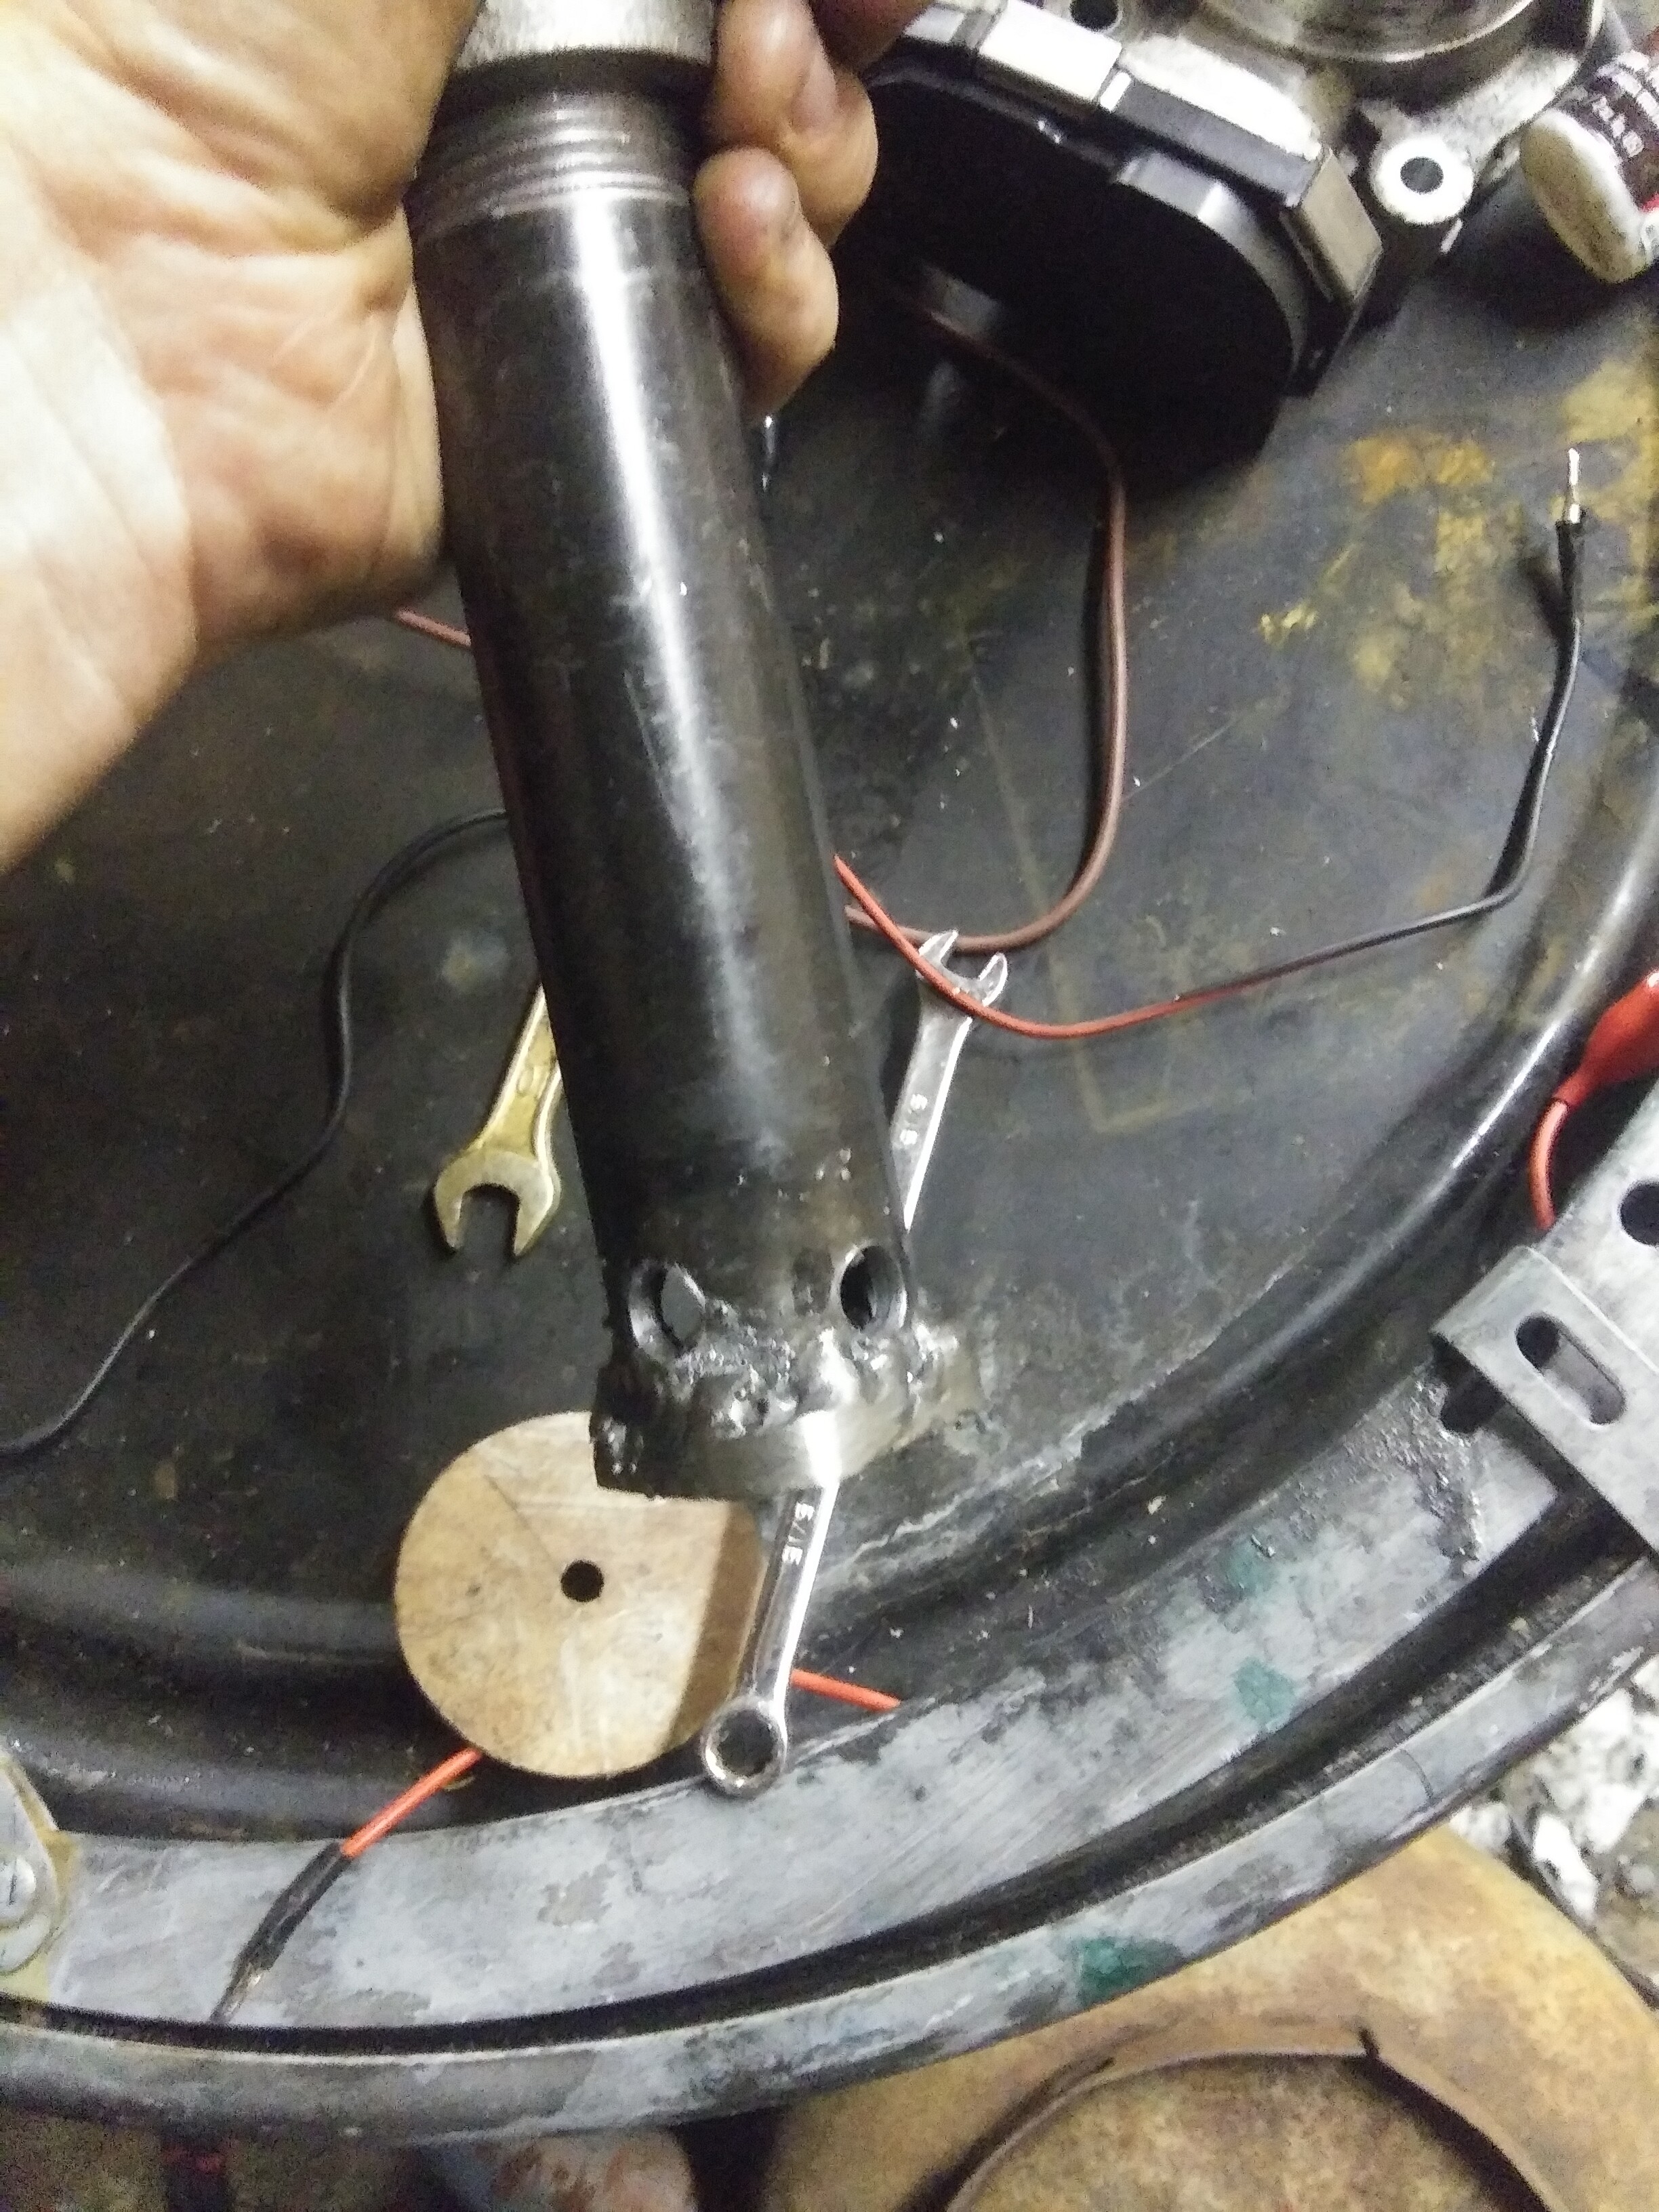
I’ve scrounged up 10 of the bigger wrist pins.
14mm bore 5mm wall thickness. Heavy heavy, 4 ounces each in steel. Hopefully these will make good jets for charcoal. On that car rim I plan to weld in 16ga sheet metal fins for adding surface area inside hoping incoming air will cool it down. I will probably wrap the burn tube with ceramic wool that I have left over, and protect it by wrapping over that with chicken wire. Not sure how far down the reaction would go in such a setup. I’m leaning towards a 90 degree angle on the jets. Not sure if I want to go with 5 jets or more. Mako used four* 14mm jets in their 2-4 litre engines or so the book says. 5 would give me an odd number so the jets aren’t blasting into each other.
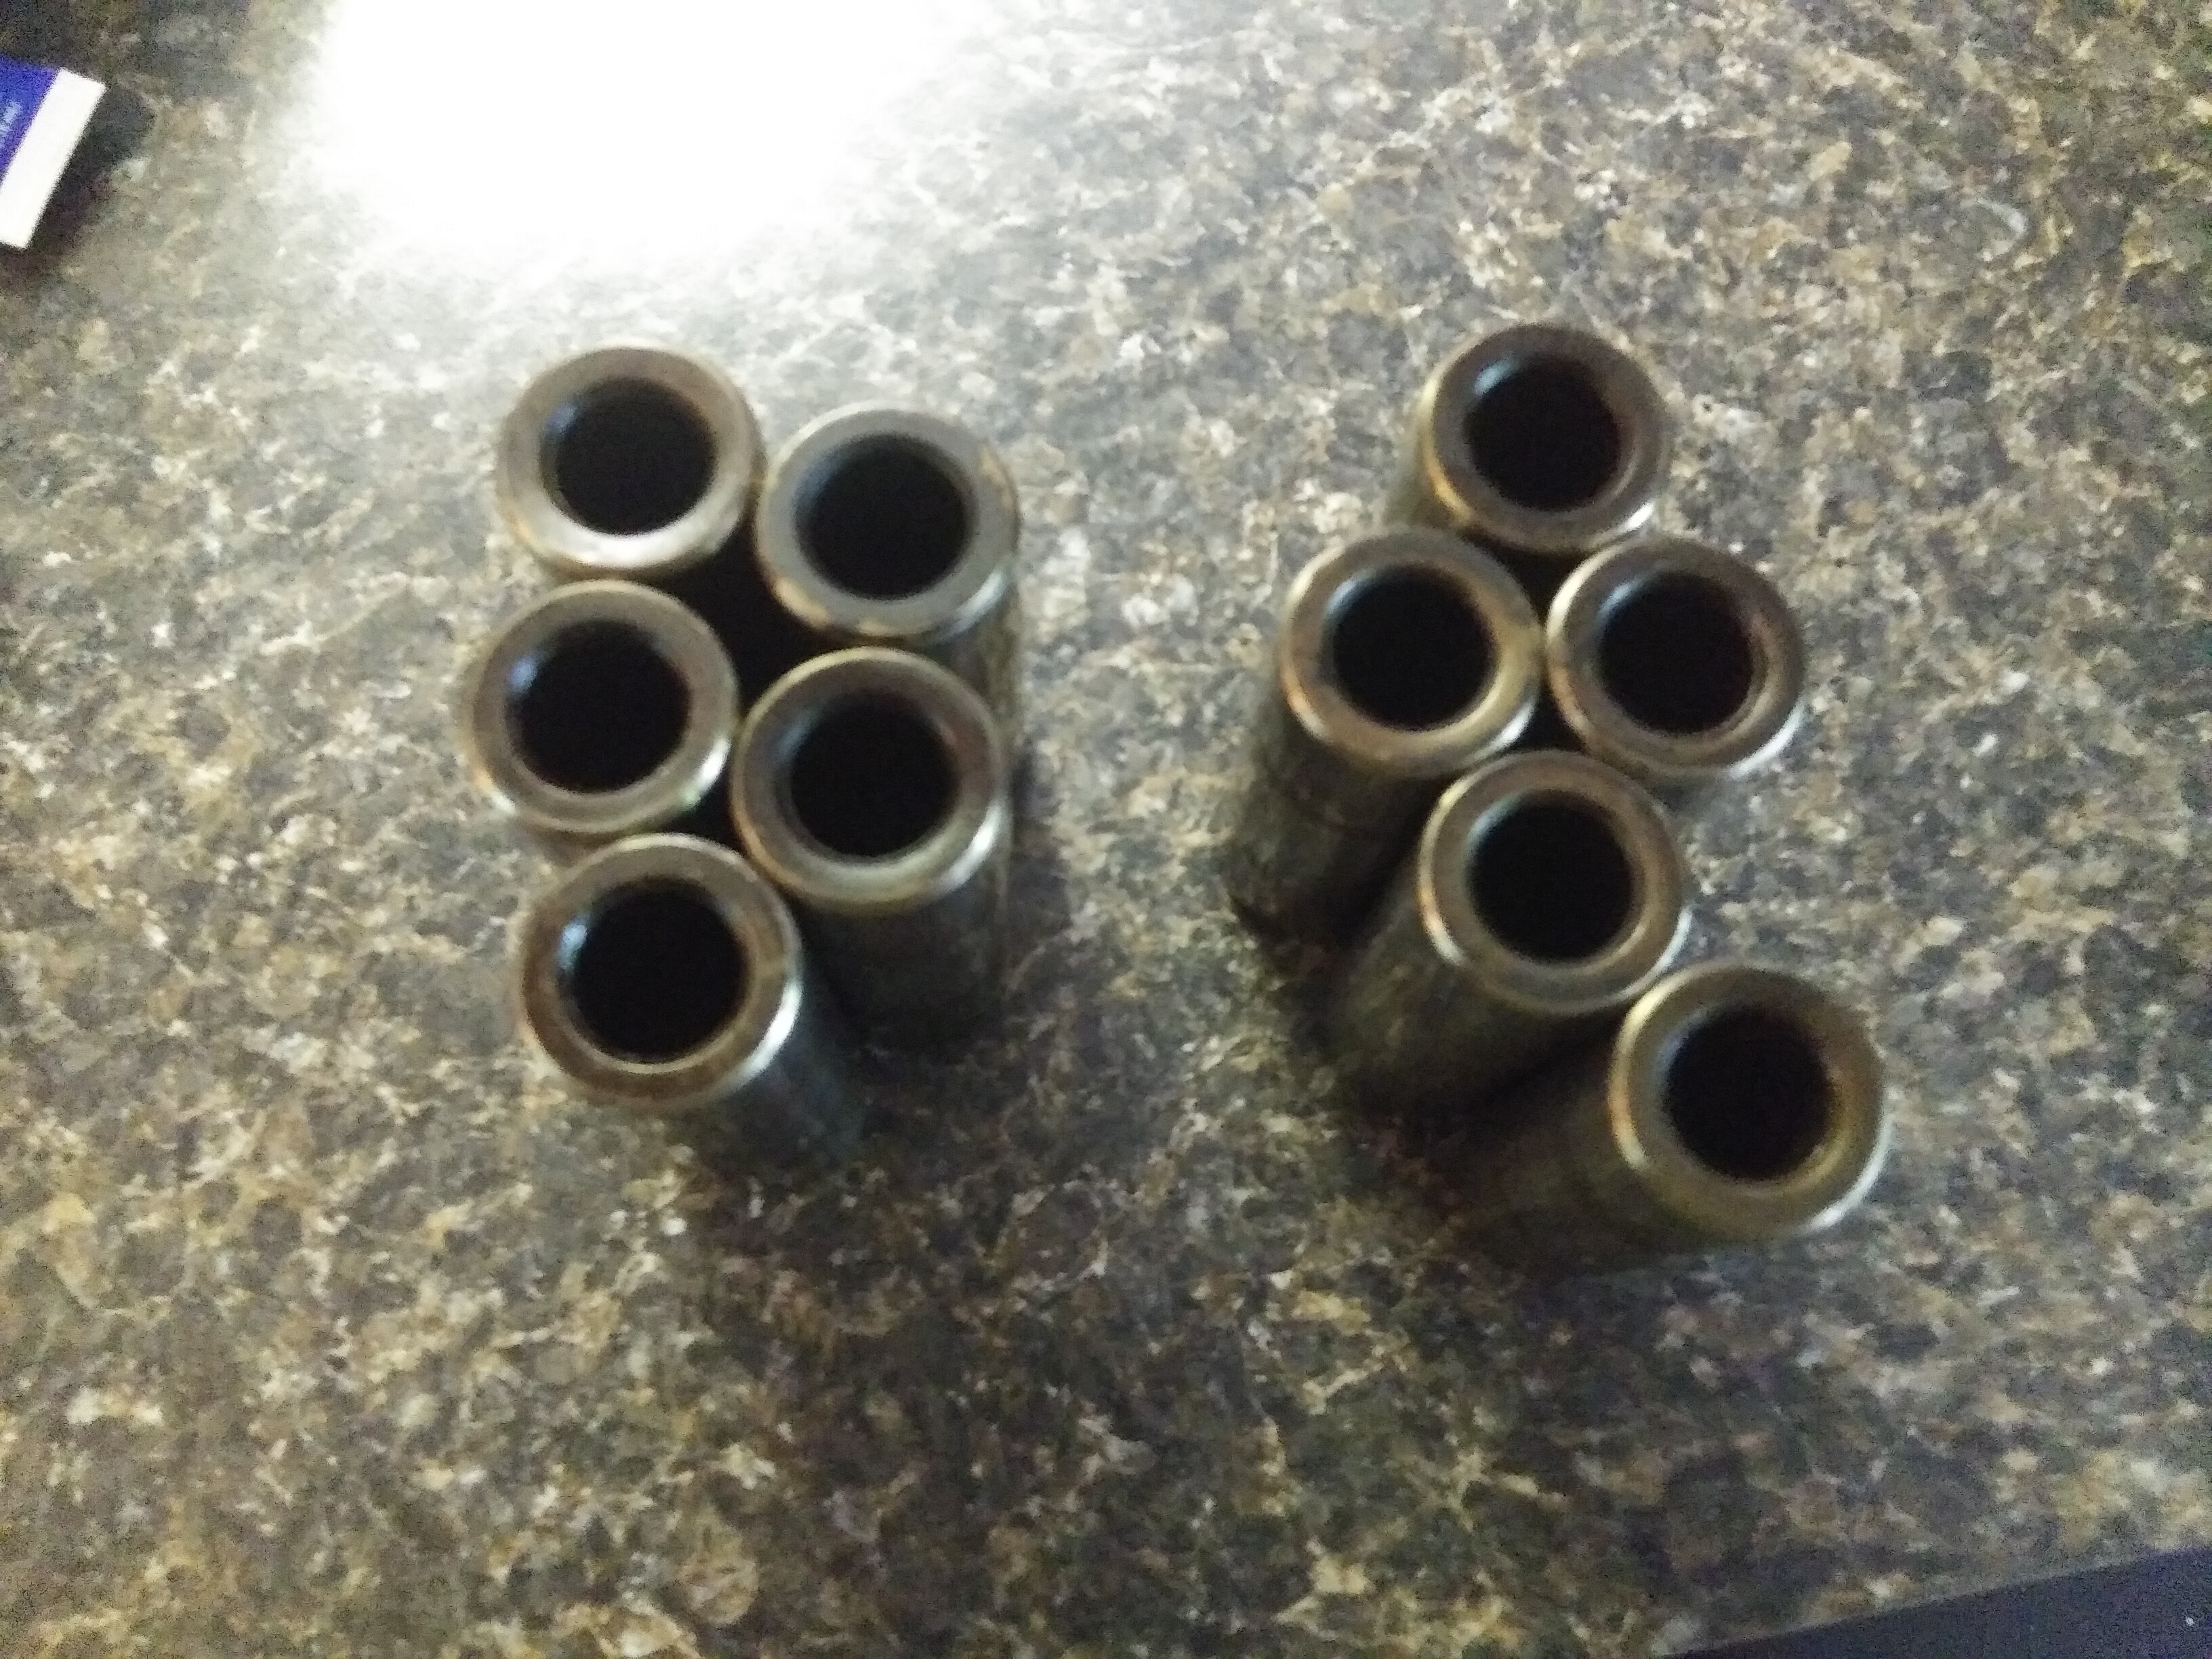
(* I originally said three nozzles because I misremembered and corrected myself)
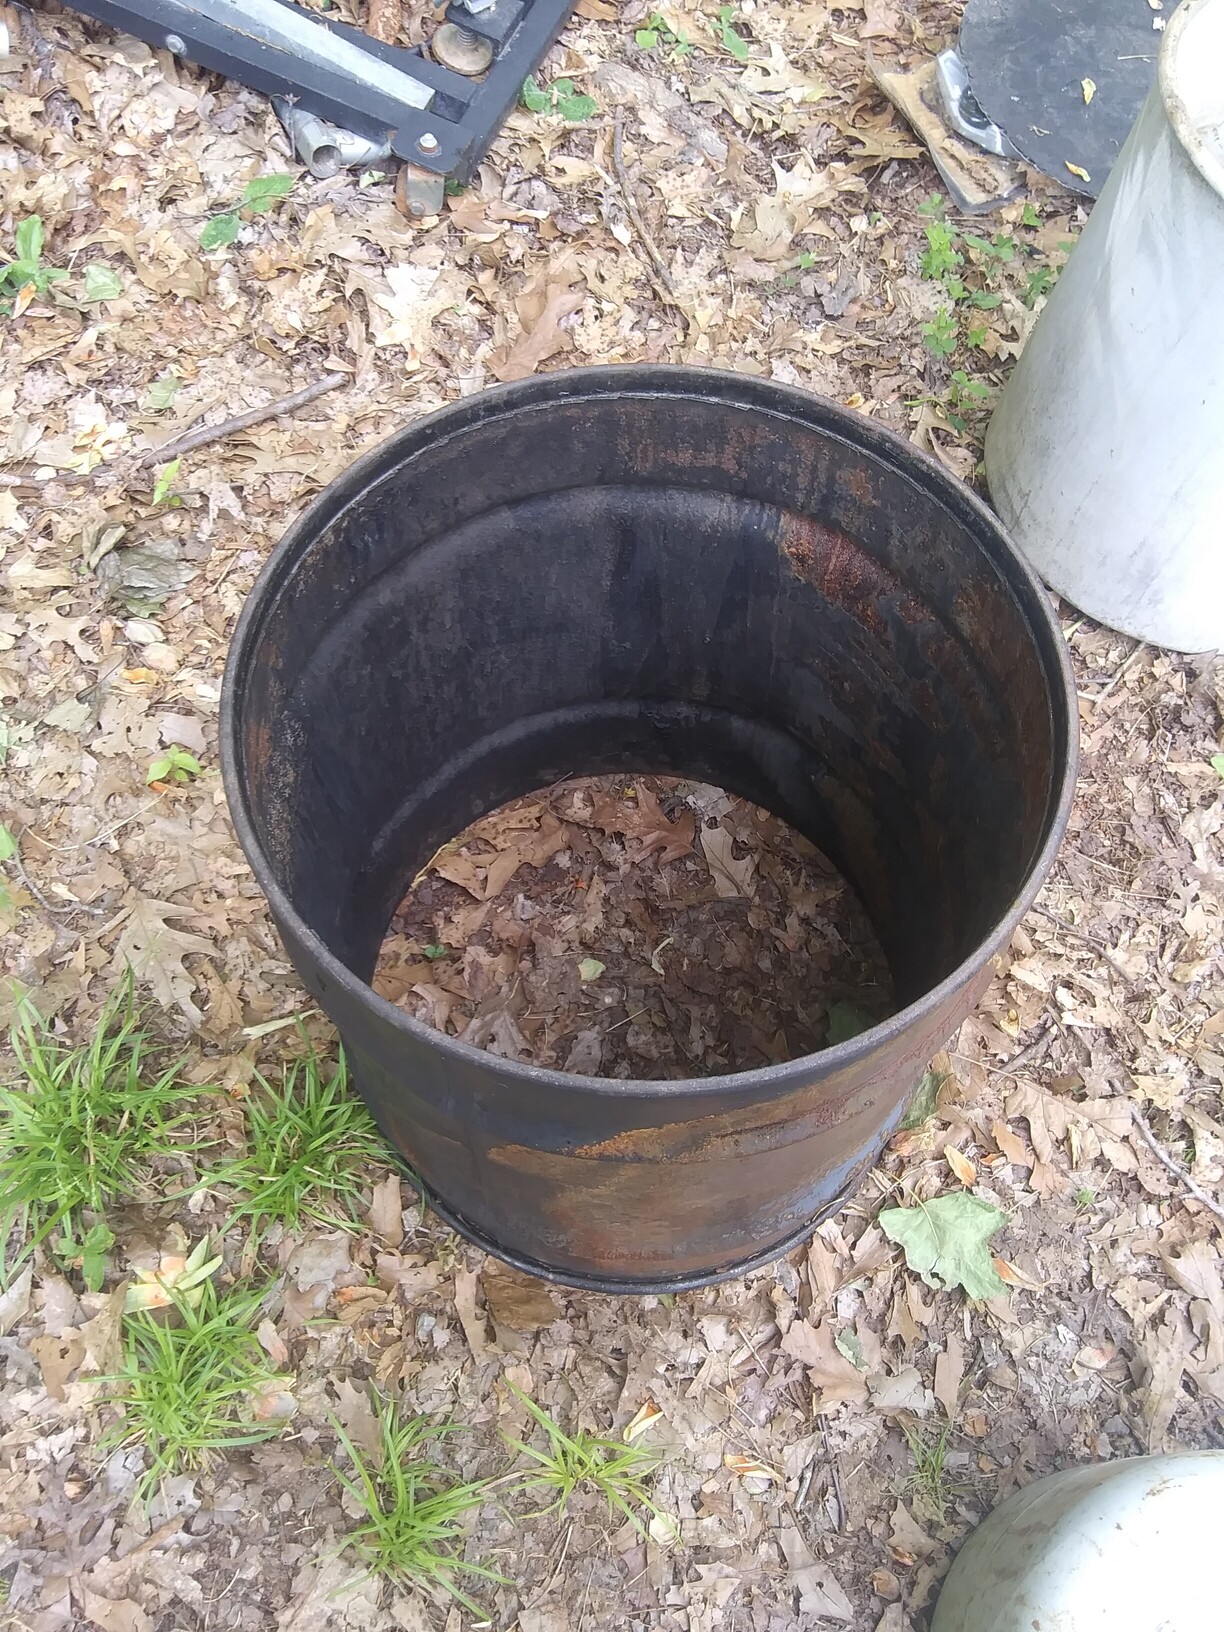
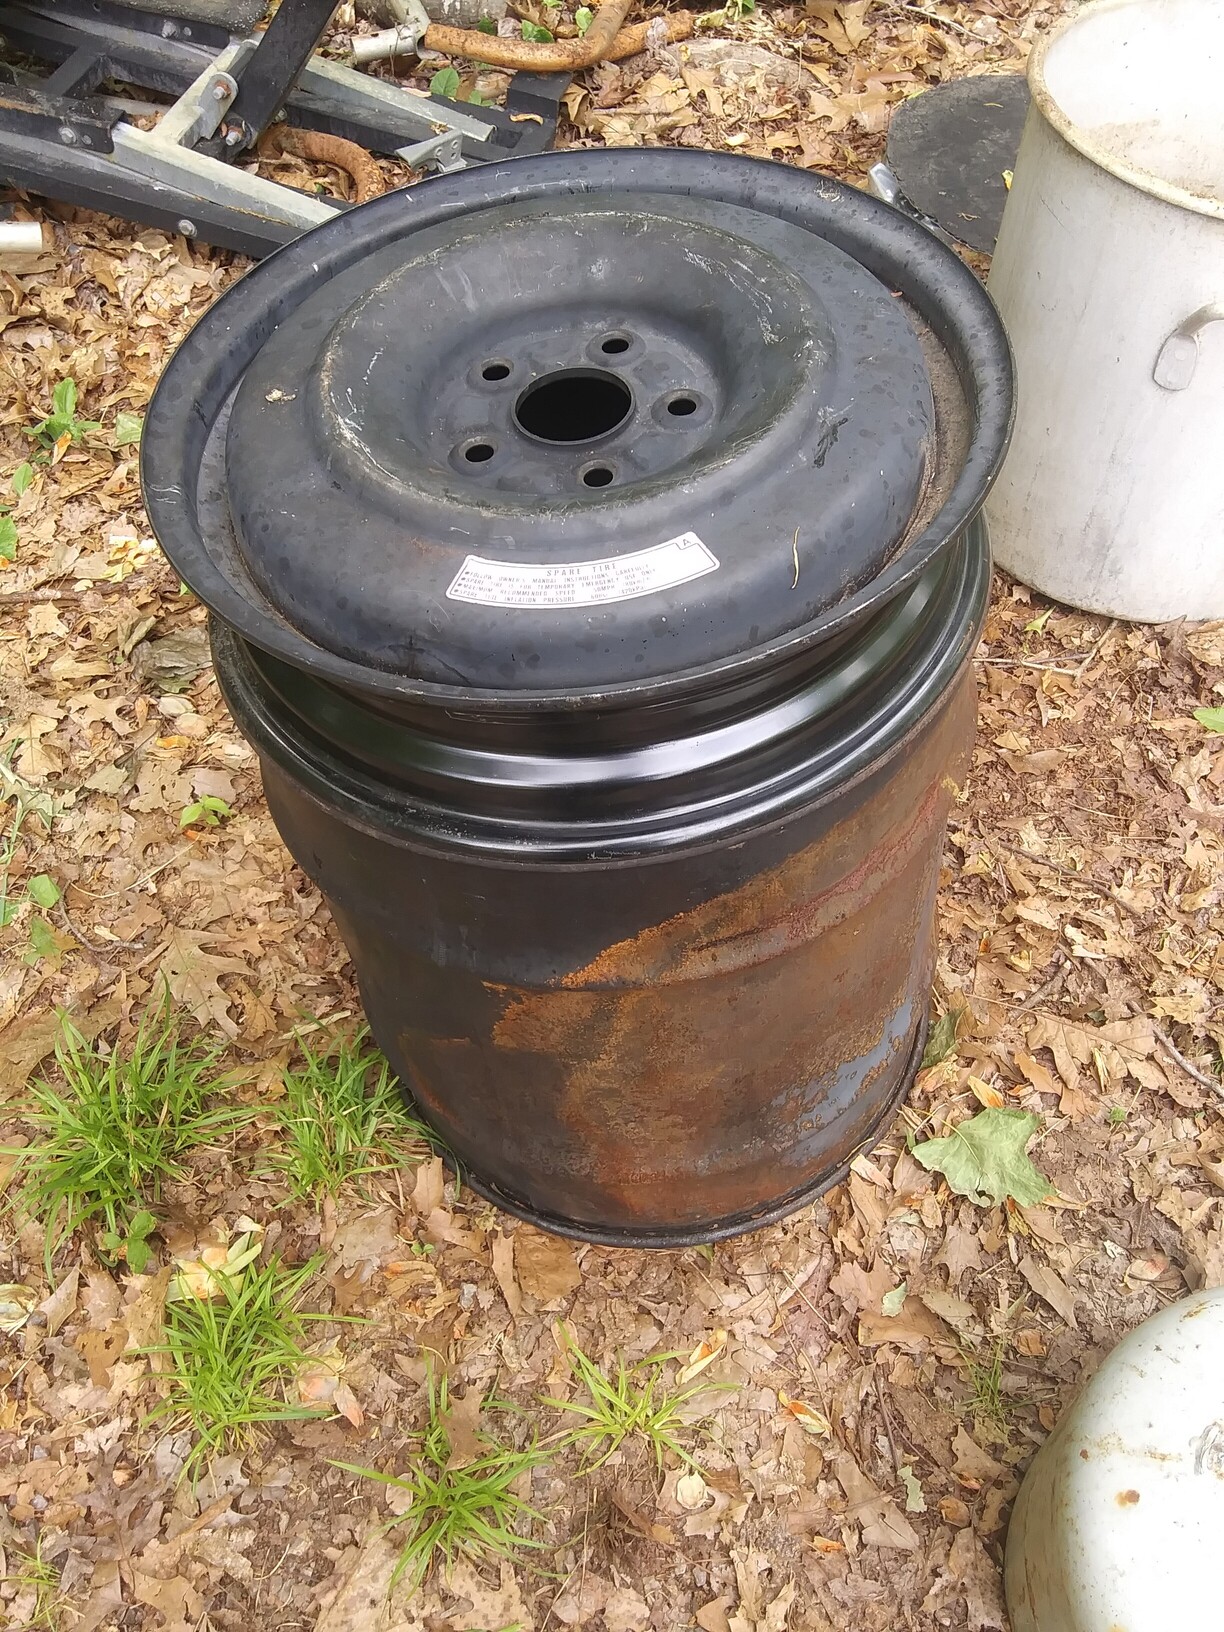
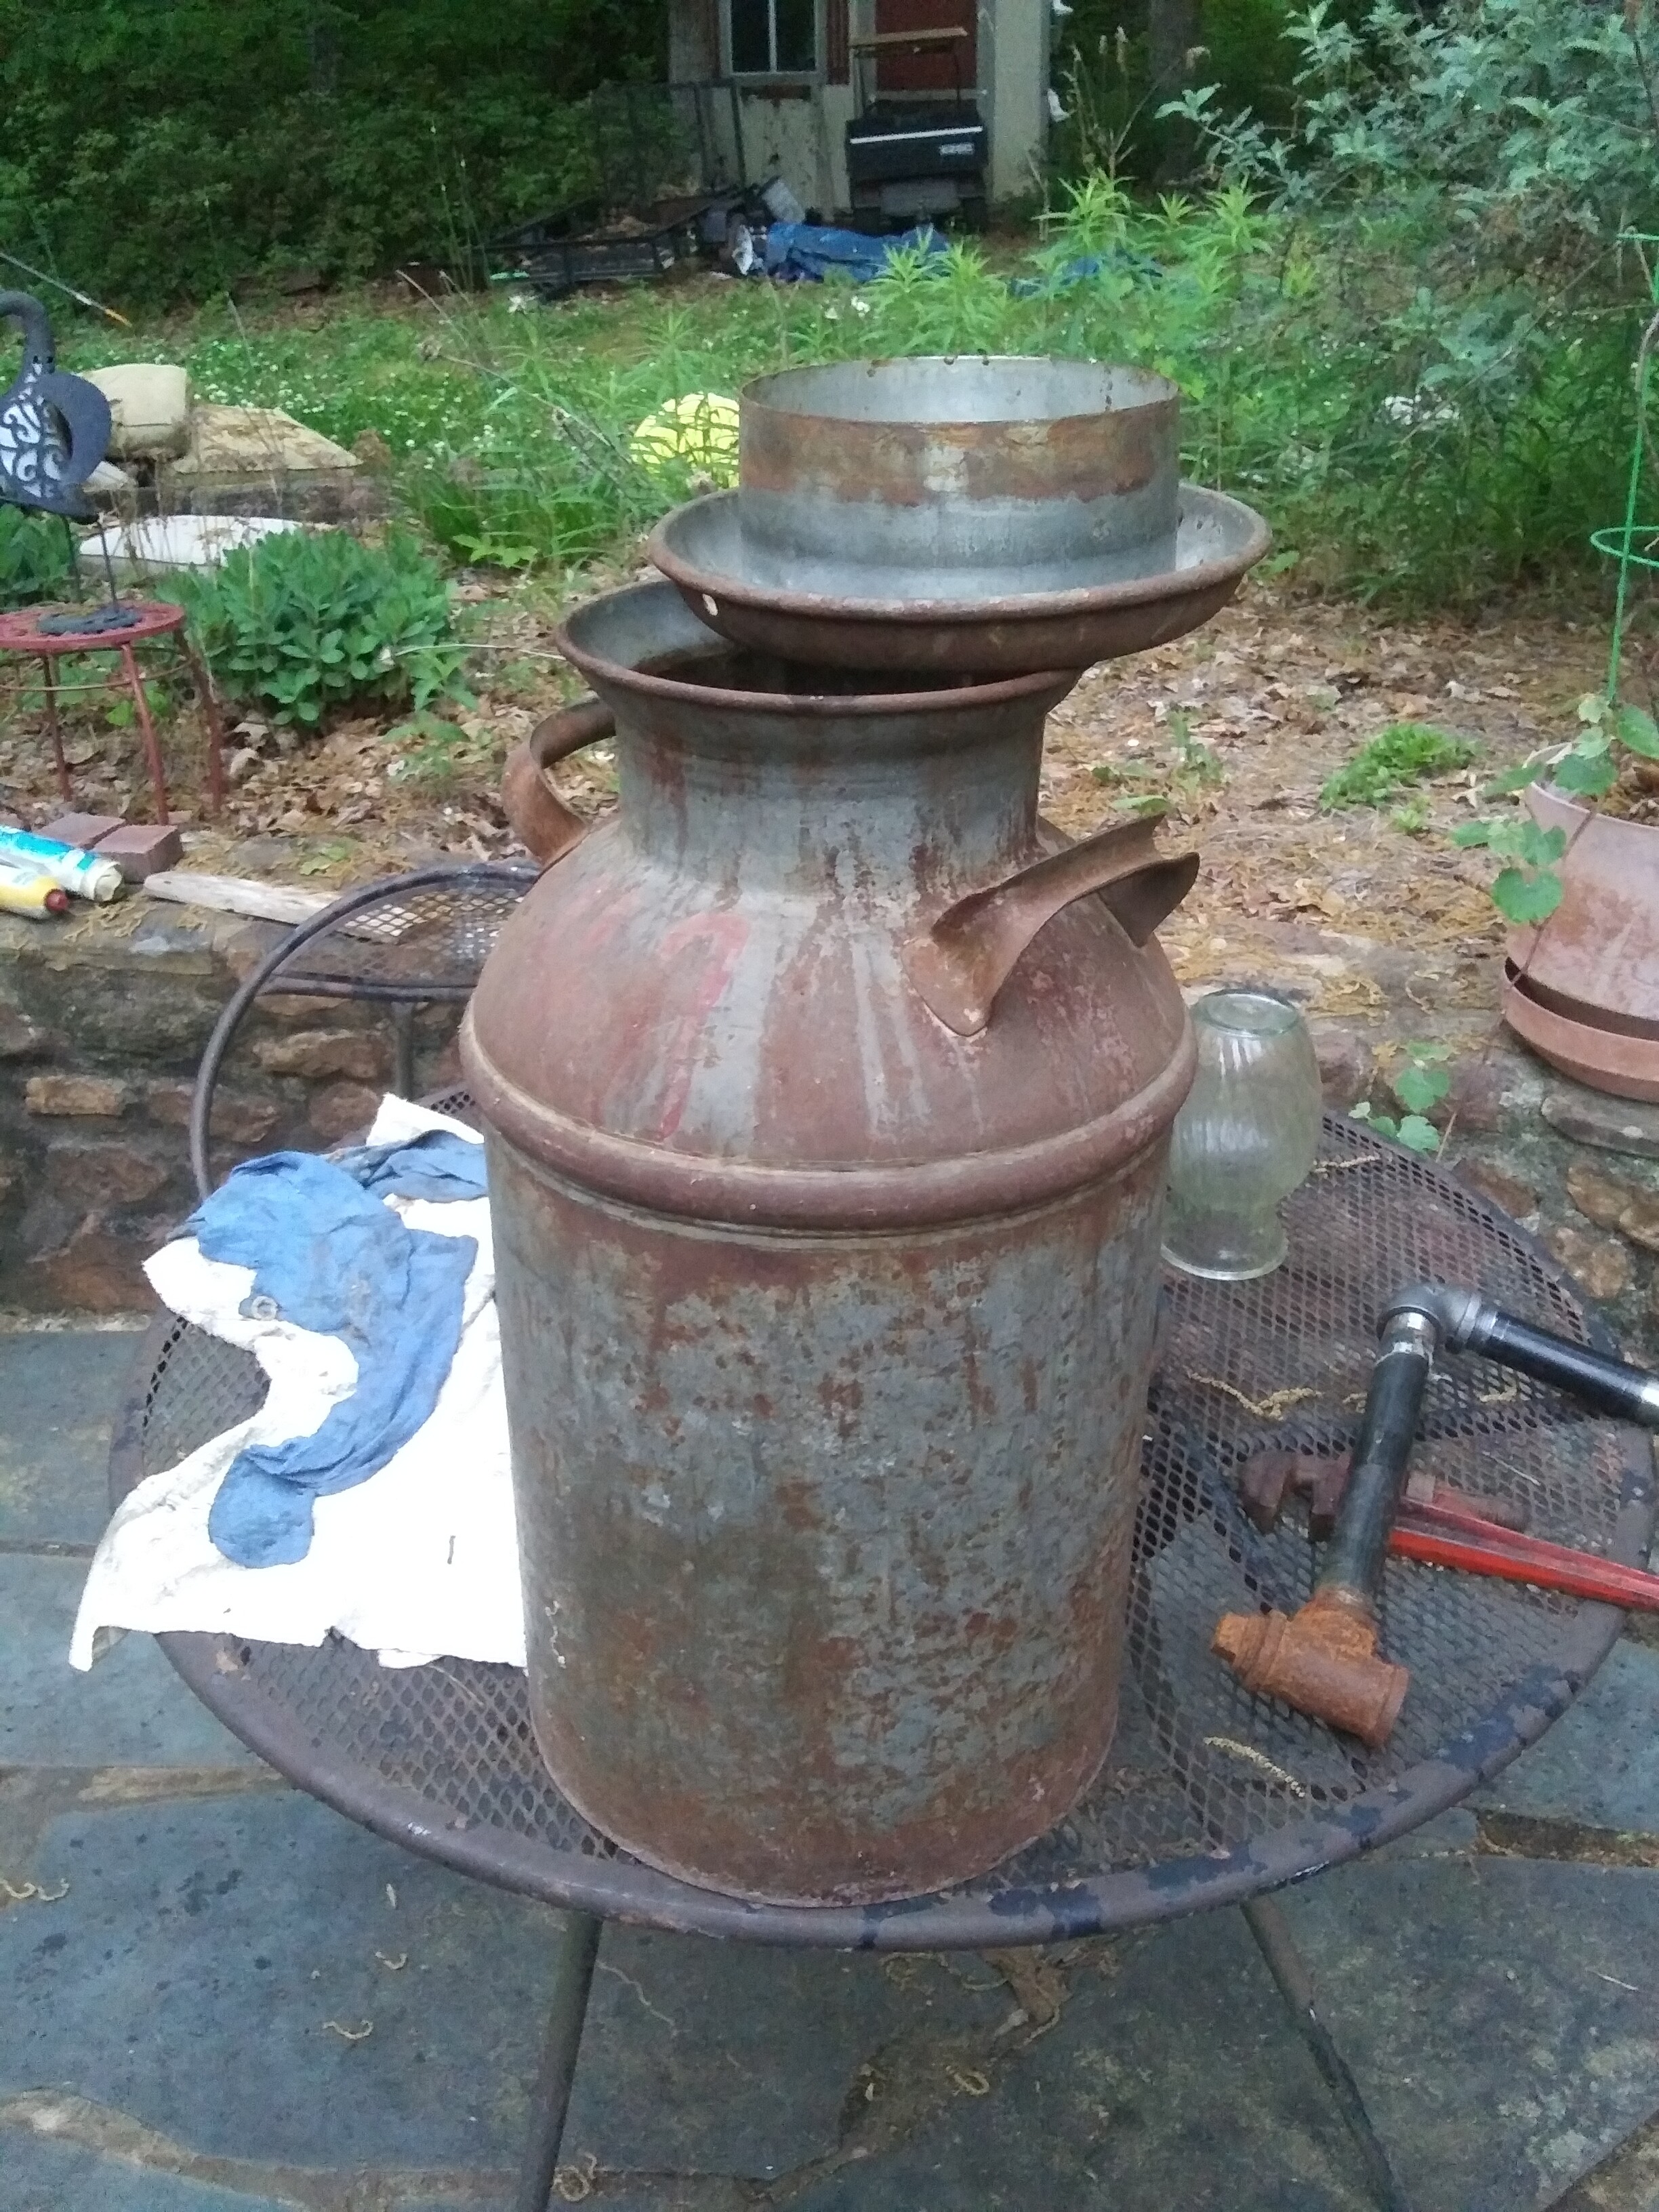
Found the old rusty trusty milk can. Has a few teensy pinholes in the bottom. I’ll weld those shut. Lid seals pretty well, I’ll just attach stove rope to the inner lip of the lid.
Milk can will be my small scale tester for my Svedlund idea. Will weld on a thick cap and drill out five 5/16" holes on the circumference of the tip of the nozzle. I’ll probably go with a ratio of 3rds.
Lower 1/3rd being the active zone and hopper being the upper 2/3rds. Will have a ceramic wool hearth for the nozzle to blast into. Inside of the milk can is in better shape than the outside ironically.
I’ll see how this flares and if it can run a small engine.
2 Likes
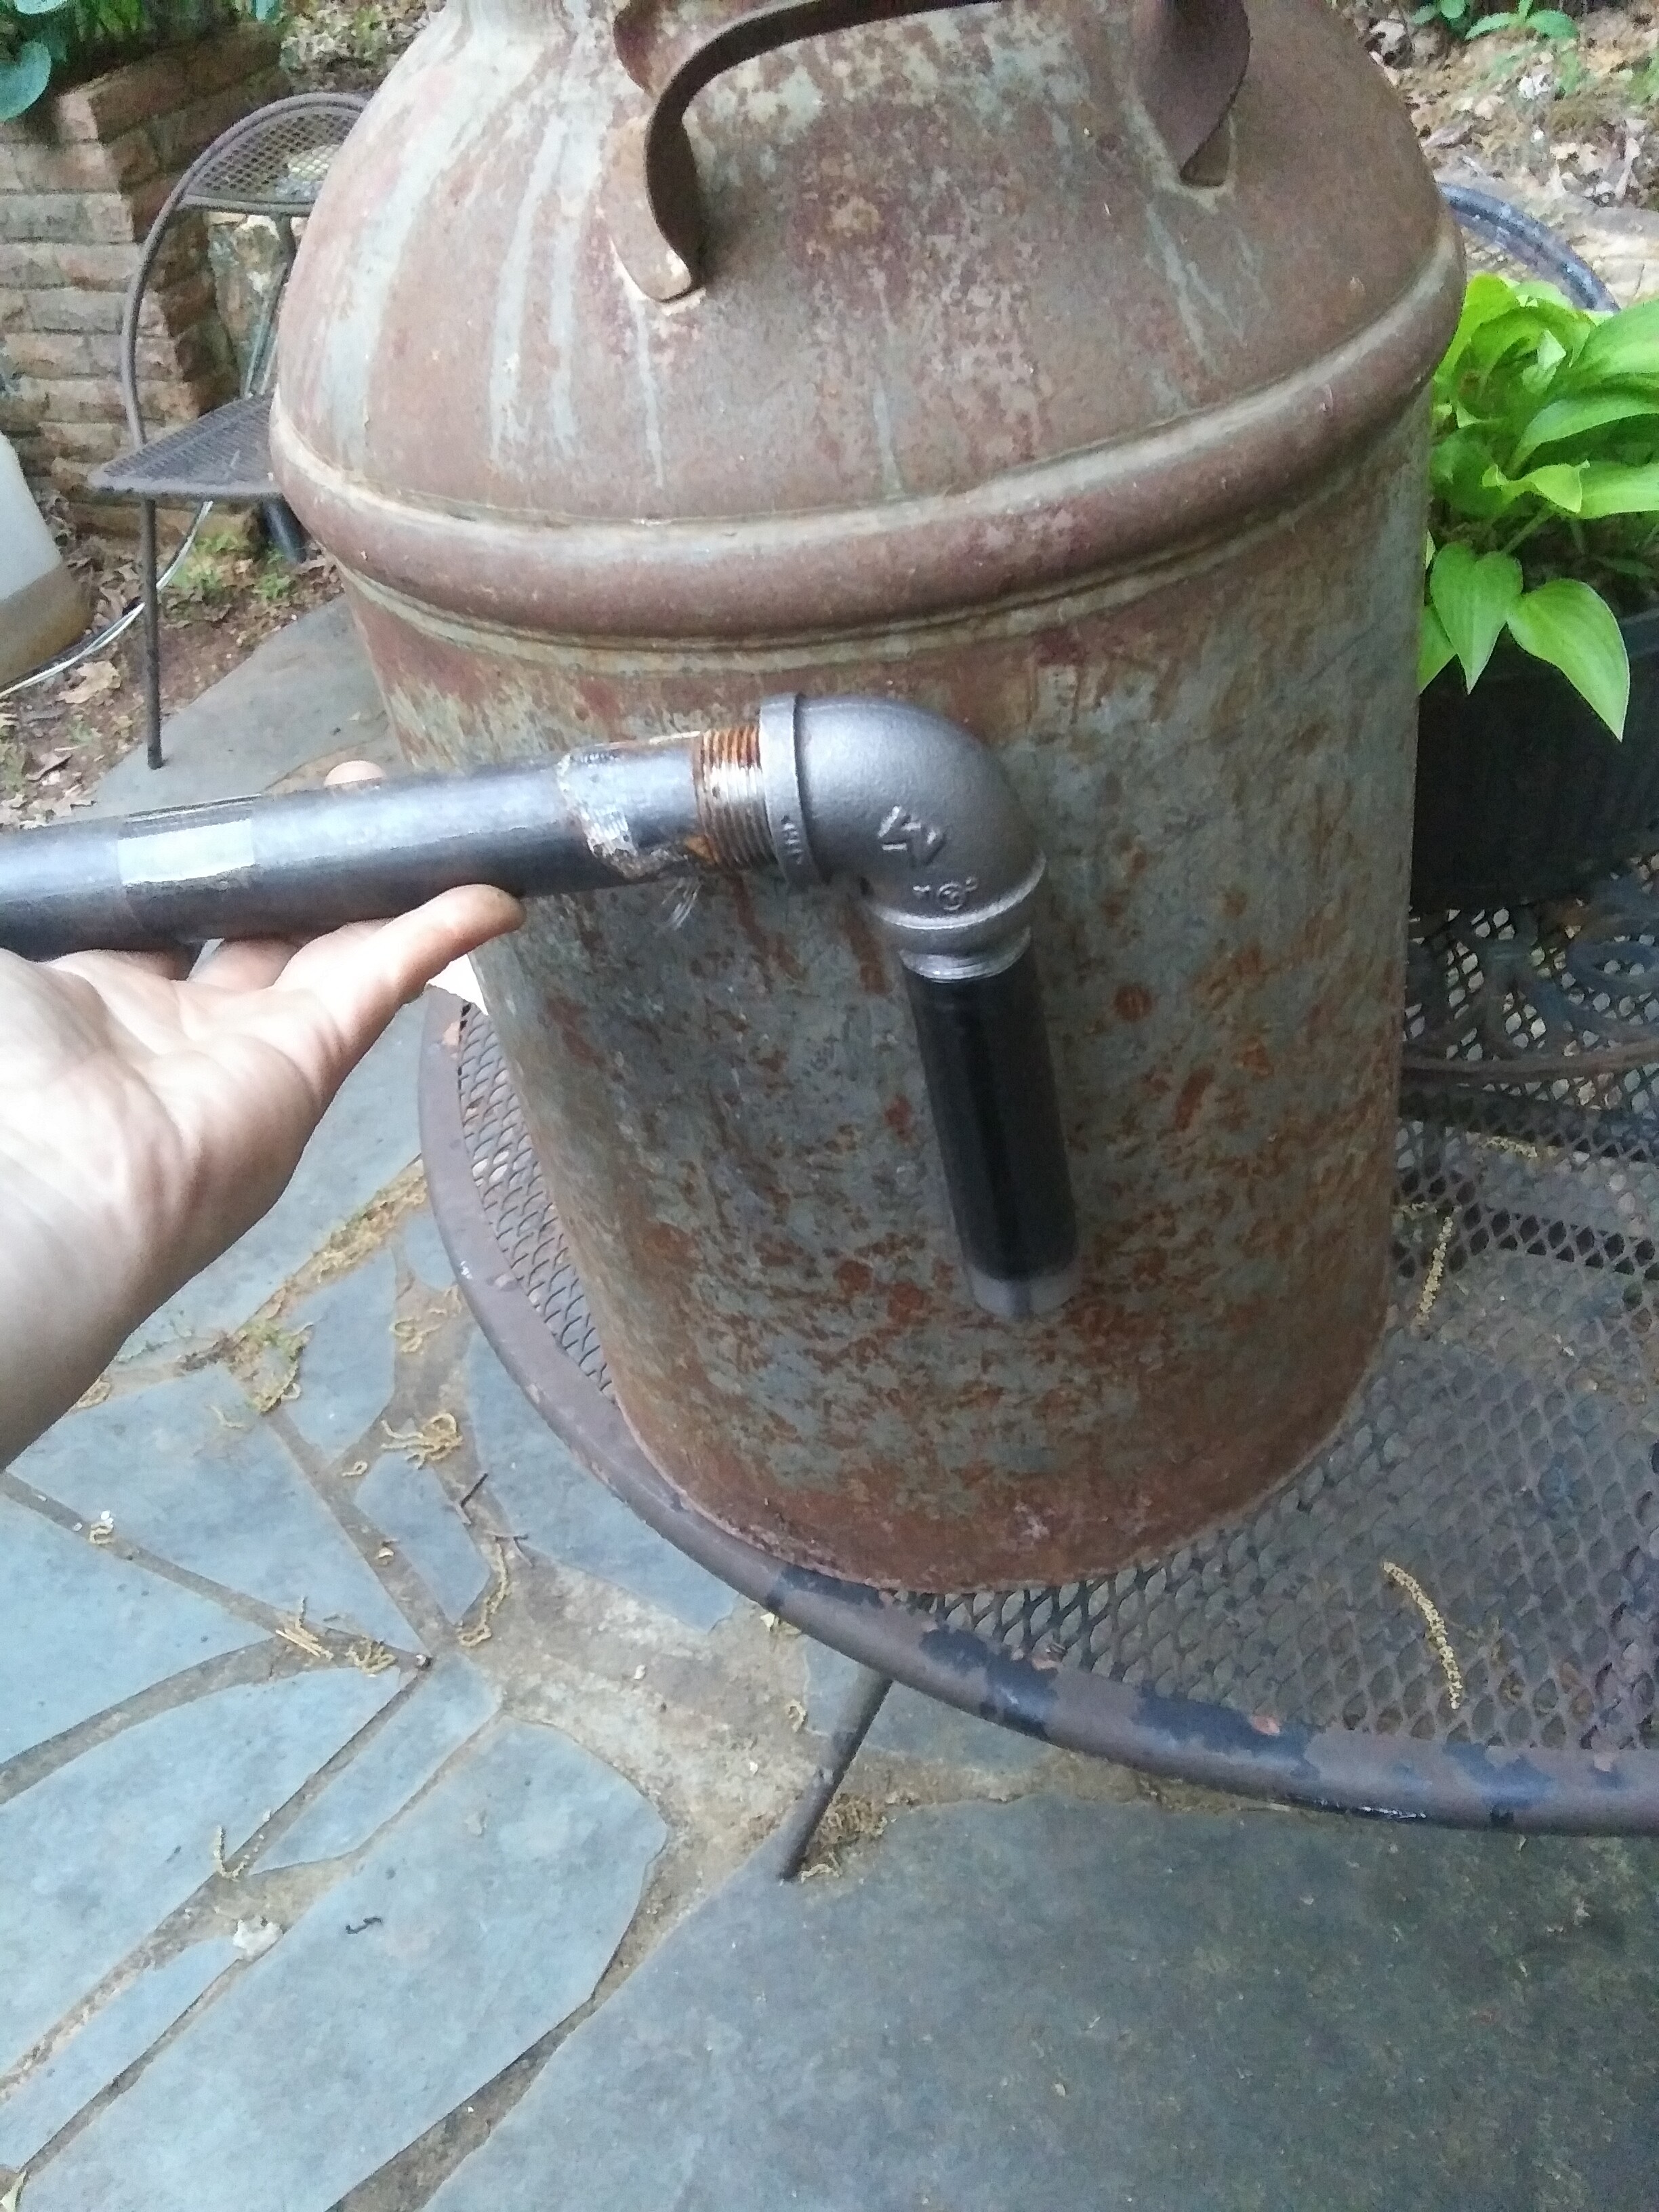
Here’s the milk can. And the nozzle before I weld on the cap and drill in the jet holes. Bottom of the can will have ceramic wool and will be lined in the lower 1/3rd in ceramic wool. Nozzle will protrude partially past the ceramic wool area to force any moisture past the active plane. 1" in and 1" out as far as plumbing goes.
1 Like
Here’s the prototype nozzle finish. 1/4" plate welded to the end of the pipe and four 3/8" holes. After marking out for the five 5/16" holes it looked like too much material would be missing so I sized up to 3/8" though with fewer holes.
2 Likes
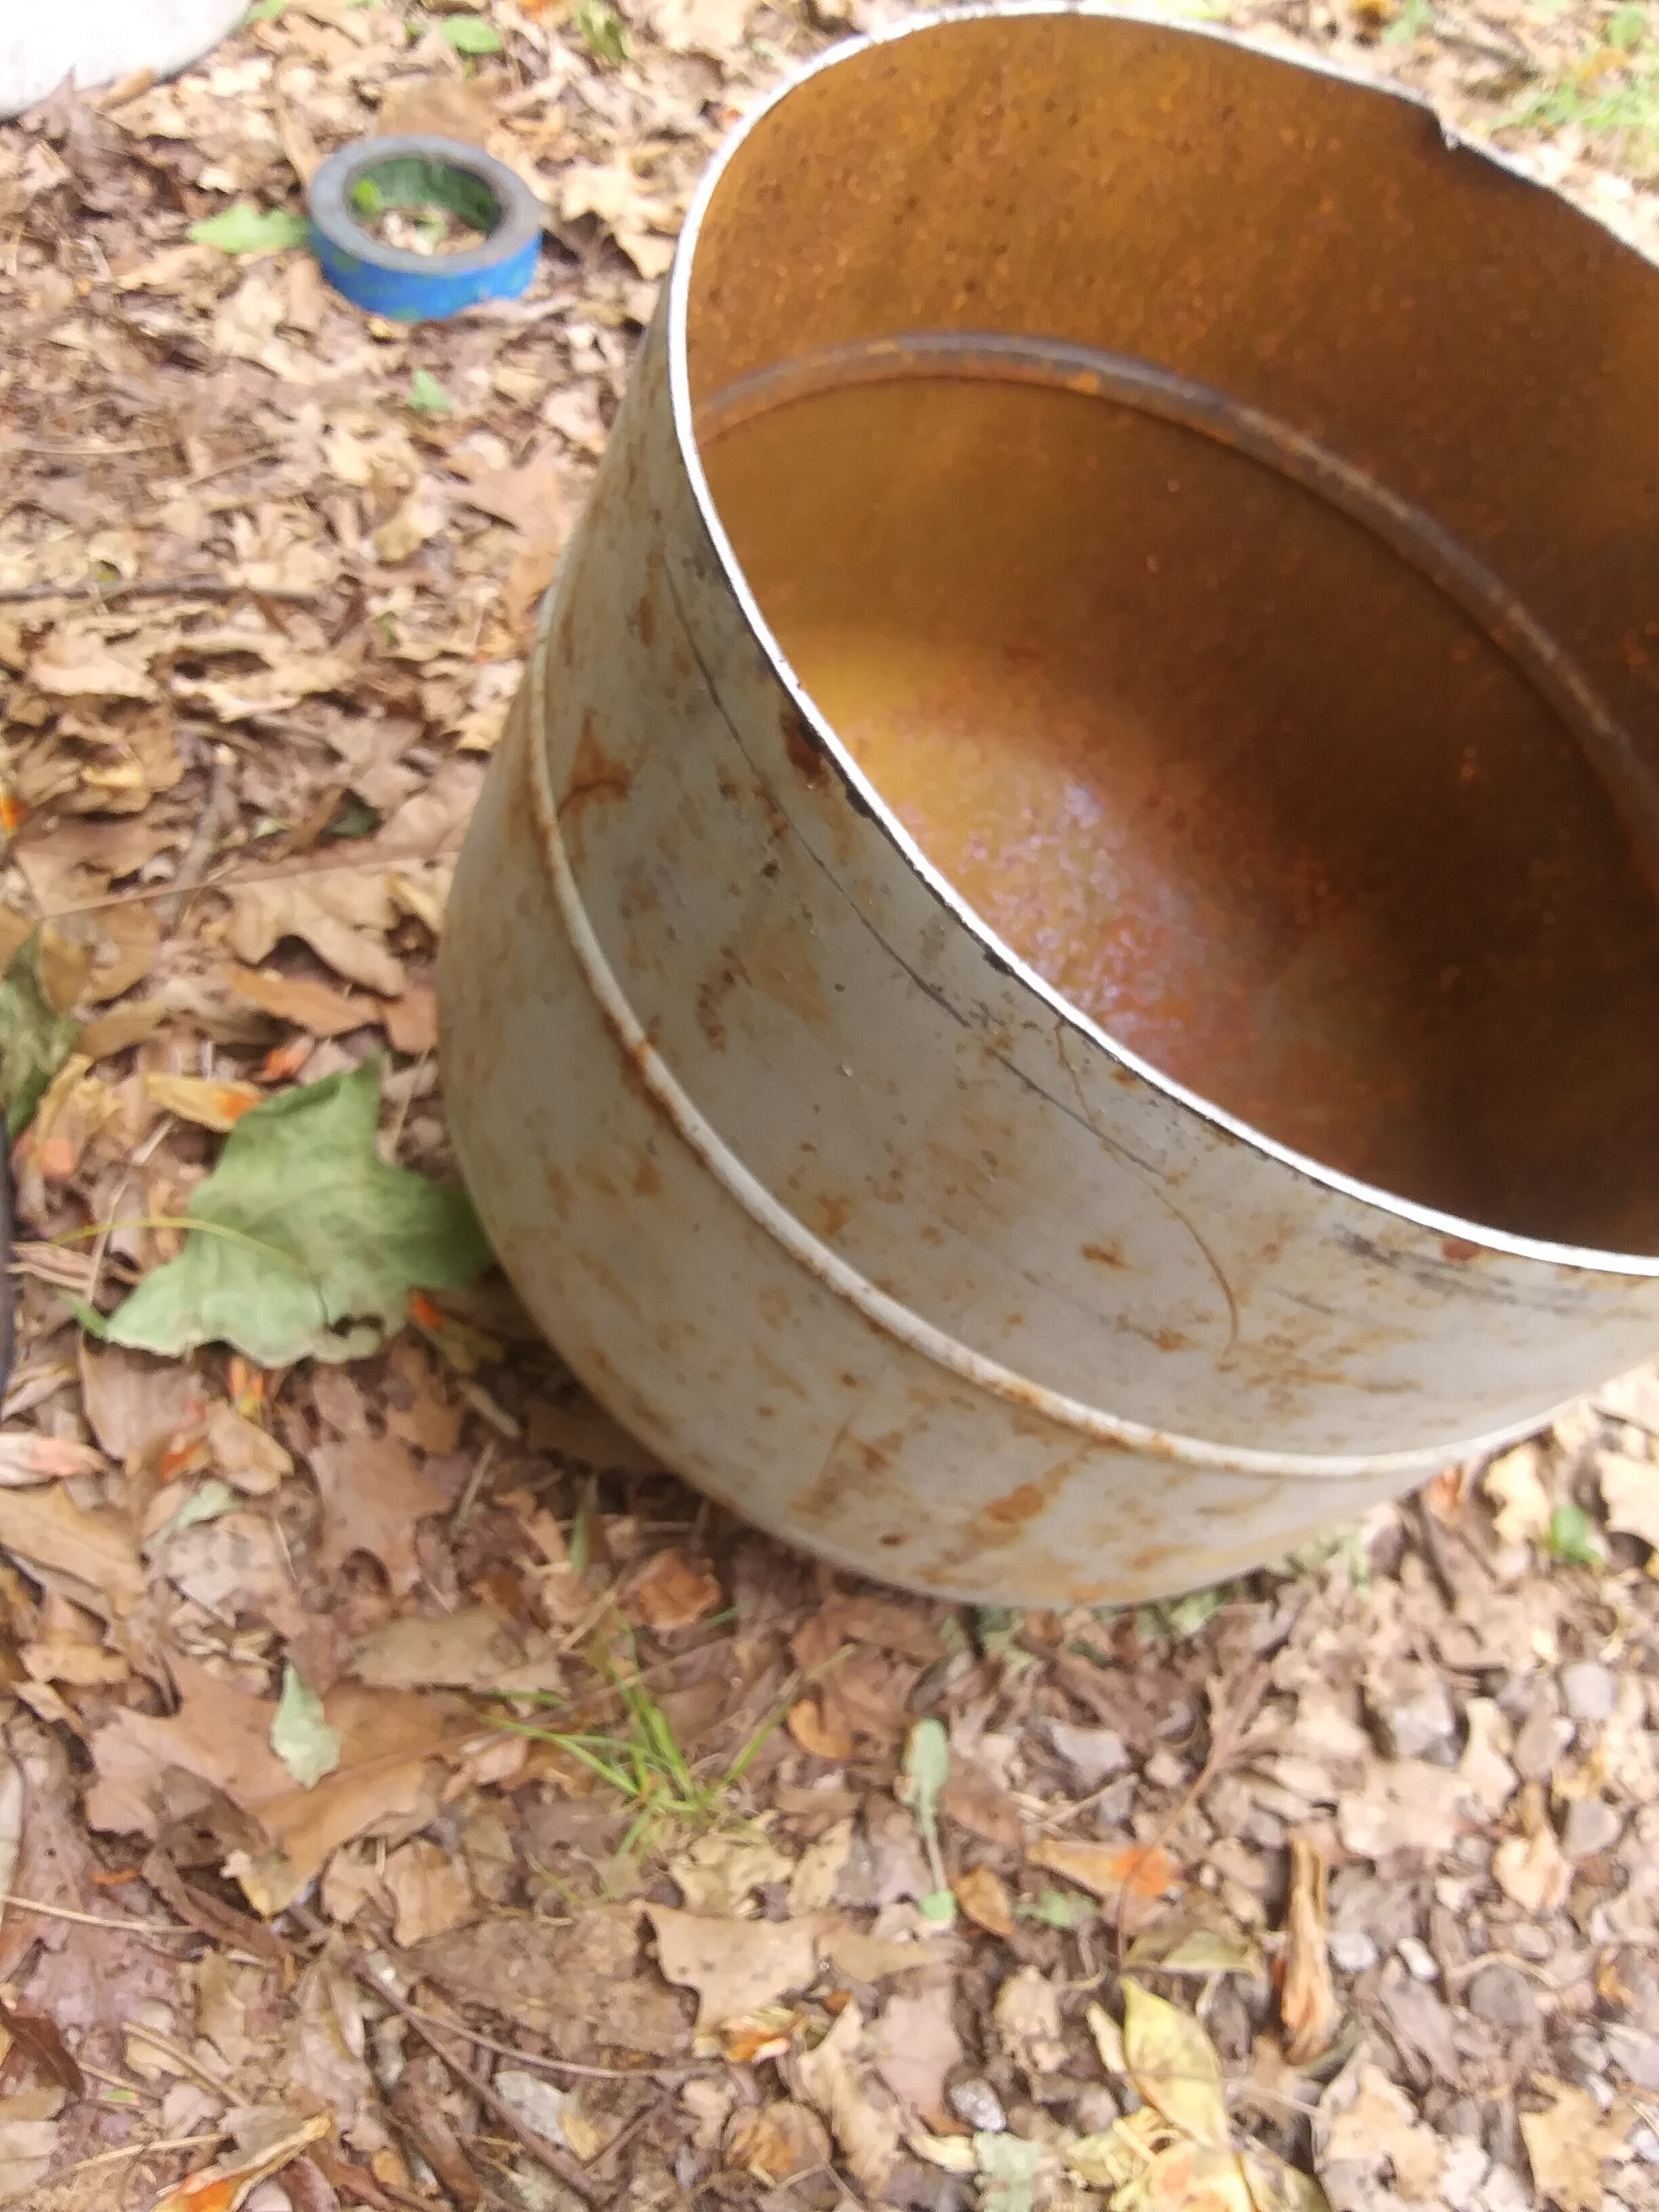
Patched some pinholes in the milk can. Put in the ceramic wool. One layer on the bottom and one layer as the burn tube. Makes a 10" inner diameter. Won’t have a lot of volume but it’s just a test bed. If I really like the results I might extend the can with a propane tank. But for now it’s just a tester. Going to the hardware store tomorrow to get a shorter 1" nipple and some elbows. Might bother with making a small cyclone filter, might not. Will all screw together with pipe fittings if I do.
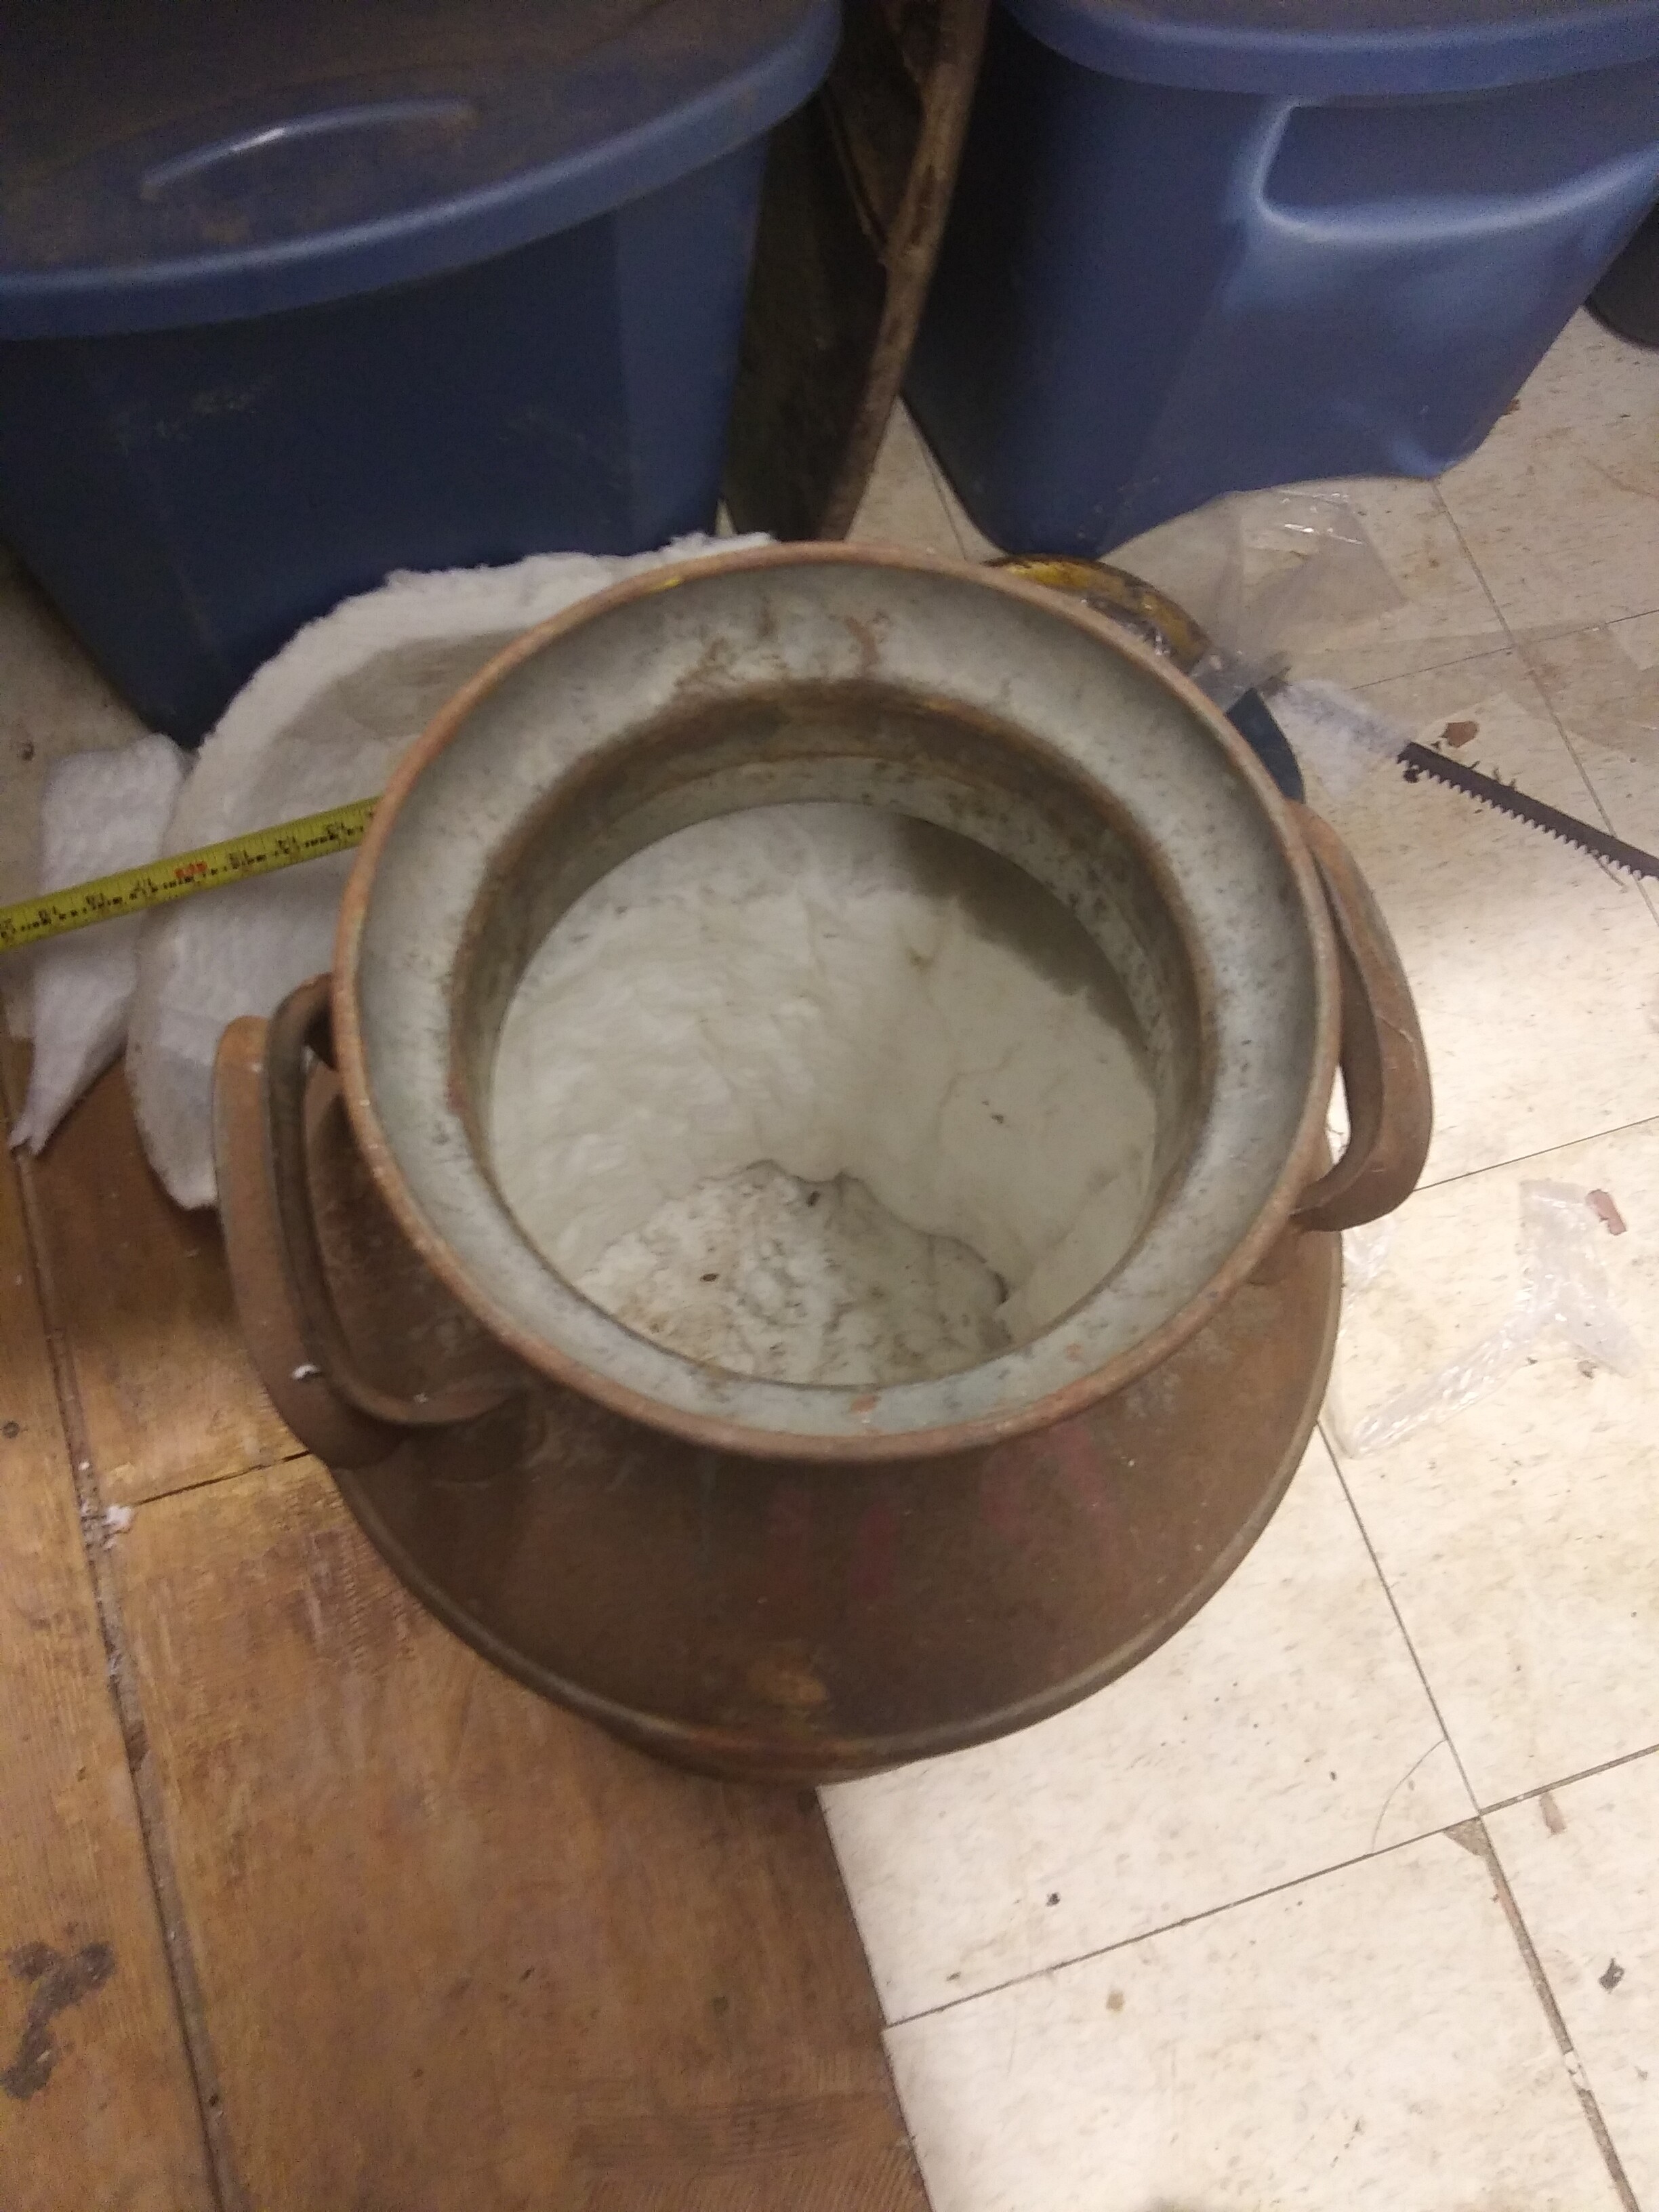
1/3rd of the length of this can is about 6 inches so I might make the tip of the nozzle stop 6 inches above the bottom. I’ll just use some of my spare expanded sheet and fold it up into a little grate to fit over the exit pipe.
2 Likes